Pipeline Caching and Alembic Files
If you've created a seriously huge model environment or an animated character that is really complex, or a particle simulation that plays back a turtle-speed, then you know the pain of single-digit frame rates. Maya 2013 has a new Pipeline Cache set of tools that lets you save either the entire scene or a selected object as a cached files using the open-source Alembic file format. These saved cached files can then be loaded back into the scene and played back or navigated at a dramatically faster frame rate. This is ideal for moving about a huge data model or playing back just a particle system at a reasonable rate. The Pipeline Cache menu includes options to export and import files as an Alembic or GPU cache. There are several differences between these two options, but the key visual differences are that the GPU version displays the scene without any textures, only RGBA colors. The GPU cache options also collapses the node hierarchy to a single node making the geometry so it cannot be edited. The benefit for these trade-offs is blinding fast movement about huge scene files. Importing the file as a Alembic cache file isn't quite as fast, but allows editing of geometry and displays applied textures. Both file types use the same Alembic file saved with the .abc extension. For game developers, this feature lets you load a cached version of a completed environment and move through it at a fast frame rate just like the game player would providing the much needed immediate feedback in the Maya interface, as shown in Figure 1, without having to compile and transport the scene to the game engine.
Figure 1: Using the new Pipeline Cache feature you can load and navigate huge data files at a high frame rate. Image courtesy of Autodesk
Node Editor and Attribute Editor Templates
Maya has always been great at letting you get under the hood and tweak various aspects of the current scene and the new Node Editor makes it even easier to work with and tweak individual nodes. This Node Editor, shown in Figure 2, lets you interactively create connections between different attributes which makes it great for creating shading networks. The Node Editor has several display modes including Simple, Connected and Full mode and lets you create bookmarks to find your way back to a specific view.
Figure 2: The new Node Editor lets you visualize the connections between nodes and interactively create connections between different attributes.
Using a text editor, you can create and edit XML-based Attribute Editor templates that let you specify which attributes are visible in the Attribute Editor for specific node types. This tool is available as a Bonus Tool which you can download using the Help menu.Access References in the Outliner
References are great, especially for a team environment, where several artists are working on different pieces of the scene. They let you load in the current version and update it when a newer version is available. Creating, loading and unloading references are easier than ever now that the Outliner includes its new Reference menu. Using this menu, you can create references, load and unload and even export scene objects as references without having to open the Reference Editor. There is also an option to allow animation curves from referenced files to be edited directly without having to reopen the referenced file.Working with Characters
Maya 2013 includes many new improvements for working with characters, but of all the improvements, I think the new Heat Map skinning method takes the cake. Traditionally skinning a character with weights is one of the hardest aspects of character creation, but the new Heat Map option in Maya 2013 make the process much easier. This option sets skin weights by treating each influence object as a heat source which cools as you move further from the heat source. The results are much better than the other methods and requires less tweaking to get the skin weights right. The revolutionary Character Controls that were introduced in the previous edition of Maya has been improved in a number of ways to make working with characters even easier. The various Character Controls have all been combined into a single interface with tabs available for Skeleton, Definition, Controls and Custom Rigs, as shown in Figure 3. The basketball character shown in the figure was loaded from the Maya Visor interface and provides a good example. There is also a new Start Pane to walks you through a character setup. The controls have been opened up so you can define your own custom character templates.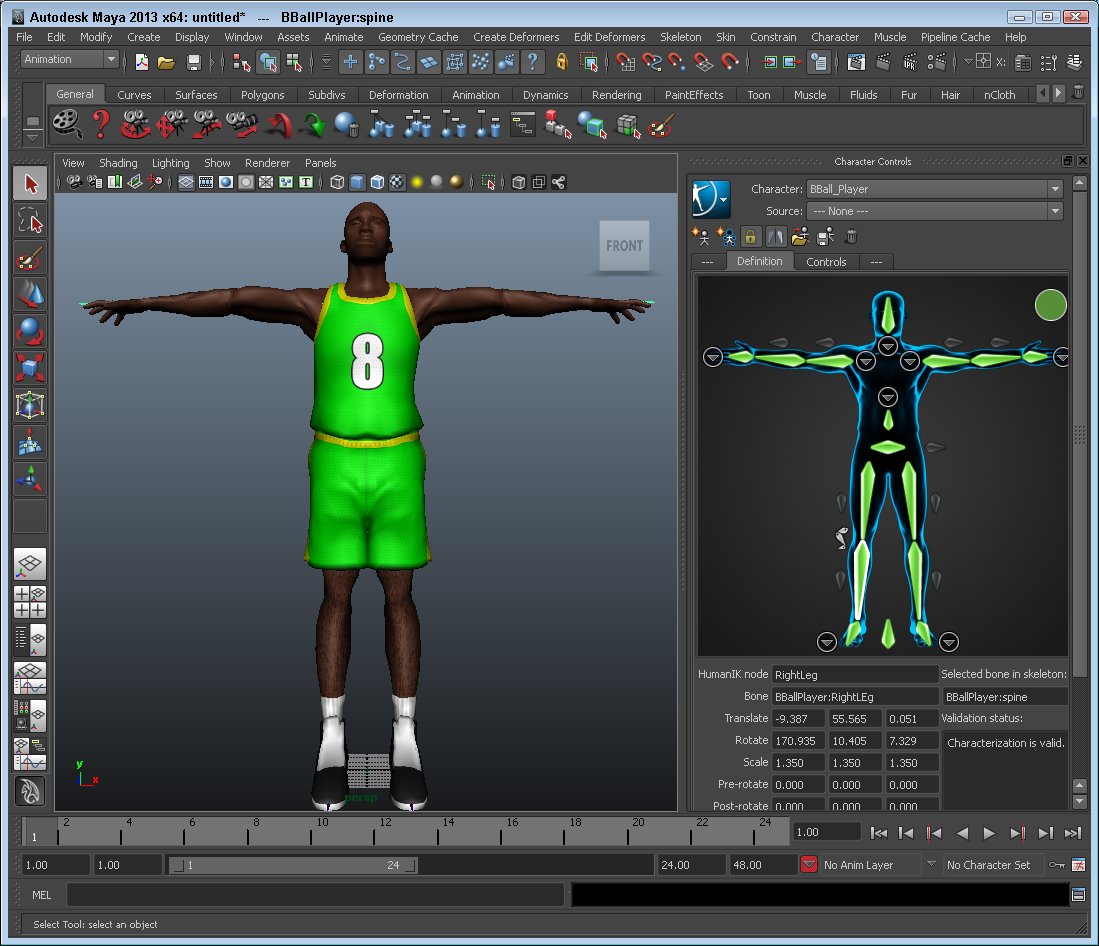
Figure 3: All the available Character Controls are now together in a simplified interface making it easier to rig characters.
Animation Improvements
Maya 2013 includes a new Retime Tool that works within the Graph Editor, shown in Figure 4. This tool places visual bars at specific points in the timeline and once placed, you can scale all the animation keys located between those bars by dragging to the left or right which speeds or slows down the animation that is adjacent to the bar's position. You can also lock the bars so that certain sections of animation aren't changed. This gives animators a lot of local control over their animations.

Figure 4: Using the Retime Tool, you can easily speed up or slow down specific areas of your animation.
Retargeting is the magic bullet that lets you reuse animations over and over, but often this is more work than just redoing the animation, but with the new .atom file format, Maya 2013 lets you reuse animations effectively. The .atom file format stands for Animation Transfer Object Model and while importing you can have it match the character hierarchy, match according to joint names or by using a filter template. Once matched up to the current rig, the loaded animation is applied to the new character saving you the trouble of animating from scratch. When working with separate clips in the Trax Editor, Maya 2013 includes a new Offset setting and a Match Clips feature that lets you match up the clips for better transitions. You can select to Match Translation or Rotation. You can also turn on ghosting to see the clips motion leading to the current frame.
Thanks for the review!