Influence maps have been around since the very early days of game AI, tracing their history back to real-time strategy games over a decade ago. Since then, influence maps have become a cornerstone technique for game developers, and are even starting to become prevalent in first-person shooters as well (e.g. KILLZONE 2/3).
In this tutorial, you'll learn about some of the motivation for influence maps and why they are so appealing. You'll also find out when to use influence maps, and what representation fits best with your game. Then, you'll see the algorithm in action as well as its most important parameters that you'll need to tune when using influence maps in your game.
Motivation
Influence maps ultimately help your AI make better decisions by providing useful information about the world. In particular, influence maps provide three different types of information that are particularly useful for decision making:
- Situation Summary -- Influence maps do a great job of summarizing all the little details in the world and making them easy to understand at a glance. Who's in control of what area? Where are the borders between the territories? How much enemy presence is there in each area?
- Historical Statistics -- Beyond just storing information about the current situation, influence maps can also remember what happened for a certain period of time. Was this area being assaulted? How well did my previous attack go?
- Future Predictions -- An often ignored aspect of influence maps, they can also help predict the future. Using the map of the terrain, you can figure out where an enemy would go and how his influence would extend in the future.
As you can imagine, each of these different properties of influence maps helps the AI perform its threat analysis calculations in a much more intelligent way. Since these are factors that we take into account as human players, it should also help the AI!

Why Not Influence Maps?
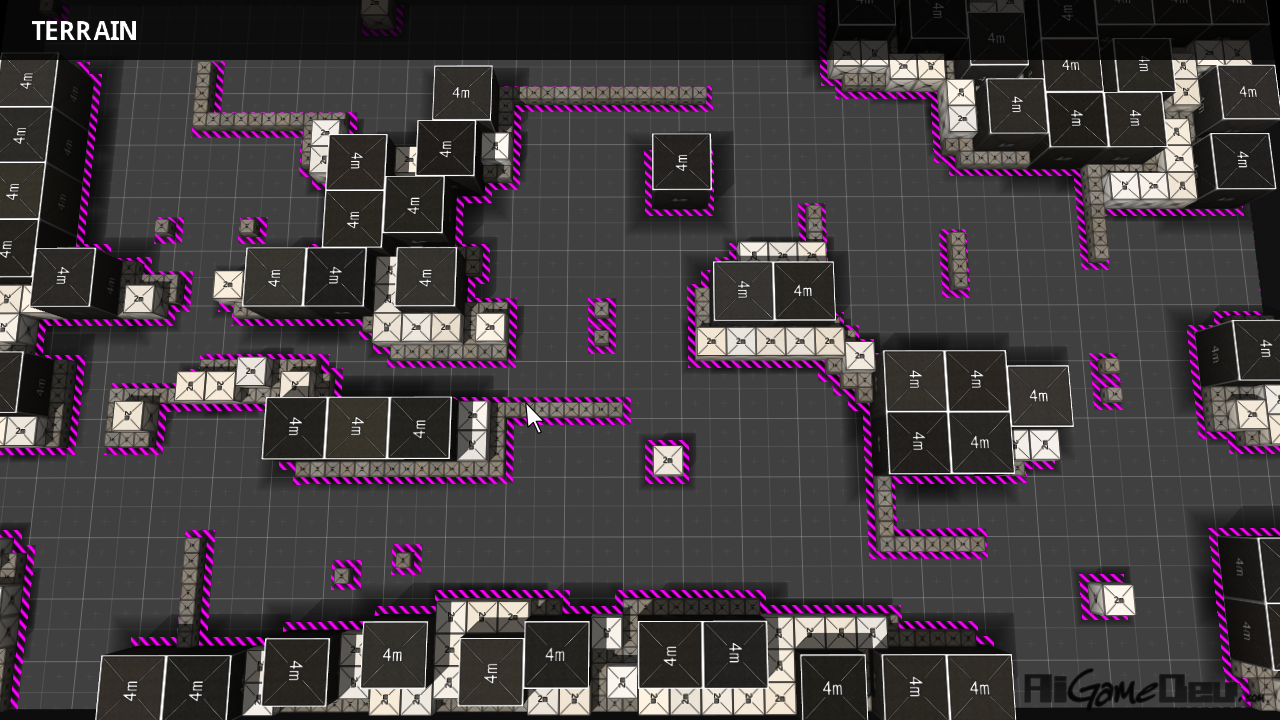
If you're already convinced about the benefits of influence maps, you should probably take a second to pause before implementing them. There's one reason that you wouldn't really need them in your game; if the world is too simple you just don't need a "map" for it. This is the case for large open terrains with the occasional tree, for example.
In general, you need an influence map in the following cases:
- If your graph has varying connectivity, and not just a 2D grid with all its connections traversable.
- If your world has interesting features like choke-points, large open areas, large obstacles.
Otherwise, you can use simple distance-based equations in your AI decision making to reason about the world. There's no need for the overhead of an influence map in memory, nor its computational cost.
Representation
High-precision grids, rough area graphs, waypoint networks, or a coarse grid in space; all are sensible options for representing an influence map. There are more options too! Generally there are two things you need from your influence map representation:
- Spatial Partition -- A way to easily and efficiently partition space and store information (i.e. influence) for each partition. This allows the influence map to store information about the past, gathering statistics about what happened.
- Connectivity (optional) -- An indication of connectivity between these spatial partitions in space. The connections allow the influence mapping algorithm to predict how influence could spread through the level, predicting what could happen in the future.
Obviously, the important question is which is the best choice for your game? Generally, the more precise representations will be useful for low-level decision making, and larger partitions will be better suited to high-level decision making.
a) 2D Grids
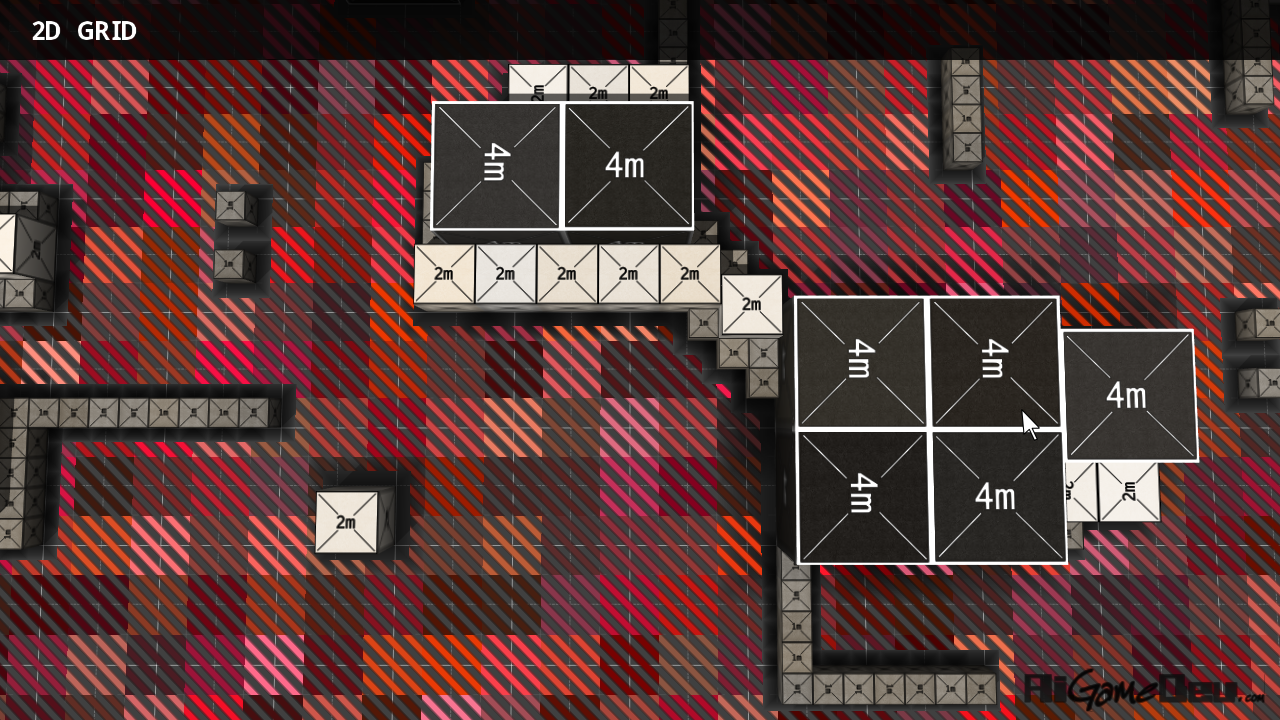
This is a great default representation if you can map your world to a mostly 2D environment. It's a very fast representation to process and very simple to implement. The downsides, however, are that you may waste memory if you have sparse environments.
b) Area Graphs
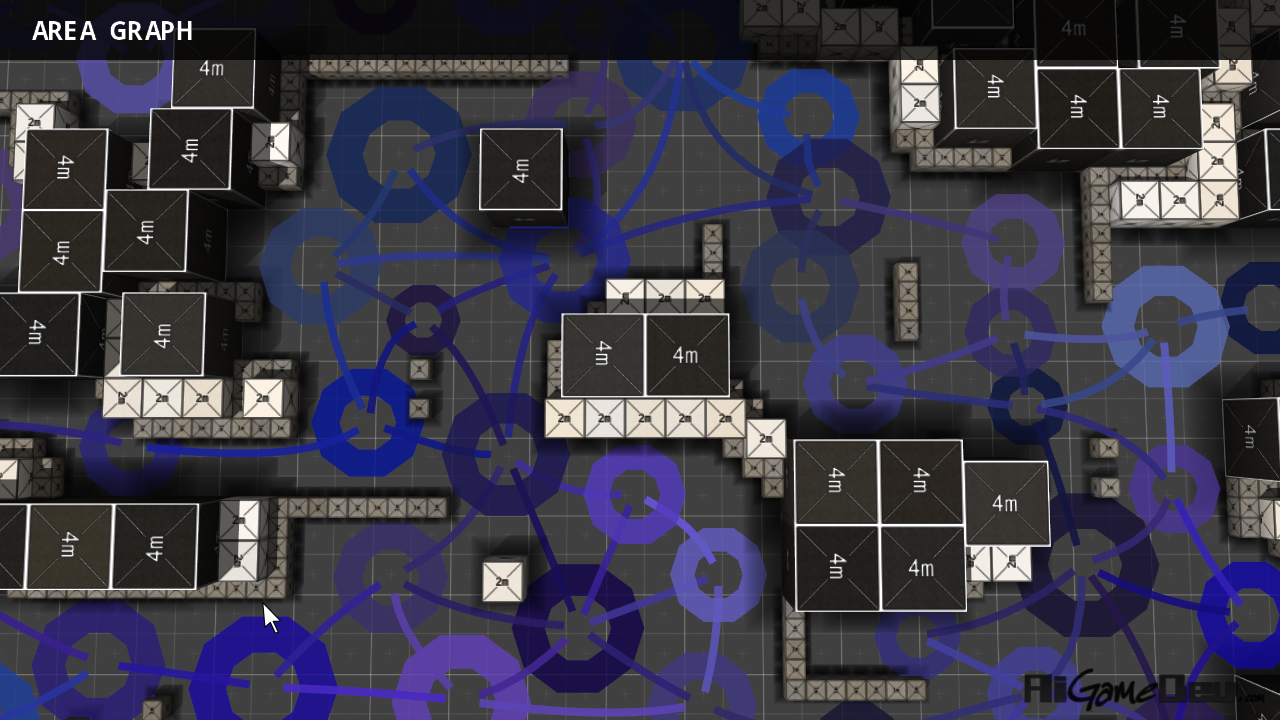
If you have a navigation hierarchy in place already, then you can use that as the basic representation for the influence map. The advantage of this approach is that it's not a very intrusive change and can easily be incorporated into most game engines. The disadvantages are the lack of precision in cases where details are required for the decision making.
c) Waypoint Network
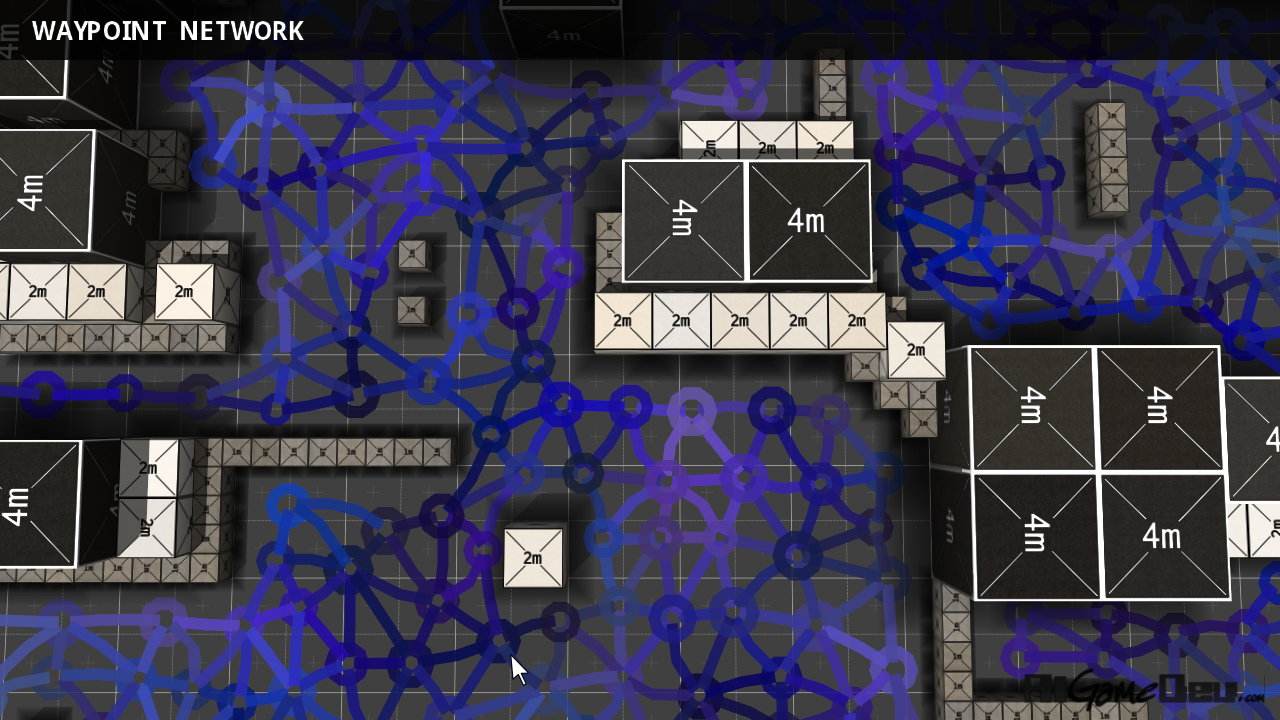
Using a full waypoint network in 3D resolves some of the problems with 2D grids, as you can easily wrap a waypoint network over multiple levels of a building or upstairs. However, the downside is that it's much less efficient to process than both a grid or an area graph.
d) Coarse Grid
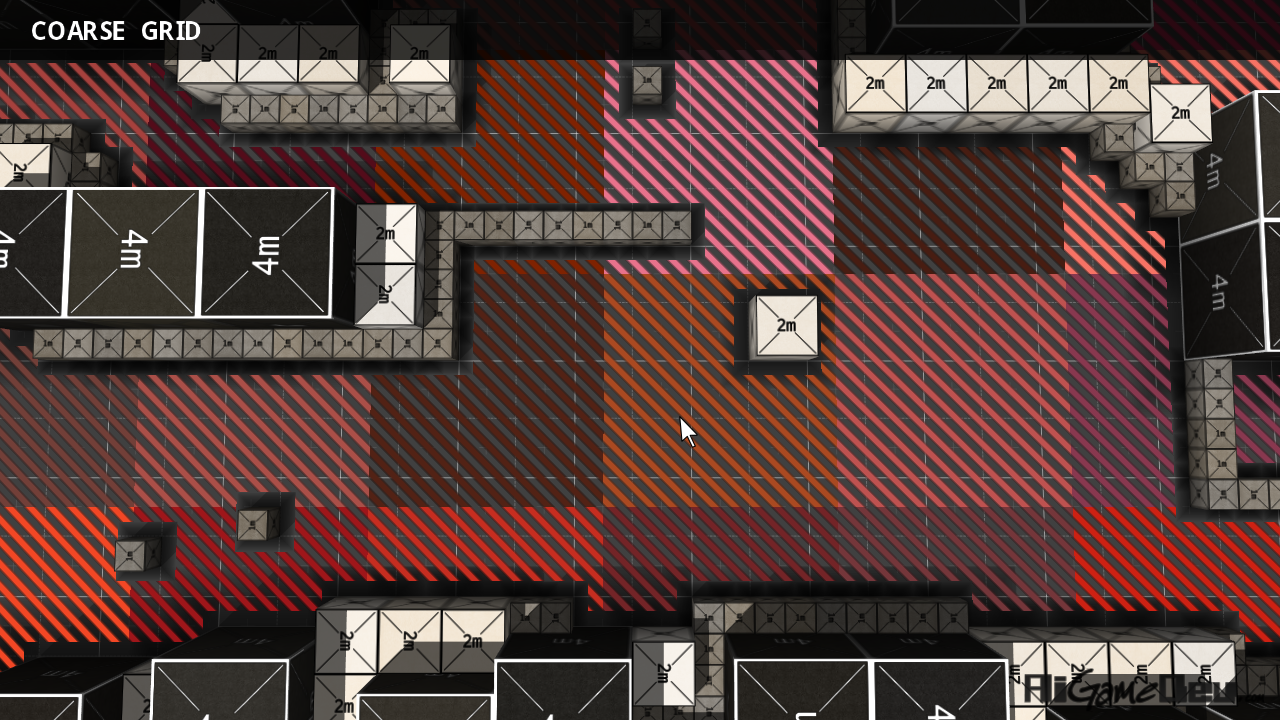
One last option is to decrease the resolution of the grid. Unfortunately, this causes certain grid cells to span over obstacles, which can cause problems when updating the influence. The alternative is to remove those split cells from the representation, but certain connectivity may be lost because of it. Using these cells as disconnected buckets in space to store influence is also an option, though it rules out predicting the spread of the influence in the future.
The Algorithm
Fundamentally, the algorithm is similar to a blurring process that you can find in photo editing software like Photoshop. You start by setting the influence values in your map, and then repeatedly blur the map to spread the influence from the source towards neighboring nodes.
The influence mapping algorithm is actually pretty flexible. It's made up of two different steps, but you can run those steps in any order you see fit and customize them quite extensively.
1) Setting Influence
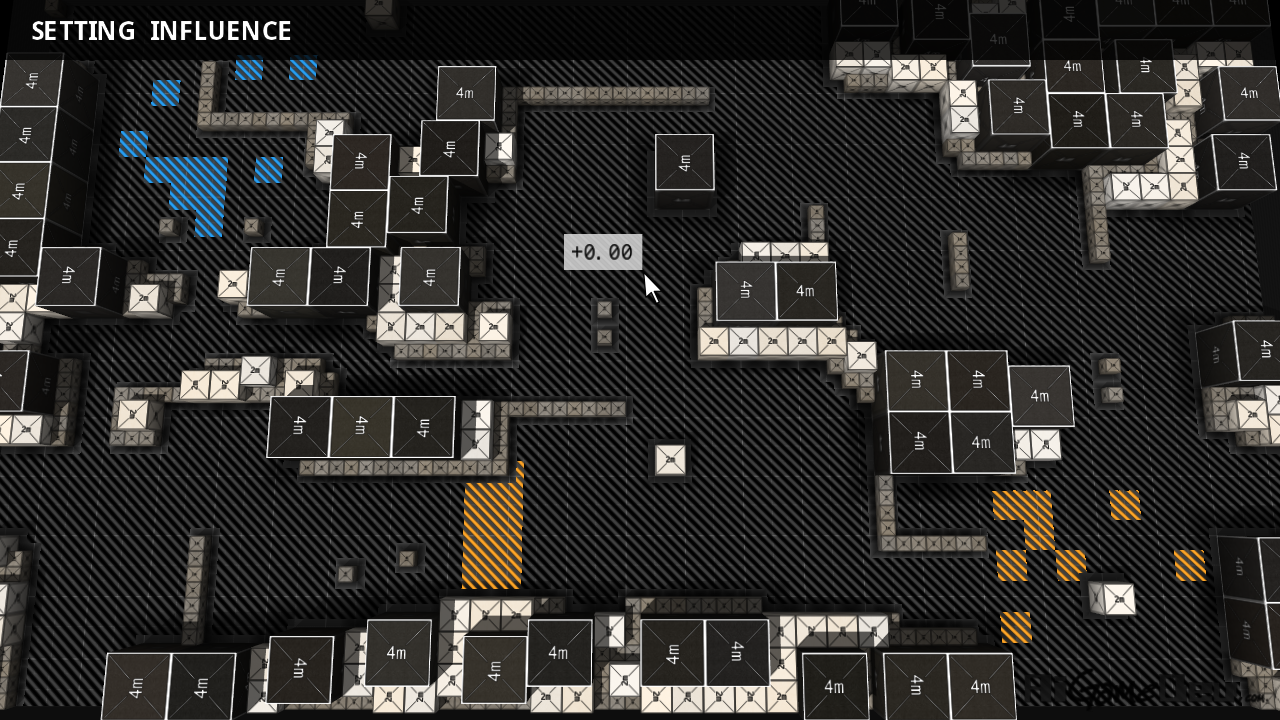
Typically, the first step is to set the influence sources inside the representation you chose. It's as easy as storing or updating a floating point number in an array of influence values. The only challenge is figuring out the influence sources for your game. Often these sources can be:
- Entities, both friendly and enemy soldiers, semi-permanent turrets, etc.
- Events like grenade explosions, bullet fire, taking damage.
You'll also need to figure out which of these influence sources are additive (layered on top of the existing influence) and which are reference (set as the base influence value). That depends on your game, but temporary events like bullet fire are well suited to additive influence.
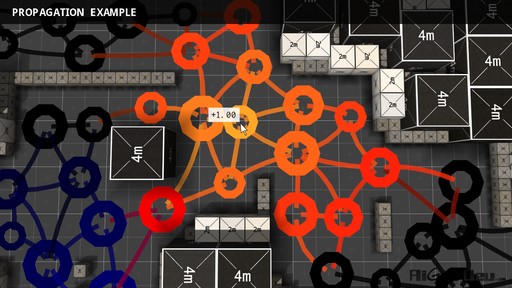
2) Propagation
The propagation algorithm itself is very simple, and fits in less than a page of code. There are many different ways you can implement this, and many variations would also work fine... but this is a good place to start:
void InfluenceMap::propagateInfluence()

{

  for (size_t i = 0; i < m_pAreaGraph->getSize(); ++i)

  {

	float maxInf = 0.0f;

	Connections& connections = m_pAreaGraph->getEdgeIndices(i);

	for (Connections::const_iterator it = connections.begin();

		it != connections.end(); ++it)

	{

	  const AreaConnection& c = m_pAreaGraph->getEdge(*it);

	  float inf = m_Influences[c.neighbor] * expf(-c.dist * m_fDecay);

	  maxInf = std::max(inf, maxInf);

	}


	m_Influences = lerp(m_Influences, maxInf, m_fMomentum);

  }

}
A few things to note:
- You need double buffering if you want your influences to be calculated correctly. You can do that by setting the new influence values in a local store, then copying it back into the m_Influences array. If you do an extra propagation step each frame, then you can avoid the copy (at the cost of some extra processing).
- Without double buffering, the influence may propagate differently depending on the order of your graph nodes and how you process them. This makes the influence on a grid look a bit more irregular, but nothing fatal! If you're looking for some extra performance this may help a bit in practice.
- Here the code uses exponential decay for the influence, which has some nice properties. However, it's a bit slower than linear decay for instance, which only requires a division and not an exponential function.
- The code above only handles positive influences and their propagation. If you need to handle negative influences also, then you could also accumulate the minimum influence and combine them together.
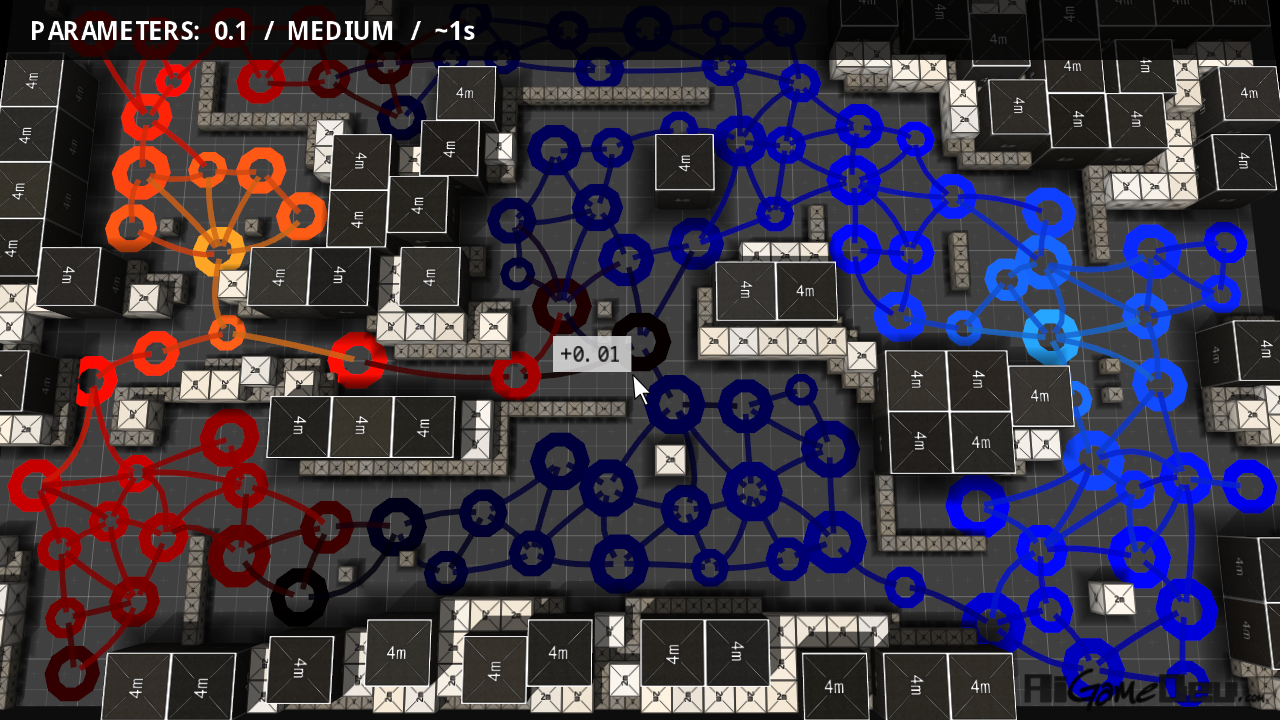
Parameters
The only challenge left is figuring out the parameters for the code snippet above. Here's a breakdown of the most important ones you need to keep in mind.
a) Momentum
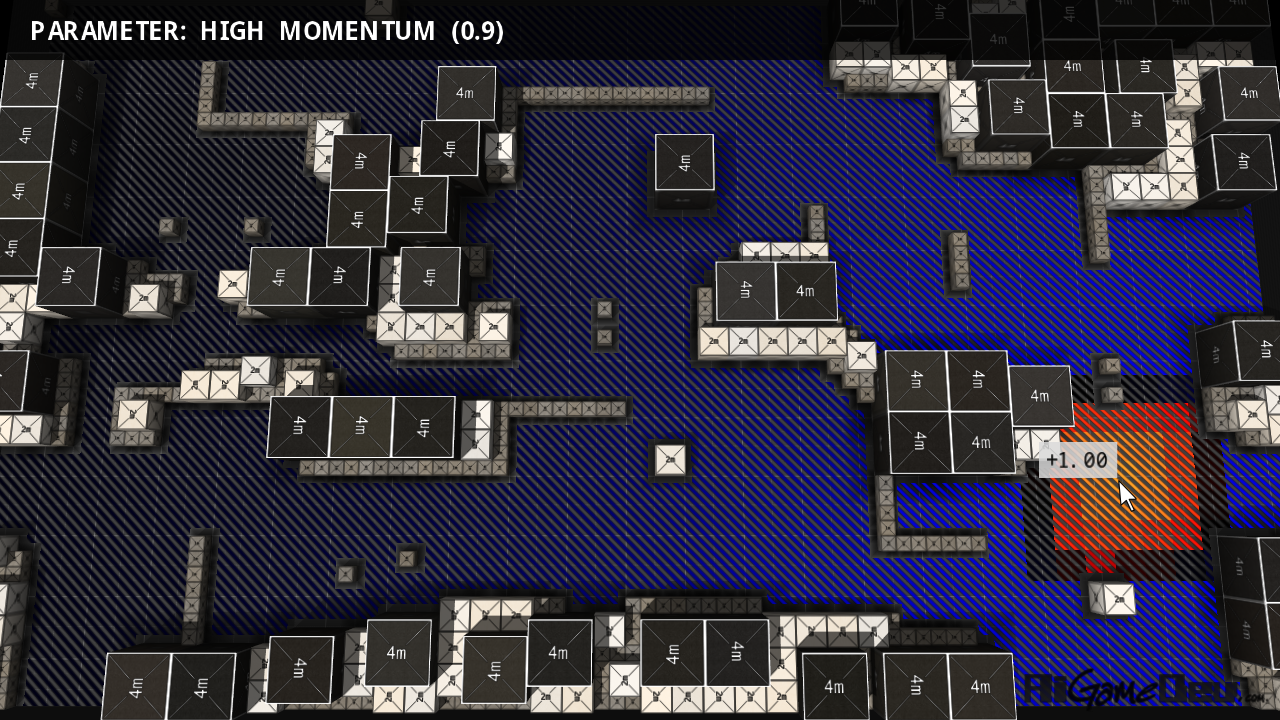
When you update the influence value, how much do you bias the update towards the existing value compared to the new value? The code above uses linear interpolation to blend from the current value to the new value, and then relies on the momentum parameter to control the result.
If you set the momentum to high (closer to 1.0) then the algorithm will bias towards the historical values of the influence, which is particularly well suited to storing statistics about previous attacks. Use this for things like high-level strategic maps. Conversely, if you set the momentum parameter to low (closer to 0.0) then the algorithm biases towards the currently calculated influence, so the propagation happens quicker and the prediction is more accurate. Use this for low-level influence maps for individual positioning for example.
b) Decay
How quickly should the influence decay with distance? In the code snippet above, this is controlled by a multiplier to the distance before it's passed to the exponential function, so you can control how quickly the influence fades.
Typically, you'll use different decay values based on the size of your influence map. Lower decay for larger strategic maps, and higher decay when the map is localized and used for tactical purposes. If you'd like influence to spread differently per-unit then most likely you'll need different influence maps for that, or a customized algorithm that stores additional information per cell.
c) Update Frequency
The parameter you'll have the least control over, is the update frequency. This will depend on how many resources you have at your disposal for updating the AI. Luckily, influence maps can scale down relatively well, but there's a base amount of computation that needs to be done to get good quality information.
Most often, you'll update high-level strategic maps less often, for example at 0.5Hz to 1Hz. Then, at the low-level for the tactical maps that individuals use, consider doing that at 2Hz to 5Hz. No influence maps really need to be updated at 30 FPS!
Tutorial Video
[media]http://vimeo.com/23913640[/media]
Conclusion
- Influence maps are particularly easy to get up-and-running! It's less than a page of code.
- You'll most likely end up with a variety of different influence maps to provide better information to your AI.
- Pick your map representations wisely, though a 2D grid and your existing area graph are the safest bets.
- Expect a lot of iteration along with the AI decision making as you tweak the parameters of your influence map.
If you have any questions on the topic of influence maps and their use for spatial decision making, don't hesitate to ask here or via Twitter!