What is Duality?
Answering this question extensively isn't really in the scope of this tutorial - but you probably should know what we're dealing with. You can read all about it on the official website, here's a short version however:- It's an extensible 2D game engine.
- It comes with a visual editor.
- Free and Open Source.
- Based on C# and OpenTK.
- Built around a plugin system.
- Allows fast prototyping.
Installing Duality
Your first steps should be to check whether your system meets all the requirements for developing using Duality. Don't worry. There aren't many:- Make sure that the .Net Framework 4.0 (or higher) is installed on your system. It usually is, since it comes with Windows Update and is a requirement for a lot of modern applications. If you're not sure whether to get it or not, you may just download it and let the installer decide.
- Next, you're going to need Visual Studio, which will be your main tool for writing source code. If you happen to have a professional version of it laying around, you can use that one. Otherwise, you can get a free version from Microsoft, just look for Visual C# Express. Download it and install it.
- Now get the latest binary package of Duality. It should be a .zip file. Extract it and run DualityEditor.exe. You should see a splash screen followed by the Duality environment.
Setting up a Project
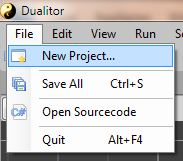
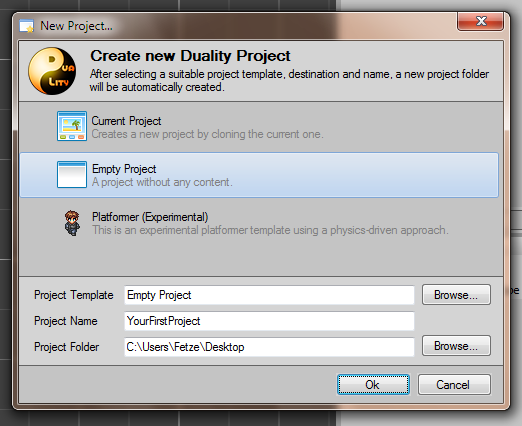
Each application handles its files and projects differently, but most of them detach project from application. Duality doesn't do that. Each project you set up comes with its own version of engine and editor and there is no central location in which the "Duality Editor Application" resides. While this approach may sound ridiculous at first, there is a practical reason for it: Duality is still under development and backwards compatibility can not always be guaranteed. Looking at long term development, it can't be entirely ruled out that there are updates that will break projects set up in previous versions of Duality. By carrying its own version of engine and editor, each project will remain safely play- end editable. Although you can still update them manually, old projects can live on without issues.A Duality project spans the folder in which editor and engine application are located, as well as all of its subfolders. Thus, the folder to which you've extracted the binary package during installation already is a Duality project! It hasn't been set up specifically, but still: Nothing prevents you from developing your game right there. While setting up a new project can be as easy as copying a folder, Duality also has a New Project dialog that allows you to do some more advanced setup. Select File / New Project... to create a new project:
Editor Layout
There you are, sitting in front of your computer screen and staring at some grey-ish thing named Dualitor. What next? Where is the game content going to be? When do you get to write some code? What are all these areas and why are they all empty? Well. May I Introduce?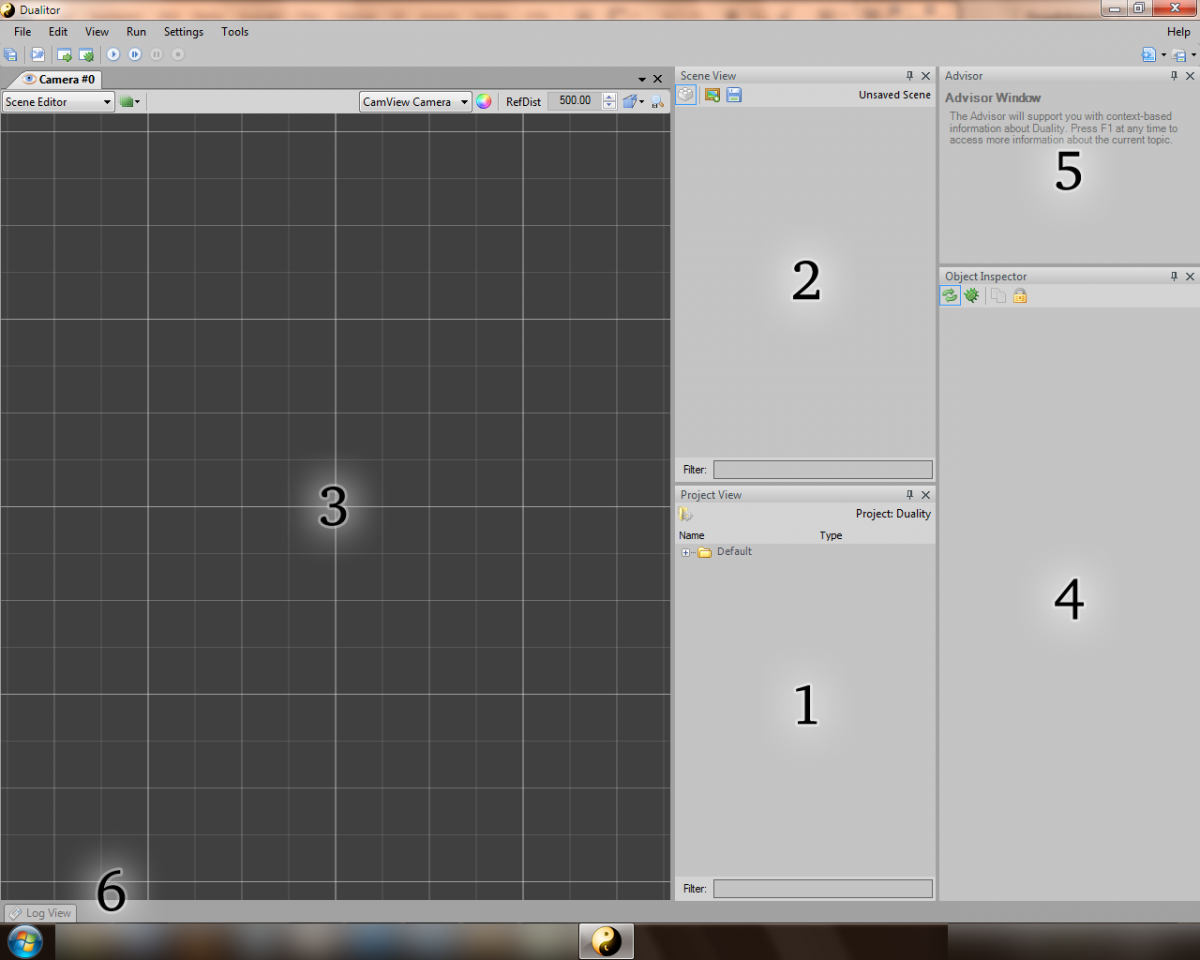
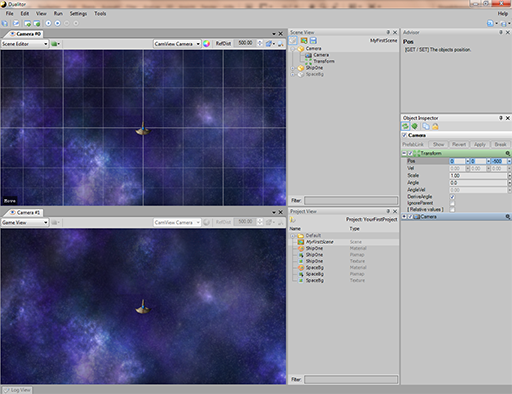
- Project View: This area is essentially a filtered file system browser rooted at your project's Data folder. In other words: This is where all your game content goes. It shows all the Resources your project has and the ones that are embedded in Duality itself. The latter ones are called Default and are always available.
- Scene View: While the Project View deals with Resources, the Scene View deals with Gameobjects and Components. It shows the contents of the currently active Scene as a hierarchial scene graph.
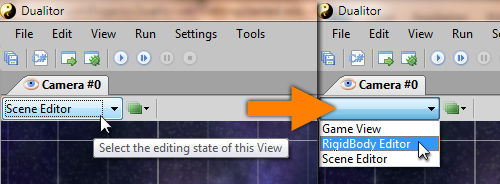
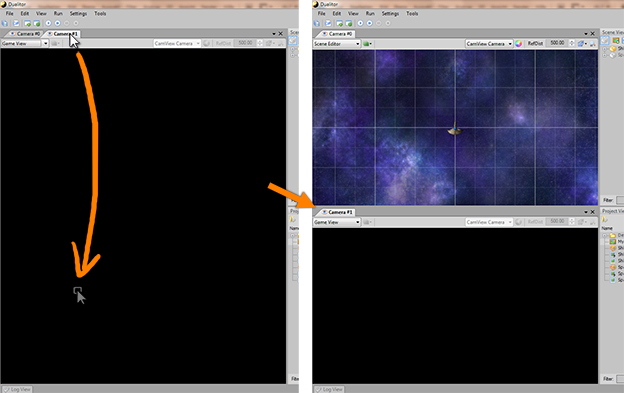
- Camera View: Shows the currently active Scene from a camera objects viewport. You can navigate by turning the Mouse Wheel or holding Middle or Right Mouse Button. Try it! If you don't quite get a feel for this kind of navigation, there is also an alternative set of camera controls: When holding the Space Bar, you can drag and turn the scene around using both Mouse Wheel and Left / Right Mouse Buttons. In the upper right of the Camera View, you can select a single Editing State and multiple View Layers. By default, the Scene Editor should be active, as well as the Grid Layer. Note that you can open as many Camera Views as you like, just select View / Camera View.
- Object Inspector: As in most other applications, you will occasionally select objects. The Object Inspectors job is to show their properties and allow you to edit them. If you open multiple Object Inspectors using View / Object Inspector, selection changes will be split among them.
- Advisor: Especially useful for beginners, the Advisors job is to provide helpful information about whatever your Mouse Cursor is currently hovering over. If you want to know what a specific Button, Property or Object does, try hovering over it and take a look at what the Advisor tells you. For more detailed information, press F1 while hovering over something - it will open an external help file whenever such topic is available. If you accidently close the Advisor, you'll find it under Help / Advisor.
- Log View: Logging is a powerful debugging device and the Log View provides a clean look at what your game, engine and editor are writing to their logs. If expected errors occur, they will be logged. If unexpected errors occur, they will be logged as well. Ideally, both shouldn't happen - but you know how it is. The Log View helps you keep an eye on problems.
Building a Scene
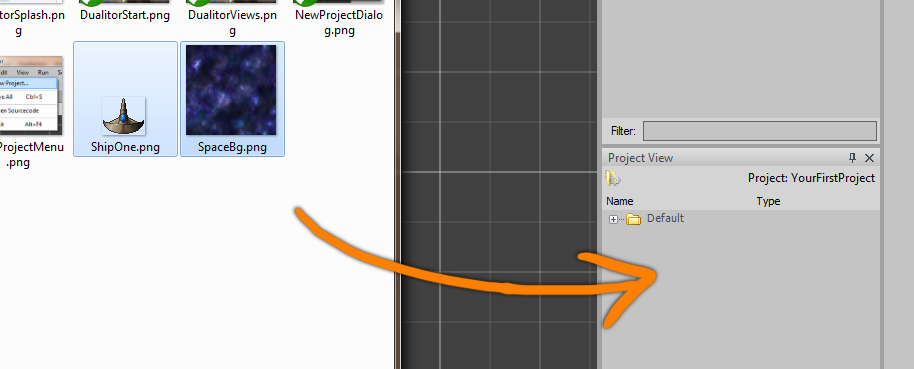
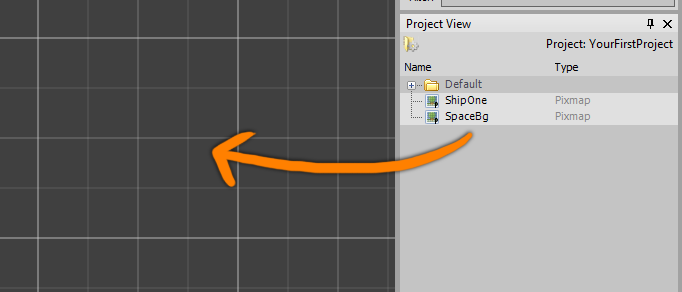
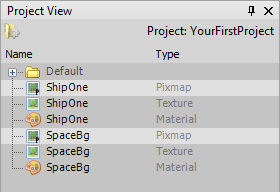
Time to get your hands on actual development. Let's start with something simple, a space shooter maybe. Space has the advantage of being completely empty, which naturally ressembles the state of a new project, so we're authentic right from the beginning. All we need to do now is fill the void with stuff. Here's a background and a space ship. Download them:

Editing Gameobjects
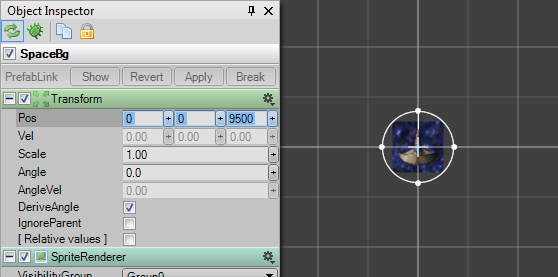
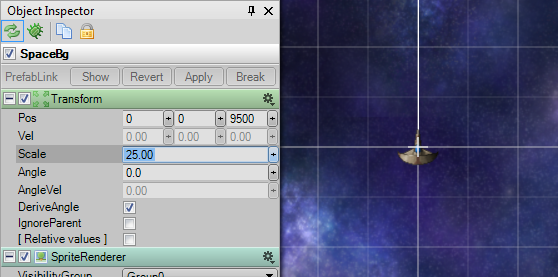
Now take a look at the Gameobjects that have been created by your dragdrop action. They are displayed as yellow boxes in the Scene View. Expand them and you will see that each of those objects in fact seems to consist of two pieces: Transform and SpriteRenderer.

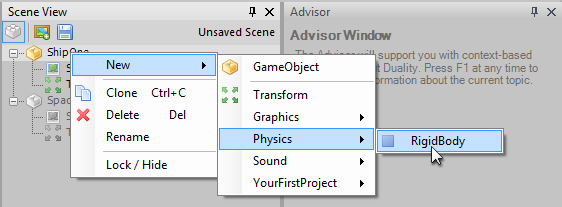
Physics and Collision Detection
After configuring the background, we should do the same for the player ship. Right now, it isn't different from the background object at all: A sprite located somewhere in space, not able to do anything useful. Our goal is to make it fly around based on user input. There are at least two methods to achieve that - both require some programming, but are based on different concepts:- In the first approach, we might just listen for user input and directly interfere with the Transform properties Position and Rotation, which is very easy to handle and allows us direct control over all the math behind player movement. This is good if we don't require physically "correct" behavior and don't want physics to interfere with the game code.
- On the other hand, there is the physics-driven approach. Instead of doing the math ourselves, we can just define the object's physical shape and apply forces to it like a thruster would. The main advantage is flexibility towards physical object interaction and a believable collision response right from the beginning.
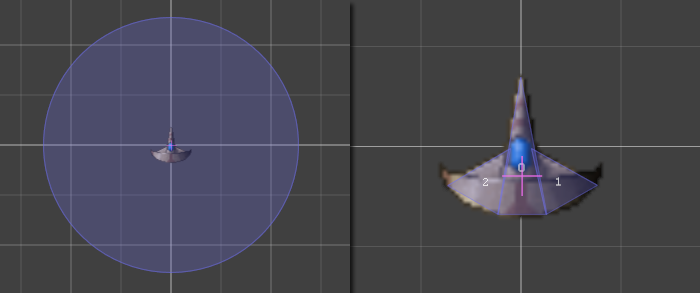
- By default, an object's mass is calculated based on the total area occupied by all of the primitive shapes. Overlapping shapes might make an object appear unusually heavy - you might want to avoid (or use) that. If you aren't content with the automatic mass calculation, you can always enter an explicit value in the respective RigidBody property.
- Each shape adds a little complexity to the physical simulation. For performance reasons, you should always use the simplest shape that you can get away with. When defining polygons, each edge adds complexity. Circles are generally easiest to calculate but aren't always suitable.
Testing the Scene Setup
After defining the ship's shape, be sure to switch back to the Scene Editor mode. Let's see what happens when we run the game. In Duality, you don't need to actually run the game to see that: The editing environment has a built-in testing mode called Sandbox, which allows you to see the game in action while at the same time being able to use full editing functionality. The current Scene's state is saved when entering the Sandbox and restored after exiting it. However, the current Scene has never been saved anywhere, so we better do it now. Click on the Save Scene button in the Scene View and a new Scene Resource will appear in the Project View. Enter a suitable name and hit return to accept.


Writing Code
Enough with all the preparations. Time to write some code! Click on the Open Sourcecode button in the upper left to bring up Visual Studio (or Visual C# Express) with the game plugin project open. While other game frameworks are referenced and used by your own code, Duality does the reverse: In a Duality game, it's not your code that is using the engine - the engine is using your code! Every custom Component, each and every feature you implement is compiled to a Plugin .dll file, which Duality will load and use as it sees fit. The Visual Studio solution that is opened using that button contains a new project that is a fully configured Duality Plugin - ready to be filled with your code.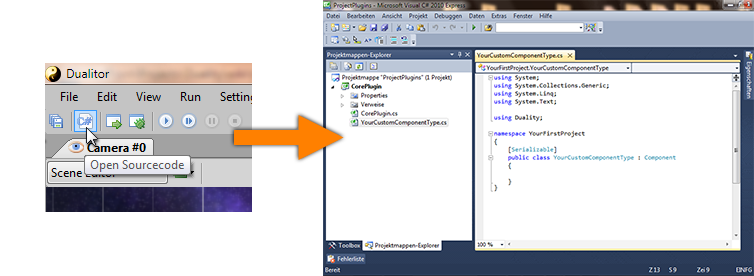
using System;
using System.Collections.Generic;
using System.Linq;
using System.Text;

using Duality;

namespace YourFirstProject
{
    [Serializable]
    public class Player : Component
    {

    }
}
It defines a class named Player that derives from the Component base class. This is the primary way to introduce new logic to Duality: By defining custom Components that can then be added to Gameobjects in the editor. Let's implement some basic player ship logic step by step:
- First add using directives for the namespaces Duality.Components.Physics, OpenTK and OpenTK.Input. That way we won't have to call all those classes we'll be using by their full name.
- Right after the [Serializable] attribute, add a new [RequiredComponent(typeof(RigidBody))] attribute. This will tell engine and editor that our player logic will always require its Gameobject to also have a RigidBody. We'll need it to apply user input forces to it.
- Let Player not only derive from Component, but also implement the ICmpUpdatable interface. It will allow us to do one update per frame cycle by providing a suitable method definition. Your class definition line should look like this: public class Player : Component, ICmpUpdatable.
- Click on ICmpUpdatable and a tiny blue square will appear to its left. When hovering over it, a context menu will appear. Open it and select Implement interface explicitly. Visual Studio will add some lines of code for you. Remove throw new NotImplementedException(); from its body so we can insert our own implementation.
- Before checking user input or applying forces, we'll need to retrieve the RigidBody Component to work on. The best way to obtain a reference to it is to ask our Gameobject: RigidBody body = this.GameObj.RigidBody;.
- Now that we are prepared, we can check for user input. if (DualityApp.Keyboard[Key.Left]) (If the player presses the left key), body.ApplyLocalForce(-0.0001f); (apply a small counter-clockwise rotation force).
- Implement the same for the right key and a small clockwise rotation force.
- If neither the left nor the right key is pressed, we want the ongoing rotation to stop: body.AngularVelocity -= body.AngularVelocity * 0.1f * Time.TimeMult;. Each frame, a tenth of the current velocity is subtracted. We'll need to multiply that value by Time.TimeMult to account for Duality's variable time step: Not all frames take the same amount of time. A game might run fast on one machine (many frames per second) and slow on the next (few frames per second). To be sure that the underlying logic always executes at the same speed, there is Time.TimeMult to compensate: At 60 FPS, it will equal exactly 1.0f, leaving all calculations as they are. If we run at 120 FPS (i.e. twice as fast), it becomes 0.5f so each frame is doing half the work and everything adds up roughly the same it does at 60 FPS. When running at 30 FPS (half as fast), it will be 2.0f to compensate in the other direction. You get the idea.
- Check for more user input! if (DualityApp.Keyboard[Key.Up]) (If the player presses the up key), body.ApplyLocalForce(Vector2.UnitY * -0.2f * body.Mass); (apply a small local upward force). By multiplying that force with the bodies mass, we prevent the movement from behaving different for differently weighted objects: For heavier object we simply apply more force, for lighter ones less.
- Implement the same for the down key and a small local downward force.
using System;
using System.Collections.Generic;
using System.Linq;
using System.Text;

using Duality;
using Duality.Components.Physics;

using OpenTK;
using OpenTK.Input;

namespace YourFirstProject
{
    [Serializable]
    [RequiredComponent(typeof(RigidBody))]
    public class Player : Component, ICmpUpdatable
    {
        void ICmpUpdatable.OnUpdate()
        {
            RigidBody body = this.GameObj.RigidBody;

            if (DualityApp.Keyboard[Key.Left])
                body.ApplyLocalForce(-0.0001f);
            else if (DualityApp.Keyboard[Key.Right])
                body.ApplyLocalForce(0.0001f);
            else
                body.AngularVelocity -= body.AngularVelocity * 0.1f * Time.TimeMult;

            if (DualityApp.Keyboard[Key.Up])
                body.ApplyLocalForce(Vector2.UnitY * -0.2f * body.Mass);
            else if (DualityApp.Keyboard[Key.Down])
                body.ApplyLocalForce(Vector2.UnitY * 0.2f * body.Mass);
        }
    }
}
That's all we need for now. Right-click on the CorePlugin project (not the .cs file) in the Solution Explorer and select Build to compile the Plugin. Now switch back to the Dualitor - it will notice that you recompiled and automatically reload the Plugin. Now right-click on the player ship Gameobject in the Scene View and select New / YourFirstProject / Player. Enter the Sandbox mode. Fly using the arrow keys.
Run, Debug and Publish
Running your game in the editor is fine as a first test - but sooner or later, you'll want to publish your game, or run it as a standalone application. That application is called DualityLauncher.exe and is also available through the editor UI. Click on the Run Game button in the toolbar.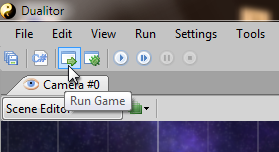

- logfile.txt: The launcher application's log file. Will be rewritten after each start.
- logfile_editor.txt: The editor's log file. Will be rewritten after each start.
- perflog.txt: The launcher application's performance report file. Will be rewritten after each start.
- perflog_editor.txt: The editor's performance report file. Will be rewritten after each start.
- Backup: An automatically generated backup folder while editing project Resources. Never accessed.
- Source/Media: A temporary folder that holds source media files while editing them. Can be safely deleted without losing any data.
- Source/Code: Holds the project's source code. It's your choice whether you deliver it or not.
- DualityEditor.exe: The editor.
- DualityEditor.exe.config: Some runtime configuration for the editor app.
- DualityEditor.pdb: Debug symbols for the editor.
- DualityEditor.xml: XML documentation for Visual Studio Intellisense.
- Duality.xml: More XML documentation.
- OpenTK.xml: Even more XML documentation.
- DDoc.chm: API reference for Duality.
- editoruserdata.xml: Editor layout and settings.
- designtimedata.dat: Design-time data for GameObjects such as their locked / hidden state.
- Aga.Controls.dll: Some Editor user interface library.
- CustomPropertyGrid.dll: Some Editor user interface library.
- VistaBridgeLibrary.dll: Some Editor user interface library.
- WeifenLuo.WinFormsUI.Docking.dll: Some Editor user interface library.
- Windows7.DesktopIntegration.dll: Some Editor user interface library.
- Plugins/*.editor.dll: Duality editor plugins.
- Plugins/*.xml: XML documentation of Duality plugins.


This looks really cool, I want to take a closer look at it later. Bookmarked. : )