Before We Start!
I would just like to say, before we start this tutorial, you will
not be creating a game in this tutorial - you will only learn how to use the editor and then add some basic code to make an object move on the screen, setup a timer and a game over event. Tutorials will come in the future where you will make a game from start to finish.
You will need to have Visual Studio 2012 installed.
Don't forget to keep saving whilst working on the code.
What is Rapid2D?
First off before you get into any coding you should know what Rapid2D is. Rapid2D is the first engine that has been specifically created to develop Windows 8 games for all of their current devices.
How to get Rapid2D!
To get Rapid2D simply head over to our website (
https://www.rapid2d.com/site/page/index.html) and sign up. Once done navigate over to the Downloads tab. On the left hand side of the screen you should see a group called "Categories" which has contained within it three things. You will want to select the first option which is "Rapid2D Engine".
Once here you will see 3 options which are; Rapid2D Studio, Rapid2D Pro and Rapid2D Free. For this tutorial you will be using the free version of the engine so go ahead and click on it. From here click the big green download button and read through the terms and agreements.
Once you have read through them click on the "Accept and Download" button if you wish to. You should now be greeted with another screen where you can click download then choose your directory you wish to save it to.
Installing Rapid2D
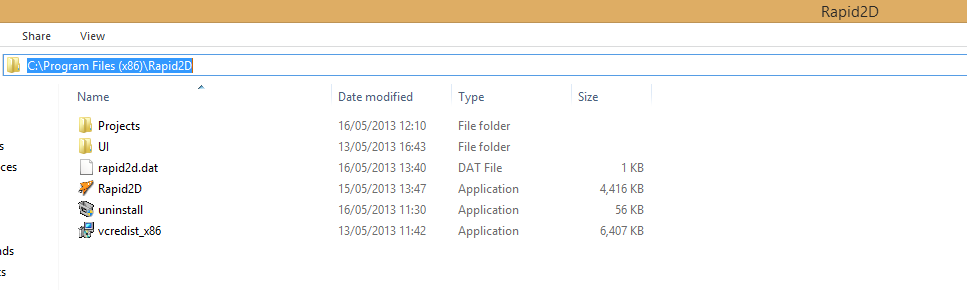
Now that you have the engine all that there is left to do is install the engine. To do this navigate to where you saved the file you downloaded in the previous section and double click the installer. A new window will appear and you will be able to choose your destination folder. For this tutorial I am going to leave it at its default setting which is: "C:\Program Files (x86)\Rapid2D".
Once you have chosen your directory hit the install button. It should now begin to install, once complete you should see the close button in the lower right hand corner become clickable, so click it.
Running Rapid2D
To run Rapid2D you will need to head over to the directory that you installed it in. In our case (unless you chose differently) it will be in: "C:\Program Files (x86)\Rapid2D". Once here double click on the Rapid2D.exe file which has a rocket for its icon image.
You will be greeted with a log in screen which requires you to enter your log in details that you created when you signed up to the Rapid2D website earlier on in the tutorial. Once you have entered your log in details hit the log in button and you will be greeted with a window that looks like this:
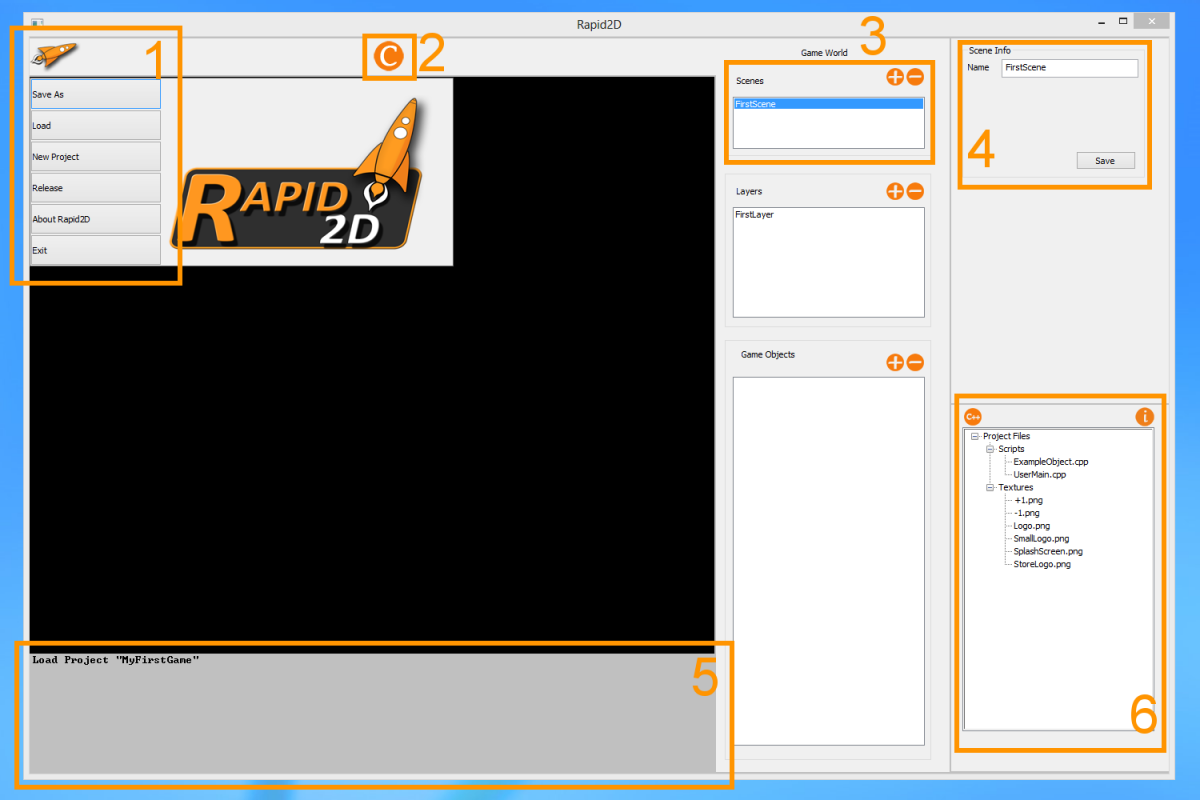
Now before you get into this tutorial I highly advise you head over to our website and read through
this handy little guide you have setup to get you used to where things are in the editor and how it looks.
Example Time!
Now that you are hopefully a little bit more familiar with the engine's user interface you can move onto doing a really simple example. This example will show you numerous things ranging from creating layers, objects, adding textures, applying animation to textures, adding a custom collider to an object, adding a script to an object, creating a simple script and much more.
So to begin with before you do anything you will need to download the sprites you will be using in this tutorial which can be found here: . Once done place them somewhere on your computer that you will be able to navigate to with ease.
Starting up!
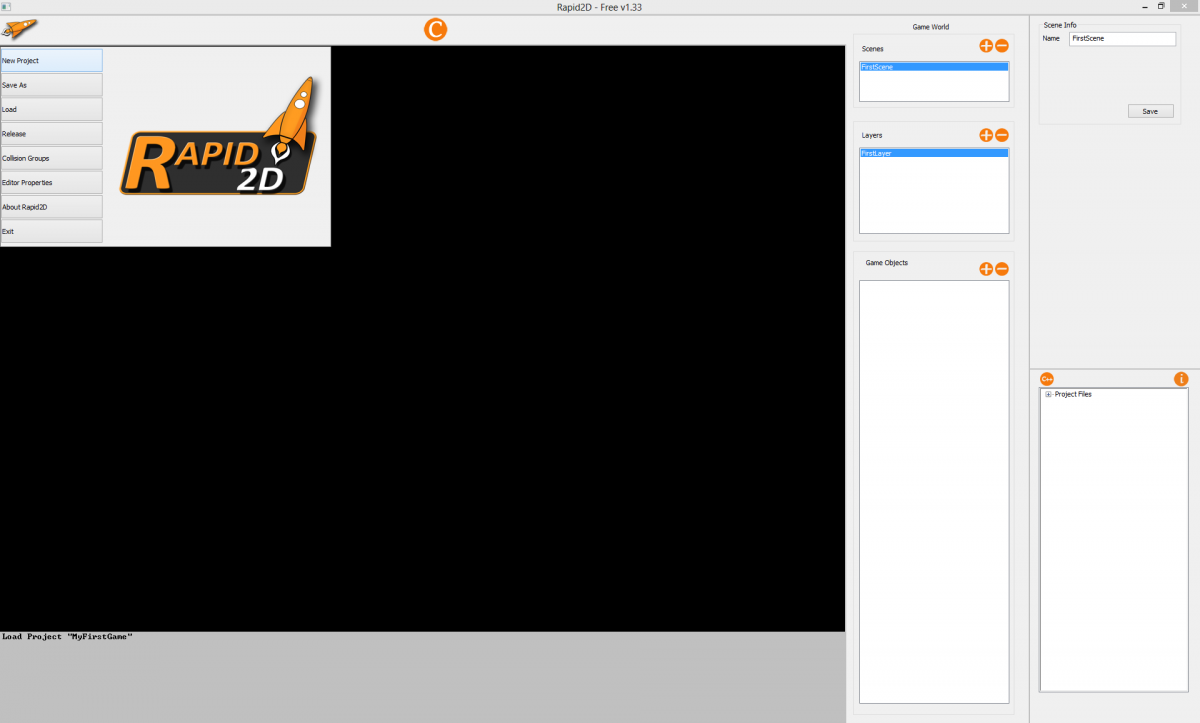
Now that you have everything you need you can progress onto some practical applications. To start with open up your Rapid2D engine and click on the Rocket in the top right hand corner and you should see this menu:
Click the top option, "New Project" you should now have a small window open which asks you to set a name for your project. Name it "Example" for simplicity and click "Save As".
Importing Textures (Images)
Now your window should look like this:
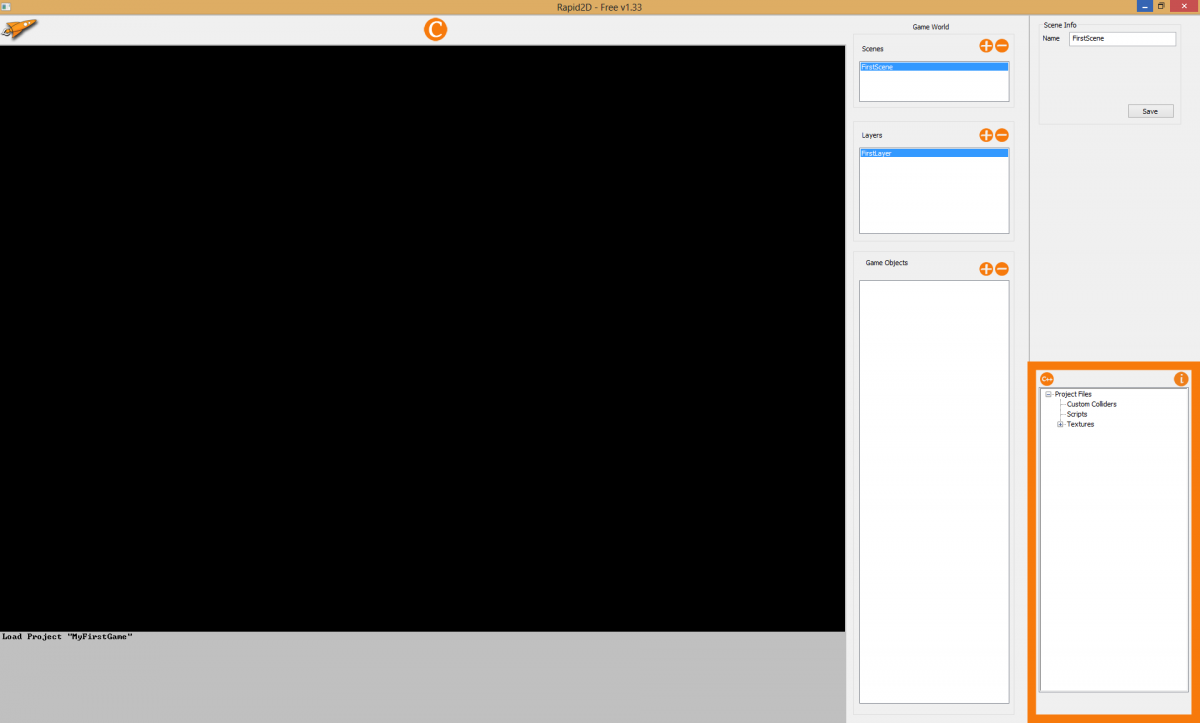
Inside the orange box within the image above is where you will be working for a little while after this next step. In the lower right hand corner box (below the "C++" and "i" buttons) there should be the text "Project Files" with a + next to it. Click the + button next to it and it should drop down unveiling some other options and look something like this screenshot:
Now click the + button on the left of the option called "Textures". You will notice you have the default textures which will be included in every project you create. These are "particles.png" and "Rapid2D.png". We won't be using these textures, instead you will be using the ones you downloaded earlier. First locate where you saved the images and then open another window and go to where you installed Rapid2D in our case again it is "C:\Program Files (x86)\Rapid2D" as seen below:
From here navigate to the projects folder, here you will see two folders! One is called "Example" or whatever you chose to name the file and "Sample" which you won't use in this tutorial. Double click on Example and then double click on the Data folder and then finally head on into the Images folder. This is the folder you will need to place any textures and images into if you want to use them in your game. Go ahead and copy over those textures you downloaded earlier into this folder. Your "Images" should now look something like this:
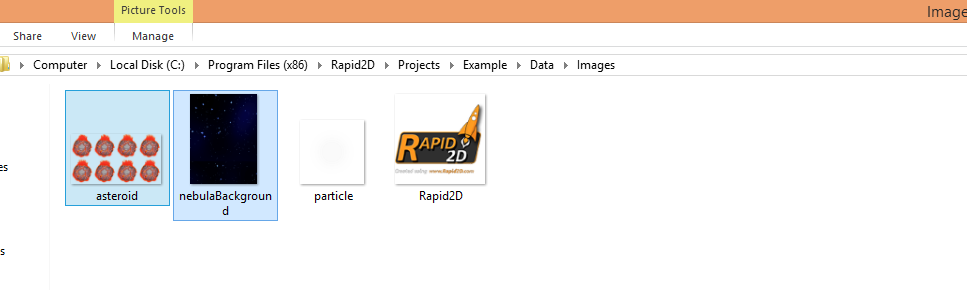
If you now go back to your Rapid2D engine window you will notice that two new items have been added to the Textures sub heading - they will be the "asteroid.png" and "nebulaBackground" which are the two textures you will be using.
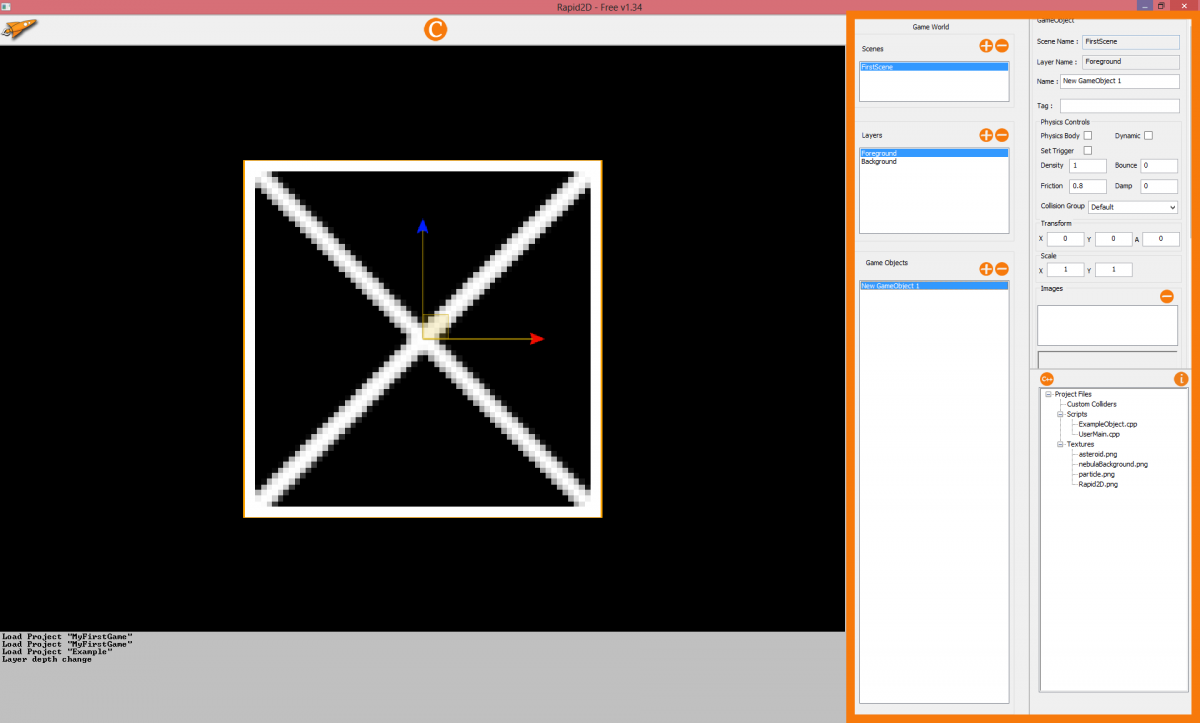
Creating the Game World
Now that you have the textures you want to use, you can start to create the world you will be using. To start with you need to navigate to the "Layers" tab in the Rapid2D engine. We will need two layers which you will call "Foreground" and "Background" so you need to add a layer and edit the name of the default created layer called "FirstLayer". To do this in the layers tab click the text once that reads "FirstLayer" now you should notice a new box named "Layer Info" has appeared to the right of the "Layers" box as shown below:
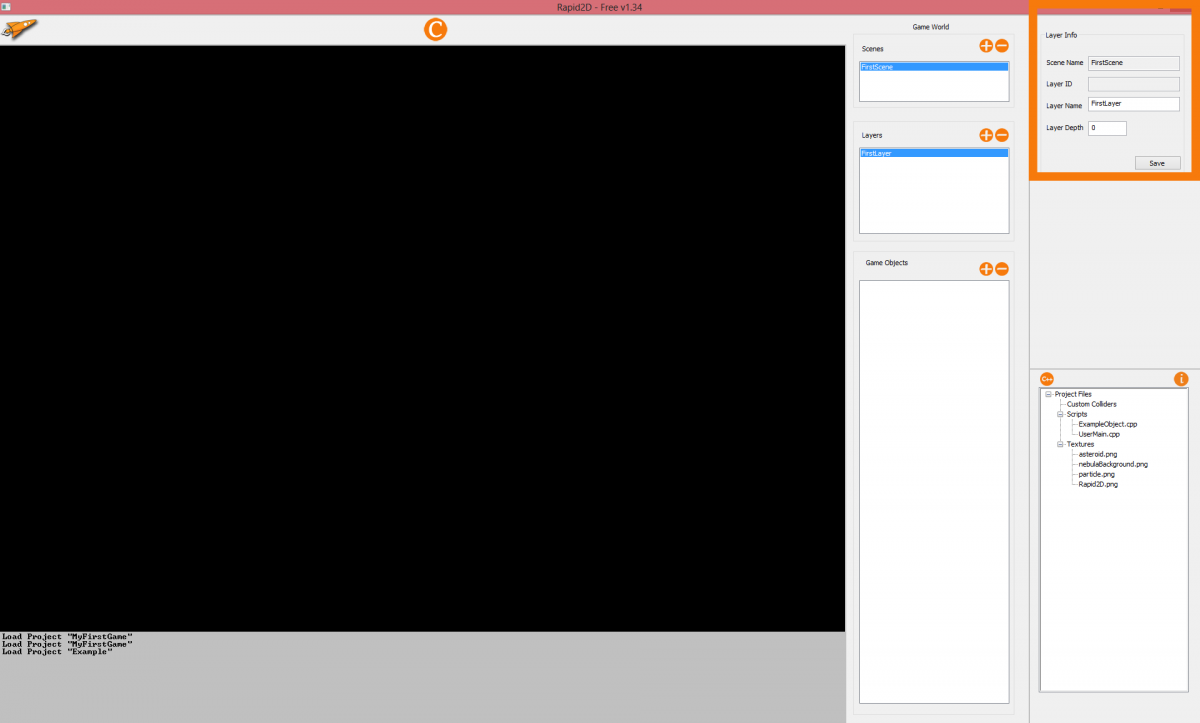
Within the "Layer Info" box you will be able to see four options you can customize. For this example you want to edit the text in the "Layer Name" option from "FirstLayer" to "Foreground" and in the box below called "Layer Depth" you will want to leave this at 0. All that's left to do now is to click the save button.
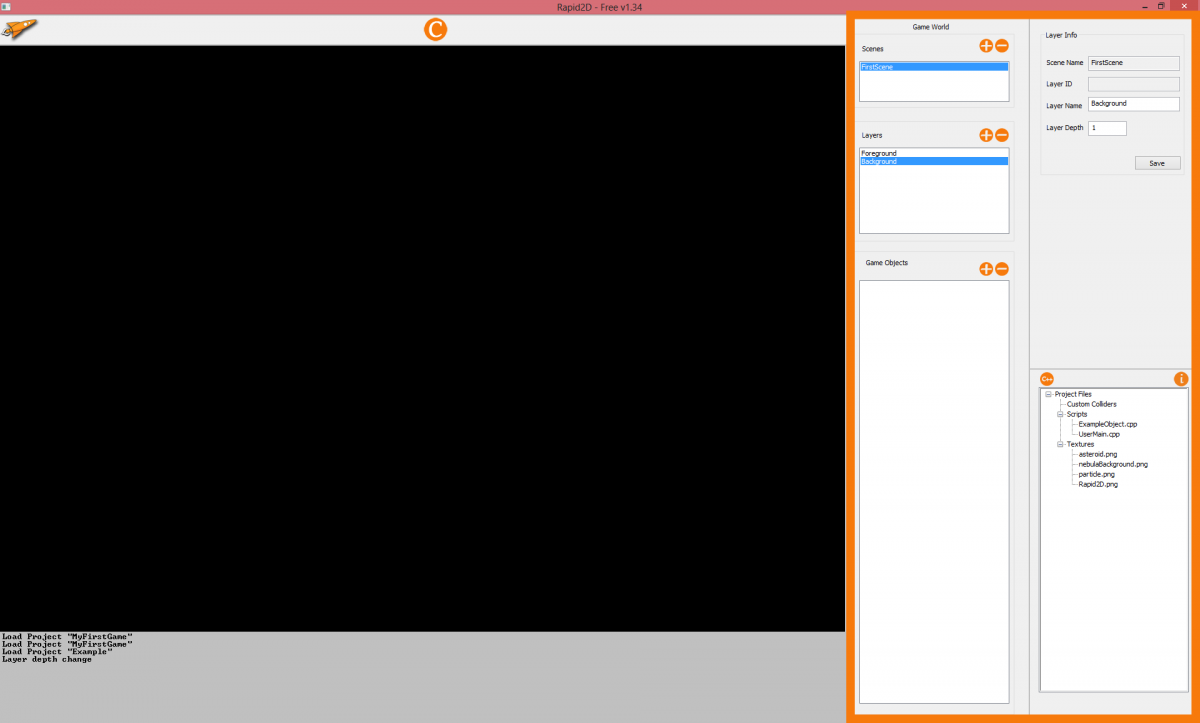
Now to have setup the foreground layer you need to create a new layer! To do this you need to head back over to the "Layers" tab and you will be able to see two orange buttons, one of which is a + (plus) symbol and a - (minus) symbol. To add a layer you need to click the orange + button as this will create a new layer! Just like you did before you will need to click on the new layer which should be called "New Layer 0" and edit the "Layer Name", change it to "Background".
Now before you save this layer you need to do one more thing before you can move onto the next stage of this tutorial and that is you need to change the layer depth of the new layer you just created which is really simple to do. Within the "Layer Info" for the "Background" layer you should see the option at the very bottom called "Layer Depth". This option needs to be set to 1 as it will allow us to set a texture to the "Background" layer you just created which won't show over the top of the "Foreground" layer.
Your editor should now look something like the one shown below:
Adding Objects to the Game World
Now that you have created some layers it's time to create some objects for both of the layers you just created. In this step you will simply create the objects you need for each layer and then in the next stage you will apply some textures to them!
So to create an object you first need to select which layer you wish to create an object for. To do this simply click once on the layer you wish to have an object on. In this instance you are going to create what will be the "player" object which is the "Foreground" layer. Now that you have done this you can create an object by looking in the box below labelled "Game Objects". Once again you should be able to see the + and - symbols. All you need to do is hit the + button. Your editor should look something like this now:
The box that has appeared in the "Game World" to the left of all the editor options is the object you have just created. Anyway just like the layers you need to edit a few things within the object before it will become useful. Once again in the top right hand corner of the screen will find a box called "GameObject" which is where you will be able to edit things about the object you have selected. So just like before head over to the "Name" option and rename the object to "Player".
Now that this is done you can move on to editing some other options of the object. The first set of options you should encounter below where you changed the name of the object is the "Physics Controls" to which you will need to make some changes to. First off you will be able to see three tick boxes, all of which will need to be ticked. "Physics Body" basically tells the engine that you want to make the object a physics object - this opens the object up to things like collision with other physics objects; "Dynamic" allows the object to move around the game world and "Set Trigger" allows you to have other objects pass through it whilst allowing for collision to be set when it collides with specified objects that you will program in.
Now you have four more options which are "Density", "Bounce", "Friction" and "Damp". For this tutorial you need to set all of these to 0. For now this is all you need to do for this object.
Now replicate these steps for an object called "background" which will be in the "Background" layer. However when you come to set the "Physics Controls" this time only tick "Physics Body" and set the rest of the settings the same.
Your editor setting should now look something like this:

Adding Textures to Objects
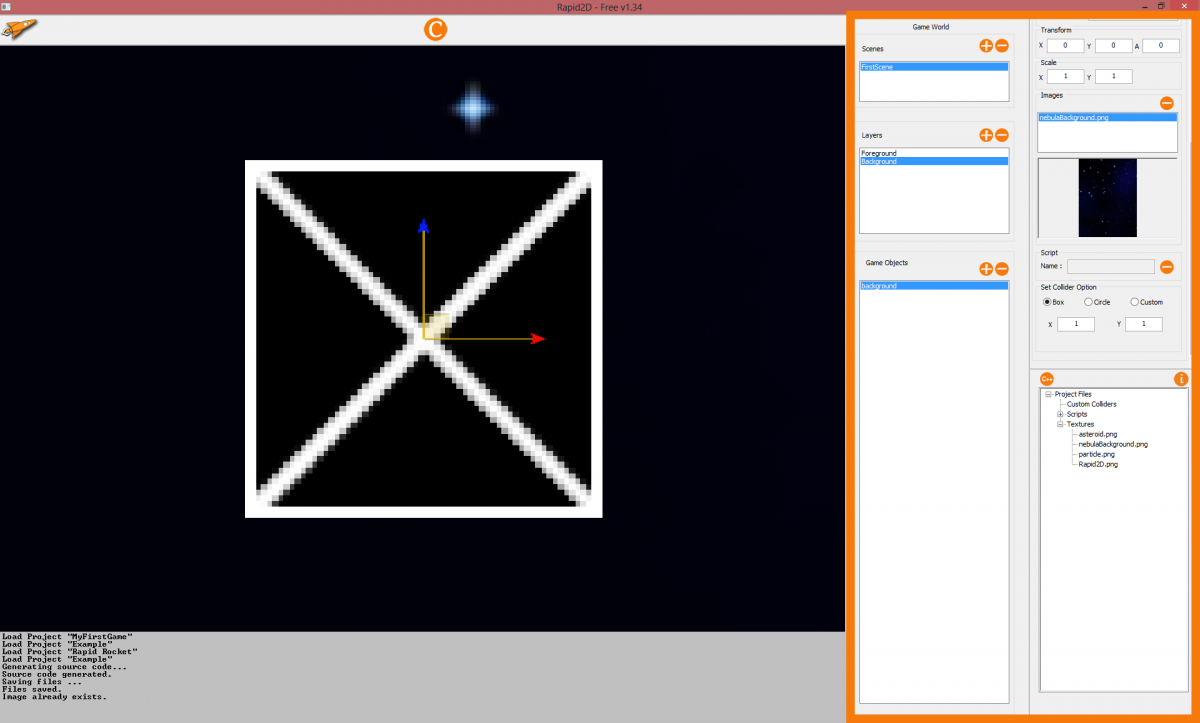
In this section you will be adding a texture to the new object you just created in the "Background" layer called "background". This is a very simple task as all you need to do is head back into the "Background" layer and select the object "background". From here you can scroll down past all of the options like the "Physics Controls" till you see a new set of options labelled "Images". Now to add a texture you simply need to open up "Project Files" in the bottom right hand corner box and then open up the "Textures" tab and click a few times on "nebulaBackground.png".
This as you have already noticed has added the text "nebulaBackground.png" to one of the boxes with the "Images" and the actual texture below. However you may have noticed the object in the "Game World" is still a box and not the texture you have just selected it to use. To apply the texture simply double click on the text "nebulaBackground.png" within the "Images" section.
This has now changed the "Game World" slightly as the texture you have given to the "background" object has taken effect. Your editor should look something like this now:
Adding Animation Textures to Objects
Now the reason you haven't given the "Player" object a texture is because you are going to give it an animated texture which is slightly more complicated but it follows the same steps as you did before so go ahead and add the "asteroid.png" to the "Player" object. The first thing you might notice is there are several asteroids on screen. This is because the texture file is actually what is known as a sprite sheet.
To make the image actually animate and display one image at any one time you must edit the images settings. To do this navigate to the "Project Files" then head into "Textures" and click on the "asteroid.png" text within the dropdown menu. Once you have done that, click on the "i" button which I have pointed to in the screenshot below:
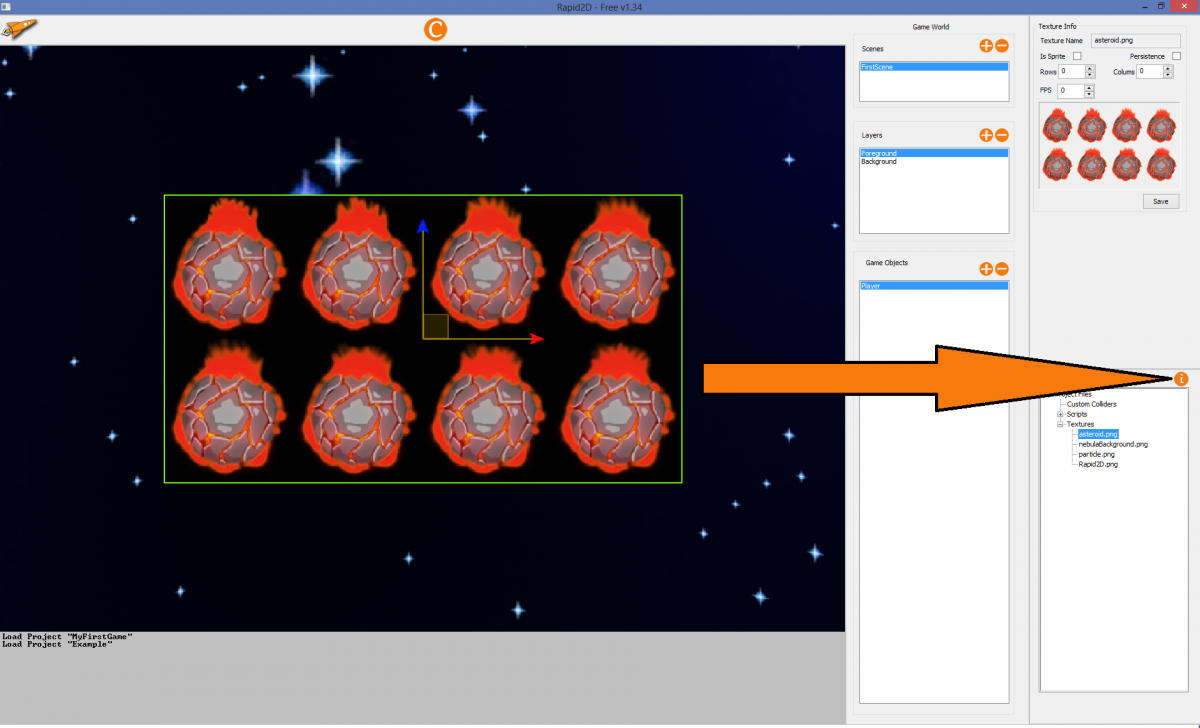
A new box in the top right will appear called "Texture Info". This is where you can set how many "Rows" and "Columns" the sprite sheet has as well as how fast it is animating through by editing the "FPS".
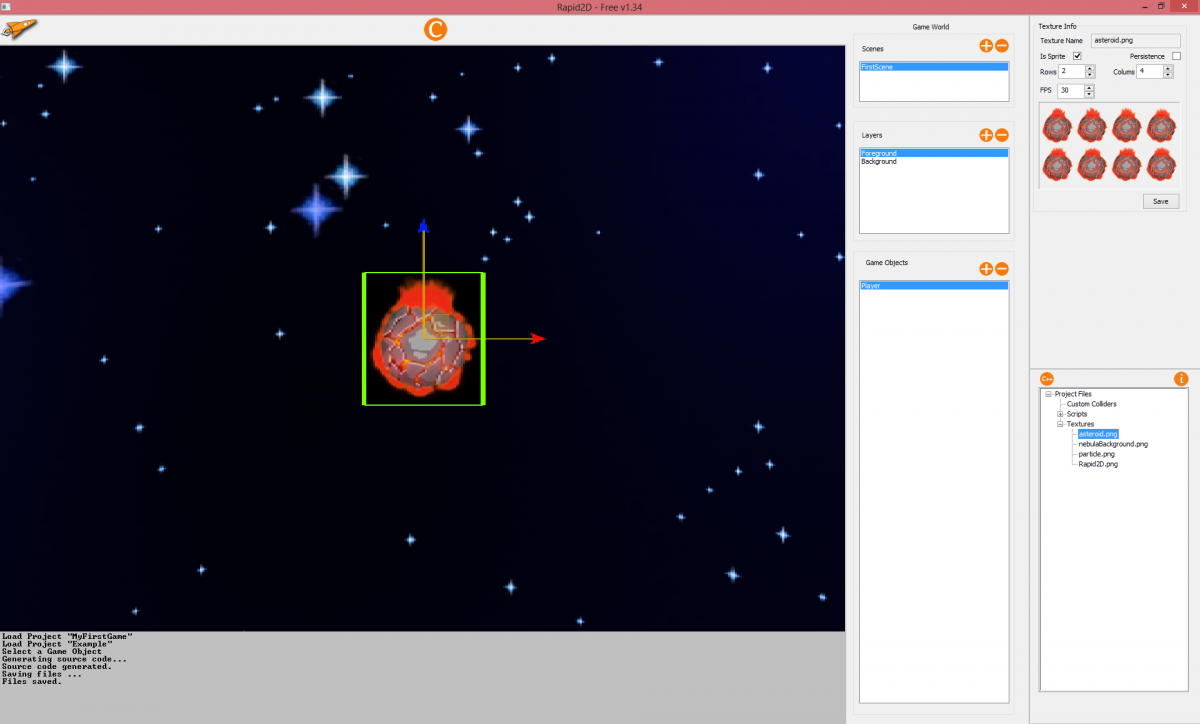
So the first step is to tick the box "Is Sprite" which tells the editor that the texture you have opened in the "Texture Info" window is like the name suggests, a sprite. Now you need to set how many "Rows" and "Columns" there are in the sprite sheet. We need there to be two "Rows" and four "Columns", so go ahead and set them accordingly. Next you need to set how fast you will want the image to cycle through the sprite sheet you have just divided up, for this you edit the "FPS" option and set it to 30.
Once you have done that all you need to do is hit the save button, once that has been done then you will notice that the image will have shrunk and will be continuously looping through its animation sequence that you have just setup.
Your editor should now look something like this:
Adding Object Colliders
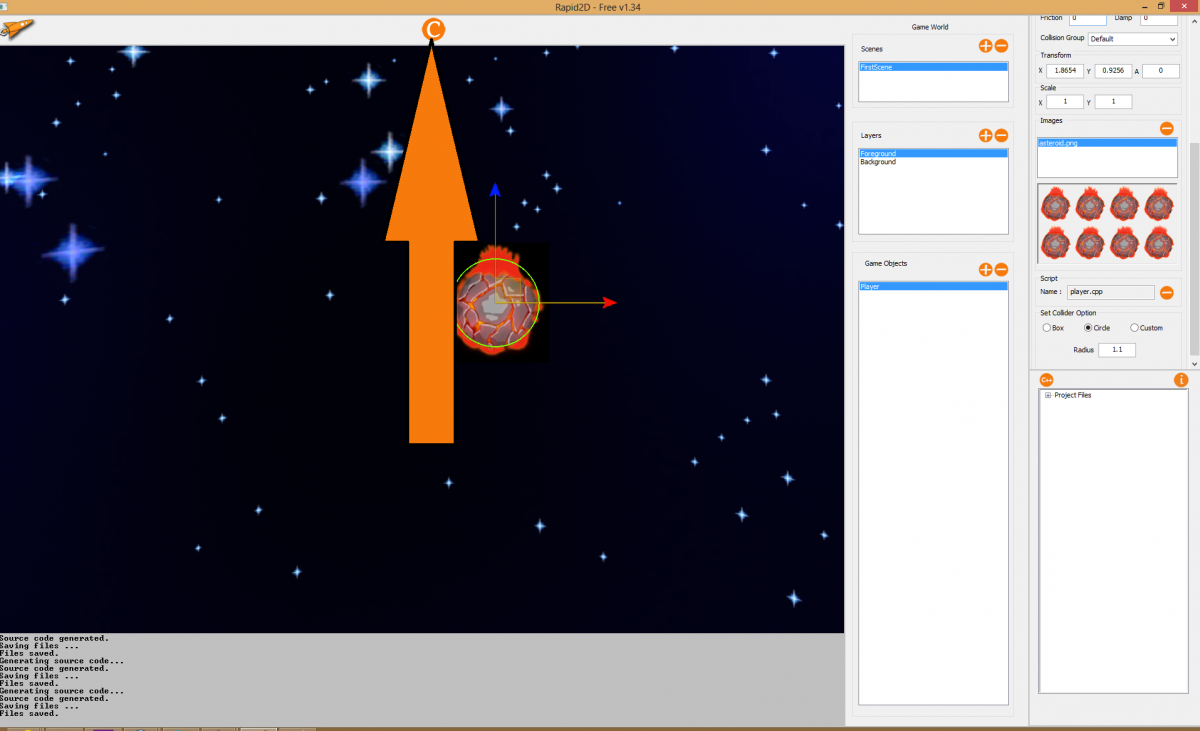
Now that you have the "Player" object animation set up you have just a couple more things to do before you can begin to program. The first is you need to give the "Player" object a collider. To do this click on the "Player" object and then scroll down the "Game Object" box till you reach the very bottom and see the "Set Collider Option" which has three circle boxes that are called "Box", "Circle" and "Custom".
The "Box" collider is a square collider that will appear in green around your object in the "Game World". "Circle" is as the name says a circular collider which will also appear in green around the object, ideal for things like coins, asteroids and other round objects. Last but not least is the "Custom" collider option which allows you to add and edit points around your object, this means if you have an obscurely shaped texture you can create your own ideal collider.
We will be using the "Circle" collider in this example so tick the option for it. Now you might notice that the collider is a bit too small for this object. So in the "Radius" option set it to 1.10 this will then make the collider larger and thus covers more of the object.
Your editor should looks similar to the one below:

Creating Scripts
In order to create "Scripts", you need to do one simple thing and that is click the "C++" button located to the left of the "i" button you used earlier. A new window should have opened up, all you need to do is edit the "Class Name" text box. We will use the name "Player" for this so go ahead click create. We have now created a new script.
To locate the "Script" you just created head into the "Project Files" dropdown and open up the "Scripts" dropdown. You should now see the one you just created called "Player.cpp".
Adding Scripts to Objects
All you need to do now is add the "player.cpp" you created just now to the "Player" object. To do this click on the "Player" object and then scroll down the "Game Object" box till you see "Scripts". All you need to do now is click in the option that says "Name" and then head back through the "Project Files" dropdown and locate your "Script" and just like you did before with the textures double click on the "Player.cpp" and it will add it to the object.
Your editor should look something like this now:
Compiling the Project
The last step left is to compile the "Project Files" which is a very simple task. All you need to do is hit the giant "C" button which is to the right of the "Rocket" that you clicked on in the beginning. To help you out there is an image below with an arrow pointing to its location.

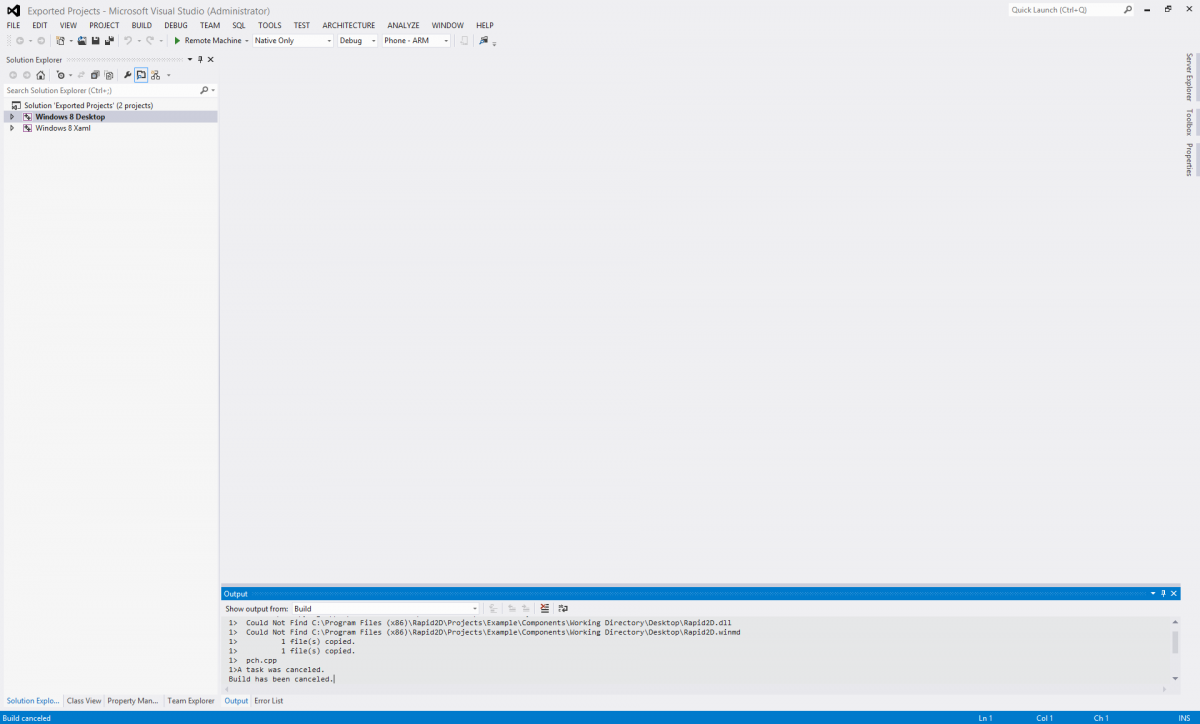
Once you hit that button it will not only save the project you are currently working on but it will create the actual "Visual Studio Project" which is what you need for the next step.
Opening your Visual Studio Project
Now you have finished using the editor but it is best not to close it down. All you need to do in this step is head back to where Rapid2D is installed "C:\Program Files (x86)\Rapid2D". Now from here you should see a "Project" folder which is where you need to go, so double click on there. You should see two more folders here called "Example" and "Sample", select "Example" - this is the project you made.
From here you will see a number of folders and files that weren't there the first time you came here to add your images. The file you are interested in is called "Exported Projects", simply double click on it and it should load up "Visual Studios 2012" and open up a screen that looks something like this:
Adding Player Movement Code
Now that you have opened up our "Visual Studio Project" you can finally add some code. Remember the "Player.cpp script" you made earlier on? Well it is time to edit that but first you need to navigate to it within "Visual Studio 2012". To navigate to it all you need to do is head into the "Solution Explorer" which is located on the left hand side of the screen as shown below:
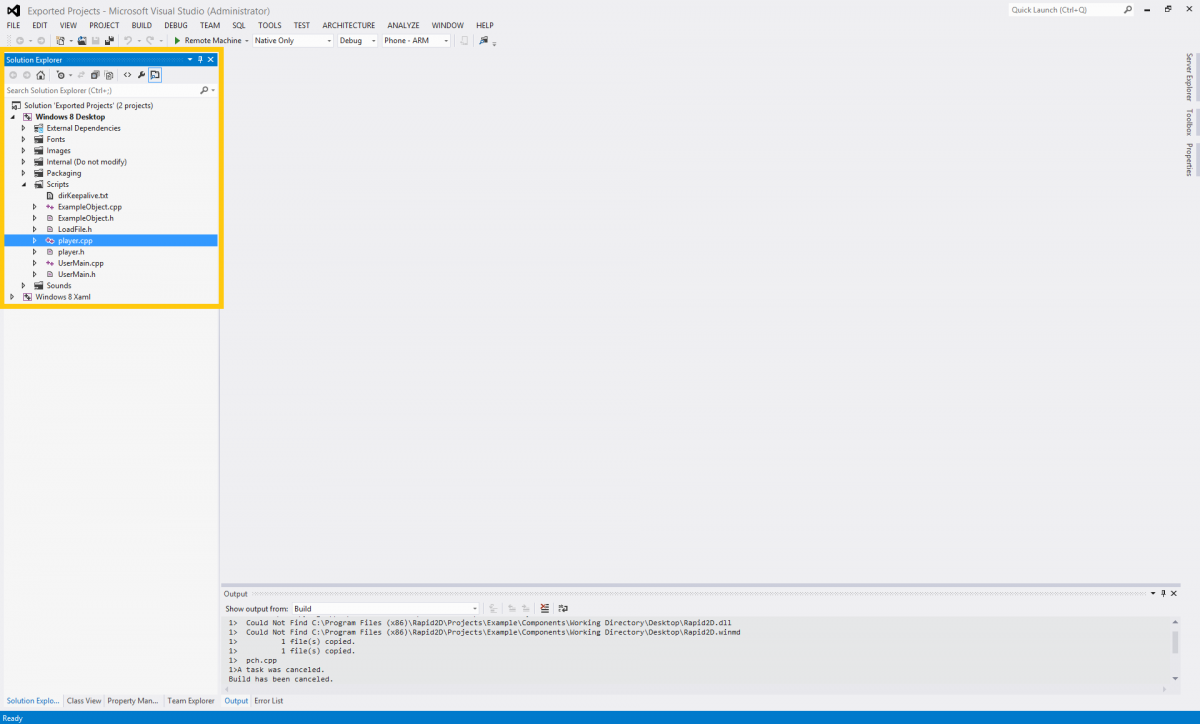
Now in here all you need to do is double click "Windows 8 Desktop" and then double click "Scripts" and then finally double click "Player.cpp" which will open up the "Player.cpp" in the main window of "Visual Studio 2012".
Now your screen should look like this:
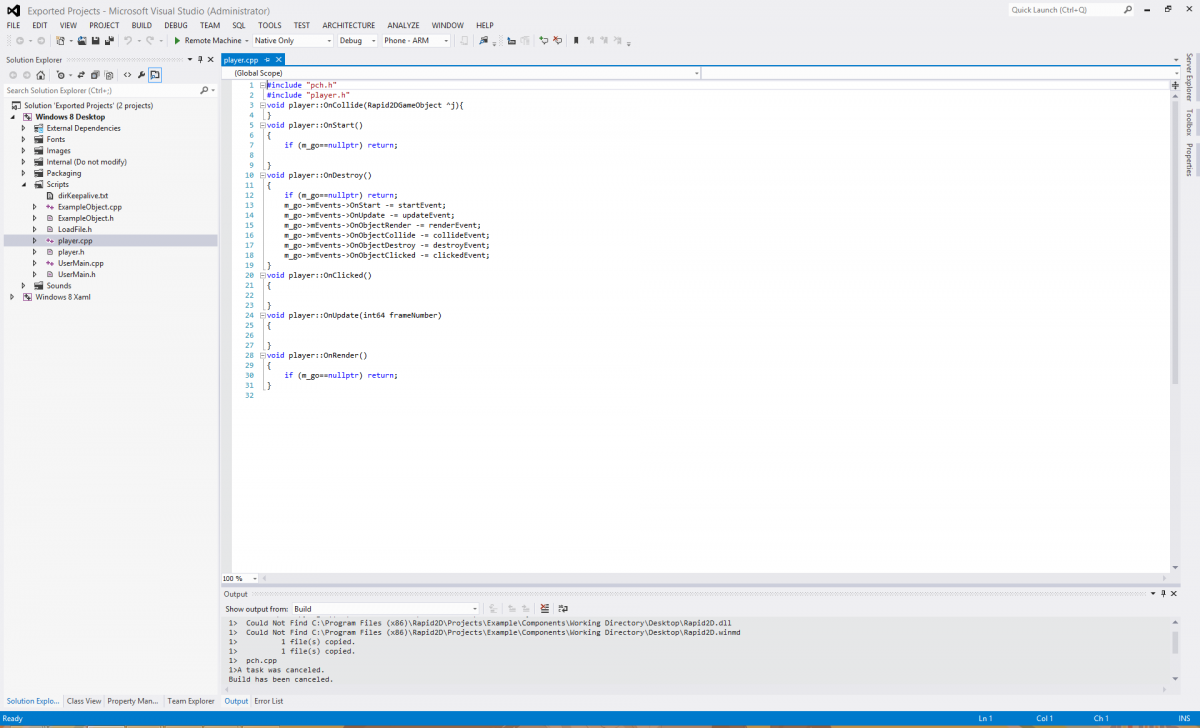
This is where you can add and edit events for things like on click events and what you want the object to do at certain times. However you don't need to do anything here as to get the "Player Object" to move you need to edit the "UserMain.h" and "UserMain.cpp" files so double click those files and they should open up.
All the code may look confusing but don't worry it is relatively simple to understand. In the "UserMain.h" file you need to add a few things, the first being two "Boolean" variables, which are variables that can either be true or false and the last variable you need to add is a "Float" variable which can store numbers with a decimal point.
Now that you know what variable types you will be using, you need to know what names you will be giving them! We will need the two "Boolean" variables to be called
AtPositionX and
IsPressed, as for the "Float" variable you will call it
TouchPointX. The only thing left to know is where you will be placing these variables. They will need to be placed within the
private: access group. Remember to add a semi colon ";" at the end of each line.
So the code you added should be:
bool AtPositionX;
bool IsPressed;
float TouchPointX;
Since you have now declared the variables you need to "initialize" them! To do this you will need to head on over to "UserMain.cpp" and look for
void UserMain::Start(), this is where you will be "initializing" the variables you just created. You may have noticed it has a curly brace "{" on the next line, the code and any code you add here after will have to be placed on any line after that but before the closing curly brace "}". So to do this simply add the name of the variable that you created before and follow it up with the "=" sign and then add the key word
false if it's a "Boolean" variable or again use the "=" sign and then add
0.0f followed up by a semi colon. The code you should have written will look like this:
	IsPressed = false;
	AtPositionX = false;
	TouchPointX = 0.0f;
Now that the variables have been "Initialized" you can use them. So now you will need to head on over to
void UserMain::Update(int64 frameNumber). The variables you just created will be used here however you need to do one more thing before you can, that is you need to create a link to the game object using something called a "pointer", this basically like the name suggests points to an object which enables us to access a few variables that would be otherwise exclusive to the game object you wish to use.
To do this add the following line of code:
Player^ player = (Player^)Get("Player"); what it does is it creates a "pointer" to the
Player object (the symbol for a pointer in this case is the "^"), and then it gets given a nickname which is
player which you will then need to use in the next line of code.
Before you can do anything else to the
void UserMain::Update(int64 frameNumber) area, you will need to add in a few more lines of code in another area which is
void UserMain::PointerPressed(Rapid2DVector ^ _TouchPoint). This is where to put any code that you will want to be affected by the screen being pressed. What you will want to do here is set
IsPressed to true and
TouchPointX equal to the built in variable
_TouchPoint specifically its
x co-ordinate. To do this you will need to use the "->" symbol which allows us to access things that the object contains. So in this case you will write
_TouchPoint->x;.
The lines of code you have added should look like this:
IsPressed = true;

TouchPointX = _TouchPoint->x;
Now you will need to do something similar within
void UserMain::PointerMoved(Rapid2DVector ^ _TouchPoint). You need to make sure that
TouchPointX once again is equal to
_TouchPoint->x. The line of code you should have added is:
TouchPointX = _TouchPoint->x;
There are only two more things you will need to do before you can make the "Player Object" move around. Navigate over to
void UserMain::PointerReleased(Rapid2DVector ^ _TouchPoint). Here you will need to make sure
IsPressed is no longer true and create a pointer called
player which points to the
Player object exists like you did before. Once you have done that the code you have added should be:
IsPressed = false;

Player^ player = (Player^)Get("Player");
The reason you needed to create
player again is because you will need to use it in an "If Statement" which enables us to check if something is happening and if it is you can choose what you want to happen. So in this case you will want to see if the "Player Object's"
x position is greater than ">"
TouchPointX + 1. If it is then you will want to affect the "Player Object's" speed which you will need to use the "->" symbol again and then add
TranslateVelocity(0, 0, 1). The numbers in the brackets are the function's "parameters" which are basically things the function requires in order to operate properly. You are basically seeing if the "Player Object" is at the
TouchPointX position and if it is you want it to stop.
The "If Statement" should look like this:
if (player->GetPosition()->x > TouchPointX + 1)
{
	player->TranslateVelocity(0,0,1);
}
Now that you have done all of this you are one more line of code away from being able to move the "Player Object"! You will need to head back into the
void UserMain::Update(int64 frameNumber) area and below where you set up the [test]player[/test] "pointer" you will need to add the code which will get the "Player Object" to move. Just like before you will need to use
player with the "->" symbol however instead of using
TranslateVelocity like you did last time, you will need to use
SetVelocity which takes two "parameters" which are
x and
y however you won't be using numbers. Instead of a number for the first "parameter" which is
x you will want to use
TouchPointX- player->GetPosition()->x. For the
y "parameter" you can just use 0).
The code you should have written should look like this:
player->SetVelocity(TouchPointX- player->GetPosition()->x,0);
Now after all that the "Player Object" will finally be able to move when you test the game later. However there are a few other things you should know about and add before testing the project out.
Creating a Timer
One of the things that you might want to use is a "Timer" and it just so happens that there is a "Timer" built into the engine. Setting up a "Timer" couldn't be simpler, just head over to the "UserMain.h" and scroll up to the top of the page and where you can see a line that reads
#include "BasicMath.h" and add:
#include "BasicTimer.h"
Then head into the
private section where you put the variables like
TouchPointX and add the code:
BasicTimer^ timer;
Now we need to head back into UserMain.cpp's UserMain::Start function and add the following line of code:
timer = ref new BasicTimer();
Once done head back over to the "UserMain.cpp" and enter the
void UserMain::Update(int64 frameNumber) area once again. Below the code you placed in there before you will want to update the timer by adding the line of code:
timer->Update();
All that is left to do now is a simple "If Statement" which will check if the "Timer's" current time is greater than or equal to ">=" 30 then reset the timer, which basically means if 30 or more seconds have passed we will want to reset the timer back to zero. To do this add the following code:
if (timer->Total >= 30)
{
	timer->Reset();
}
In a future tutorial we will cover how to draw variables and timers to the screen to create a HUD.
Creating a Game-Over Sequence
Another thing you will probably want to do is end the game at some point. One of the ways you can do this is by creating a "Game-Over Sequence". In this example the way you will do this is by editing the previously created "If Statements" events so that it will reload the "Scene" after 30 seconds have passed rather than just resetting the timer.
To do this head back into the "If Statement" you created in the "Timer" section and above the
timer->Reset(); line you wrote you will need to add the same code you wrote when you "initialized" the variables in
void UserMain::Start(). Those variables were
IsPressed = false;,
AtPositionX = false; and
AtPositionX = 0.0f;. Obviously when you make a game using the engine you can make a game over image appear on the screen and then do other things you may want it to do.
Compiling and Testing
You can now finally see what you have been working towards in action! All you have to do now is test the code to make sure it works by "Compiling" the game which is really easy to do!
However before you can debug/compile the game, you will need to change some of the information in some of the drop down boxes to the right of the green play button pointed to in the image below:
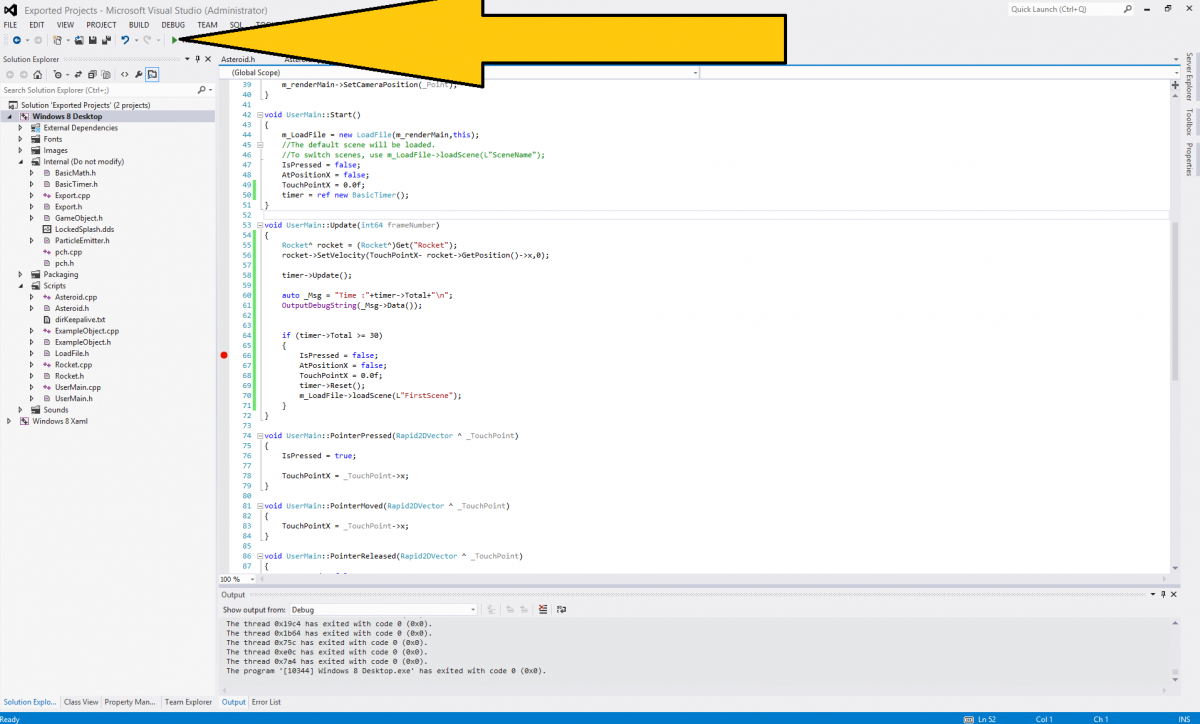
In the very last one that currently reads "Desktop - ARM" you will need to change that to either "Desktop - x64" or "Desktop - x86". Then once done all you have to do is click the green play button.
Please check our website
www.rapid2d.com for more tutorials and updates in the days to come.


This article seems to be mostly just a reprint of some of the numbered tutorials included in the Rapid2D documention - https://www.rapid2d.com/site/page/articles.html/_/rapid2dusermanual/
I'm not sure how reprinting that information here adds any value to GameDev.net.