I think we all consider Editor Tools a great and really useful aspect of Unity. Working with it has allowed us to create prototypes really fast and makes a lot easier to build prototypes, to add new objects easily and to assign variables. It's a huge improvement in our work flow. The thing is, as Immortal Redneck grew bigger, we started to needing our own tools and we could use Unity editor to build them fast.
We've already written about what assets we'be bought to make our development a little more straight-forwarded, but sometimes there's none for your needs. So, why not making it ourselves? It's not the first time we've built our own tools to improve our workflow, and Immortal Redneck wouldn't be different. So let me show you what we have.
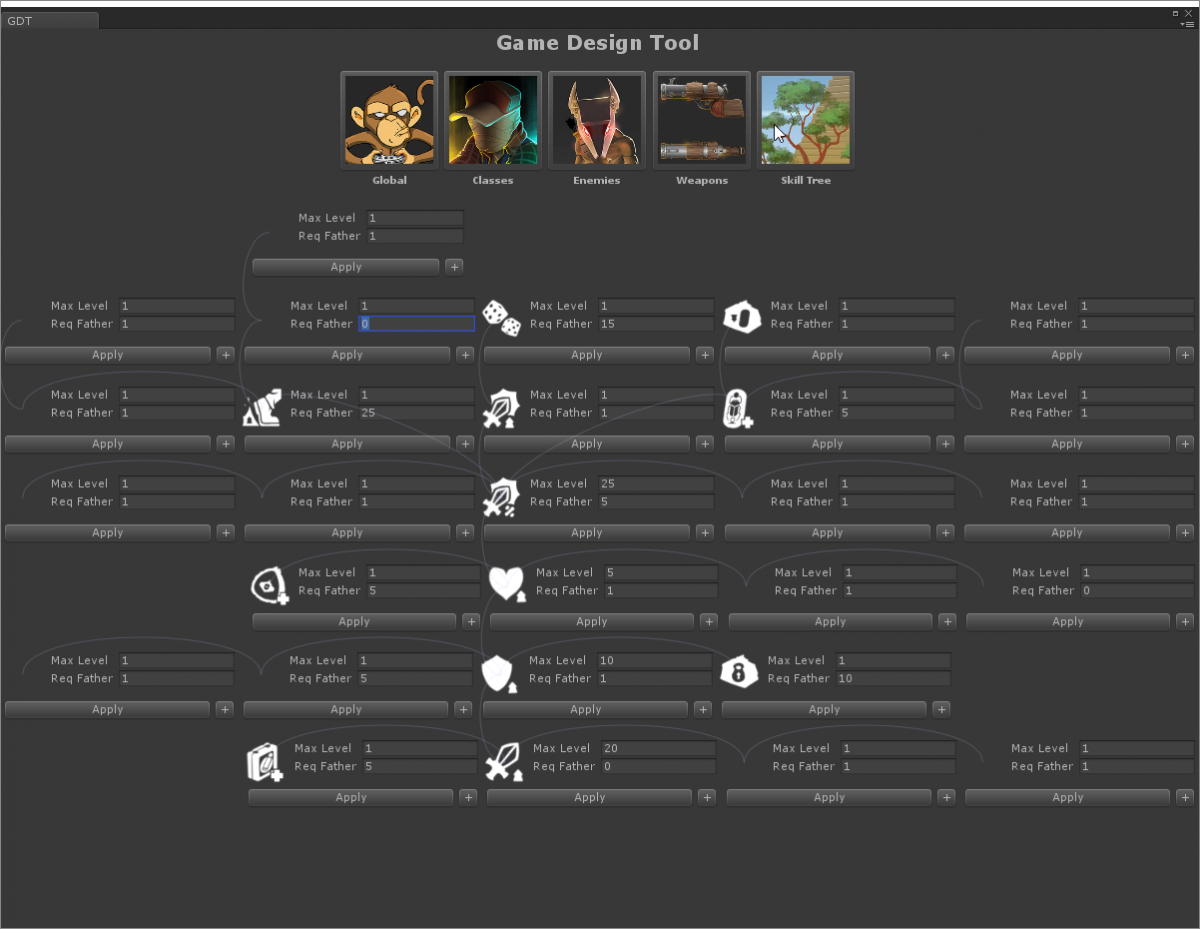
Game Design Tool
Immortal Redneck is a big game - at least for us. In addition to the amount of development hours, it would require a lot of balancing: there's guns, enemies and skills, so we wanted this task to be as easy and simple as possible.
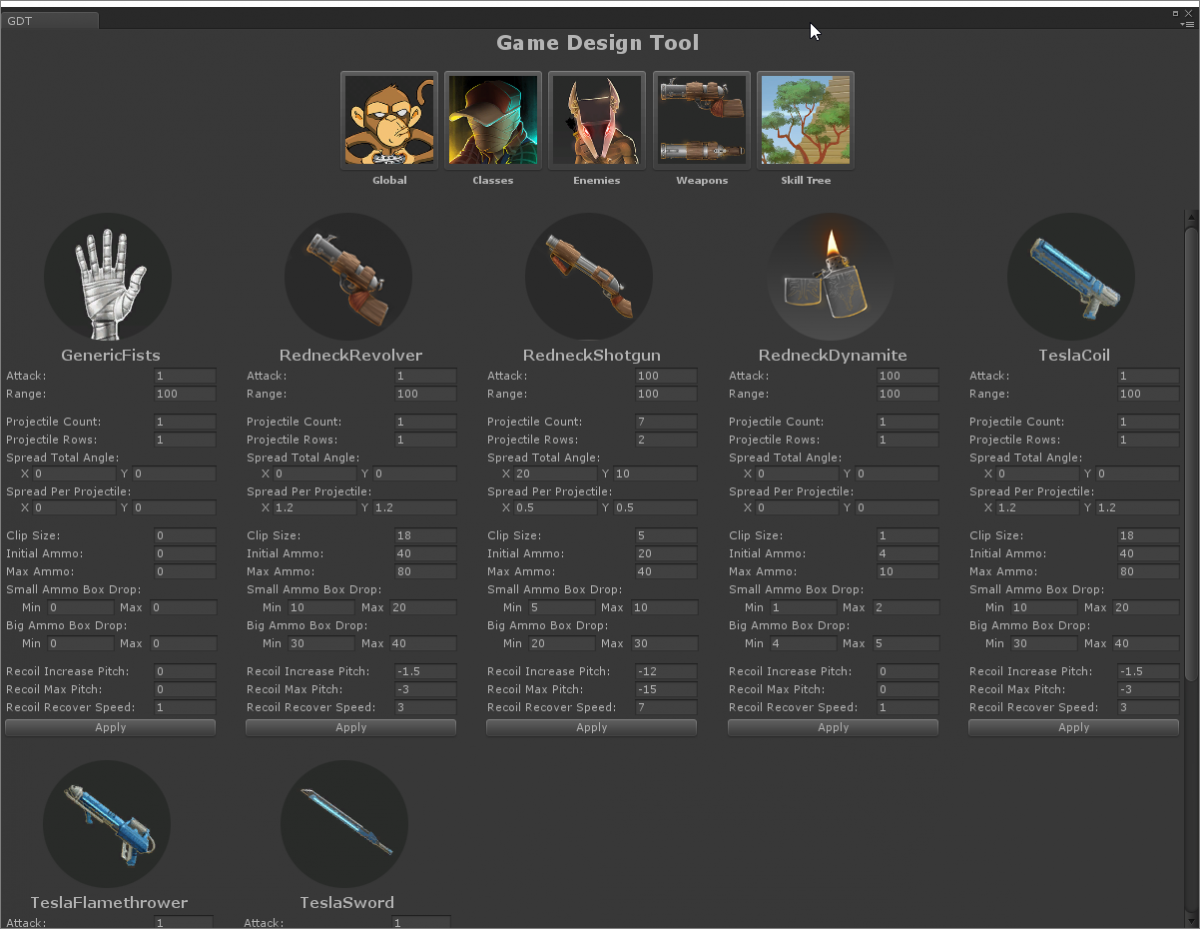
That's why we built this tool, to change things almost on the fly. Right now, we can alter:
- Global parameters like drop rates and spawn times between enemies
- Each class statistics (HP, Attack, Defense, etc.)
- Enemies' stats. In the future, we want to change their global behavior and change when they attack, when the hold, at what distance they start moving...
- Weapons' damage, range, spread, ammo, recoil...
- The skill tree's levels, gold rates, statistics it changes...

Room Utils
We want our game to have a lot of rooms, so we needed to have the capacity to create them fast and well. We coded a few tools to this intention.
In first place, we created a menu that looks like ProGrids so we can mix everything. We can duplicate objects in each axys really fast because that's what took us most time in the first days of development. Also, it was excruciatingly boring and repetitive thing for the team to do.
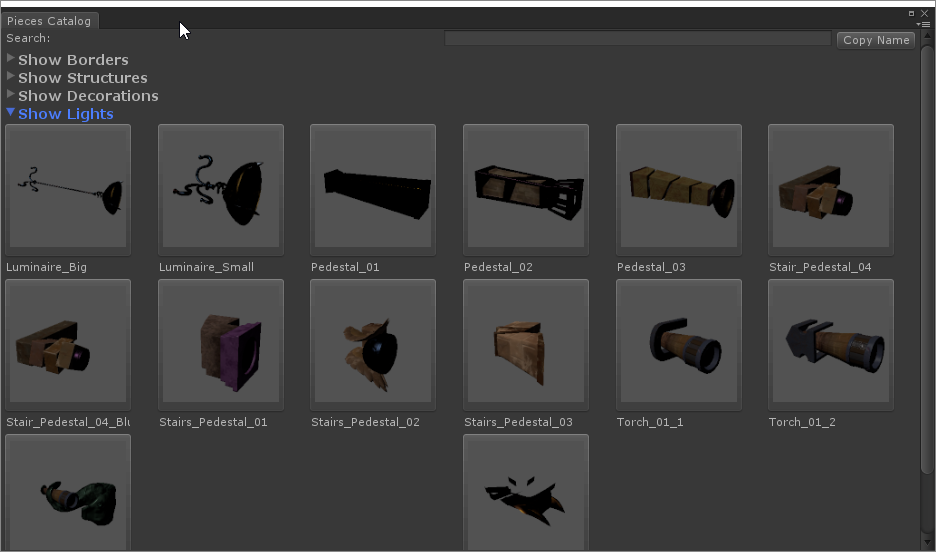
There's another tool that allow us to check each asset we've created on a catalogue, and paste what we want into the scene. It's almost automatic and works really well. We can place the asset in the place we are looking at or select something in the scene and replace it with something from the catalogue. This is a really, really fast way to replace a whole floor or wall.
RoomScene Inspector
Each one of our rooms is a scene due to a optimization requirements. Even though Unity 5.3 has evolved a lot in this matter, it's still kind of hard to work with them in comparison with using prefabs, for example.
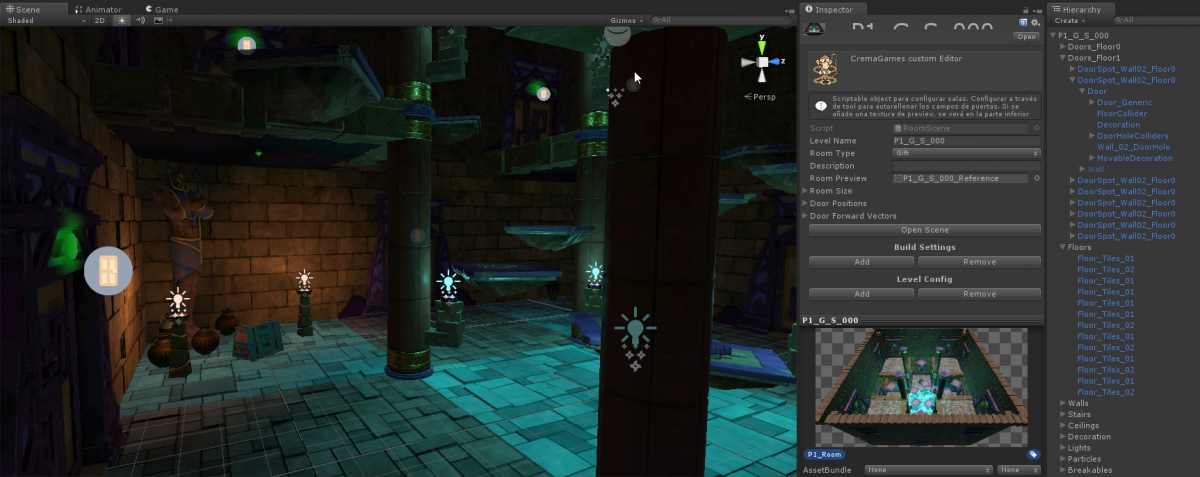
We decided to work that way, creating various scenes and using a ScriptableObject as a reference for each room. This ScriptableObject has the data of each scene, but we can also use it to open them, add them to Build Settings and more stuff.
We work constantly with Custom Inspectors in Unity because of this, and that's why we've extended the default editor and added more options. We've even added a room preview because Unity is not allowing that at the moment and it's something that we need to quickly identify what we are changing in the scene.
Create PBR Material
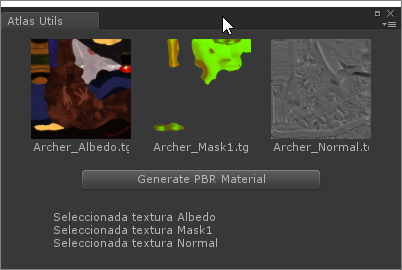
Working with PBR (Physically Based Rendering), as we are doing in each asset of our game, requires three textures (Albedo, Mask1 and Normal) every time. This implies that each time we import something into Unity, we have to create a Material for that object and assign the three texture each one at a time.
It's not a very taxing process, but when you start adding textures of everything in the game, it takes sometime and gets boring. We coded a little tool that automatically create the material by selecting the three texture on the project. It ended up being one of the most useful tools in our development.
MultiCamera Screenshot
Most screenshot plugins only let you use one game camera. Since Immortal Redneck uses two - one for the player, another for the weapon - we created our own tool to capture all the cameras we wanted.
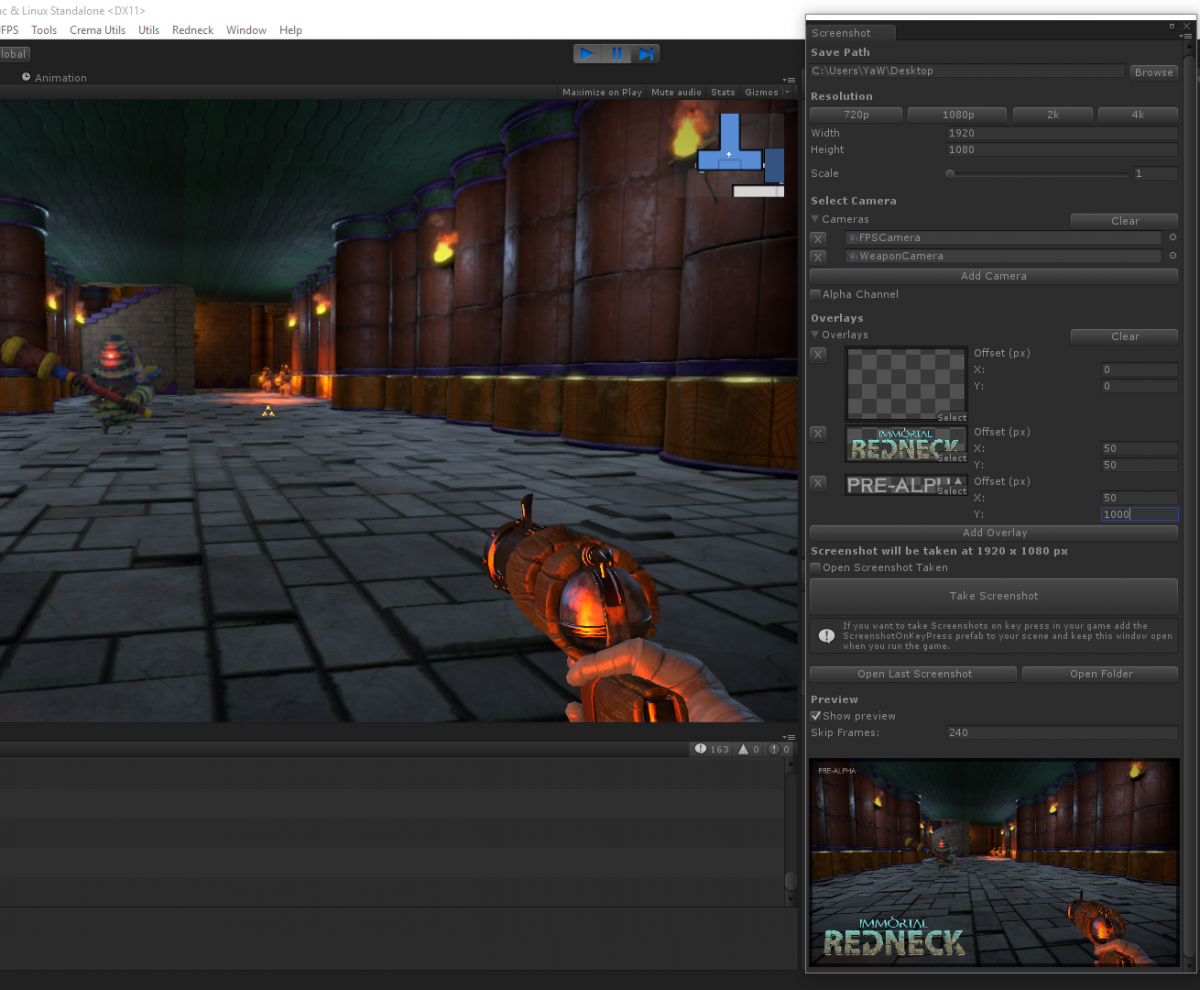
Once we had it, we made it better with overlay options, so we could add our logo and insert the always necessary 'pre-alpha' title without opening Photoshop.
Every promotional screenshot you've seen has been capture with MultiCamera Screenshot.
Combine Utils
Meshes that use the same materials can be combined in Unity to improve its performance. There's various plugins to do this, but we are using our own tool because it looks better.
Again, we took ProGrid's style and created our own window. It looks great and it has a lot of options: creating a group of objects to combine, another one to erase a group, another to combine them and the last one to separate the group.
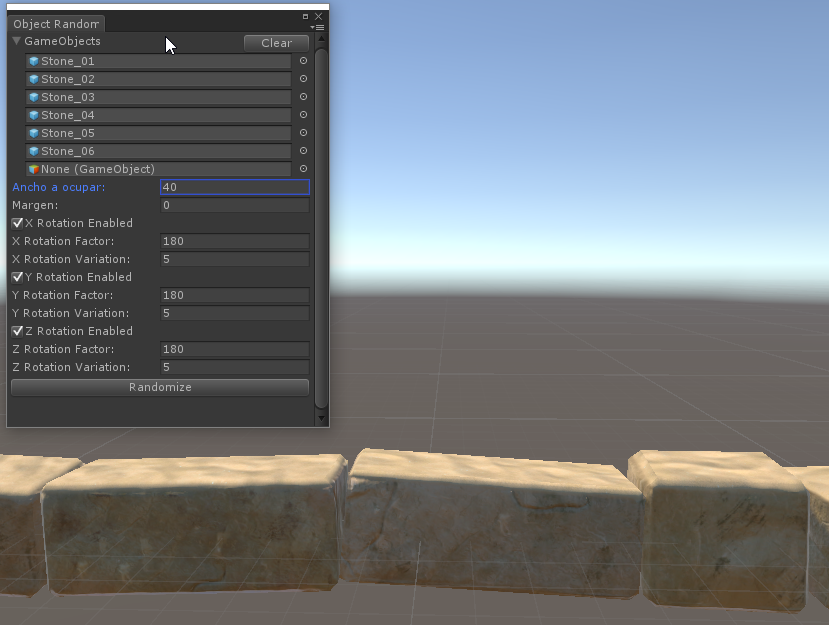
Object Randomizer
In order to build the three pyramids of Immortal Redneck, our artists made different rock blocks that they would have to pile to create the pyramids sides.
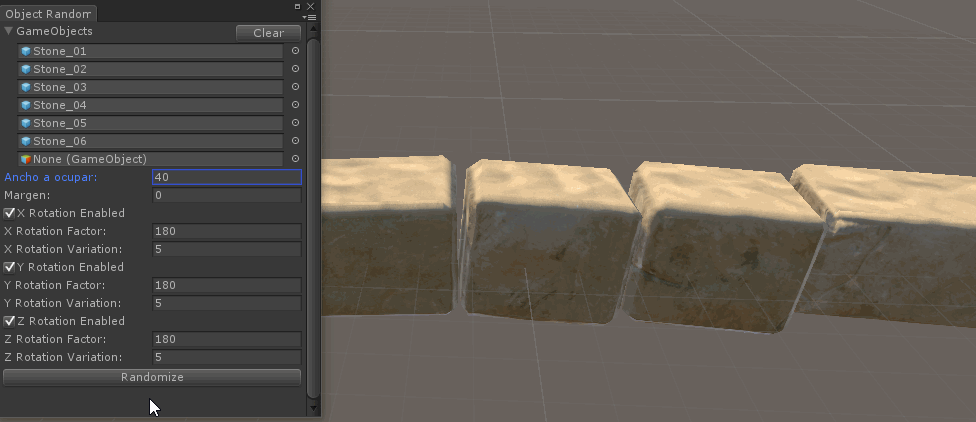
To do this manually would be hard, so we coded a little tool that would take rock lines with little variations. This way, our artists could create as many lines as they wanted and build the pyramid faster without repeating patterns. Later, they made some little changes, but the pyramids were done in a jiffy.
Gizmos
Unity has a very interesting feature: it merges Gizmos with scripts. Gizmos are conceived to show graphics over the scene so some stuff is easily seen on it.
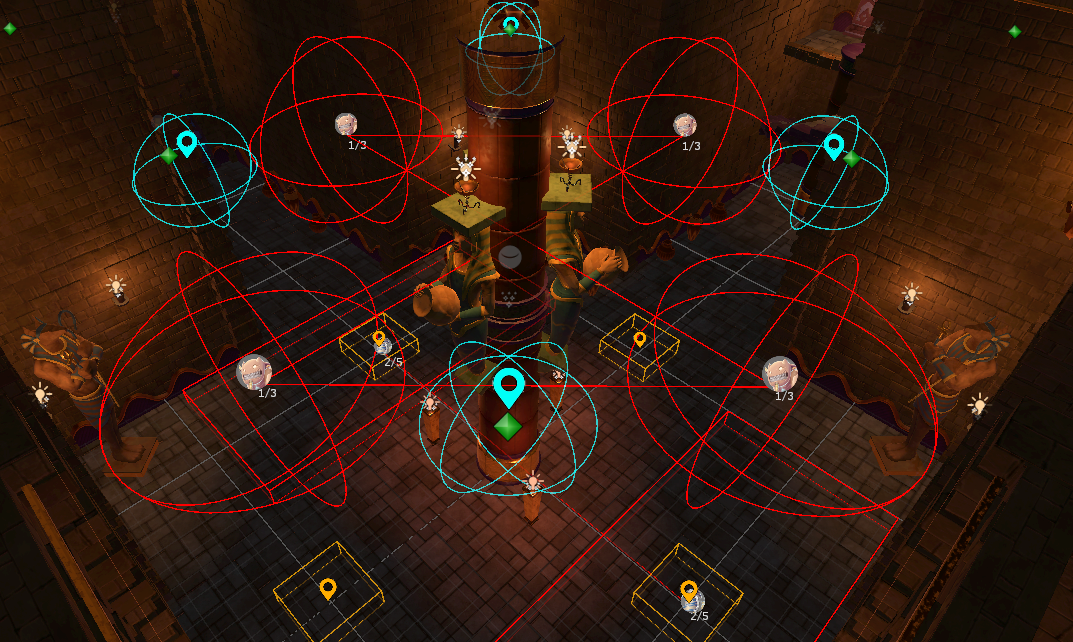
For example, in the room above, we've got gizmos showing spawn positions and interest points for their AI.
Red spheres show the enemies avatar so we can see where they'll spawn, while red squares do the same with walking creatures.
In a similar fashion, blue spheres represent the flying enemies' interest points and the orange squares on the floor are interest points for the walking ones.
At first, it might seem crowded and confusing, but it really helps a lot once you get used to it.
Components Clipboard
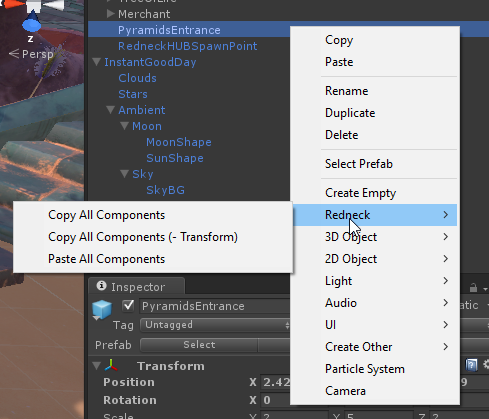
Anyone that's worked with Unity has experienced this: you test the game, you change something, you stop it and then you cry when you realize nothing has been saved.
Sometimes, you need to change a value while playing so you see on real time how that affects the game. We coded a script that worked as a clipboard so you copy your values so you can paste them after stopping the game. It's simple and easy to use, and it saved our artists a lot of time.


Oh awesome. I'm very interested in how you make the "copy all components" tool.
Definitely depicts me! Can you give some hints on how to achieve the Components Clipboard part?