In Part 1, I went through the creation of a basic CMake build environment and ended by breaking the build for one of the three targeted platforms. Continuing on from this broken example, the intention is to fix the project correctly and begin leveraging CMake abilities in a more fundamental manner. A utilzation of CMake's language will be presented in the process of fixing the project and additional target types, along with ways to use them, will be added. Primarily everything covered will be focusing on the cross platform nature of the environment and CMake usage. Parts 1 2 3 4 5
The CMake Language
Everything in the language supported by CMake is based on text processing and the expansion of macro type text into larger (or smaller) pieces of different text. This simplicity of design for the language unfortunately also leads to a number of things which seem simple enough from the descriptions but can be confusing and downright painful to use correctly. The key to using CMake is to make sure you don't try to get too fancy. If you can write a couple extra lines and avoid complexity, just write the extra code. This is a build system after all and as such being verbose still means you are being verbose in a very minimal portion of the overall project code.
MESSAGE, Learn It and Love It
The first thing to do when learning CMake is to get an understanding of the command 'MESSAGE'. This command is your bread and butter method of debugging. From the online documentation:
message([STATUS|WARNING|AUTHOR_WARNING|FATAL_ERROR|SEND_ERROR] "message to display" ...) For most usage only two variations are needed: MESSAGE( "This is a message." ) and MESSAGE( FATAL_ERROR "Why this failed." )
Everytime I describe a command or feature of CMake, I will include a 'MESSAGE' based example so you can see the item in action and what it does. You should be able to add these snippets to any CMake file without causing problems for the file you add them to. As such, using the previous articles very simple hello world starter project is a good place to insert the snippets and see the results.
Revisting the Basics
Remember that CMake is a caseless language, well that's only partially true and the details need to be cleared up. A command named 'PROJECT' can be written as 'Project' or 'project' and CMake will execute it the same way no matter what case it is. The important item here is that the description is specific to commands, the variables covered next are case sensitive such that 'a' and 'A' are different variables. In fact most items beyond the commands are case sensitive so be careful about your usage of case.
The CMake Variable Type
As with any language, CMake has the concept of a variable. In the case of CMake the variable is very limited in terms that it is nothing more than a dynamic form of text replacement. There are no integer, boolean or other types of variable in CMake though integer and boolean are supported by being represented as strings.
Also of note, if you misstype a variable via incorrect case or simply a typo there is no concept of "undefined" variable except that you get an empty string back. This lack of error result can be a large source of bugs and they can be very difficult to track down. There are only two direct operations performed on variables in CMake:
Setting a variable: SET( MyVariable ToThis )
Expanding a variable: ${MyVariable}
The first rule to keep in mind, CMake treats everything as text until explicitly told not to and as such using variables can be error prone. Take the following CMake snippet:
SET( MyVariable AValue )
SET( AnotherVariable MyVariable )
MESSAGE( "MyVariable" )
MESSAGE( "${AnotherVariable}" )
The output will be: MyVariable MyVariable
If you are scratching your head going "huh", you are not alone. The expansion of a variable to its replacement has to be triggered manually by the user. In order to trigger expansion you must surround the variable name with '${' and '}'. So, rewriting the example to do what you may have expected:
SET( MyVariable AValue )
SET( AnotherVariable ${MyVariable} )
MESSAGE( "${MyVariable}" )
MESSAGE( "${AnotherVariable}" )
The output of which will be: AValue AValue Note that in the two uses of 'MyVariable' I told CMake to explicitly expand it. Also note that expansion within quotes takes place, so using '$' as part of a message needs to be done carefully.
Nesting Expansion
Revisting the first version of the example of variables, there is something important to consider. Given the original example:
SET( MyVariable AValue )
SET( AnotherVariable MyVariable )
MESSAGE( "MyVariable" )
MESSAGE( "${AnotherVariable}" )
Let's modify it a bit:
SET( MyVariable AValue )
SET( AnotherVariable MyVariable )
MESSAGE( "${MyVariable}" )
MESSAGE( "${${AnotherVariable}}" )
You might be surprised to see the output as: AValue AValue What the code in the second 'SET' and 'MESSAGE' lines means now is something quite a bit different. The 'SET' portion has not changed but the way we expand the variable within the 'MESSAGE' text string has. Basically we are saying to expand the variable 'AnotherVariable' and then expand the result of that expansion again. In other words, it is a pointer to another variable in a C like language.
Another variation would be:
SET( Target Something )
SET( ${Target}_Name MyLibrary )
SET( ${Target}_Type SharedLibrary )
If you guessed that the last two 'SET' commands will make variables named: 'Something_Name' and 'Something_Type', you get a gold star. This makes it possible to create the equivelant of structures within CMake. As much as these are clever ways to use the expansion system, I try to avoid them as overly complicated for what should be a simple secondary portion of your project. There are times and places to use them, hence the description, but try to avoid them for your personal sanity and that of others that have to figure out what the expansions mean.
Appending To Variables
A common pattern required in make files is to concatenate and append various things together. The set command is used for this with a slightly modified syntax:
SET( Target Part1 )
SET( Target "${Target} Part2" )
MESSAGE( "${Target}" )
Which outputs: Part1 Part2
Make sure to use the quotes unless you want CMake to eat white space and turn the item into a list.
Lists In CMake
Lists are supported in CMake but in a somewhat clunky manner which imposes some limitations on what they can be used for. Remember that everything in CMake is text based, as such CMake can support lists but it does so by simply making a string with semi-colon delimited sections of text in them. So, if I want a list of x, y and z, it is really just a string: "x;y;z".
This is normally fine and you can do a lot with this, but if you ever have something which requires a semi-colon you can't use CMake lists since it will break the item at the semi-colon into two pieces. Even with the limitations, lists are an important part of CMake day to day usage. Take the following:
SET( MyList a b c ) MESSAGE( "${MyList}" ) Outputs: a;b;c In larger lists, it is possible to write the same code as:
SET( MyList a b c ) MESSAGE( "${MyList}" ) With the same output. CMake automatically removes the whitespace and replaces it with a semi-colon. Now, what if you really wanted the string "a b c" instead of conversion to a list? Simple, double quote the right hand side of the 'SET' command:
SET( NotAList "a b c" ) MESSAGE( "${NotAList}" ) Outputs: a b c
Again, things get more complicated mixing and matching variables in different manners. So for instance what about the following:
SET( NotAList "a b c" )
SET( NotAList2 "d e f" )
SET( ItsAListNow ${NotAList} ${NotAList2} )
MESSAGE( "${ItsAListNow}" )
Outputs: a b c;d e f
To fix it to be a non-list of the two given items, you again have to double quote the 'SET' contents:
SET( NotAList "a b c" )
SET( NotAList2 "d e f" )
SET( ItsStillNotAList "${NotAList} ${NotAList2}" )
MESSAGE( "${ItsStillNotAList}" )
While the examples are simple, the complexity of what is and what is not a list or compiled into a list gets a bit tricky on occasion. Once again, the best solution is not to mix and match and be very explicit about how you work with lists.
Booleans, Really?
In any language which supports flow control it is neccessary to have a concept of true and false. CMake supports this concept but it can be a tricky subject due to the way the support is implemented. In many (most?) languages true means "non-zero" without further expansion, i.e. only 0 means false, anything else is true.
CMake unfortunately enforces the false premise and assumes everything else is true which really turns things around on most programmers. What is considered false in CMake is the following: an empty string, "FALSE", "OFF", "NO" or any string ending with "-NOTFOUND".
So, when writing flow control, it is important to remember the list of things which actually will be considered false. A notable item missing from the list is "0" so math can't be used to actually end up with a false value unless you then compare the resulting string to a zero string explicitly.
Integral Variables
They don't exist except by side effect of extensions added to the language. Again, everything is text in CMake, so 1, 2, 3 are all stored as text strings. In general, there is rarely much reason to use numeric values in a build system so integer processing will not be covered.
Flow Control In CMake
CMake supports a full language, you could sit down and write a CMake game if you were perverse enough to have the desire to do so. Instead I'll stick to writing a game using C++ and avoid CMake as much as possible. CMake supports the basic 'foreach', 'while' and 'if/else' types of flow control.
While it seems limited, each command has multiple variations which allow for common usage patterns you may require. 90+% of the time, the only flow control you should really need in a build system is the 'if/else' variation. As such, the syntax is important to cover but also a second warning to read the section on "Booleans, Really?" as these items go hand in hand.
A real understanding of the oddities of CMake's concept of true/false is critical moving forward. (Or to repeat it here, what constitutes a false must be known as everything else is considered true.)
If/Else In a Linear Text Processor
CMake is not much of a parser and primarily is just a lexer, it simply processes text in a linear fashion looking for keywords and what are effectively 'escape' sequences. The keywords are fairly obvious such as "PROJECT" or "ADD_SUBDIRECTORY".
The escape sequences are generally caused by something like '${' where the system waits till it finds a matching '}' and then looks in a map for the text between '${' and '}' which it then inserts into the the text stream CMake is reading.
Given such a system, if/else require specific terminators. As such, CMake supplies the following commands: 'IF', "ELSE", "ELSEIF" and "ENDIF". An example of using 'IF'/'ENDIF' to test for primary platforms:
IF( WIN32 ) ENDIF( WIN32 )
IF( APPLE ) ENDIF( APPLE )
IF( UNIX ) ENDIF( UNIX )
It is no longer required to put in the same start and end tags for 'IF'/'ENDIF', i.e. the 'ENDIF( UNIX )'. You can simply write 'ENDIF()' and it will implicitly match the nearest scope of 'IF'. I started when CMake expected the matching tags and as such it is a habit to use the matching tags. The benefit to continuing to do so is that CMake will print out warnings about non-matching tags such that if you goofed up the structure you know where to start backtracking from.
Fixing The Intentional Build Break: The Correct Method
In the prior article I ended up intentionally adding something which seemed like a safe change but broke the build on the OsX platform. The fix at the time was intended to be something you might do in a panic in order to let others get back to work. It was a quick patch, it is now time to fix the problem in the proper manner. The problem introduced is very simple. As of the latest Xcode (4.6.1) and the recent transition to LLVM (CLANG) as the compiler instead of GCC, C++11 support is not enabled by default. So, using lambda's is illegal without some changes to the build environment. CMake makes this easy, but there are some gotcha's to be noted. In order to start this, download the following simple environment:
Unzip that somewhere. If you have a Mac, you get to follow along and see the errors go away, otherwise you still learn a key bit about CMake in this process. The reason I used the OsX break in the example is that it was easy to trigger and Windows and/or Linux specific folks would be mostly clueless as to how to fix it. If you don't have a Mac available don't fret, the intention is to teach about CMake and cross platform work, not specifically about the Mac environment no matter how specific the fixes are to Mac at this point.
The CMake Variables Of Interest
Using the simple project, the CMake GUI displays the following when advanced is turned on
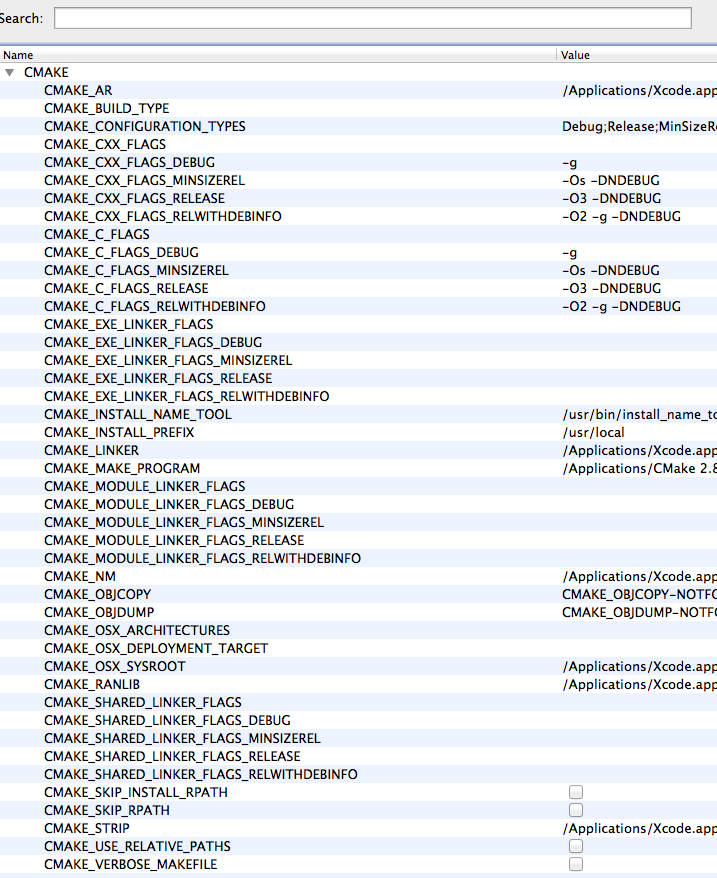
That's a lot of variables, thankfully we don't need to modify very many of them. The items we are looking to change are the "xxx_CXX_FLAGS_xxx" variations to start with. But first, we need to put the broken project back into the build.
Open up 'CMakeProject/tests/CMakeLists.txt' and remove the 'IF( NOT APPLE )' and related 'ENDIF' lines and then regenerate the project with CMake. When you go back to Xcode it should update automatically and show the 'Hello2' target once again. Obviously if you attempt to build it will fail on the lambda line. Since we need to make the new flags global, we are going to put the modifications of the compilation flags into the base most 'CMakeLists.txt'.
Instead of having to hunt for the file via the open file dialog, CMake has done us a favor and added the file into the project for us. The base most 'CMakeLists.txt' can be found under the 'ALL_BUILD' target, so just click on that and it shows up in the Xcode editor area. (Most IDE's have this same feature where the most related CMakeLists.txt is included in the targets and/or projects.) The flag we want to add is going to be global and included in all build variations. So the variable we want to modify is 'CMAKE_CXX_FLAGS' by adding the '-std=c++11' flag to the variable. Change the root CMake file as follows:
CMAKE_MINIMUM_REQUIRED( VERSION 2.6.4 )
SET( CMAKE_CXX_FLAGS "${CMAKE_CXX_FLAGS} -std=c++11" )
PROJECT( CMakeProject )
ADD_SUBDIRECTORY( tests )
Regenerate the project and build in Xcode. If you were to check this in as is, the OsX folks would be happy but everyone else would likely be very mad because this will apply to all builds regardless of platform. Since Visual Studio's compiler doesn't know this flag, the build would either be broken or generate a whole bunch of warnings about the unknown flag. So, how do you figure out what is the current platform and limit the changes to only one of them.
CMake defines several variables based on the current platform: UNIX, WIN32, APPLE and others. These variables are fairly generic and don't specifically indicate a particular platform, for instance on OsX both UNIX and APPLE will be set. For the time being, we don't need to be very specific, we just care if this is a Mac and we assume it is running OsX, so just checking 'APPLE' is good enough.
CMAKE_MINIMUM_REQUIRED( VERSION 2.6.4 )
IF( APPLE )
	SET( CMAKE_CXX_FLAGS "${CMAKE_CXX_FLAGS} -std=c++11" )
ENDIF( APPLE )
PROJECT( CMakeProject )
ADD_SUBDIRECTORY( tests )
This fixes the code for Mac and will work on other platforms. You can commit and be confident that all platforms will work with the new project added. Let's have some fun and make our C++11 test a bit more complicated. Open 'Hello2/main.cpp' and modify it to be the following:
/* Hello World program */
#include <function>
#include <iostream>

int main( int argc, char** argv )
{
	typedef std::function< const char* const ( void ) > StringFunction_t;
	StringFunction_t helloString = []() {return "Hello World!";};
	std::cout << helloString();
	return 0;
}
If you are on Windows or Linux everything looks good and you commit. Within the next couple minutes a furious OsX programmer walks over and smacks you upside the head and asks why you keep breaking the build!!!! So, you disable your C++11 test again, and go back to figuring out what the heck is wrong now. Deciding to fix the thing once and for all, you change the root CMake file to be the following:
CMAKE_MINIMUM_REQUIRED( VERSION 2.6.4 )
IF( APPLE )
	SET( CMAKE_CXX_FLAGS "${CMAKE_CXX_FLAGS} -std=c++11 -stdlib=libc++" )
	SET( CMAKE_EXE_LINKER_FLAGS "${CMAKE_EXE_LINKER_FLAGS} -stdlib=libc++" )
	SET( CMAKE_SHARED_LINKER_FLAGS "${CMAKE_SHARED_LINKER_FLAGS} -stdlib=libc++" )
	SET( CMAKE_MODULE_LINKER_FLAGS "${CMAKE_MODULE_LINKER_FLAGS} -stdlib=libc++" )
ENDIF( APPLE )
PROJECT( CMakeProject )
ADD_SUBDIRECTORY( tests )
Once again, the C++11 testbed compiles under all three environments and the OsX programmers stop making Voodoo dolls which look like you. In addition to telling the compiler to allow C++11 syntax in the core language, we also need to point it at the Clang project standard libraries, otherwise it only allows the language changes but none of the library features. We also tell the linker for the three forms of targets about the change.
Libraries
Eventually almost every project is going to want to break up code into libraries. There are of course two variations of libraries: static and shared. To start with, we'll add the most simple version which happens to be a static library. Add the following directories to the 'CMakeProject' hierarchy: CMakeProject libraries Hello Include Source
A fair number of people do not like separating the include and source folders and prefer to simply put everything in a single location. This is purely personal preference and as such, once you have gone through the articles, merge the directories if you desire. The reason I perform the division is for later, when I want to distribute a pre-built library and the headers, it simply makes it easier if the headers and source are not mixed together.
Add the following files, we'll discuss the contents a bit later:
CMakeProject/libraries/CMakeLists.txt
ADD_SUBDIRECTORY( Hello )

CMakeProject/libraries/Hello/CMakeLists.txt
INCLUDE_DIRECTORIES( Include )
SET( INCLUDE_FILES Include/Hello.hpp )
SET( SOURCE_FILES Source/Hello.cpp )
ADD_LIBRARY( Hello STATIC ${INCLUDE_FILES} ${SOURCE_FILES} )
CMakeProject/libraries/Hello/Include/Hello.hpp
#pragma once
const char* const HelloString();
CMakeProject/libraries/Hello/Include/Hello.cpp
#include const char* const HelloString() { return "Hello Library!"; } And finally, modify the root CMake file to contain the additional line to add this to the build:
CMakeProject/CMakeLists.txt
CMAKE_MINIMUM_REQUIRED( VERSION 2.6.4 )
PROJECT( CMakeProject )
ADD_SUBDIRECTORY( libraries )
ADD_SUBDIRECTORY( tests )
Regenerate the project with CMake and you should see the new library in the project.
INCLUDE_DIRECTORIES
One of the new commands used in CMake is the 'INCLUDE_DIRECTORIES' command. This command is responsible for telling CMake what include paths your targets require when compiling. The path you give CMake is relative to the location of the 'CMakeLists.txt' currently being processed.
In this case the file 'CMakeProject/libraries/Hello/CMakeLists.txt' is being processed and as such we can simply type in 'Include' since it is in the same directory as the 'CMakeLists.txt'. Later, we will need to include multiple directories. In order to do so, there are two options.
Call 'INCLUDE_DIRECTORIES' multiple times with each directory or add multiple directories in a single call.
GET_PROPERTY( directories DIRECTORY INCLUDE_DIRECTORIES )
MESSAGE( "${directories}" )
INCLUDE_DIRECTORIES( Include )
GET_PROPERTY( directories DIRECTORY INCLUDE_DIRECTORIES )
MESSAGE( "${directories}" )
INCLUDE_DIRECTORIES( A )
GET_PROPERTY( directories DIRECTORY INCLUDE_DIRECTORIES )
MESSAGE( "${directories}" )
INCLUDE_DIRECTORIES( B C D )
GET_PROPERTY( directories DIRECTORY INCLUDE_DIRECTORIES )
MESSAGE( "${directories}" )
Which outputs: CMakeProject/Include CMakeProject/Include;CMakeProject/A CMakeProject/Include;CMakeProject/A;CMakeProject/B;CMakeProject/C;CMakeProject/D
All directories and paths output by CMake are absolute rooted paths. For this reason, do not try to distribute the outputs of CMake since they are machine specific. Anyone compiling the code will need to use CMake on their machine.
ADD_LIBRARY
The command 'ADD_LIBRARY' is similar to 'ADD_EXECUTABLE' in that it defines an output for your project. There is an additional parameter which tells CMake what type of library is to be made. The new parameter can be 'STATIC', such as we used, or 'SHARED', which will be dealt with later. Something which may seem a little strange is that you give this command both the headers and the source files. The reason for this is that 'ADD_LIBRARY' is effectively the project generator, if it did not have the header files they would not show up in an IDE.
Using Libraries
So far we can build the library but nothing is trying to call the functionality or link against it. In order to use the library we need to expose some extra data to the other projects. The data exposed needs to be the include directory location and the name and location of the library to be linked against. The link library can be solved fairly easilly, add the following:
CMakeProject/tests/Hello2/CMakeLists.txt
CMAKE_MINIMUM_REQUIRED( VERSION 2.6.4 )
PROJECT( HelloWorld )
ADD_EXECUTABLE( Hello2 main.cpp )
TARGET_LINK_LIBRARIES( Hello2 Hello )
CMake will take care of figuring out where the library is and link it to 'Hello2' from now on. Things get a bit more difficult at this point since CMake does not track the include directories. We need to somehow pass the location of the include directories back to the root CMake file. If you remember from the first article though, CMake propagates data only into files called by 'ADD_SUBDIRECTORY', it doesn't get the changes made in those files back though.
In steps a modification of the 'SET' command: SET( OutVariable Values PARENT_SCOPE )
Using this variation of the 'SET' command we can push values back up to the calling CMake command. So, let's add a couple items to the 'CMakeLists.txt' files:
CMakeProject/tests/Hello2/CMakeLists.txt
CMAKE_MINIMUM_REQUIRED( VERSION 2.6.4 )
INCLUDE_DIRECTORIES( ${HELLO_INCLUDE_DIRS} )
PROJECT( HelloWorld )
ADD_EXECUTABLE( Hello2 main.cpp )
TARGET_LINK_LIBRARIES( Hello2 Hello )

CMakeProject/libraries/Hello/CMakeLists.txt
INCLUDE_DIRECTORIES( Include )
SET( INCLUDE_FILES Include/Hello.hpp )
SET( SOURCE_FILES Source/Hello.cpp )
ADD_LIBRARY( Hello STATIC ${INCLUDE_FILES} ${SOURCE_FILES} ) # Export the include directory.
SET( HELLO_INCLUDE_DIRS Include PARENT_SCOPE )

CMakeProject/tests/Hello/main.cpp
/* Hello World program */
#include <iostream>
int main( int argc, char** argv ) { std::cout << HelloString(); return 0; }
If you regenerate the project and compile again, it doesn't compile. There are three basic problems with the approach which have to be fixed. First off, the propagation of the include directory only goes up one level and there are actually two levels involved. I.e. CMakeProject/CMakeLists.txt calls CMakeProject/libraries/CMakeLists.txt which in turn calls CMakeProject/libraries/Hello/CMakeLists.txt.
The propagation of the variable only gets to the CMakeProject/libraries/CMakeLists.txt scope. We have several choices to fix this, one would be to call 'SET' in the second level to push the variable all the way to the root CMake context but this is error prone since then you have to duplicate the 'SET' calls at both levels.
Another possible approach would be to remove the intermediate file and add libraries directly via the root CMake file. This is possible but defeats the purpose of breaking things up for easier maintanence. So, the solution is another new CMake command: 'INCLUDE'. The 'INCLUDE' command works similar to the 'ADD_SUBDIRECTORY' except that instead of starting a new context of CMake, it processes the file in the existing context.
As such, we effectively do include the libraries directly in the root CMake file but we leave the division of files alone. Unfortunately, 'INCLUDE' is not a perfect solution since it runs within the scope, and effectively the directory, of the parent CMake file. So the calls to 'ADD_SUBDIRECTORY' need to be modified.
CMakeProject/libraries/CMakeLists.txt
ADD_SUBDIRECTORY( libraries/Hello )
With this change, regenerate the projects and attempt to build. Once again, it fails. The last bit to fix is the include path itself, let's do a little debugging. Add the following line to 'CMakeProject/tests/Hello2/CMakeLists.txt': MESSAGE( "${HELLO_INCLUDE_DIRS}" )
Regenerate the projects and the output will be: Include This is not correct, we need the full path to the include directory. In order to correct this, open up the 'CMakeProject/libraries/Hello/CMakeLists.txt' and modify it as follows:
SET( INCLUDE_DIRS ${CMAKE_CURRENT_LIST_DIR}/Include )
INCLUDE_DIRECTORIES( ${INCLUDE_DIRS} )
SET( INCLUDE_FILES Include/Hello.hpp )
SET( SOURCE_FILES Source/Hello.cpp )
ADD_LIBRARY( Hello STATIC ${INCLUDE_FILES} ${SOURCE_FILES} ) # Export the include directory.
SET( HELLO_INCLUDE_DIRS ${INCLUDE_DIRS} PARENT_SCOPE )
Regenerate the project and the output will be the full path to the library include directory. Build and everything should work this time. CMake keeps some useful variables which can be used to solve a number of problems in setting up the build, among them is the variable 'CMAKE_CURRENT_LIST_DIR' which contains the full path to the location of the 'CMakeLists.txt' file currently being processed. By combining that variable with the include directory name we form the full path required in projects intending to use this library. If you have not followed along step by step, here is the new project:
Conclusion
In this part we have covered some of the basic commands available in CMake files, how to fix per OS issues and finally how to start building modular projects using static libraries. In the next part we will cover shared libraries and finally begin including the open source unit testing libraries.


Hi AllEightUp.
I love your tutorial. It's really helpful.
Just quick suggestion. In section when you introduce "INCLUDE" command it would be good if you could mention to update CMakeProject/CMakeLists.txt file and replace:
ADD_SUBDIRECTORY( libraries )
with
INCLUDE ( libraries/CMakeLists.txt )
I got lost when following it and figured it out after downloading your project.
;]