This article originally appeared on medium.com
This is a guide that helps anyone, with software development experience, get started creating their first mobile game. This year, I made it one of my goals to create a mobile video game. I have been developing software for over a decade, making business applications and platforms. All the while, I have been jotting down ideas for games.
I recently released Clear the Zombies! on iOS and Android. The first choice I had to make was what tools, frameworks and platforms I would use. To help with that choice I created requirements for what I needed these tools to be and do:
- Cross platform (so that I am efficient with my time and don't have to learn multiple languages and build the game more than once.)
- Free to use
- Easy to test and build
- Great documentation and community support
The tools I chose and why
More details on how to get started with these platforms are given later in this article.
Game Framework: Phaser Phaser is a great javascript/canvas based 2D game framework. It is free to use, has excellent documentation, and tons of community-driven examples.
Cross Platform Mobile Framework: Cordova Cordova is the gold standard for cross platform mobile apps. I had previously used it with Ionic Framework when i was building a business app. It is free and managed by the Apache Software Foundation.
Emulation, Testing, Build, Configuration: Intel XDK I wish I had discovered this tool when I was working with Ionic. It has a great emulator that displays many devices (iPhones, iPads, Android Devices, etc.) and emulates the core phone capabilities such as geolocation and network status. It also has a preview app that you can install on your phone. The preview app allows you to upload your game to your device without having to build and install your game every time. Best of all, Intel XDK takes care of managing your build configurations, certificates, and your build processes.
Source Control: Bitbucket and SourceTree Bitbucket has free to use private hosted repos. SourceTree is the best git GUI I have used so far. It takes a bit of time to get used to this tool because there are many bells and whistles, but it is worth the time investment. Also, my friend Jon Gregorowicz got me hooked on the Gitflow Workflow and SourceTree has gitflow management built in.
Image Asset Creation: Inkscape and Piskel Creating my own sprites and images was by far the most intimidating part of this project. I considered using free sprites and images, but realized very quickly that there would be large inconsistencies with the style, dimensions and scaling that would make my game look like a Frankenstein's monster. I resigned to the fact that I would be making all my own images and sprites and found that I not only really enjoyed it, but it was not as hard as I thought it would be. Inkscape and Piskel make the process easy. Anil Beniwal introduced me to Inkscape, which is a free svg tool. I mainly used it for scaling and effects. It has great features that make converting a png into an svg (vector graphics) easy and adding masks and filters a cinch. Piskel is a simple but effective tool for making spritesheets. I used this tool to create everything from backgrounds to sprites to buttons.
Analytics: Google Analytics You will inevitably want to know how users are using your game. Google analytics is an easy and free way to start tracking how many users you have, what screens they are using, and what levels they have achieved. What type of game should I make? Since this was my first game, I knew I would spend a considerable amount of time ramping up on the technologies. I wanted to make sure that the game I would be making would not be too ambitious so that I could finish building it in a reasonable amount of time. I wrote down some requirements for myself when designing the game. I would suggest you do the same. A simple core game mechanic that can be developed in a few days and continue to be refined to make the game more fun and challenging. Simple controls. The game screen is static and confined to a set space. This allowed me to avoid camera complexities and simplified my scaling logic for different devices.
Where do I start?
These are high level steps to start you on your way. I do not go into the nitty gritty details because there are many options and most of the features of these tools are described in detail in the documentation for the given tool. What I aim to accomplish with this list is helping you to shortcircuit a lot of the research that I have already done concerning what tools work best for the different parts of game development.
Start by downloading and installing Intel XDK. From here you will create a new project and select XDK's Phaser template from the templates->games section. To start understanding phaser and Cordova run through this tutorial by Pablo Farias Navarro. It is great for beginners
Create your core game engine using either mock images or free sprites. This should be the minimum amount of code that can be written to have a working version of your game. Iterate, iterate, iterate.
Create a task list for yourself and knock off items one at a time to build up your game. Once you have something working that is fun, start to think about replacing the mock images with real ones.
Once you have a working version with good images, sign yourself up to become an Apple and Android developer. There is a cost associated with each of these. Unfortunately, this is the one part that you will have to pay actual money for. Create your icon and splash screen. Get your Apple certificates following the documentation from Intel XDK. Generate marketing materials for the Play Store and App Store. This includes creating your own icons and banners. Build your apk and ipa files and submit them to the Play Store and iTunes Connect respectively. Market, market, market.
The devil is in the details
In this section I will go over things I had to figure out on my own about each tool and each step in the process.
Using Intel XDK As I said earlier, Intel XDK has become my favorite new tool. You can use it for writing code, emulating devices, testing, and building. Personally, I continued to use Sublime for code editing because I am used to it. XDK's emulator is great, because unlike developing using a chrome browser, it allows you to test Cordova plugins and the code around them without having to install on a device.
The test tab in combination with Intel's App Preview app works great for early stages of the game. It will help you to see what your game looks like on a real app without having to build and install. However, it only works with a subset of Cordova plugins. As you start to add more, you will need to do full builds. The build features are the best I have seen so far for free. It makes the process super easy and delivers a fully signed app that is ready for each of the stores.
For iOS, you will need to download a certificate from the Apple Developer Console. You only need to do this once. The step by step guide can be found here. When building for Android, always use Crosswalk! It is a browser that Intel XDK can build into your apk for consistency. I tried using a straight android build for a while. However, my game was laggy and inconsistent.
Starting to develop with Phaser
Phaser is one of the best application frameworks I have ever used. I have done a lot of web development in the past few years and have had to rely on many different third party packages. Usually, there are at least one or two headaches involved in that process. Phaser, however, is very straight forward, it does exactly what you need it to do, and works exactly as the documentation says.
Scaling
The one big gotcha is scaling. Mobile devices have many different screen sizes and pixel density ratios. This can be a nightmare to code against and test. Here are two resources that helped me understand how to get around this: First scaling resource Second scaling resource Here is my adapted code that I use to set the game size:
var w = window.innerWidth * window.devicePixelRatio, h = window.innerHeight * window.devicePixelRatio;
if(h > 800) {
	var div = h / 800; //800 is target
	w = w / div;
	h = 800;
}

var game = new Phaser.Game(w, h, Phaser.AUTO, "game");
Even with this code, you will still have different screen sizes. This could cause you to place a sprite too close to the edge of a screen, putting it in danger of being cut off on some devices. To counteract this, I created a standard ‘Safe Zone’ on the screen that I could guarantee would not be cut off. I would then use that zone as a reference when placing all content.
The code for that safe zone looks like this:
this.scaleFactor = window.devicePixelRatio / 3;

//determine the safe zone
this.safeZone = {
	width: this.game.width,
	height: this.game.height,
	x: 0,
	y: 0,
};

var heightWidthRatio = 1.9;
var currentHeightWidthRatio = this.game.height / this.game.width;

if (currentHeightWidthRatio > heightWidthRatio) {
	this.safeZone.height = this.game.width * heightWidthRatio;
	this.safeZone.y = (this.game.height - this.safeZone.height) / 2;
} else {
	this.safeZone.width = this.game.height / heightWidthRatio;
	this.safeZone.x = (this.game.width - this.safeZone.width) / 2;
}
When placing items (sprites, buttons, text, etc.) onto the screen I always do 3 things. I place them at x: 0, y: 0 to get their natural size. Then I scale them to a percent size of the safe zone using either width or height (By using % sizes you make sure that the screen will look the same on all devices). Finally, I relocate the item to where it should go. Example adding a sprite:
//Step 1 - place
var sprite = this.game.add.sprite(0, 0, "ZombieSprite");

//Step 2 - scale
sprite.height = this.safeZone.height * .10 //10% of safeZone
sprite.scale.x = sprite.scale.y; //scale width same as height

//Step 3 - relocate
//In this example I will place the sprite in the center of the safeZone
sprite.x = (this.safeZone.width - sprite.width) / 2;
sprite.y = (this.safeZone.height- sprite.height) / 2;
In the below images of my game, you can see the effect the safe zone has on the left and right sides of the screen. The gutter on the iphone is smaller than on the Nexus 6P. I always emulate using the iPhone 4 because it has the smallest screen. If it works on the iPhone 4 it will work anywhere.
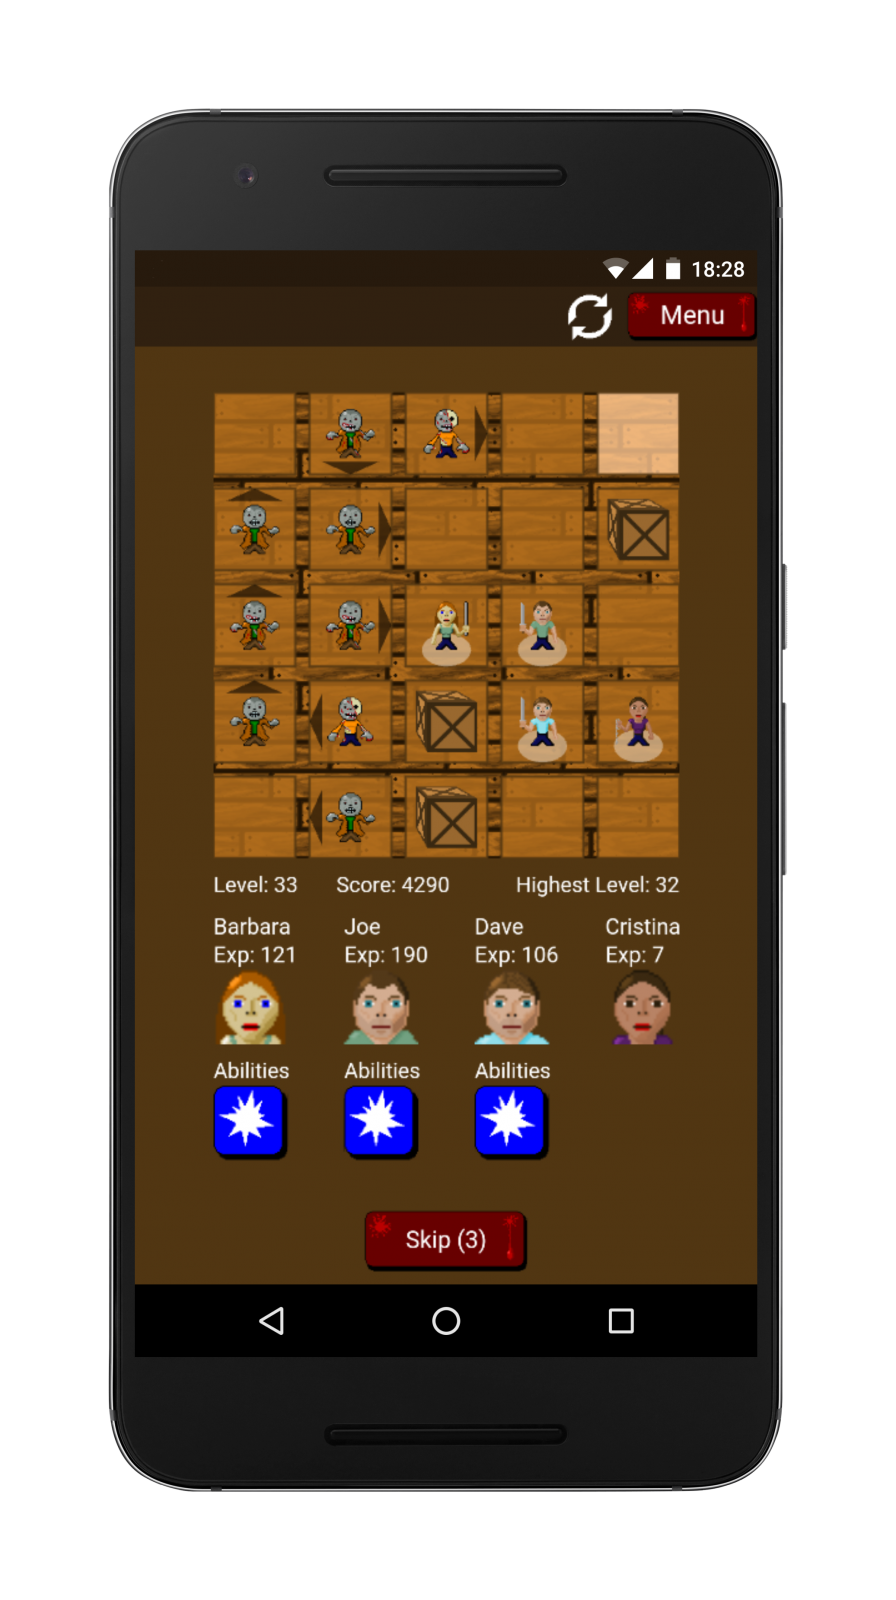
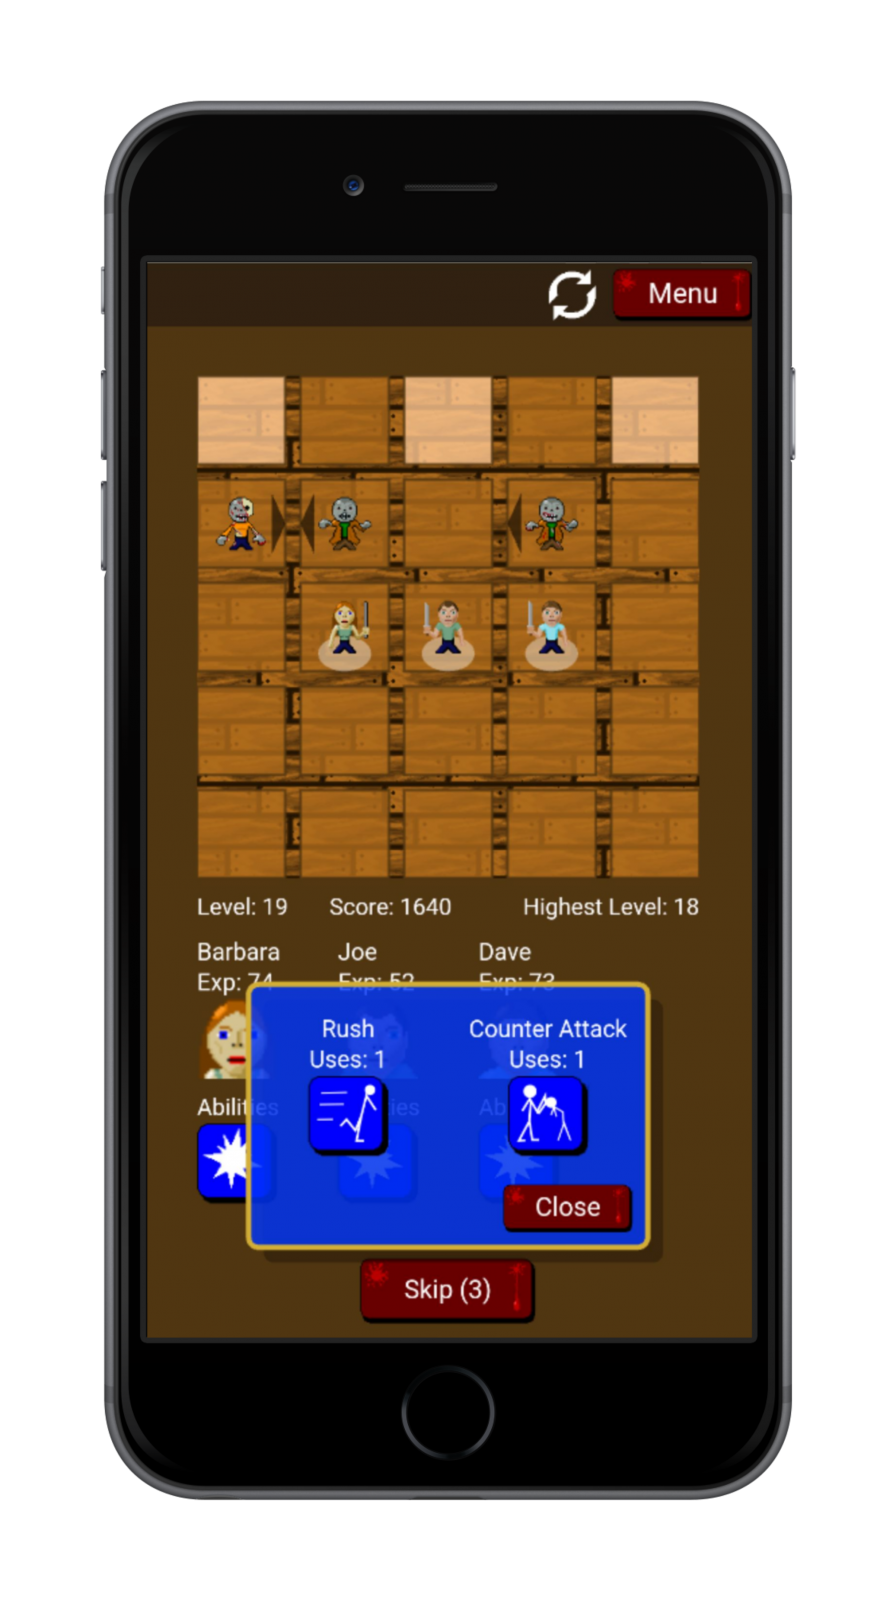
Different safe zone sizes and scaling
States
If you end up having more than one screen in your project, I suggest using states. When you switch to a new state, the old state and all of its sprites will automatically be destroyed. It is an easy way of managing different screens and their setup.
Creating Sprites
I had never created sprites before I created this game. The first thing I did was look for articles on best practices. I found this article, by Derek Yu, simple enough and effective. Don't worry if your sprites look crappy at first. Applying Derek's shading techniques will go a long way to making them look great.
I used Piskel to create all my spritesheets. It is great because you can create the sprites in a browser without having to download any software. It allows you to easily make pixel by pixel changes. It also allows you to create each frame of your sprite sheet so you can animate your characters and buttons. In order to standardize I made all of my characters on a 64 x 64 canvas.
Inkscape came in handy whenever I needed to vectorize a png, scale it, add effects or combine images. It was invaluable when I was creating my marketing materials. The most important feature I learned to use was the Path-> Trace Bitmap feature, which allowed me to convert a png to an svg.
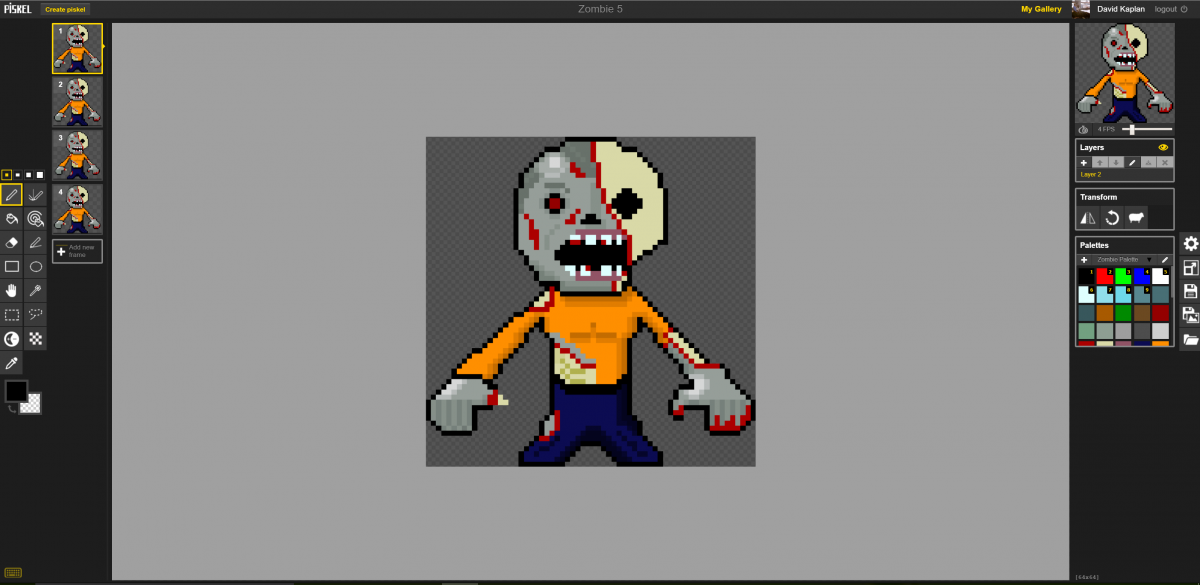
One of my zombies for ‘Clear the Zombies!’. I later vectorized the head in inkscape for my icon.
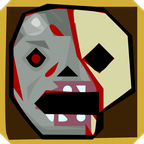
The vectorized version of the image above.
Splash Screens
Splash screens are great for showing off your brand as the game loads. However, they are not so straightforward because, as I discussed earlier, devices have many different screen sizes. For iOS the number of screen sizes is limited. You can use inkscape to crop and resize your splash screen and load it into XDK under the projects tab.
Android is a little more difficult, because there are so many devices. To get around this, Google recommends you create a 9-patch image. 9-patch images are images that have stretch zones, telling the device what is ok to stretch and what is not. I tried to find a site to generate these for me automatically, but got fed up and used the Google recommended tool to manually adjust them. The documentation for that tool is here.
Marketing
Your game will not sell itself. You will have to get out there and market it. Two of the most important free tools for marketing are Facebook and Twitter. Create a specific Facebook page and Twitter page and start posting. This article from Soomla had some great ideas.
Conclusion
There is a lot that goes into making a game. With this article, I tried to highlight all of the issues that I thought would hang up a first time game developer. If you want to know more about a specific subject, please reply to this post and I will do my best to respond and update the information herein.


There were a lot of links missing I added from your original article. Also, is there a reason you left out the section on using Google analytics?