This is a step-by-step instructional guide on how to setup a BlackBerry 10 (BB10) development environment. This article includes instructions for downloading all the Cascades tools, installing them, and setting them up. You will learn how to get the BB10 simulator up and running and then how to connect it up to the momentics IDE to run and test code. You'll also learn how to connect to a physical BB10 device so that you can run code on a real device.
A Little Background Information
Prior to BB10, app development for BlackBerry was done using Java or HTML5. You'll find references to the older development environment as "Developing for BlackBerry OS".
BlackBerry purchased QNX in 2010 and adopted their tools for use to build the BB10 environment. Before BB10 was ready the BlackBerry PlayBook tablet was released running the new QNX OS. To build applications for PlayBook you were given the following options to choose from:
- Native (C/C++, OpenGL)
- HTML5
- Adobe AIR
- Android Runtime
About a year after the PlayBook was introduced the first BB10 device (Z10) was released. When developing apps for BB10, you have many different options to choose from:
- Native Cascades (C/C++, Cascades QML)
- Native Core (C/C++, OpenGL)
- HTML5
- Adobe AIR
- Android Runtime
- Appcelerator (BlackBerry Platform Partner)
- Cordova HTML5 framework (BlackBerry Platform Partner)
- dojo HTML5 framework (BlackBerry Platform Partner)
- jQuery Mobile HTML5 UI framework (BlackBerry Platform Partner)
- Marmalade cross platform development environment (BlackBerry Platform Partner)
- Qt (BlackBerry Platform Partner)
- Sencha Touch HTML5 framework (BlackBerry Platform Partner)
- Unity Game Engine (BlackBerry Platform Partner)
The Native Cascades Development Environment
When building apps for BB10, the preferred route is to write your code using Cascades in the Momentics IDE. Cascades is a framework developed by
The Astonishing Tribe (TAT) which is an extension of
Qt. In this article I describe how to setup a Windows PC for use to make BB10 applications using Cascades.
Get the Momentics IDE
To start you will need to download the Momentics IDE. You can download the current version of the software from the BlackBerry developer site located
here.
Choose your platform from the website, download the installer and run it. At the time that I am writing this article, the current version of the Momentics IDE is version 2.0. I'm using Windows 7 to set everything up so I see the following when the installation program starts.
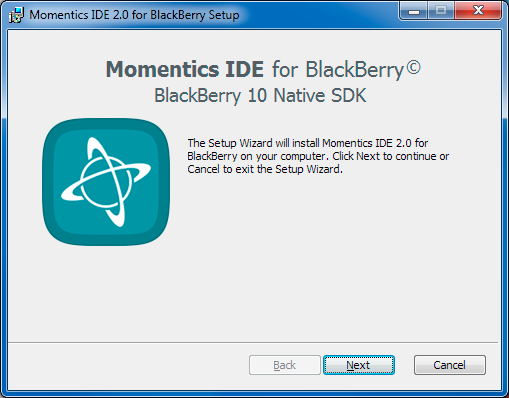
Click
Next through a series of dialogs, accept the license agreement and choose an installation directory (
C:/bbndk is a good default). After doing all of that, find the new icon on your desktop and launch the
Momentics IDE for BlackBerry.
First Run of the Momentics IDE
When the Momentics IDE starts up for the first time you will see the following dialog appear.
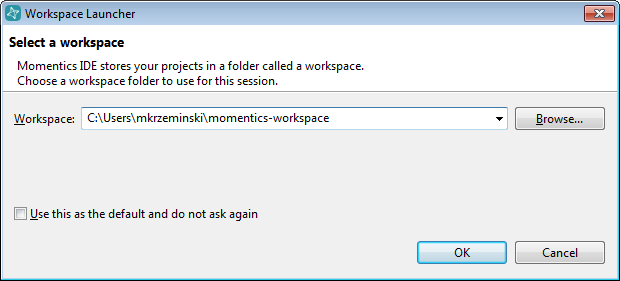
This dialog is asking you for the location where you want to place all the source code that you will be using to make BlackBerry applications. Either accept the default path that it gives you or choose another location. I also recommend enabling the checkbox that reads "
Use this as the default and do not ask again" to prevent this dialog from popping up in the future when you start the IDE.
After you click the
OK button, the IDE will start up and notice that you are missing some SDK files. At this point you should see the following dialog appear.
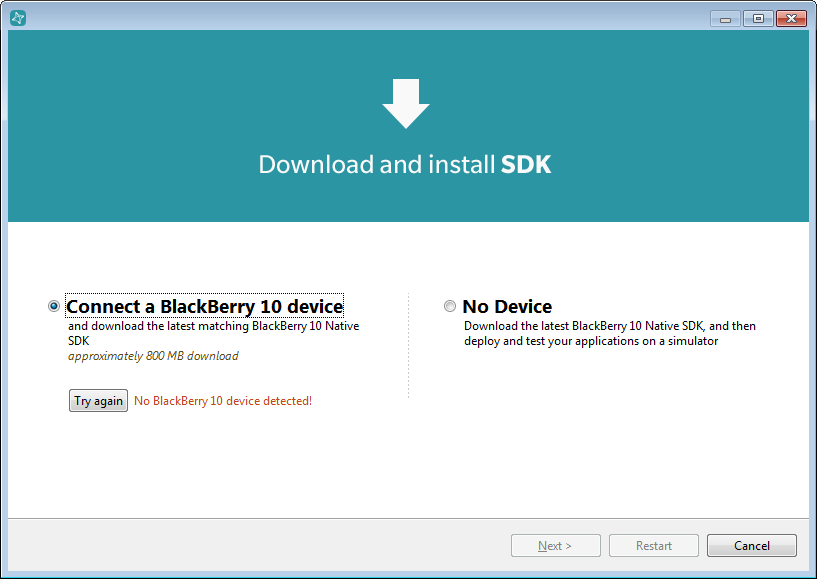
We will come back to setting up the SDK files in a minute, so right now just click the
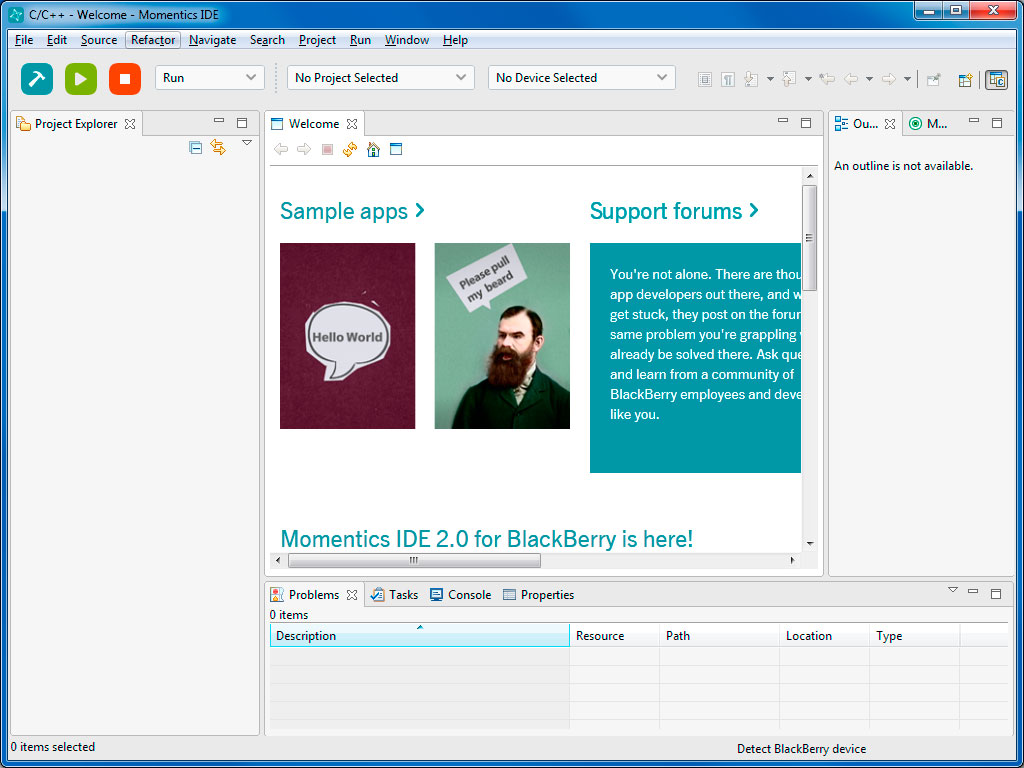
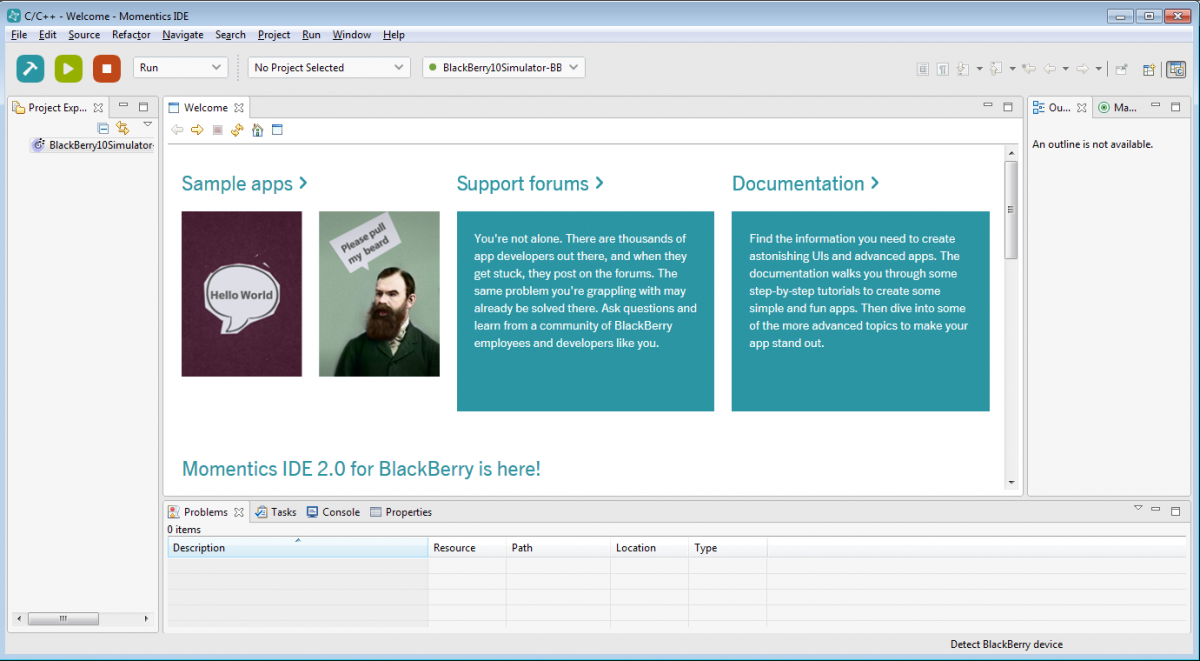
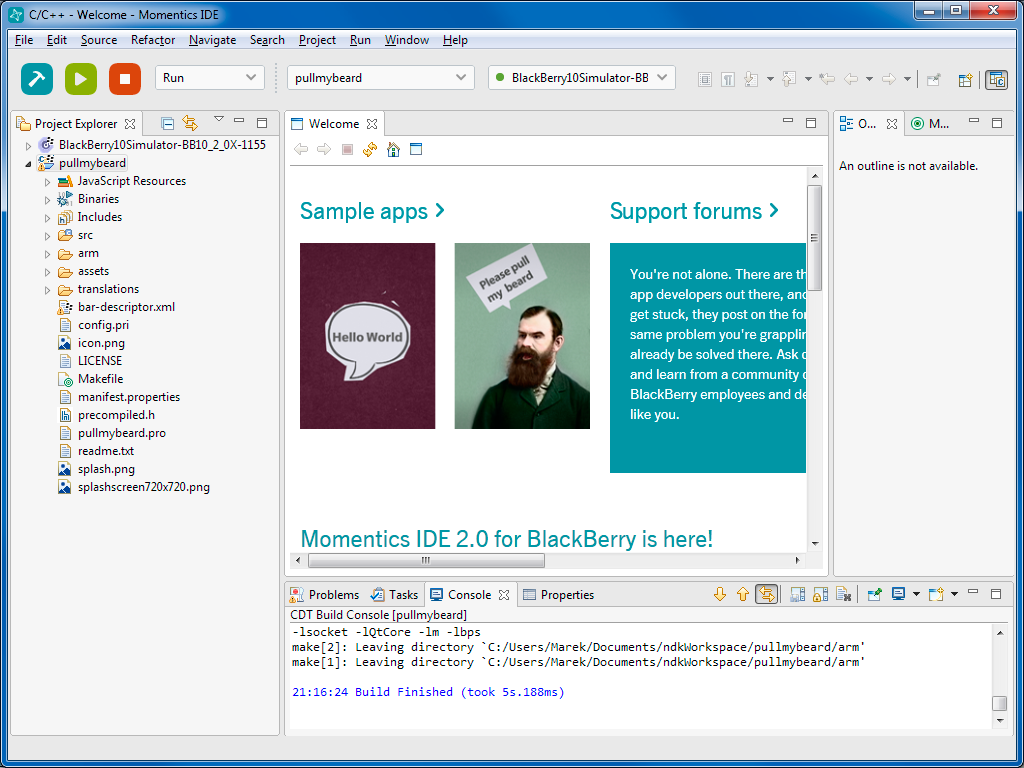
Cancel button in the bottom right corner. You should now see the main screen in the IDE that looks something like this:
The IDE is now installed so next up we will setup a BB10 simulator. For now just close the IDE.
BlackBerry 10 Simulator
You can find the latest version of the BB10 simulator to download
here.
Download the installer and then run it to install the simulator on your computer. Click
Next through the welcome dialog and accept the license agreement. You will then be asked where you want to install the simulator's virtual machine (VM) files.
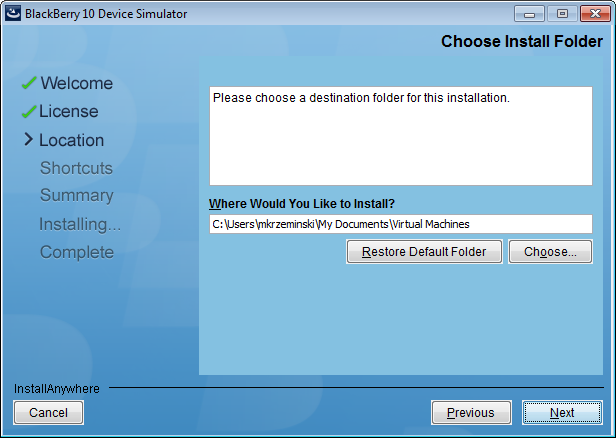
Remember where you install the VM because you'll need this location in some following steps below. The simulator runs in a virtual environment which tries to simulate the behaviour of the BB10 hardware on your PC. For additional information about the BB10 simulator have a look
here.
To run a VM, make sure that your PC has the minimum system requirements listed
here.
You will need some additional software installed on your PC to run the BB10 simulator so I will be installing the VMware Player on my Windows PC. You can click the link found on the system requirements webpage or head down to https://www.vmware.com/tryvmware/?p=player&lp=1 to get a copy of the free VM Player.
After you install the VMware player, you should see a new icon on your desktop like this:
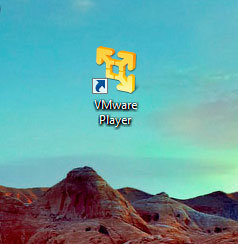
Launch the VMware player to see initial screen where you can select a VM to run.
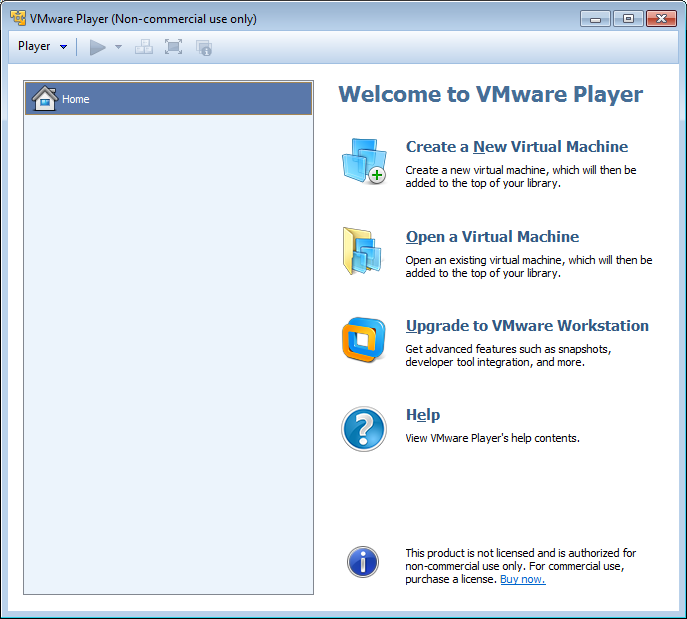
Select the "
Open a Virtual Machine" option shown in the image above and then navigate to the directory where you installed the BB10 simulator.
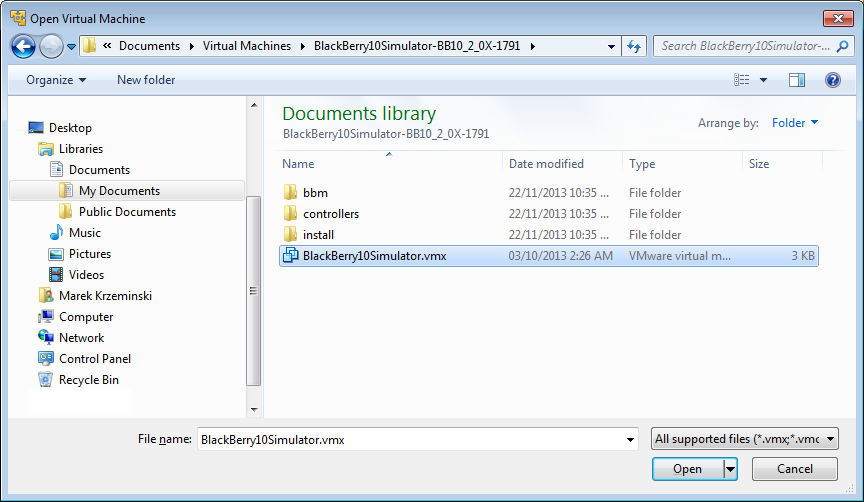
Select the
BlackBerry10Simulator.vmx file and click
Open.
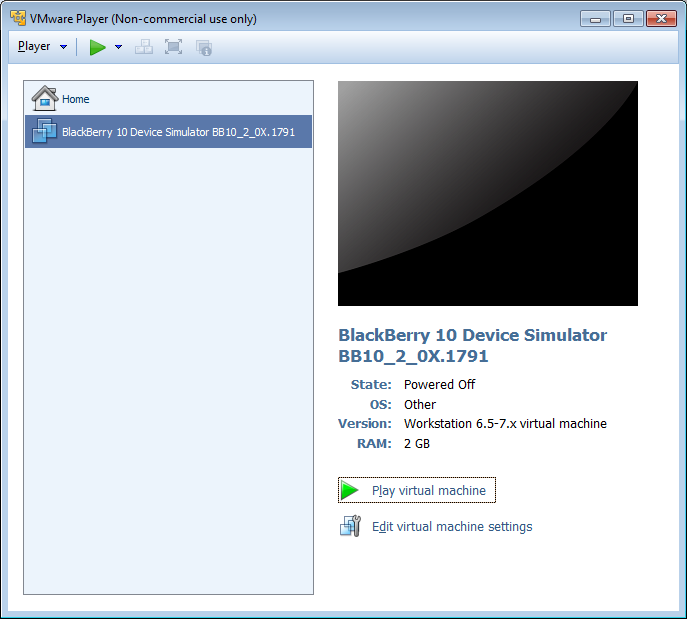
You should now see the BB10 Simulator listed in the VMware Player as shown in the above image. Select the BB10 Simulator in the list on the left and then you can edit the VM settings by clicking on the "Edit virtual machine settings" option found in the bottom right. I will leave my BB10 simulator with the default settings so just click the "
Play virtual machine" option to start the simulator.
The BB10 simulator will start to load and a screen will appear asking you which BB10 device you would like to simulate.

I'm running the BB10_2_0X.1791 version of the simulator so I see six options. Option 1 lets me simulate a Z10 device, Option 2 simulates a Q10/Q5 device, Option 3 simulates a Z30 device. The last three options are the same as the above three but just with Safe Mode enabled.
If you don't choose an option, one will be selected for you automatically after a few seconds.
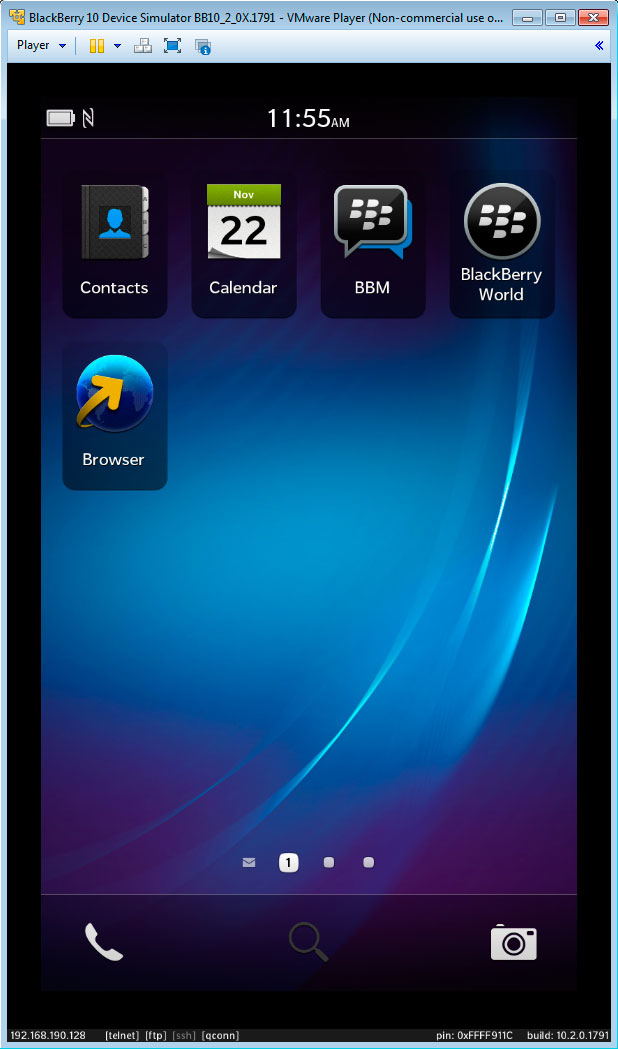
Select an option or wait for the default to be selected and after a few minutes, the simulator will finish loading and you will see the BB10 interface on the screen. The BB10 OS is heavily based around swipe gestures to navigate between different screens. To produce a swipe in the simulator press the left mouse button down on your mouse, move the mouse in the direction you want to swipe, and then release the left mouse button.
Now let us take a quick look at how you can control different options in the simulator. If your mouse focus is inside the simulator press
Ctrl+Alt to free it and have it leave the VmPlayer. Click on your Windows
Start button and navigate to Programs >
BlackBerry 10 Simulator directory and launch the
Controller program.
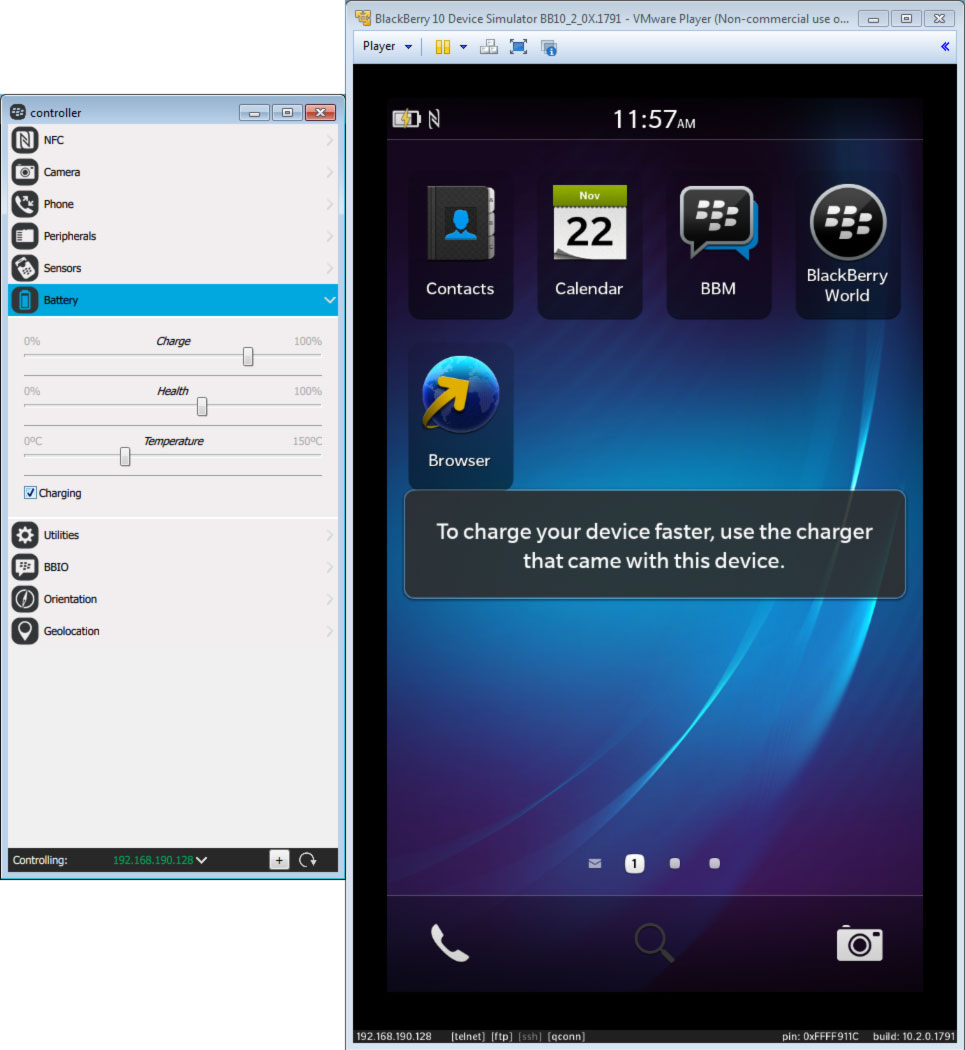
The controller is an external program used to control different options in the BB10 simulator. If the BB10 simulator is running when the controller is started it should automatically find and connect to it. You will know when this happens because in the bottom left hand corner of the controller, you will see that it says which IP address the controller is controlling.
Using the controller you can simulate NFC transactions, simulate phone calls, sensors etc. For example open the
Battery category in the controller. Have a look in the top left hand corner of the BB10 simulator to see what the current battery icon looks like.
Now in the controller click the
Charging checkbox to simulate the effect of the BB10 device being plugged in to charge the battery. You should now see in the BB10 simulator that the battery icon has a lightning bolt through it as shown in the image below. You can also use the sliders here to control how much charge the "simulated" battery has in your BB10 Simulator.
Play around with the other controller options to see what things you can manipulate in the simulator.
BB10 Simulator Setup in the IDE
Now that we have the BB10 simulator installed and running in the background, let's get the IDE hooked up to it.
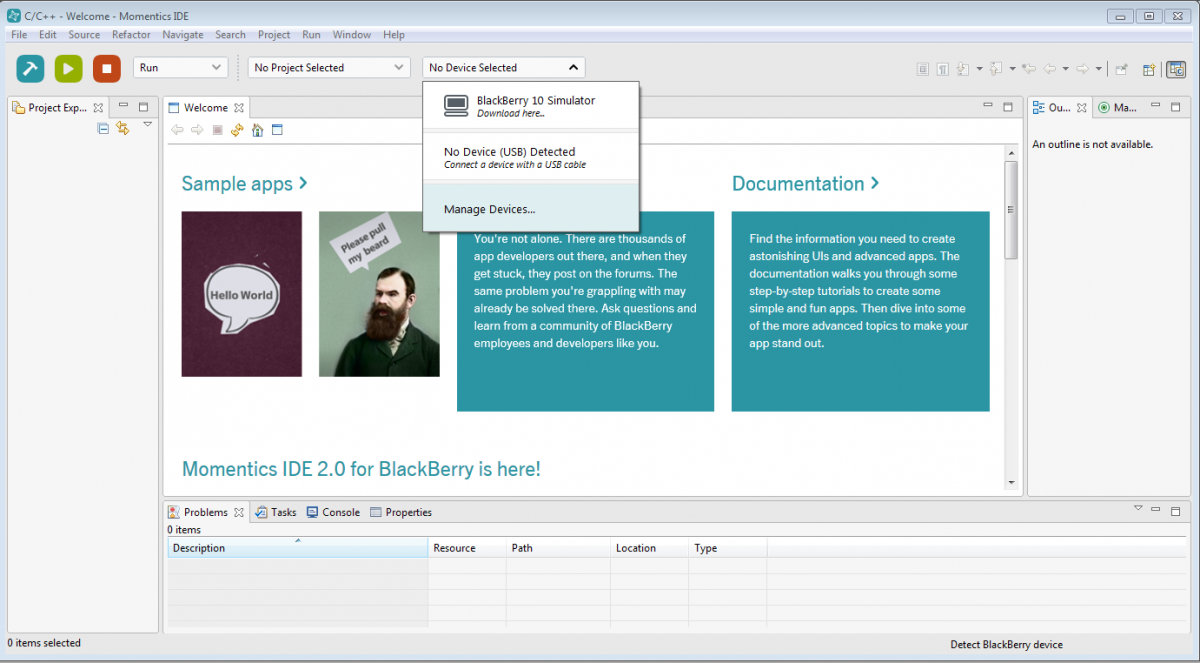
Launch the Momentics IDE again and when it starts up, close the initial start up dialog if it appears. Click on the drop down menu that says "
No Device Selected" to open it, and select "
Manage Devices..."
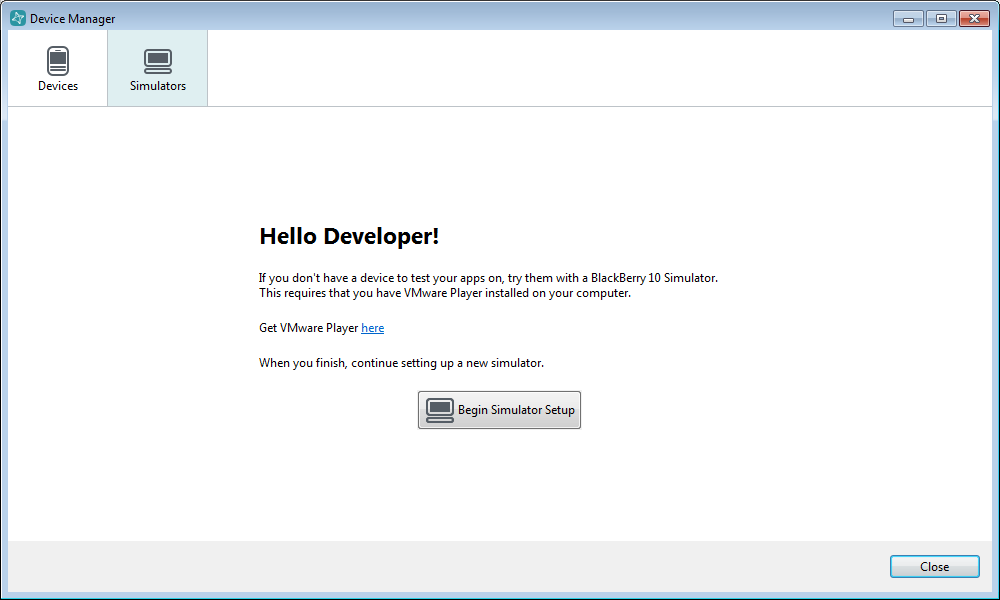
In the new dialog that appears, select the simulators tab at the top of the dialog, and then click on the "
Begin Simulator Setup" button.
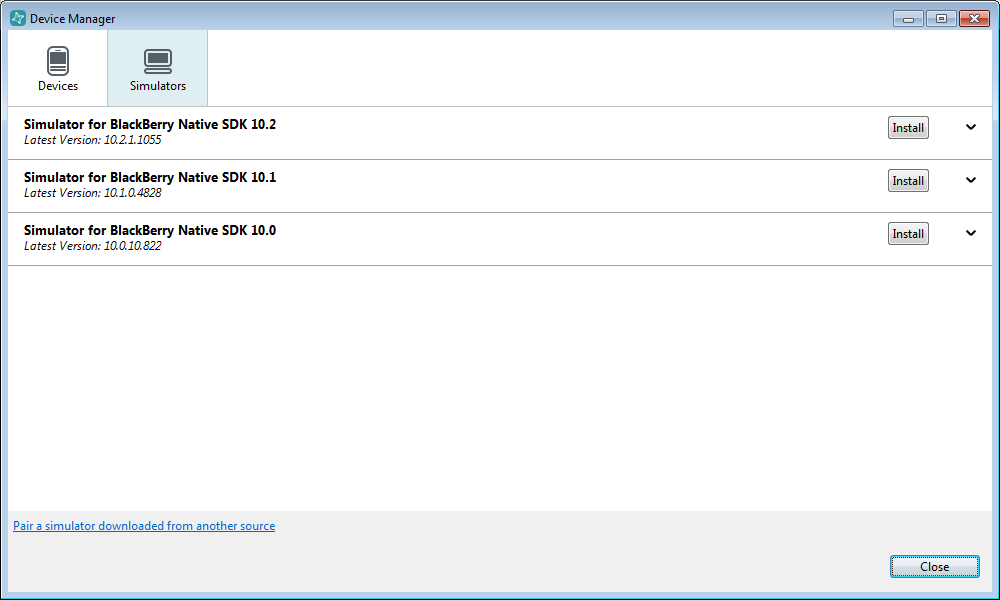
You will be presented with a list of BB10 Simulators that you can install. Since we already downloaded and installed a simulator we don't have to do it from these options. Instead, notice that in the bottom left hand corner of the dialog there is a link to "
Pair a simulator downloaded from another source".
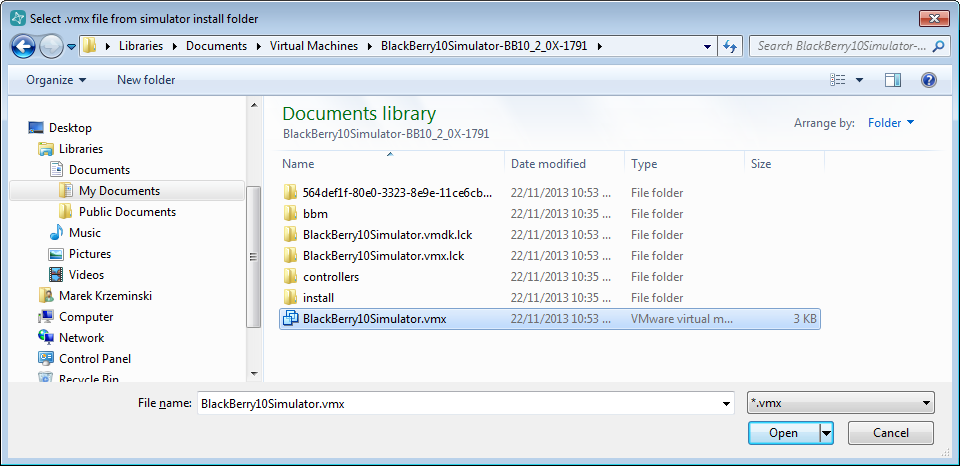
When you click the link to pair a simulator with the IDE, a dialog will open asking you to select the vmx file that you previously installed. Navigate to the location where you installed the BB10 simulator VM earlier, and select
BlackBerry10Simulator.vmx.
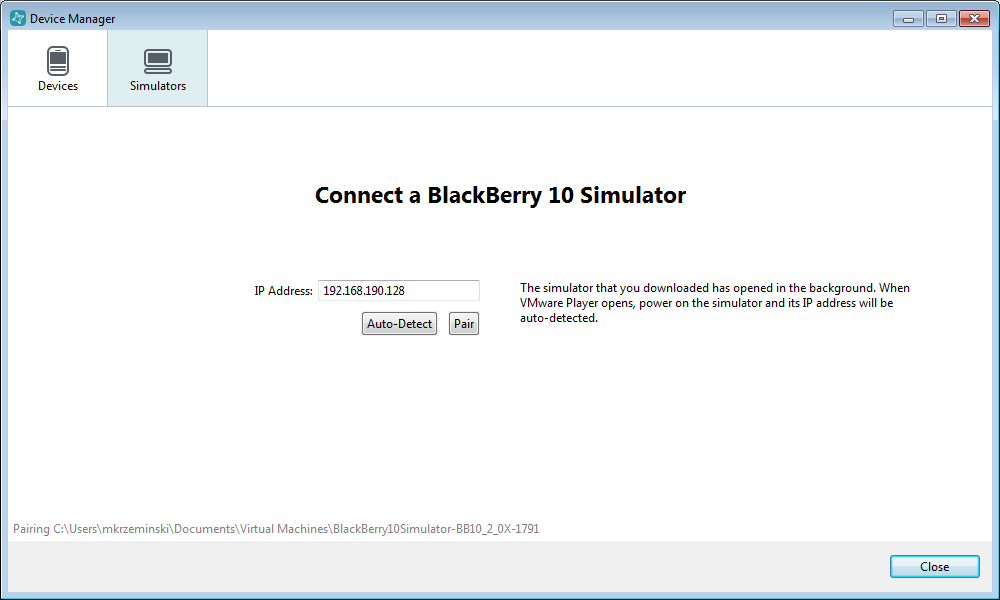
The Device Manager dialog will update and ask you for the IP address of the BB10 simulator that you want to connect to. You can either manually enter the IP address (which you can find in the bottom left hand corner of the running VM) or just click the "
Auto-Detect" button in the IDE to have it find the simulator for you. Make sure your simulator is up and running. Once you have an IP address entered, click the
Pair button.
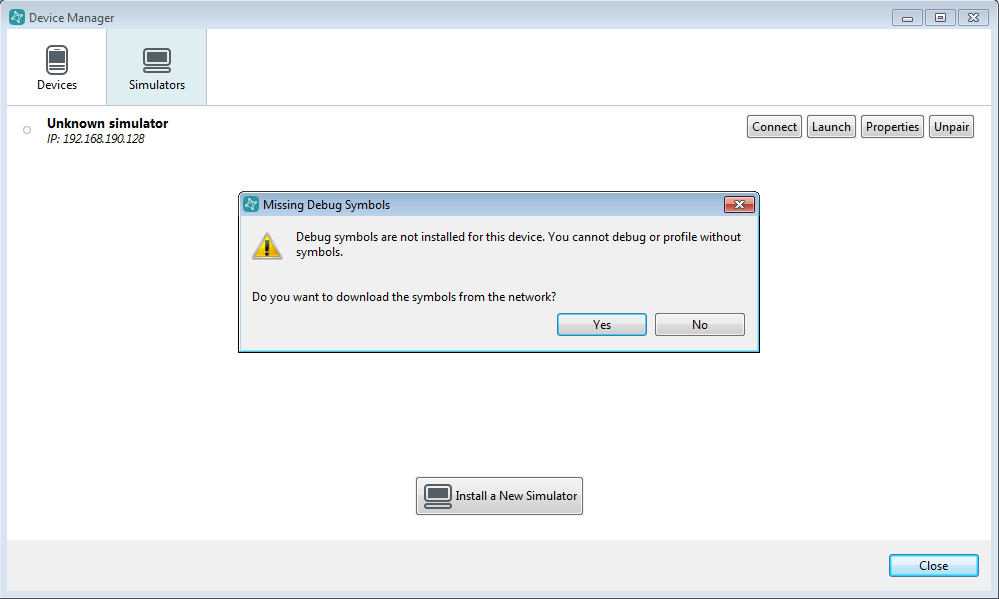
The IDE will connect to the simulator and realize that you are missing some debug symbols which are need when you try to debug apps. Click "
Yes" in the dialog to download the symbols from the internet.
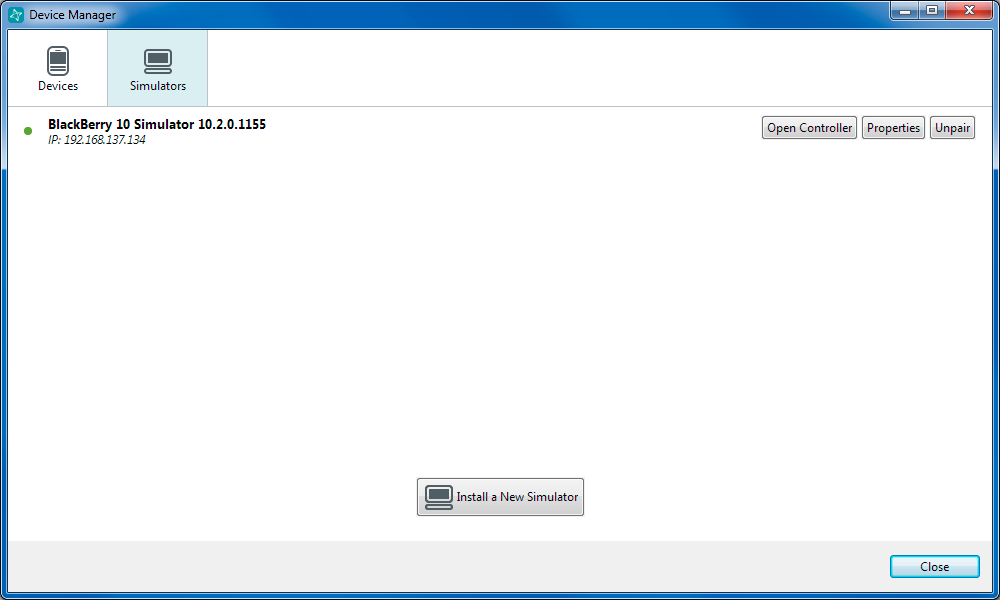
Once the debug symbols are downloaded you should see your simulator listed and the version of the BB10 OS that is currently supported by the simulator listed here. If you want to change your simulator or install a new simulator you can do that from this Device Manager dialog.
Notice that you can launch the BB10 Simulator controller directly from this dialog by clicking the "Open Controller" button rather than having to find the Controller program in your start menu.
Updating the BB10 API Level
Anytime that BlackBerry releases a new version of their OS, a new Application Programming Interface (API) will come with it. That means if you want to take advantage of the new features, you'll need to download the new API. This also means that you'll need to download a new simulator that supports the new features.
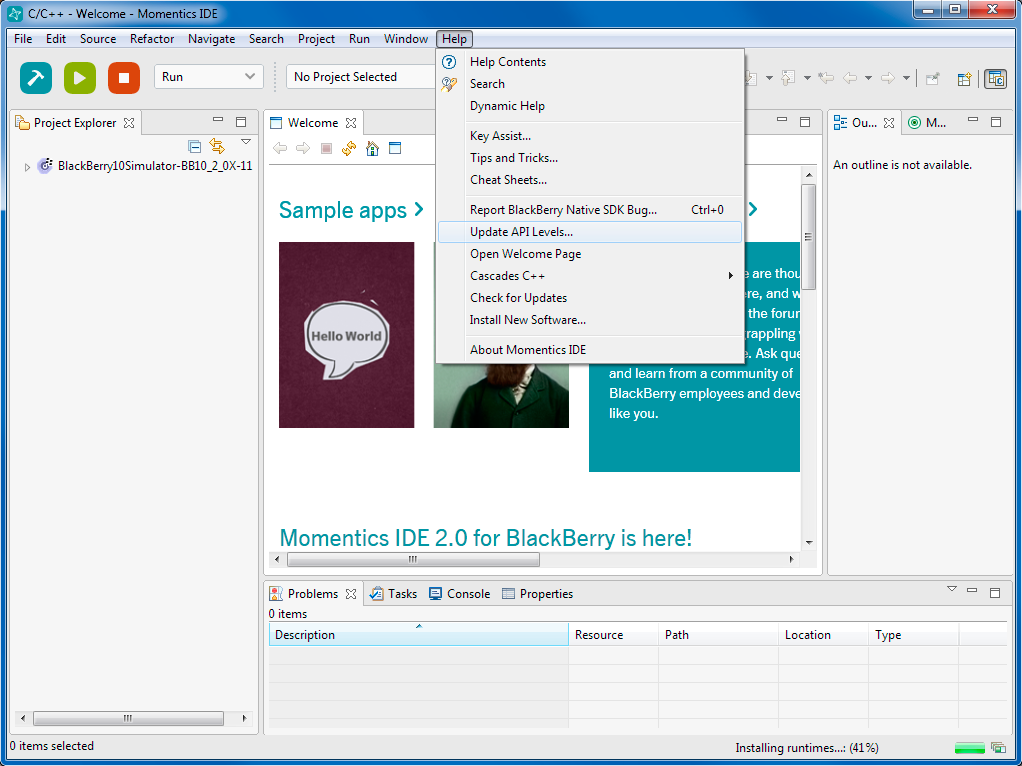
To install a BB10 API level in the IDE, click on the
Help menu, and choose
Update API Levels...
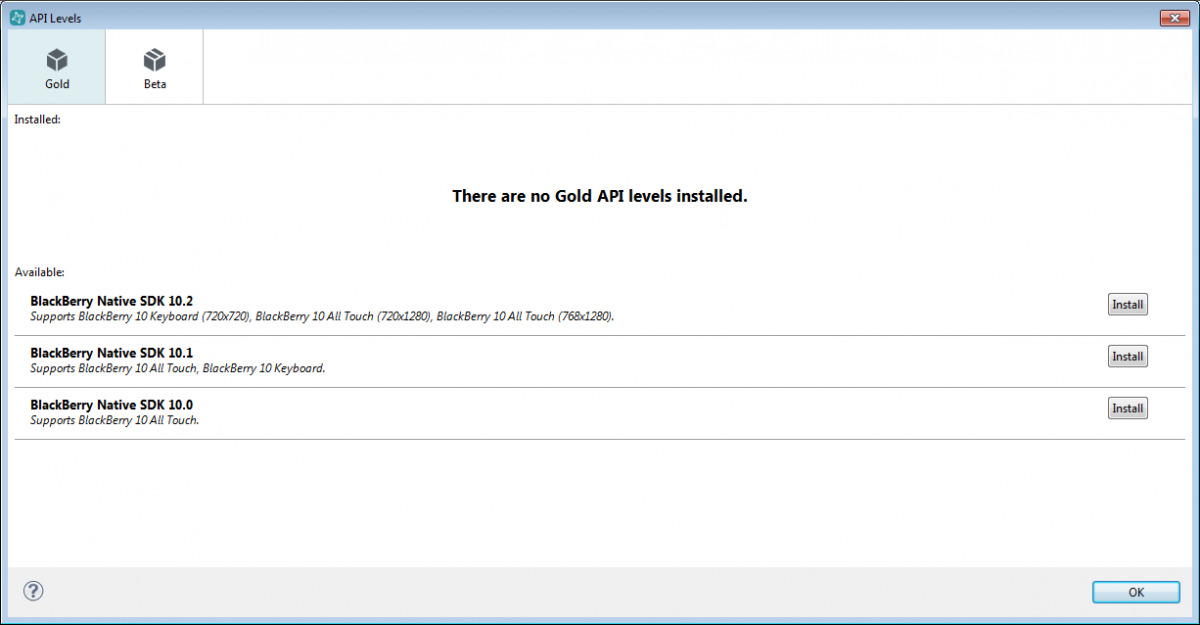
A dialog will appear showing which API you currently have installed (if any) and which ones you can choose to download and install. Also notice that you can choose "Beta" versions of new API using the tab at the top of the dialog. Beta API give you a glimpse of what is coming up in the next version, however be careful with Beta API, there may be bugs in them, or the API may change before they are fully released.
Choose the latest API level (and the one that is supported by your simulator) from this dialog by clicking the appropriate install button on the right.
When the API is done downloading and installing you will see it listed at the top of the dialog as shown below.
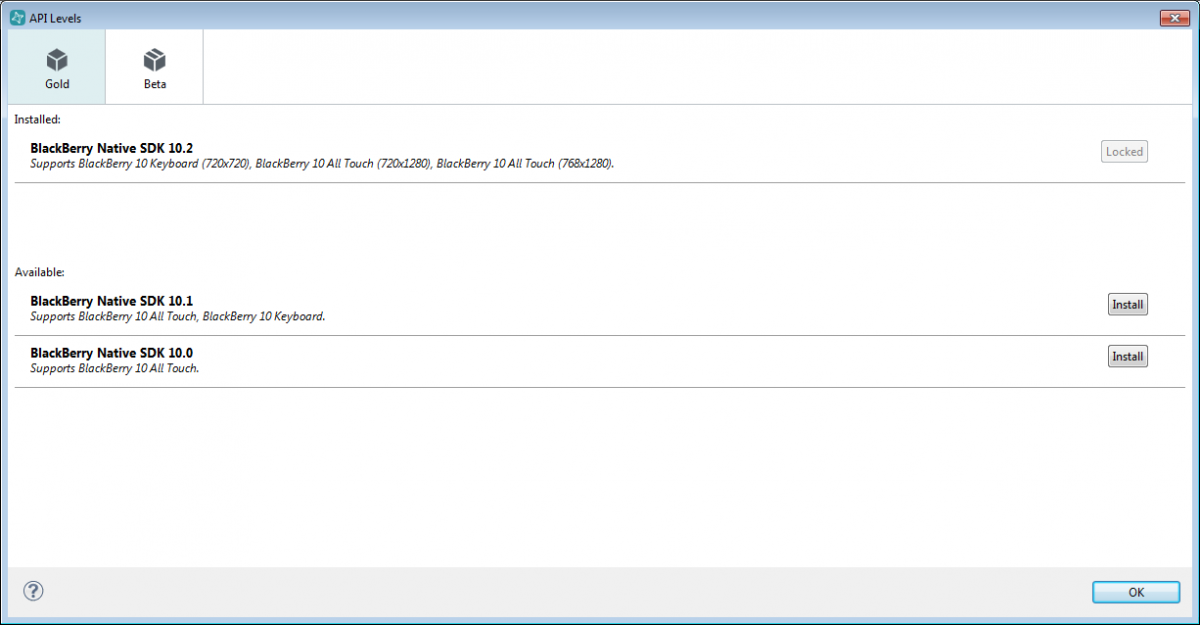
Anytime you install a new API level, make sure you
close the IDE and restart it.
Installing a BB10 Sample App
There are lots of BB10 sample apps that you can download and try, to learn how to program and make BB10 applications. I'll step you through the process of downloading and installing a sample app next.
When the momentics IDE starts up, you will see the Welcome tab (unless you turned it off) that contains links to sample apps. This isn't the only way to get sample apps!
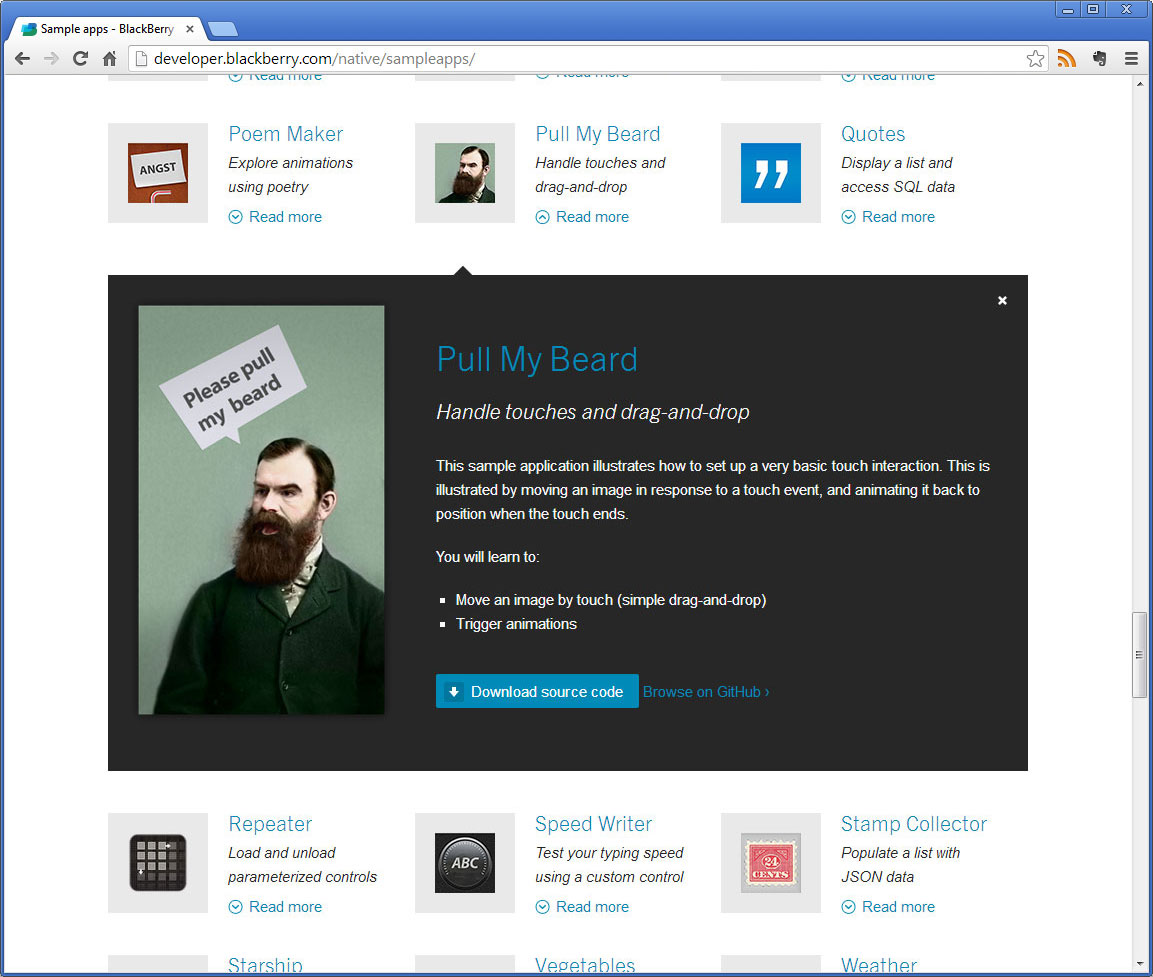
Head down to the BlackBerry developer site found here: http://developer.blackberry.com/native/sampleapps/
On this webpage you will see a listing of many different Cascades apps that you can download and try. Go and download the app called "
Pull My Beard" which is found in the UI section.
Click on the icon on the webpage to open a description of the app, and then select the
Download source code button.
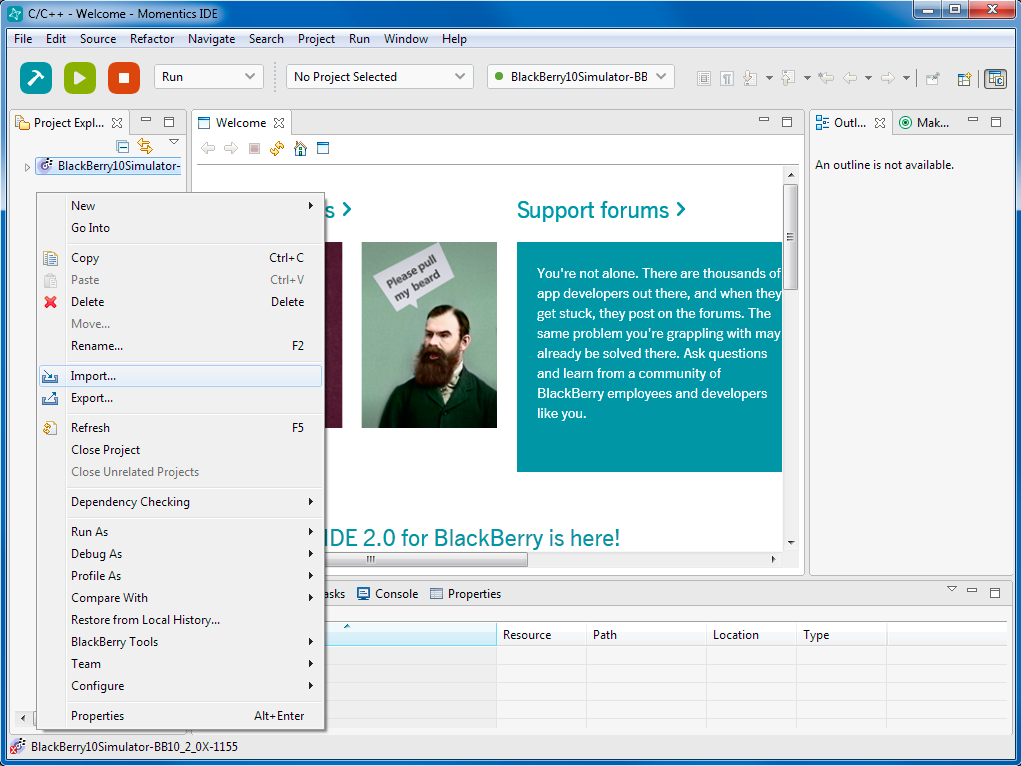
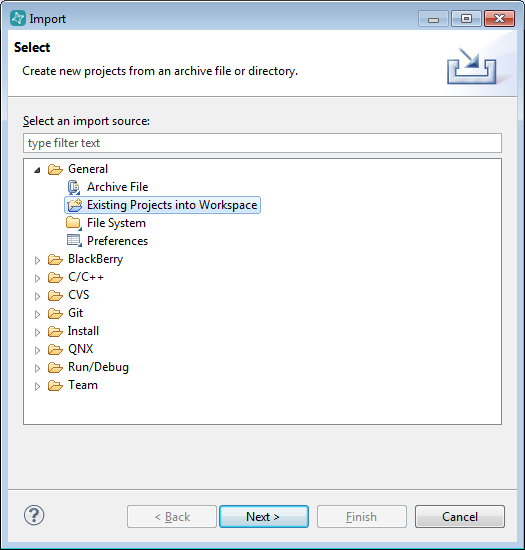
Once the zip file is downloaded to your computer, go back to the IDE and right click inside the Project Explorer tab on the left side. Make sure you right click in the white space and not on the BlackBerry10Simulator target which is also listed here.
Now choose
Import... from the menu.
The import dialog will appear on the screen. Open the
General folder, and choose "
Existing Project into Workspace". Then click
Next.
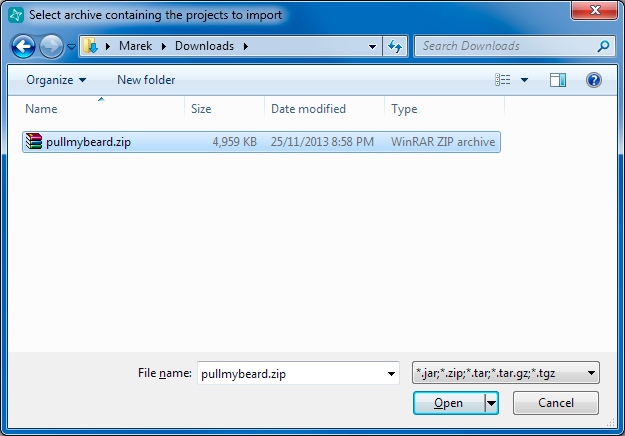
In the next dialog select the "
Select archive file:" radio button option and click the
Browse... button. Navigate to your download folder, and choose the zip file that you just downloaded from the BlackBerry developer website. Click the "
Open" button.
The IDE should recognize that the Pull My Beard application is inside the zip file so it will list it in the projects section. Click the
Finish button to copy the Pull My Beard app out of the zip file and into your workspace.
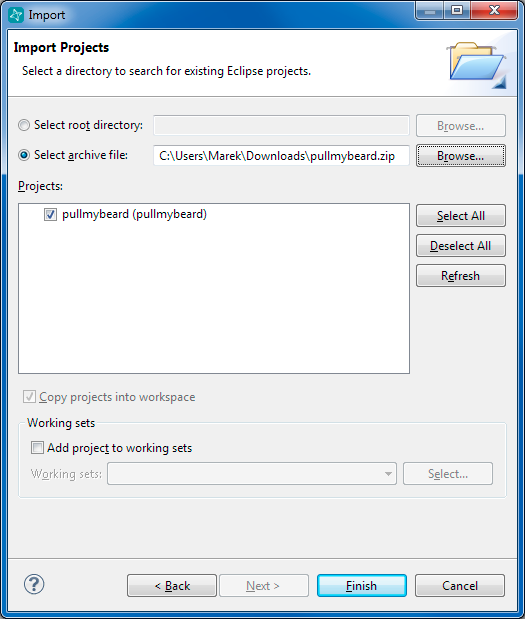
Take a look on your hard drive in the workspace folder (default location is C:\Users\yourName\momentics-workspace) to see that you should now have a new folder named
pullmybeard that has all the source files for the app.
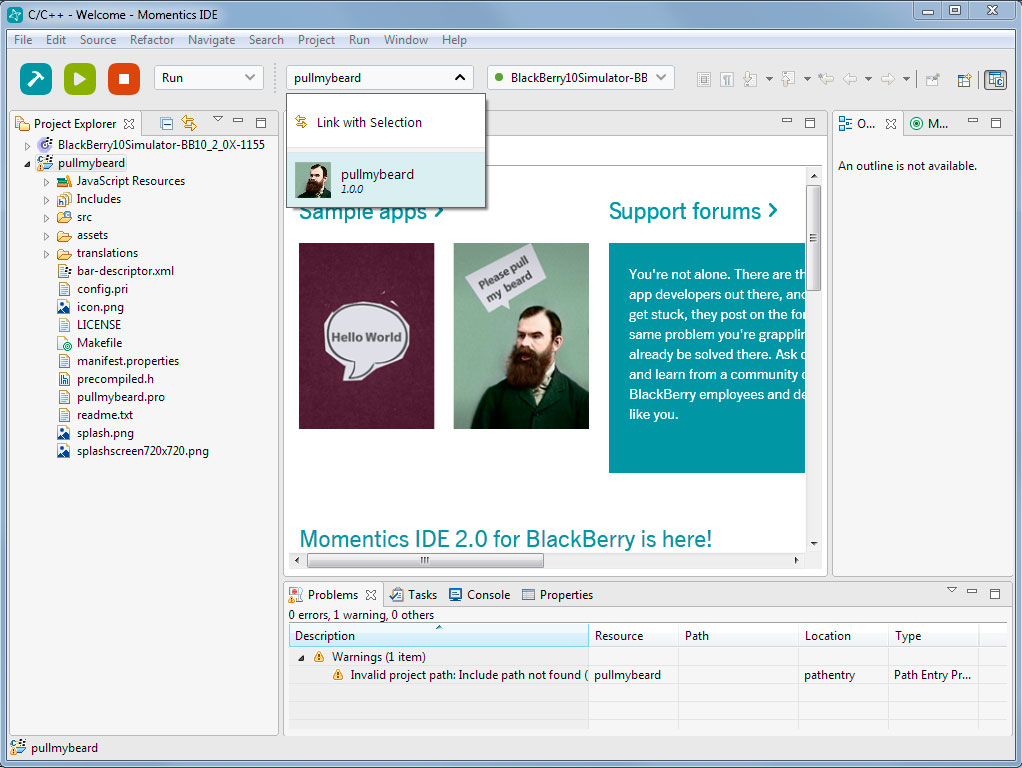
The IDE has also updated to show the pullmybeard app in the Project Explorer tab.
Running a BB10 Sample App in the Simulator
Once you have a BB10 app in the IDE, you can choose to run it on a Simulator or on a real BB10 device. Let's first look at how to run it in the Simulator.
In the first drop down menu, make sure you have "
Run" selected. Here you can also choose Debug which will let you step through the code while the app is running in case you need to debug the code to figure out what is going on in detail.
Using the second drop down menu at the top in the IDE, select the
pullmybeard app you want to run.
The third drop down menu is used to select where you want to run the app. Make sure you still have
BlackBerry10Simulator selected.
With the above options selected,
click the first blue hammer button found at the top left of the IDE to build the application for the simulator. The console should output some messages and finally say "Build Finished".
Notice that in the Project Explorer you will now have a new section under pullmybeard that is named "
Binaries". This is where your built app code is found that can be installed in the simulator to run.
To run the app after the code has finished building,
click the second green triangle button found in the top left of the IDE. This will cause the IDE to transfer the appropriate built files to the simulator and launch the application. You should now see the app running in the simulator.
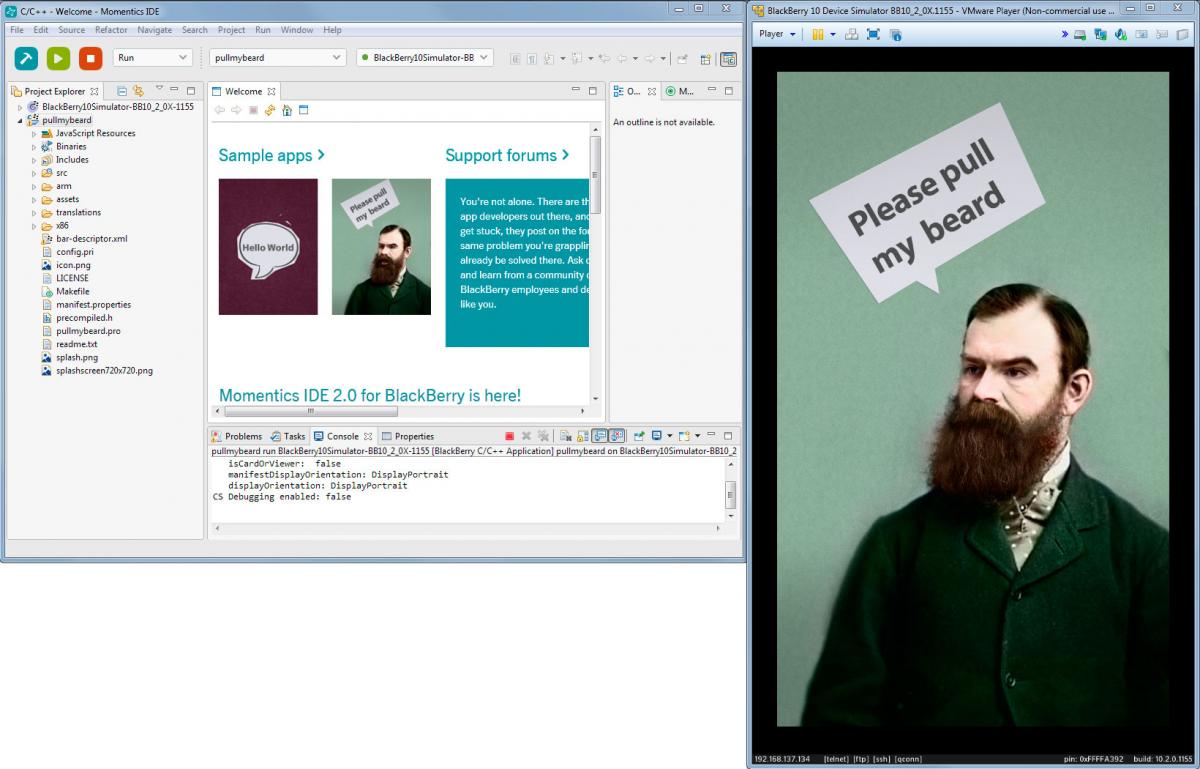
Turn your PC speakers ON and pull the beard using your mouse in the simulator. Press the left mouse button when your cursor is on the beard, drag your mouse down and then release the mouse button.
You can stop a running app by either
clicking the third red square button in the IDE, or by minimizing the app and closing it in the simulator. To minimize an app in the BB10 OS, swipe up from the bottom of the screen and then click the X beside the minimized app name.
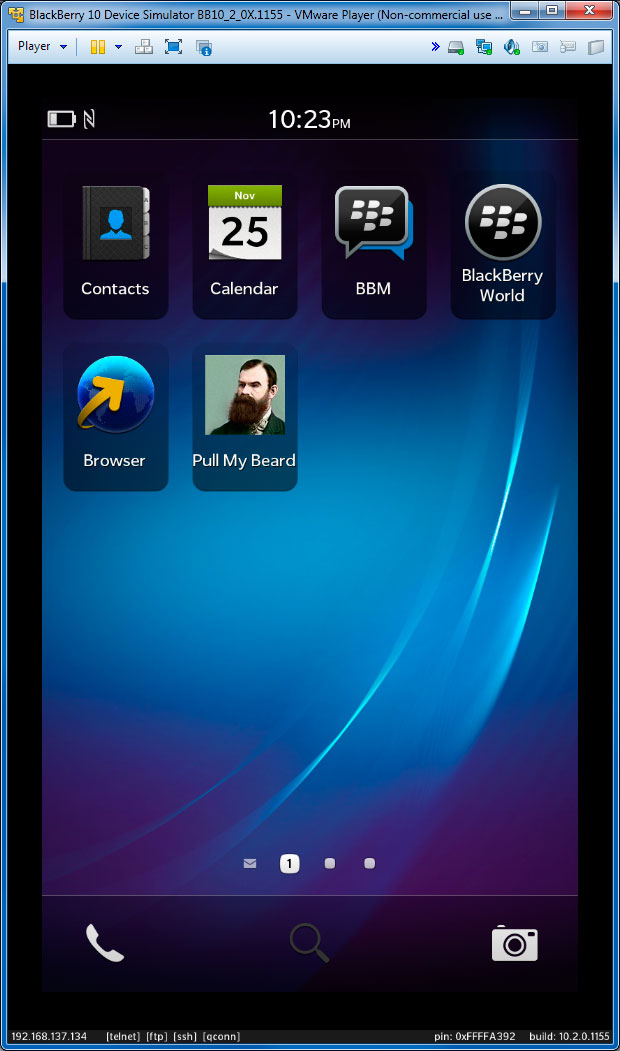
After an app is installed on the simulator it will remain there until you delete it. You can delete it by pressing and holding the left mouse button on the app icon for a few seconds. The app grid will start to pulsate and a delete icon will appear in the corner of the icon. Clicking the delete icon will delete the app from the simulator.
Note that if you make some code changes in the IDE and tell it to rebuild and run the same app, then the old version will be overwritten with the new version of the app before it will begin to run.
If you only want to run the app (and you are not interested in debugging it), you can restart the app by clicking on the app icon in the app grid.
Analyzing a Running Application
The IDE can be used for more than just building and running applications on BB10, you can also use it to navigate the BB10 file system, you can copy and move files around, and you can watch how resources and memory is used in the simulator or real device.
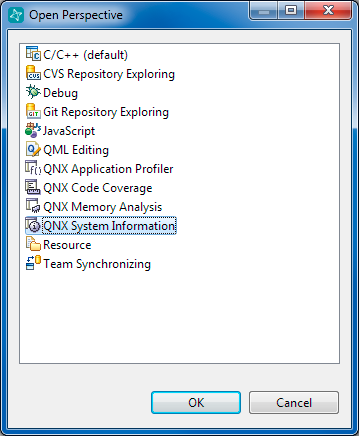
All of these functionalities are available through a QNX perspective in the IDE. To open a new perspective, select
Window >
Open Perspective >
Other...
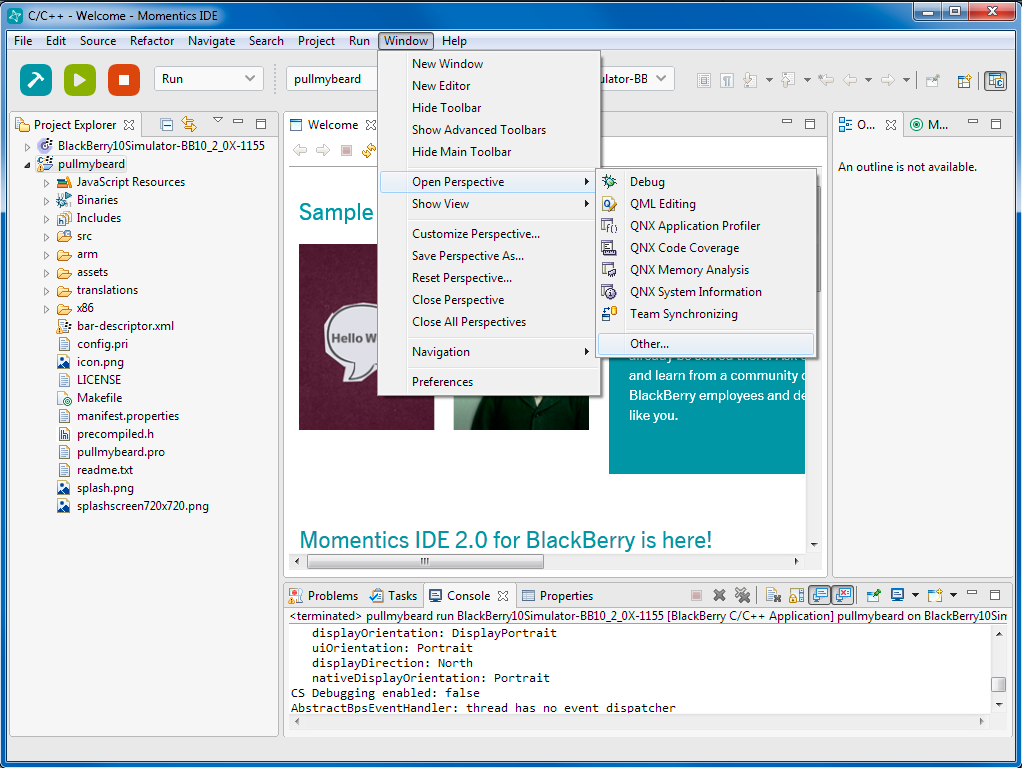
In the new dialog that appears, select
QNX System Information and then click OK.
In the top right hand corner of the IDE you will now have a new perspective available to toggle between. When the QNX System Information perspective is selected, the bottom portion of the IDE will list a number of tabs including: System Summary, Process Information, Memory Information, Malloc Information, Target File System.
On the left side of the IDE, in the Target Navigator, you will see a listing of apps and services that are running on your simulator/device. You can click on one of these options and then choose one of the tabs (Memory Information) to see how much memory the selected application is using.
Another handy thing to know about applications is that anything that you install will become available in the Sandboxes folder. See image below.
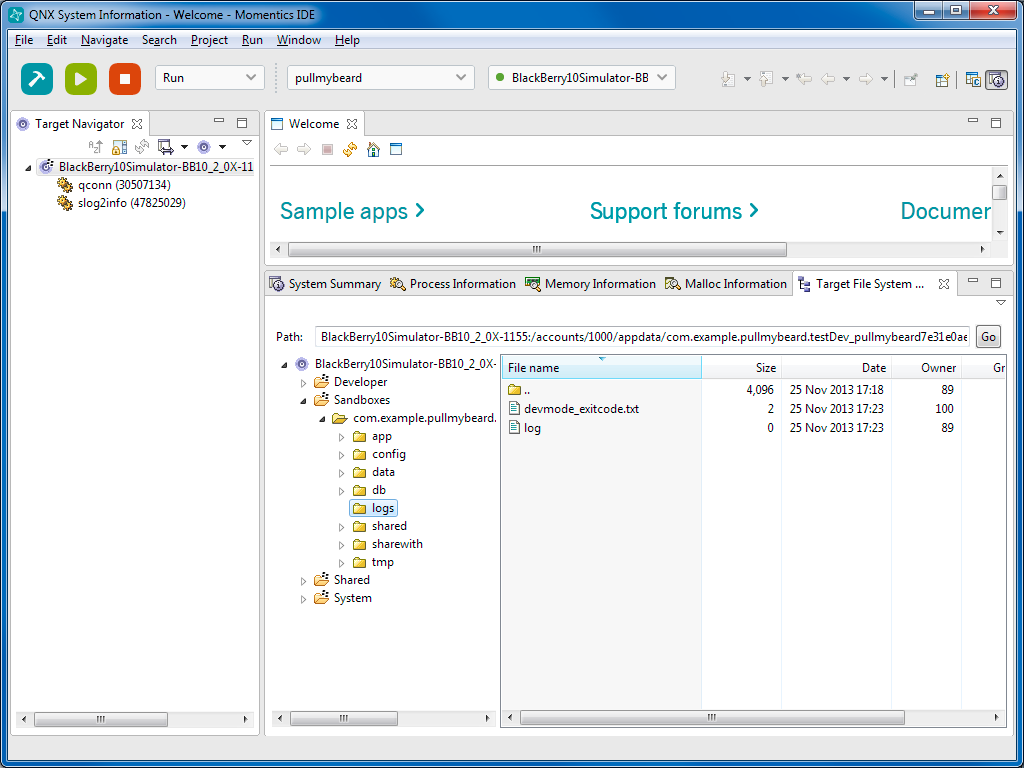
After installing the Pull My Beard application, you can see that there is a new entry there that contains the app executable, a config folder used to store settings, data, db, logs, etc. If your app generates log messages, you will be able to find the log file in the log folder. The app code that you run when you launch the application is found in the app directory. There you can view and modify the QML code if you wanted to.
Running an App on a Real BB10 Device
So far you have seen how to setup the BB10 Simulator and run a sample application on it. Now let's build the Pull My Beard application for a real BB10 device and run it there.
A simulator is good to get you started with development, but there are certain things that can be done much better or easier on a real device. For this reason, it is always better to try to run your app on a real device before releasing it in BlackBerry World.
If you still have the BB10 simulator running, close the VM Player as you won't need it and it can take up a lot of PC resources.
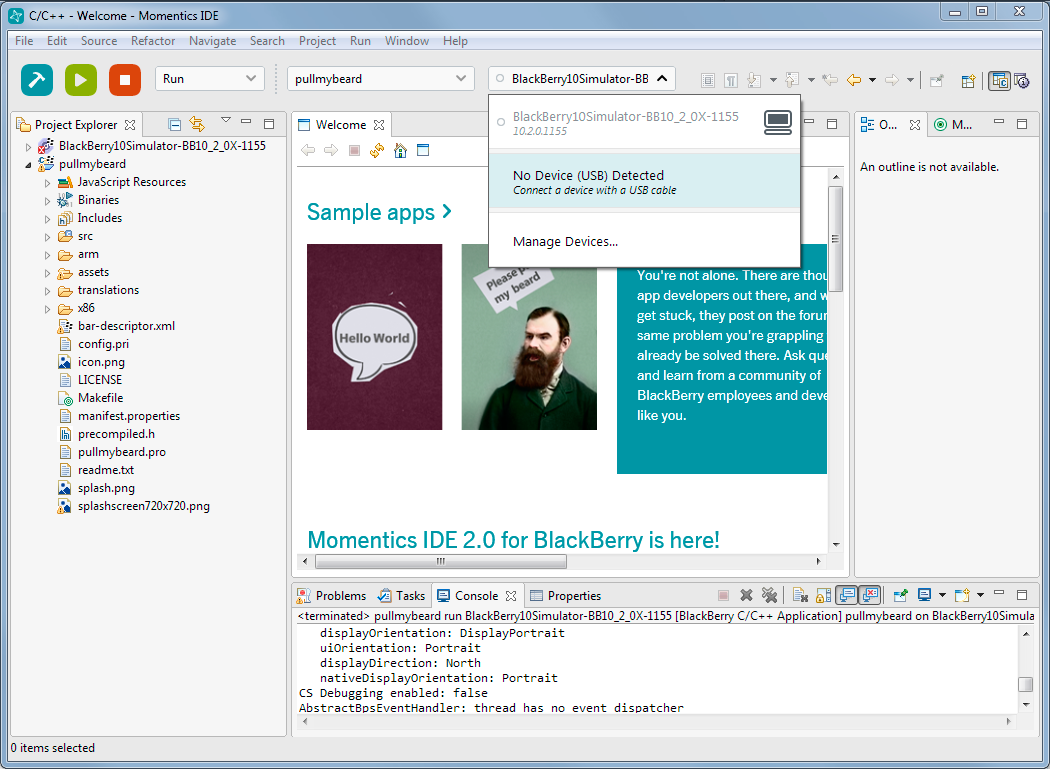
Also if you are still in the QNX System Information perspective from the last section, return back to the C/C++ perspective by clicking on the icon to the left of the QNX System Perspective icon in the top right hand corner of the IDE.
Open the Device drop down menu, and you will see that it lists "No Device (USB) Detected". Choose the
Manage Devices... option to setup the IDE for a real device.
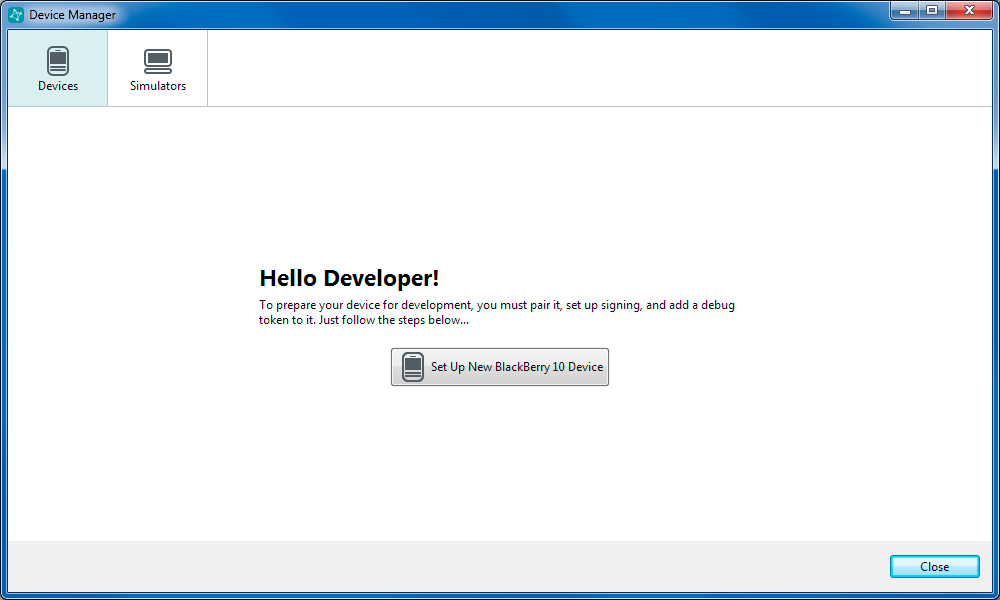
In the Device Manager dialog, select "
Devices" in the top and choose the "
Set Up New BlackBerry 10 Device" button.
On the next screen you need to pair your device to the IDE. First of all you need to make sure that your device is running in "Development Mode". To put your device into development mode, swipe down from the top of the screen on your BB10 device to open the quick settings panel.
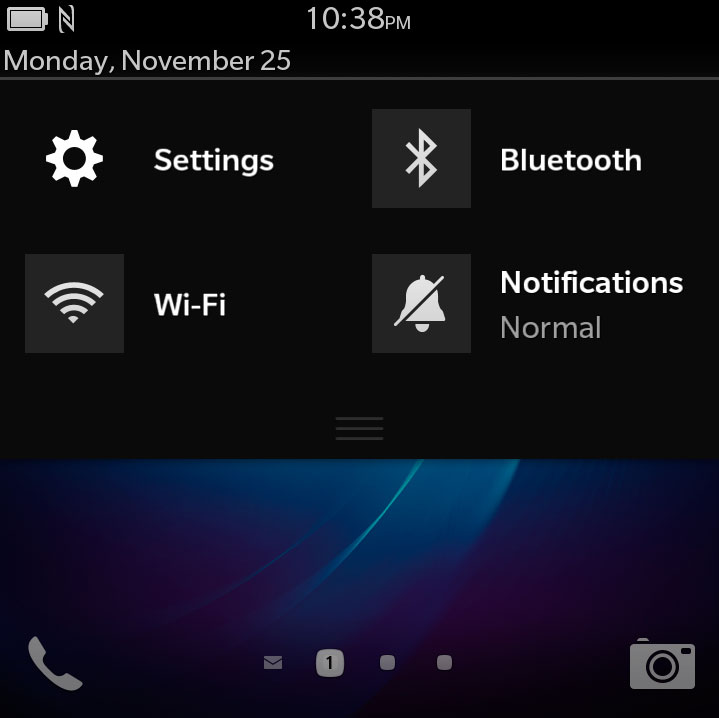
Click on the
Settings button in the top left corner to open the system settings app.

Scroll down until you see the "
Security and Privacy" option and click it.
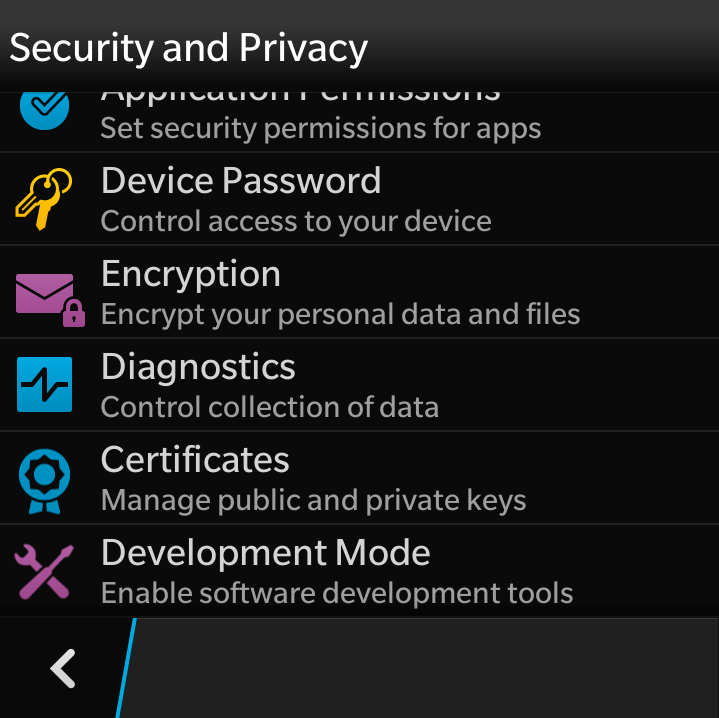
Scroll down to the very bottom where you will see the "
Development Mode" option and click it.
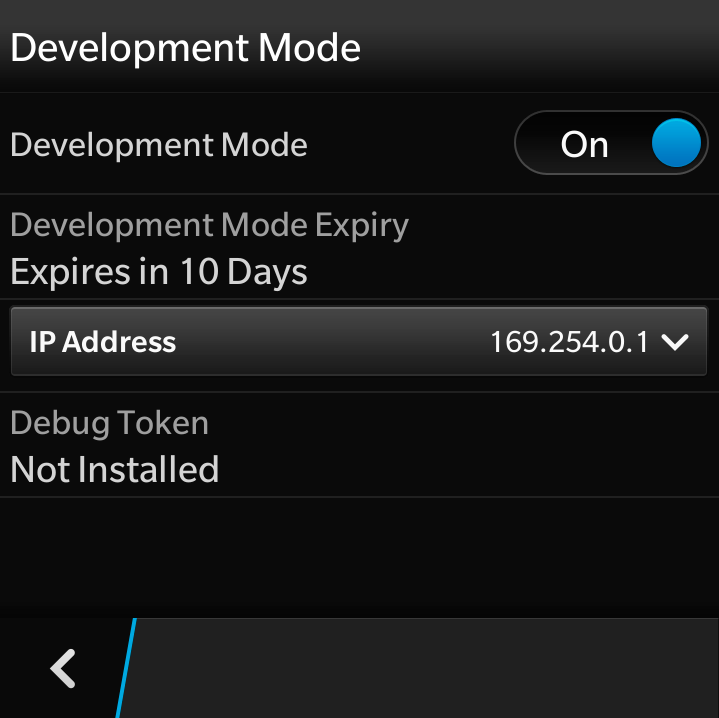
At the top of the screen there is a toggle button.
Turn development mode ON by clicking on the toggle button. The device will ask you to set a device password if you don't have one set already.
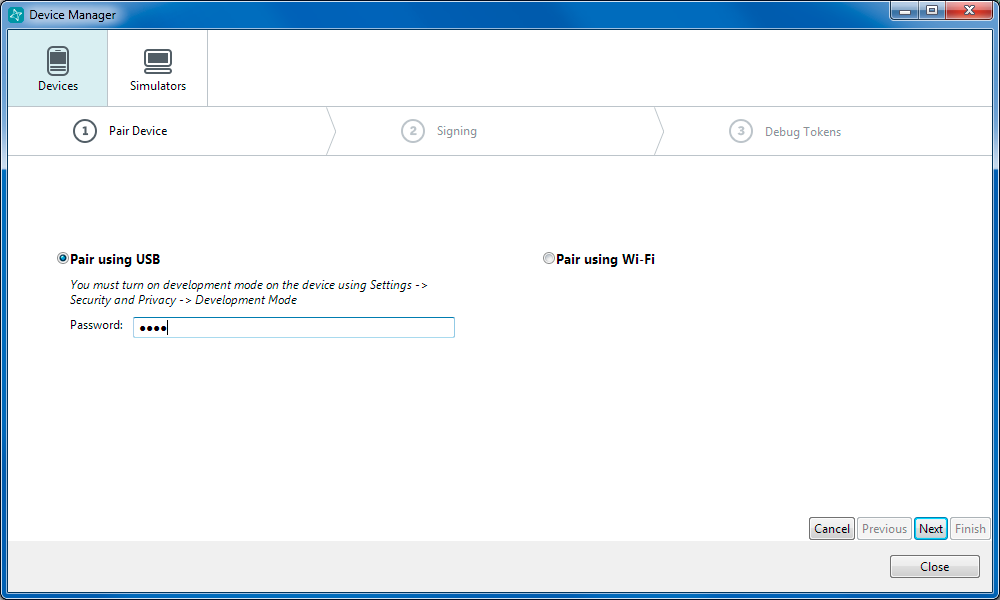
Now that your device is ready in development mode, connect your BB10 device to your PC using a USB cable.
Back in the IDE, type in your device
password and click the
Next button to begin the pairing process.
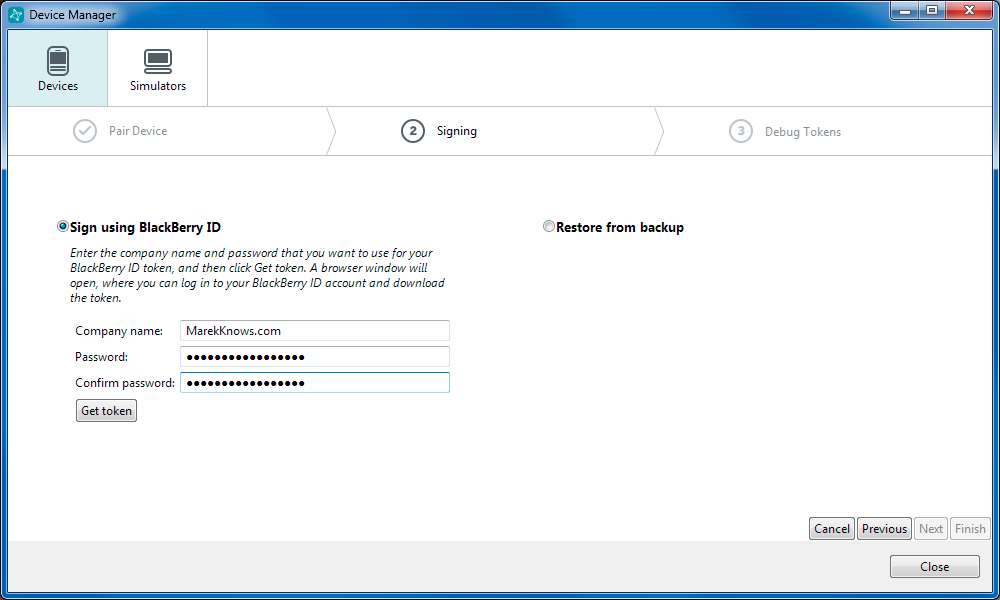
After your device is paired with the IDE, you need to sign into your BlackBerry ID account so that you can generate a debug token. Fill in the input fields provided, and click the
Get token button.
A new dialog appears asking you to sign into your BlackBerry ID. If you don't have a BlackBerry ID account you can create a new one using the link at the bottom.
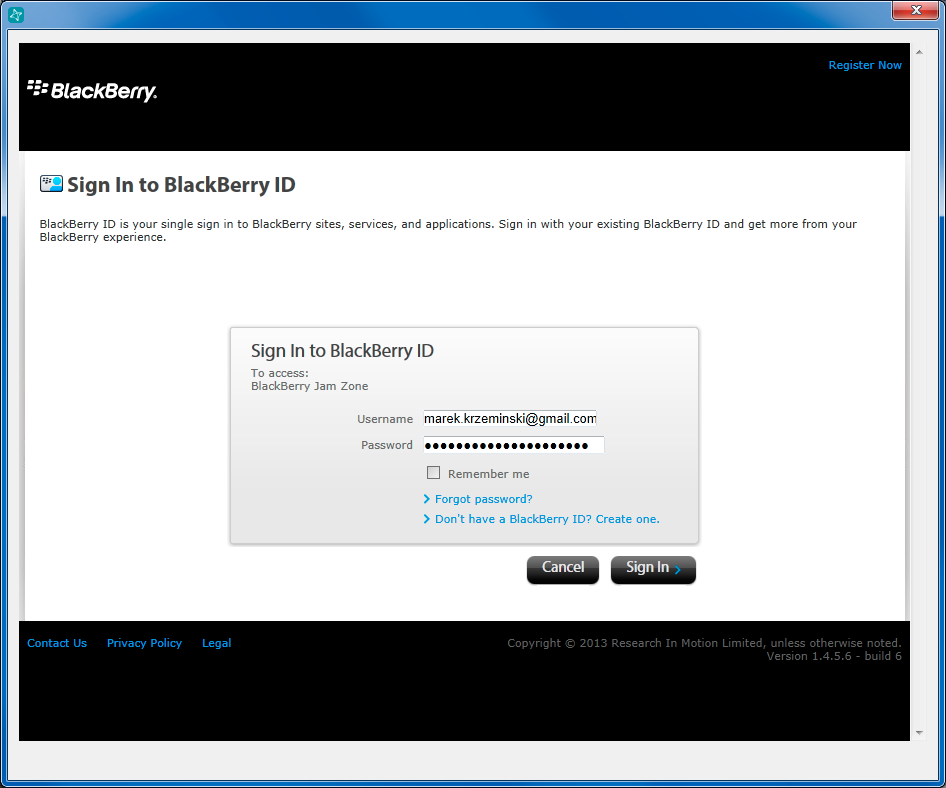
After you sign into your account, you will be brought back to the IDE when your BlackBerry ID token has been successfully downloaded. Click the
Next button.
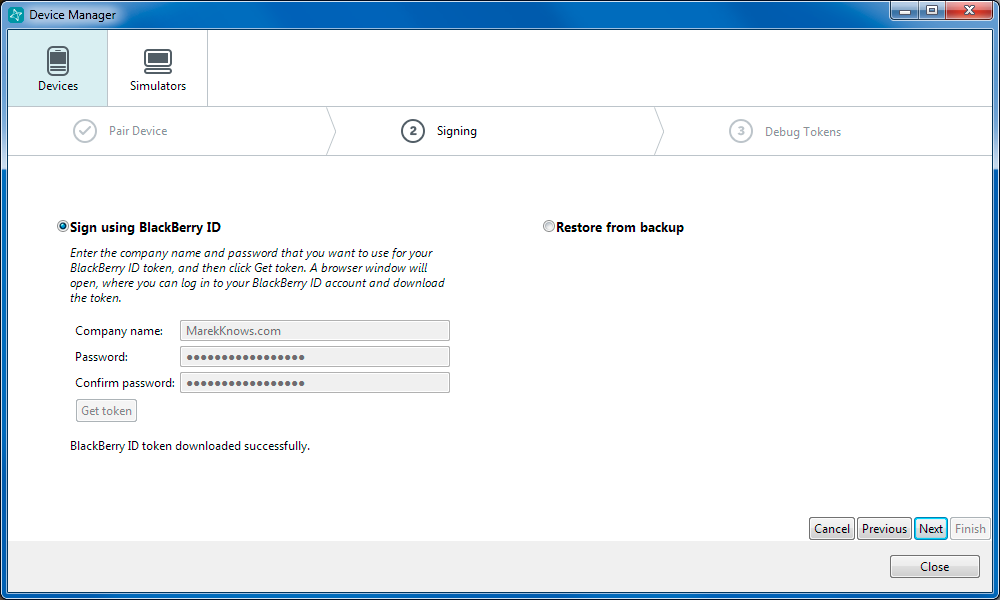
You'll be back at the Device Manager dialog now with your newly listed BB10 device as "
usb_1". The IDE will detect if you are missing any debug symbols and ask you to download them from the Internet. Click "
Yes" and wait for them to download.
If you go back to your BB10 device and look in the Development Mode section, you should see that a debug token has been installed on your device.
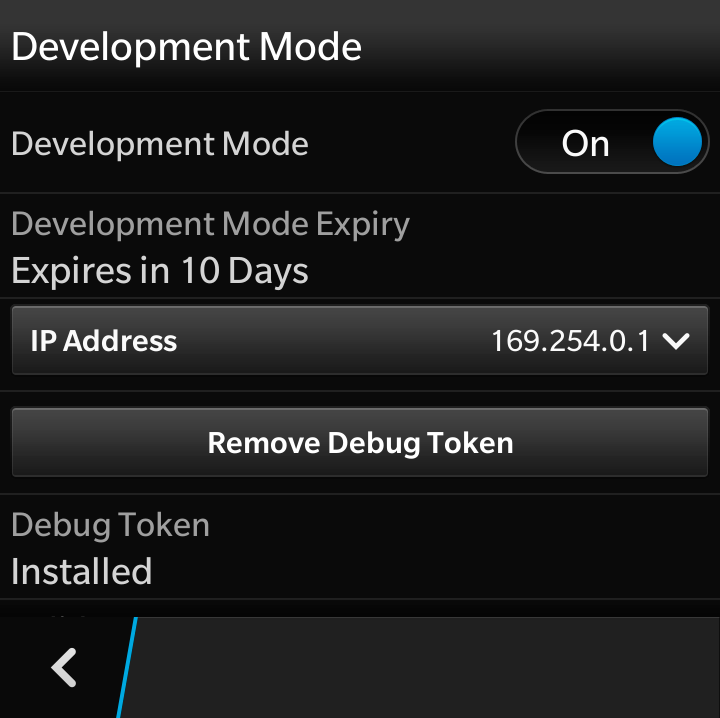
A debug token is good for 10 days. This means if you install and run an app from the IDE on to your device, you will be able to use the app for only 10 days. After that, the app will become disabled. The IDE automatically updates the token on your device every time you run an app through the IDE. When you finish creating an app and you are ready to distribute it, you will want to create a final release which will be signed by your BlackBerry signing keys. Devices that don't have your debug token installed will not be able to run your app.
Ok, after your BlackBerry device is paired with the IDE and you have the debug symbols installed (note, it is always a good idea to restart the IDE after installing new symbols or a new API level) then you can run your app from the IDE on your BB10 device.
In the IDE, select
usb_1 from the drop down list.
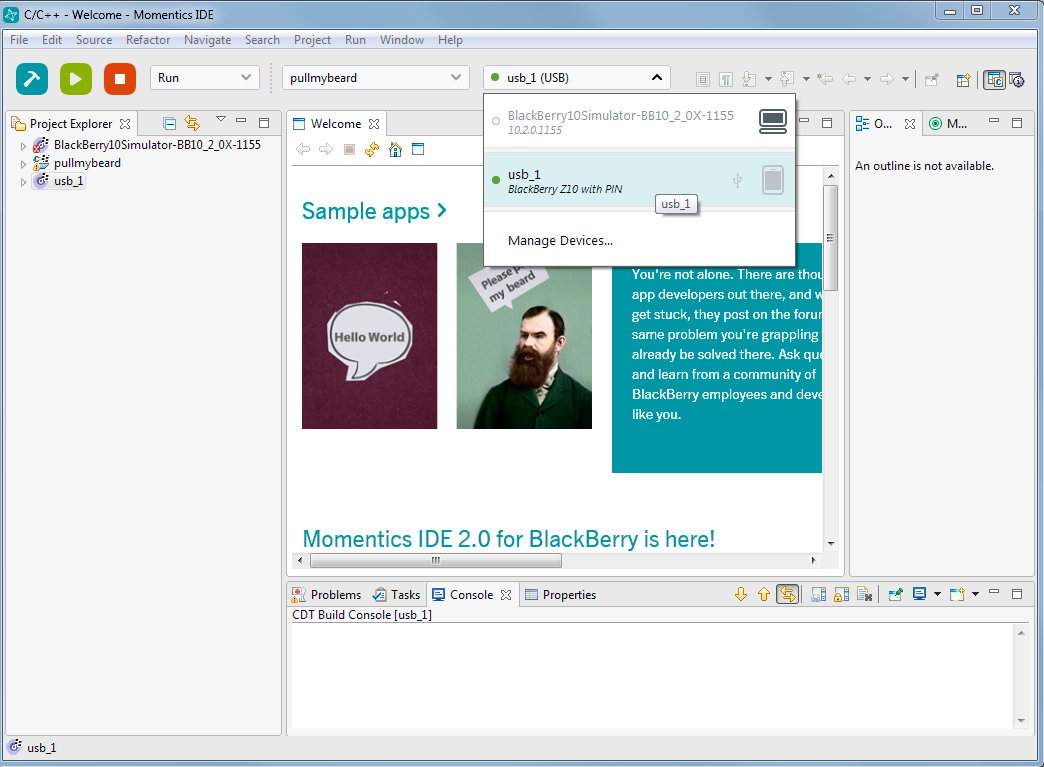
Now press the blue build button to build the app code, and then click the green run button to install and run the app on your device.
To see what happens when your debug token expires, go back to the Developer Mode options and click the "
Remove Debug Token" button.
Now try to run the Pull My Beard app from the app grid on your BB10 device and you'll notice that the app fails to launch.
Creating a Release Run
After you've fully tested your app and cleaned up any bugs you are ready to create a release version of your app. This is the version that you can upload to BlackBerry World to distribute to people around the world. The release version is signed by your BlackBerry signing keys and it doesn't depend on the debug token that expires after 10 days.
To create a release build, use the drop down menu and choose "
Release Run".
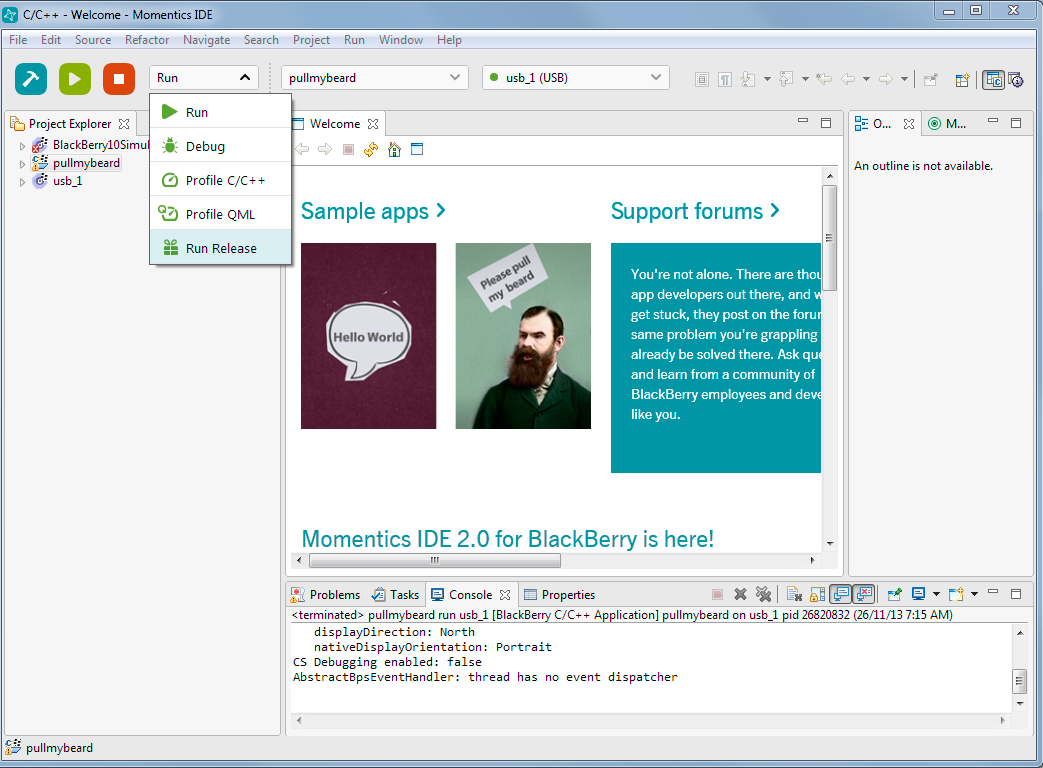
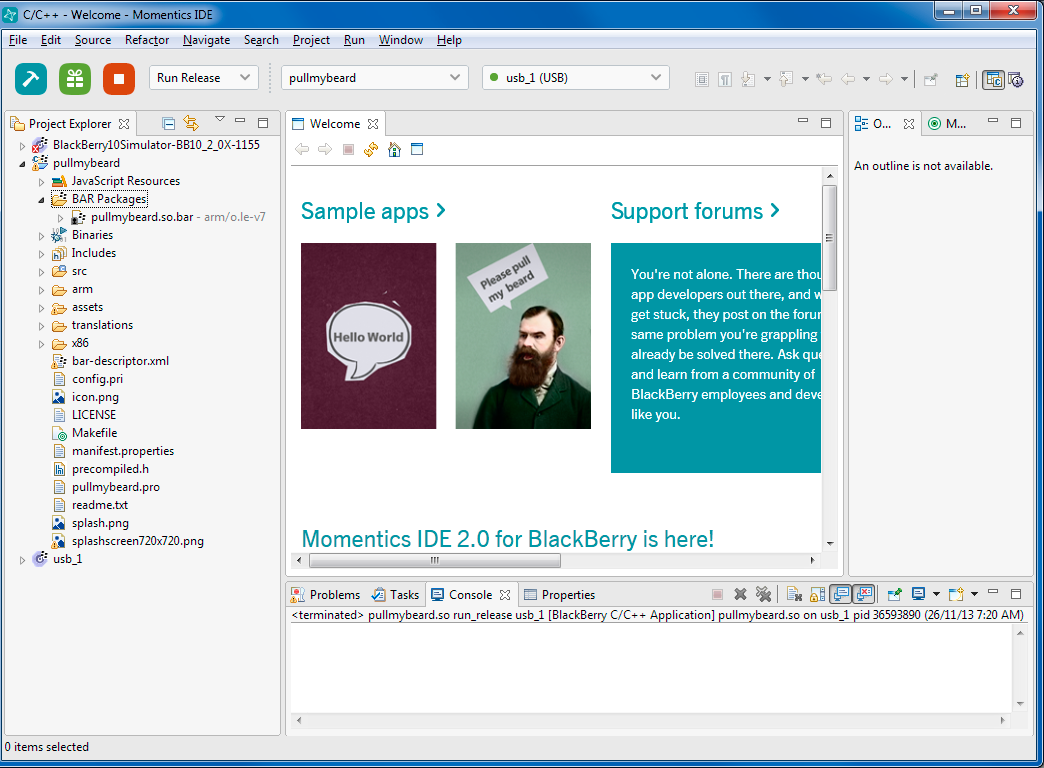
Select your app in the second drop down menu and click the build button. After the app is finished building you will see a new category under your app name in the Project Explorer called "
BAR Packages". This is the bar file that contains your BB10 installation files that can be installed on anyone's BB10 device.
A bar file is just a zip file containing all the files that are needed to run your app. You can open a bar file in any zip file extractor program if you are interested in seeing what is inside it.
Conclusion
There you have it, I covered how to install the Momentics IDE on a PC and how to get it up and running for development using Cascades. We downloaded and installed the BlackBerry 10 simulator and saw how to control it using a separate Controller application. We then looked at how to download a sample application and import it into the IDE. We learned how to build and run a BB10 Cascades application on both the BB10 Simulator and on a real BB10 device. Along the way I hope you learned a few tips on how to view the BB10 file system, monitor memory usage of applications running on your device and also how to work with debug tokens and release builds.
If you are looking for detailed documentation on Cascades, the programming language used for native BB10 development, then have a look here: https://developer.blackberry.com/native/documentation/cascades/
If you have any questions or comments about this lesson send me an email, I'm interested to hear what you thought of it. Also if you have suggestions for additional BB10 lessons send them along to me!
Article Update Log
18 Feb 2014: Initial release

