Taking Advantage of the Wii Remote
I just mentioned that we would start taking a look at using the Wii remote more as it is used in commercial games. What does that mean exactly? One of the reasons the Wii is so popular and exciting and fun for people of all ages is that playing games on the Wii requires you to move in realistic ways; ways that simulate real life. In other words, playing a bowling game, for example, on the Wii is much more like bowling in real life than playing the same game on a traditional gaming console. This is because bowling on the Wii actually requires you to move as if you are indeed bowling. Of course, you may already know this. It might even be the reason you decided to get a Wii in the first place.
So how do you mimic that same interactivity in Flash? Though you can't tap into the Wii remote's motion sensors, you can do a lot to mimic them. For example, you'll build a hammer and nail game in this chapter. In the game, you'll have a hammer move up and down to pound in a nail when you move the Wii remote up and down. That way, the Wii remote acts as a pseudo-hammer while you're playing the game. You'll create the interactivity for the game using invisible buttons and simple mouse interactivity.
Exercise 5-1: Viewing the Flash File
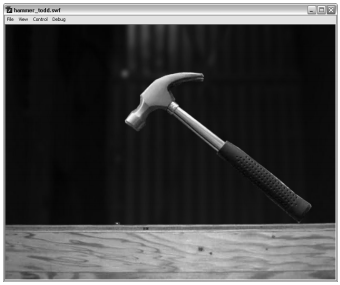
Before you start writing the code to create the game, take a look at how the .FLA file is set up. I'll also talk briefly about adding photos to a Flash application.
- In the exercise files, locate hammer.fla.
- Open the file in Flash and save it as hammer_{your name}.fla.
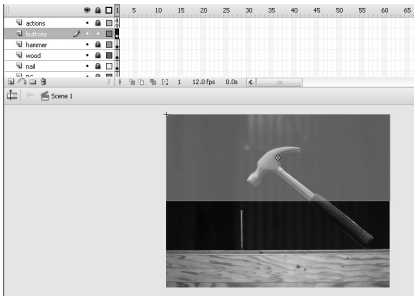
- Notice there are five layers: actions, hammer, wood, nail, and BG.
- Hide and unhide the layers to view the content on each layer. Notice that the layers contain some photos. Also notice the instance name of the hammer movie clip is hammer_mc, and the instance name of the nail is nail_mc.
- NOTE: You can import JPEG, GIF, or PNG files into Flash using File | Import | Import To Stage or File | Import | Import To Library. Once you import a bitmap graphic, that graphic is stored in your Library. To place the bitmap on the Stage, click and drag it from the Library, just like any other Library item. You can place a bitmap inside a movie clip or graphic symbol and animate it using motion tweens just as you would animate a movie clip or graphic symbol.
- Notice in the Library there are four bitmap graphics (photos) and two movie clips.
- Double-click the mcHammer movie clip symbol icon in the Library to enter its Timeline. If you expect to see an image of an early '90s hip-hop star, you may be disappointed. On the Stage inside the mcHammer movie clip, you'll see a bitmap graphic of a hammer. When you select the graphic, you will see a gray outline (as shown next), which is an indicator in Flash that you have a bitmap selected.
-

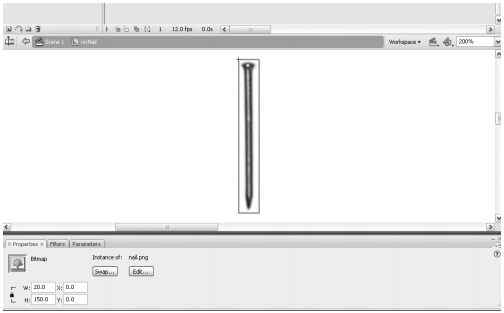
- View the nail movie clip in the Library by double-clicking the movie clip symbol for mcNail. Notice that this movie clip also contains a bitmap graphic.
-
- Click Scene 1 in the Timeline to return to the Main Timeline.
- Keep the file open for the next exercise.
Understanding Invisible Buttons
Invisible buttons are simply regular buttons with no up state. Sometimes, invisible buttons have over or down states, but typically invisible buttons only have a hit state. Invisible buttons are a handy tool in creating Wii games in Flash, because they allow you to add interactivity without adding any graphics.
You can create invisible buttons in Flash in a few ways. One way, which is the most common, is to draw the hit area of your button first. Then, you can convert it to a button symbol, and simply drag the Up state keyframe of the button to the Hit state keyframe. On the Stage, an invisible button has a semitransparent cyan color. The following illustration shows an invisible button on the stage.
Exercise 5-2: Creating Invisible Buttons
In this exercise, you'll create invisible buttons for your game.
- Make sure you are working in the same file from the last exercise.
- In the Main Timeline, select the hammer layer and click the Insert Layer button to create a new layer.
- Name the new layer buttons.
- On the buttons layer, draw a black rectangle with no stroke.
- With the rectangle selected, type the following values in the Property Inspector: X:0, Y:0, W:790, H:305.
-
- With the rectangle still selected, press F8 on your keyboard to open the Convert To Symbol dialog box. There, choose Button for the type, name the button btnInvis, choose top left for Registration, and click OK.
- In the Library, double-click the btnInvis symbol's Button Symbol icon to enter its Timeline.
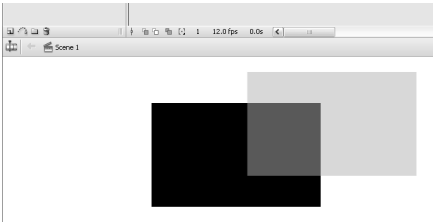
- Now, you'll make this button an invisible button. Inside the btnInvis button, make sure no frames are selected by clicking in the Pasteboard (gray area away from the shape on the Stage). Then, click and drag the keyframe on frame 1 (the frame with the word "up" above the frame) to the Hit frame, as shown here.
-
- At the bottom of the Timeline, click Scene 1 to return to the Main Timeline. It may be difficult to tell in the following illustration, but the button on the Stage is now a transparent cyan color, indicating it's an invisible button. Nice!
-
- With the Selection tool selected, press and hold ALT (Windows) or OPTION (Mac) on your keyboard and click and drag the button on the Stage to create a copy.
- Make sure the copied button is selected. In the Align panel, check the To Stage button. Then click the Align Left Edge button to align the left edge of the button to the left edge of the Stage, and click the Align Bottom Edge button to align the bottom edge of the button to the bottom of the Stage.
- Select the top button, and in the Property Inspector name the button top_btn. Select the bottom button and in the Property Inspector name the button bottom_btn.
- Save the file, and keep it open for the next exercise.
Exercise 5-3: Using Invisible Buttons
In this exercise, you'll add interactivity to the invisible buttons you created to make the hammer swing up and down and pound the nail into the wood.
- Make sure you are working in the same file from the last exercise.
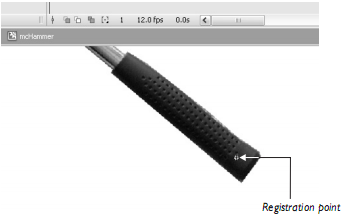
- In the Library, double-click the mcHammer movie clip to enter its Timeline. If you are having trouble selecting the mcHammer movie clip, you can lock the buttons layer so that you won't have to worry about accidentally selecting one of the buttons.
- Inside the mcHammer movie clip, notice the registration point is near the bottom right of the hammer, as shown here. This is the rotation point for this movie clip. Because the registration point is there, the hammer will rotate around that point. If the rotation point of the hammer were at the top left, the hammer would rotate around its top-left corner.
-
- At the bottom of the Timeline, click the Scene 1 button to return to the Main Timeline.
- In the Main Timeline, select the first keyframe of the actions layer and open the Actions panel.
- In the DECLARE VARIABLES AND CREATE OBJECTS section of code, create a variable called bashAmt, with a data type of Number and a value of 15. This variable will represent how much the nail will move down when hit by the hammer. Your code should match the code that follows (new code is bold): // DECLARE VARIABLES AND CREATE OBJECTS var bashAmt:Number = 15;
- On the next line, create a variable called rotateAmt, with a data type of Number and a default value of -15. This variable will represent the amount the hammer rotates when it swings. The value is negative because the hammer will swing by rotating counterclockwise. If the value were positive, the hammer would rotate clockwise. // DECLARE VARIABLES AND CREATE OBJECTS var bashAmt:Number = 15; var rotateAmt:Number = -15;
- In the DEFINE EVENT HANDLERS section of code, create the skeleton of an onRollOver event handler for the bottom_btn button. // DEFINE EVENT HANDLERS bottom_btn.onRollOver = function():Void { }
- Inside the event handler you just created, write the code that rotates the hammer by setting its rotation equal to the rotateAmt variable's value. bottom_btn.onRollOver = function():Void { hammer_mc._rotation = rotateAmt; }
- On the next line, move the nail down by the amount held in the bashAmt variable. bottom_btn.onRollOver = function():Void { hammer_mc._rotation = rotateAmt; nail_mc._y += bashAmt; }
- On the next line, update the rotateAmt variable by decreasing its value by bashAmt divided by 7. This will make the hammer rotate a little more each time it hits the nail. bottom_btn.onRollOver = function():Void { hammer_mc._rotation = rotateAmt; nail_mc._y += bashAmt; rotateAmt -= bashAmt / 7; }
- NOTE: You may be wondering where the number 7 came from. This number actually came from a trial and error process when I initially created the game. At the end of this exercise, you can change this number to modify the change in rotation amount for the hammer if you'd like to see what a different value would look like.
- Below the bottom_btn.onRollOver event handler, define the skeleton of an onRollOver event handler for the top_btn button. top_btn.onRollOver = function():Void { }
- Inside the top_btn.onRollOver event handler you just created, reset the value of the hammer's rotation to zero. This will make the hammer move up when the mouse (or Wii remote) rolls over the top button. top_btn.onRollOver = function():Void { hammer_mc._rotation = 0; }
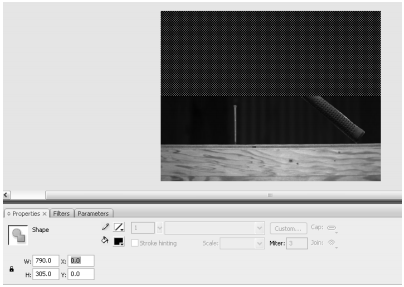
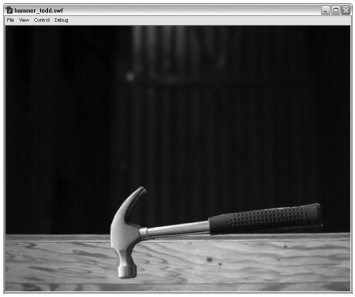
- Test the movie, and move your mouse up and down to swing the hammer. Sweet! Well, almost sweet. Notice that the nail goes through the wood and the hammer keeps rotating, which looks a little fake. You'll fix that in the next exercise.
-
- Save the file, and keep it open for the next exercise.
Exercise 5-4: Winning the Game
In this exercise, you'll stop the nail from going too far into the wood and disable the interactivity of the hammer once the game is over.
- Make sure you are working in the same file from the last exercise.
- Hide the buttons layer, and unlock the nail layer if it's locked.
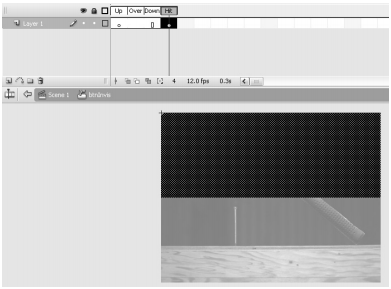
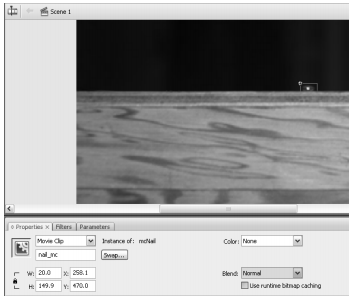
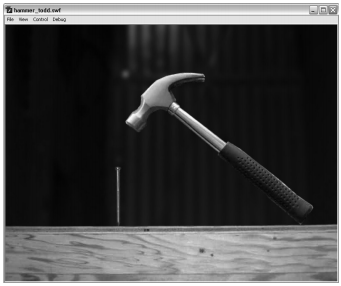
- On the nail layer, using the Selection tool, move the nail down until it looks as if it is all the way in the wood, as shown next. Then, note the Y position of the nail in the Property Inspector. You'll use this value later.
- Select the first keyframe of the actions layer and open the Actions panel.
- In your code, at the bottom of the DECLARE VARIABLES AND CREATE OBJECTS section, create a new variable called nailIn, with a data type of Number and a value of 470. This value will represent the value of the nail when it is fully hammered in, and is the same value you got when you moved the nail earlier in this exercise. var bashAmt:Number = 15; var rotateAmt:Number = -15; var nailIn:Number = 470;
- At the bottom of the bottom_btn.onRollOver event handler, create the skeleton of a conditional statement that checks to see if the Y position of the nail is greater than or equal to the value of the nailIn variable. bottom_btn.onRollOver = function():Void { hammer_mc._rotation = rotateAmt; nail_mc._y += bashAmt; rotateAmt -= bashAmt / 7; if(nail_mc._y >= nailIn) { } }
- Inside the conditional statement you just created, set the nail's Y position equal to the nailIn variable's value. This will stop the nail from moving too far down. bottom_btn.onRollOver = function():Void { hammer_mc._rotation = rotateAmt; nail_mc._y += bashAmt; rotateAmt -= bashAmt / 7; if(nail_mc._y >= nailIn) { nail_mc._y = nailIn; } }
- On the next line of code, disable the interactivity for the bottom_btn button using the button's enabled property. bottom_btn.onRollOver = function():Void { hammer_mc._rotation = rotateAmt; nail_mc._y += bashAmt; rotateAmt -= bashAmt / 7; if(nail_mc._y >= nailIn) { nail_mc._y = nailIn; bottom_btn.enabled = false; } }
- Test the movie, and pound that nail into the wood. Notice the nail stays where it belongs and the hammer stops rotating after you hammer the nail all the way in. Cool! All that you have left to do now is to make a way to play the game multiple times.
-
- Save the file, and keep it open for the next exercise.
Exercise 5-5: Playing the Game Again
Now that the game works, you'll make the game playable multiple times.
- Make sure you are working in the same file from the last exercise.
- Select the first keyframe of the actions layer and open the Actions panel.
- At the bottom of the DEFINE VARIABLES AND CREATE OBJECTS section of your code, create a new variable called nailOut, with a data type of Number and a value of the nail's current Y position. var bashAmt:Number = 15; var rotateAmt:Number = -15; var nailIn:Number = 470; var nailOut:Number = nail_mc._y;
- At the bottom of the DEFINE EVENT HANDLERS section of your code, create the skeleton of an onPress event handler for the top_btn button. top_btn.onPress = function():Void { }
- Inside the event handler you just created, reset the value of the rotateAmt variable to be -15. top_btn.onPress = function():Void { rotateAmt = -15; }
- On the next line, re-enable the bottom_btn button using its enabled property. top_btn.onPress = function():Void { rotateAmt = -15; bottom_btn.enabled = true; }
- On the next line, reset the nail's Y position to the value held inside the nailOut variable. top_btn.onPress = function():Void { rotateAmt = -15; bottom_btn.enabled = true; nail_mc._y = nailOut; }
- Test the movie, and pound! Once the game is finished, click the top of the screen to start the game over again. Nice!
Another Game Complete!
Congratulations, you just finished another game! Though the gamewas fairly simple to create, it takes much more advantage of the Wii remote than the other games you've created. Once you upload this game to a web server and play it on your Wii, the Wii remote will act as a hammer as you play the game. In other words, swinging the hammer in the game will actually be pretty close to swinging a hammer in real life.
Now that you're familiar with using the Wii remote in a similar way to how it is used in commercial Wii games, we'll start building games with more complex interactivity.
For more on this book and to purchase from Amazon, visit its book page in our Library


