Introduction
If you've been looking into terrain texturing techniques, you've probably heard about texture splatting. The term was coined by Charles Bloom, who discussed it at http://www.cbloom.com/3d/techdocs/splatting.txt. With no disrespect to Charles Bloom, it was not the most clear or concise of articles, and has left many confused in its wake. While many use and recommend it, few have taken the time to adequately explain it. I hope to clear up the mystery surrounding it and demonstrate how to implement it in your own terrain engine.
The Basics
What is texture splatting? In its simplest form, it is a way to blend textures together on a surface using alphamaps.
I will use the term alphamap to refer to a grayscale image residing in a single channel of a texture. It can be any channel - alpha, red, green, blue, or even luminance. In texture splatting, it will be used to control how much of a texture appears at a given location. This is done by a simple multiplication, alphamap * texture. If the value of a texel in the alphamap is 1, that texture will appear there in full value; if the value of a texel in the alphamap is 0, that texture will not appear there at all.
For terrain, the texture might be grass, dirt, rock, snow, or any other type of terrain you can think of. Bloom refers to a texture and its corresponding alphamap as a splat. An analogy would be throwing a glob of paint at a canvas. The splat is wherever you see that glob. Multiple globs of paint layered on top of each other create the final picture.
Let's say you have a 128x128 heightmap terrain, divided into 32x32 chunks. Each chunk would then be made up of 33x33 vertices. Each chunk has the base textures repeated several times over it - but the alphamap is stretched over the entire area. (0, 0) of the chunk would have alphamap coordinates of (0, 0) and texture coordinates of (0, 0). (33, 33) of the chunk would have alphamap coordinates of (1, 1) and texture coordinates of (x, x), where x is the number of times you want the textures to be repeated. x will depend on the resolution of the textures. Try to make sure they repeat enough to make detail up close, but not so much that the repetition is obvious from far away.
The resolution of your alphamap per chunk is something you need to decide for yourself, but I recommend powers of two. For a 32x32 chunk, you could have a 32x32 alphamap (one texel per unit), a 64x64 alphamap (two texels per unit), or even a 128x128 alphamap (four texels per unit). When deciding what resolution to use, remember that you need an alphamap for every texture that appears on a given chunk. The higher the resolution is, the more control over the blending you have, at the cost of memory.
The size of the chunk is a little trickier to decide. Too small and you will have too many state changes and draw calls, too large and the alphamaps may contain mostly empty space. For example, if you decided to create an alphamap with 1 texel per unit with a chunk size of 128x128, but the alphamap only has non-zero values in one small 4x4 region, 124x124 of your alphamap is wasted memory. If your chunk size was 32x32, only 28x28 would be wasted. This brings up a point: if a given texture does not appear at all over a given chunk, don't give that chunk an alphamap for that texture.
The reason the terrain is divided into chunks is now apparent. Firstly, and most importantly, it can save video memory, and lots of it. Secondly, it can reduce fillrate consumption. By using smaller textures, the video card has less sampling to do if the texture does not appear on every chunk. Thirdly, it fits into common level of detail techniques such as geomipmapping that require the terrain to be divided into chunks anyway.
Creating the Blends
The key to getting smooth blending is linear interpolation of the alphamaps. Suppose there is a 1 right next to a 0. When the alphamap is stretched out over the terrain, Direct3D creates an even blend between the two values. The stretched alphamap is then combined with terrain texture, causing the texture itself to blend.
Rendering then becomes the simple matter of going through each chunk and rendering the splats on it. Generally, the first splat will be completely opaque, with the following splats having varying values in their alphamaps. Let me demonstrate with some graphics. Let's say the first splat is dirt. Because it is the first that appears on that chunk, it will have an alphamap that is completely solid.
 *
*  =
= 
After the first splat is rendered, the chunk is covered with dirt. Then a grass layer is added on top of that:
 *
*  =
= 
 +
+  =
= 
The process is repeated for the rest of the splats for the chunk.
It is important that you render everything in the same order for each chunk. Splat addition is not commutative. Skipping splats won't cause any harm, but if you change the order around, another chunk could end up looking like this:
 +
+  =
= 
The grass splat is covered up because the dirt splat is completely opaque and was rendered second.
You may be wondering why the first splat should be opaque. Let's say it wasn't, and instead was only solid where the grass splat was clear. Here's what happens:
 +
+  =
= 
It's obvious this does not look right when compared with the blend from before. By having the first splat be completely opaque, you prevent any "holes" from appearing like in the picture above.
Creating the Alphamaps
Now that we know what texture splatting is, we need to create the alphamaps to describe our canvas. But how do we decide what values to give the alphamaps?
Some people base it off of terrain height, but I recommend giving the ability to make the alphamaps whatever you want them to be. This gives you the flexibility to put any texture wherever you want with no limitations. It's as simple as drawing out the channels in your paint program of choice. Even better, you could create a simple world editor that allows the artist to see their alphamap and interact with it in the actual world.
Implementation
Let's take a step back and look at what we have:
- Some sort of terrain representation, such as a heightmap
- A set of textures to be rendered on the terrain
- An alphamap for each texture
Look at #3. We know that each alphamap has to be in a texture. Does this mean that every alphamap needs its own texture? Thankfully, the answer is no. Because the alphamap only has to be in a single channel of a texture, we can pack up to four alphamaps into a single texture - one in red, one in green, one in blue, and one in alpha. In order to access these individual channels we will need to use a pixel shader, and because we need five textures (one with the alphamaps and four to blend), PS 1.4 is required. Unfortunately this is a still stiff requirement, so I will show how to use texture splatting with the fixed function pipeline as well as with a pixel shader.
Splatting with the Fixed Function Pipeline
Using the fixed function pipeline has one benefit that the pixel shader technique lacks: it will run on virtually any video card. All it requires is one texture unit for the alphamap, one texture unit for the texture, and the correct blending states.
I chose to put the alphamap in stage 0 and the texture in stage 1. This was to stay consistent with the pixel shader, which makes most sense with the alphamap in stage 0. The texture stage states are relatively straightforward from there. Stage 0 passes its alpha value up to stage 1. Stage 1 uses that alpha value as its own and pairs it with its own color value.
// Alphamap: take the alpha from the alphamap, we don't care about the color
g_Direct3DDevice->SetTextureStageState(0, D3DTSS_ALPHAOP, D3DTOP_SELECTARG1);
g_Direct3DDevice->SetTextureStageState(0, D3DTSS_ALPHAARG1, D3DTA_TEXTURE);

// Texture: take the color from the texture, take the alpha from the previous stage
g_Direct3DDevice->SetTextureStageState(1, D3DTSS_COLOROP, D3DTOP_SELECTARG1);
g_Direct3DDevice->SetTextureStageState(1, D3DTSS_COLORARG1, D3DTA_TEXTURE);
g_Direct3DDevice->SetTextureStageState(1, D3DTSS_ALPHAOP, D3DTOP_SELECTARG1);
g_Direct3DDevice->SetTextureStageState(1, D3DTSS_ALPHAARG1, D3DTA_CURRENT);
We have to set the blending render states as well in order to get the multiple splats to combine together correctly. D3DRS_SRCBLEND is the alpha coming from the splat being rendered, so we set it to D3DBLEND_SRCALPHA. The final equation we want is FinalColor = Alpha * Texture + (1 - Alpha) * PreviousColor. This is done by setting D3DRS_DESTBLEND to D3DBLEND_INVSRCALPHA.
g_Direct3DDevice->SetRenderState(D3DRS_ALPHABLENDENABLE, TRUE);
g_Direct3DDevice->SetRenderState(D3DRS_SRCBLEND, D3DBLEND_SRCALPHA);
g_Direct3DDevice->SetRenderState(D3DRS_DESTBLEND, D3DBLEND_INVSRCALPHA);
Splatting with a Pixel Shader
Why even bother with the pixel shader? Using all the channels available in a texture instead of only one saves memory. It also allows us to render four splats in a single pass, reducing the number of vertices that need to be transformed. Because all of the texture combining takes place in the shader, there are no texture stage states to worry about. We just load the texture with an alphamap in each channel into stage 0, the textures into stages 1 through 4, and render.
ps_1_4

////////////////////////////////
// r0: alphamaps
// r1 - r4: textures
////////////////////////////////

// Sample textures
texld r0, t0
texld r1, t1
texld r2, t1
texld r3, t1
texld r4, t1

// Combine the textures together based off of their alphamaps
mul r1, r1, r0.x
lrp r2, r0.y, r2, r1
lrp r3, r0.z, r3, r2
lrp r0, r0.w, r4, r3
The mul instruction multiplies the first texture by its alphamap, which is stored in the red channel of the texture in sampler 0. The lrp instruction does the following arithmetic: dest = src0 * src1 + (1 - src0) * src2. Let's say r0.x is the alphamap for a dirt texture stored in r1, and r0.y is the alphamap for a grass texture stored in r2. r2 contains the following after the first lrp: GrassAlpha * GrassTexture + (1 - GrassAlpha) * DirtBlended, where DirtBlended is DirtAlpha * DirtTexture. As you can see, lrp does the same thing as the render states and texture stage states we set before. The final lrp uses r0 as the destination register, which is the register used as the final pixel color. This eliminates the need for a final mov instruction.
What if you only need to render two or three splats for a chunk? If you want to reuse the pixel shader, simply have the remaining channels be filled with 0. That way they will have no influence on the final result. You could also create another pixel shader for two splats and a third for three splats, but the additional overhead of more SetPixelShader calls may be less efficient than using an extra instruction or two.
Multiple passes are required if you need to render more than four splats for a chunk. Let's say you have to render seven splats. You first render the first four, leaving three left. The alpha channel of your second alphamap texture would be filled with 0, causing the fourth texture to cancel out in the equation. You simply set the alphamap texture and the three textures to be blended and render. The D3DRS_BLEND and D3DRS_SRCBLEND stages from before perform the same thing as the lrp in the pixel shader, allowing the second pass to combine seamlessly with the first.
The Demo
The demo application uses the two techniques described here to render a texture splatted quad. I decided not to go for a full heightmap to make it as easy as possible to find the key parts in texture splatting. Because of this, the demo is completely fillrate limited. The initial overhead of the pixel shader may cause some video cards to perform worse with it than with its fixed function equivalent, so take the frame rates with a grain of salt. The pixel shader will almost always come out ahead in a more complex scene.
You can toggle between the fixed function pipeline and the pixel shader through the option in the View menu.
The textures used are property of nVidia(R) and are available in their full resolution at http://developer.nvidia.com/object/IO_TTVol_01.html.
The Problem of Seams
If texture splatting has a downfall, it is this: when two neighboring splats come together, an unattractive seam forms between them. The look can be recreated by tiling four of the example splats from before.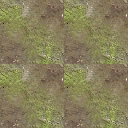
Why does this happen? Let's look at the grass alphamap of the top two sections:


Here space has been added between them and the problem becomes apparent. The one on the left does not know the border values of the one on the right. When the video card performs its linear blend, it has no way of knowing that there is in fact a black texel right next to a white one. It simply assumes the same color is on the border.
This is not an easy problem to fix and many games leave it untouched. It can be disguised a little by properly wrapping textures and a skilled level designer, but I have not thought of an elegant solution. In my experience it has been more trouble than it's worth to solve this problem, and I believe the advantages of texture splatting far outweigh the issue.
Conclusion
Hopefully this article has cleared up the mystery behind texture splatting. There are, of course, enhancements to be made, but texture splatting in its basic form is a powerful and flexible technique. It creates a smooth blend between different layers of terrain while giving detail at any distance and avoids the patterned look a detail map can give. Its main disadvantage is that it is very fillrate consuming, but with video cards becoming ever more powerful and the abilities of pixel shaders increasing, this is not an issue on modern and future hardware. Its ease of use and flexibility make it a perfect choice for texturing your terrain.
Happy splatting!
Sources
Terrain Texture Compositing by Blending in the Frame-Buffer by Charles Bloom, http://www.cbloom.com/3d/techdocs/splatting.txt
And, of course, the helpful people at http://www.gamedev.net.
Feel free to send any questions or comments to email or private message @Raloth on the forums!