A lot of the times when working with custom game engines the UI has always been a struggle, both when it comes to usability and performance. To combat this I have worked a lot with GUI rendering in mind when structuring the engine, and with this article I want to share my results.
Important
- The focus in this article is the rendering
- We will be using Texture2DArray (DirectX 10 feature, pretty sure OpenGL has similar features)
- This article will not be a performance comparison with other UI libraries
- It is a result of working on a game
- No source code/download is available
- Some of source code tags will be in lua(ish) code because there is no lua syntax formatter the comments will be // instead of --
Ideas and Different GUI Styles
Immediate and Traditional Mode GUI
Immediate Mode GUI has grown to be quite common nowadays when it comes to realtime applications and for all the right reasons. It is easy to setup and easy to modify but it comes with a price.
// during render (or maybe update but never seen that)
// this will also be drawn in this function, so if we dont call this
// function the buttons does not exist anymore
do_button("my label", x, y, function() print("I got clicked") end)
Pros
- Easy to create, modify and remove without restarting etc..
- Really easy to make basic GUI elements
- Less amount of code to write
Cons
- Harder to maintain good ordering, so controls behind other controls could get activated instead
- Things that require some kind of state and a lot of input data get complicated to implement
- Input is usually delivered during game updates and not when rendering, can make for strange behavior when clicking stuff
- You tend to pay with performance for better usability
Traditional Mode GUI takes longer to setup and it is hard to change but it tends to be more stable and when it comes to advanced UI controls it can get tricky to implement with immediate mode.
// during some kind of init of a scene for example local
button = create_button("my label", x, y)
button:set_callback(function() print("I got clicked") end)

// later in render (this will draw all gui elements we have created)
draw_gui()
Pros
- You know about all your controls before you start to draw/update them
- Complicated controls with a lot of state and transformation/inheritance gets easier
- Input handling gets more natural and stable
Cons
- A lot more code needed
- Hard to modify
- Annoying to write and maintain (personal opinion)
For a simple control like a button both of the methods looks good, but for something like a scrollable listbox with a lot of items it can get messy really quick. The reason I wanted to bring this up is because when using the traditional method the draw_gui function knows about all the GUI elements that will be drawn so it can make optimizations like a better draw order and separate them into groups depending on state changes (texture switches) etc.. The immediate GUI kinda lacks in this department and when rendering a button with text on it, we cannot assume that we can render the button first and then the text later on in another batch.
Mixing Immediate Mode with Traditional Mode
Since I like the Immediate mode GUI but wanted to have the benefits of the non immediate as well I have created a mixed kinda style that allows me to create advanced listboxes, windows, inputboxes while still drawing them in immediate mode.
// here are two versions of the immediate mode that do require an id
// but the id just need to be unique per scene
ui_button("button-id", "my label", onclick):draw(x, y)
ui_button({id = "button-id", label = "my label", onclick = print}):draw(x, y)

// this is what you do if you want to create the button beforehand
// this becomes useful when dealing with listboxes and more advanced controls
local button = ui_button({label = "my_label", onclick = print})

// in both cases the control comes to life when calling the draw function
button:draw(x, y)
Doing the UI in this way gives us all the functionality from the immediate mode, except that if we stop rendering an element we could end up with some state associated with it, but it will disappear and does not receive any further input. So basically we have the per element drawing and control of an element, but we also have a state associated with each control so we can make more advanced controls. This state allows us to poll input in the update loop instead of when rendering, and we can do the hidden update in reverse rendering order giving us the ability to ignore elements hidden under something. While this is all good we still have the performance problem to tackle, we will do this by using extensive vertex buffering combined with texture arrays and texture sheets of specific sizes.
Technical Goals for the Mixed GUI
To create the Mixed UI system we need to achieve a few technical feats
- Being able to have good performance even when elements have a very strange draw order
- We cannot modify the draw order
- Text and sprites/textures must be rendered without switching shader or adding a new draw calls
To meet these requirements we can conclude that we need a 'pretty' good draw_rect routine that can have different properties and textures without creating new draw calls.
Texture Arrays
This is a relatively new feature that allows us to use different textures in a shader depending on an input index that can come from a constant buffer (this could be simulated with mega textures like 4096x4096) The restriction with a texture array is that all textures in it must have the same width, height and format, so to make it a bit easier to manage I created a texture pool that holds a separate texture array for each combination of (width, height and format). Then I can just query the texture pool using any texture and if that texture has not been used before and does not fit in any of the existing texture arrays, we create a new texture array and load the texture in it and return (id 0) along with binding the new texture array object. If we had asked to bind a second texture with the same size it would just leave the current texture array active but update it with the new texture and return (id 1) You could improve a lot upon this by merging smaller sized textures to a bigger one and add uv offsets, so you would end up with, let's say, mostly 1024x1024 textures in a long array.
Text Rendering
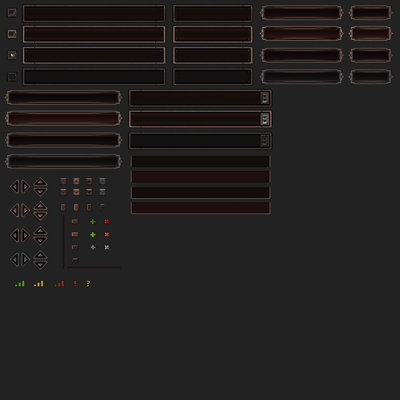
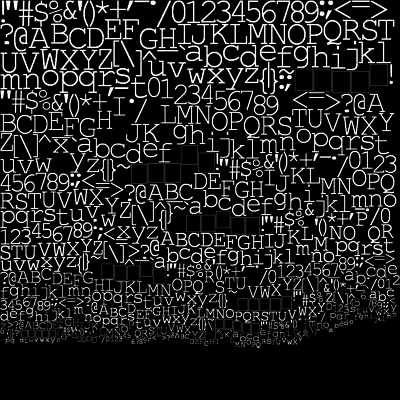
A specific font is stored on 1024x1024 texture and it contains all the different sizes packed as well. So for example calibri normal, bold and italic would be three 1024x1024 textures filled with glyphs rendered with various sizes. An example of a packed font with different sizes, this is far from optimal right now since you can pack bold and italic variants as well and have a better packing
GUI Rendering
This is working in the same way as font rendering by storing all the graphics on a single texture that is 1024x1024
Putting it all together
Putting the font and UI rendering together we get x amount of 1024x1024 textures that we can put in an array. Then, when we select what texture we want to use, instead of switching textures and creating a new draw call we just insert the texture index to a constantbuffer and with every vertex supply the the index in the constantbuffer that has information about which texture we want to use.
Results of Using the Mixed GUI Implementation
Since this article is aimed at the rendering part of the GUI implementation, I will not put any focus on how the buttons, inputboxes, listboxes, sliders etc... are working. Maybe in another article. This is an image I rendered from my engine that shows 100 buttons and 10 input boxes, the most interesting part is the number of draw calls made and the vertex count.
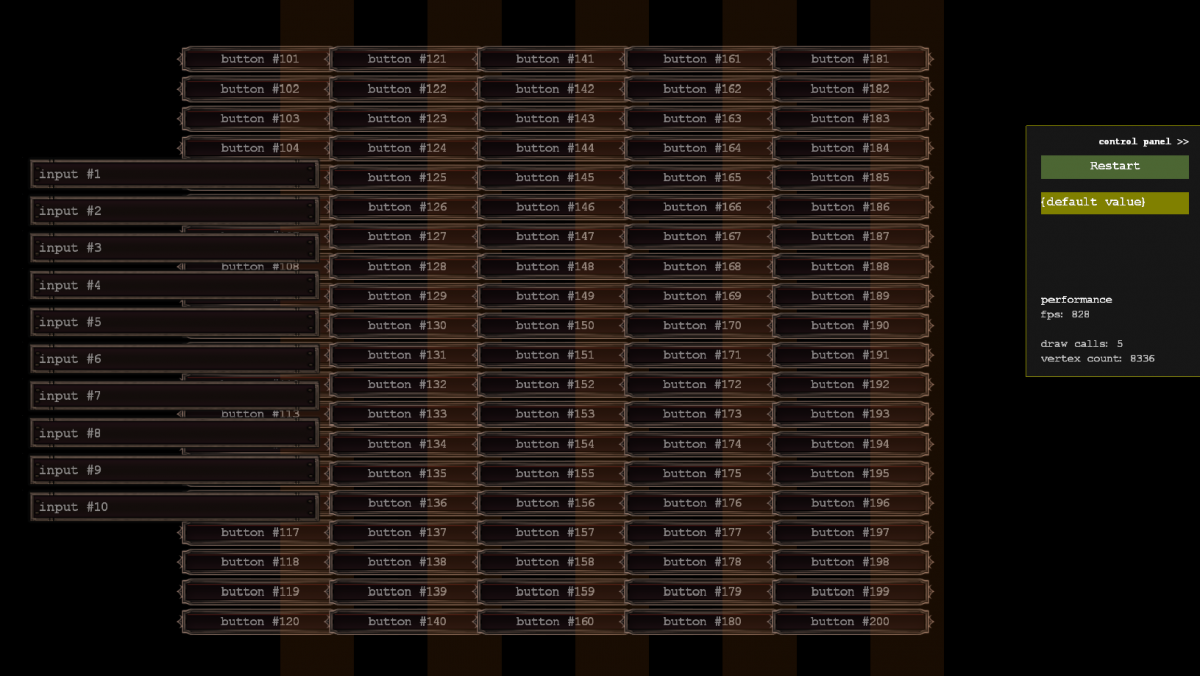
- draw calls for complete scene = 5
- vertex count for complete scene = 8336
Here you can see switching from different text sizes have no impact on draw calls either
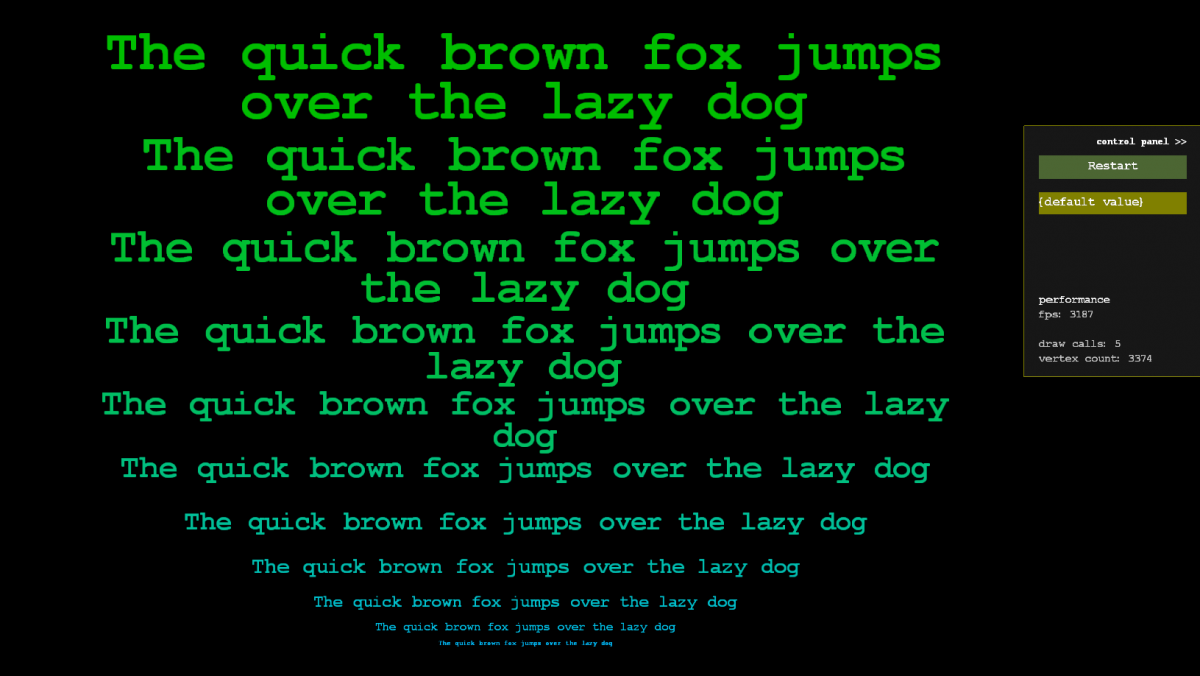
- draw calls for complete scene = 5 (same as before)
- vertex count for complete scene = 3374
This button & inputbox image was composed using code chunks like this one
// the push and pop is a stack system of render states and in this case
// it keeps the translation local to between them push()
for i = 1, 10, 1 do
	// this is the only place that knows about this textbox
	// it is not created in some init function, but we need the id
	// so it can keep track of itself the next time it gets drawn
	// after the first call the ui_textbox function will return the same
	// object
	ui_inputbox({id = i, value = string.format("input #%i", i)}):draw()

	// this will adjust each element 40 units down from the last one
	add_translation(0, 40)
end

pop()

// ui_textbox draw function would then look something like this
function draw(self)
	local width = self.width
	local height = self.height
	set_blend_color(1, 1, 1, 1)

	// set texture for complete gui texture sheet
	set_texture(gui_texture_id)
	draw_rect(...)

	// here the uv data would go in to grab the right part
	// set font, and this will trigger another
	set_texture internally
	set_text_font("arial.ttf")
	set_text_size(16)
	set_text_align(0, 0.5)

	// this function is essentialy just calling multiple
	// draw rects internally for each character to be drawn
	draw_text_area(text, 0, 0, width, height)
end
Implementation in C++ Using HLSL Shaders
Here we bind a texture object to the renderer and it will check in the active texture pool what texture is currently being used and either flush or just swap the active texture index
void IntermediateRenderer::bind_texture(Texture * texture)
{
	// this is a texture pool that contains several arrays of similar sized textures
	// lets say we want to bind texture A and that texture already exists in in the pool
	// then if we have a different array bounded we must flush but otherwise we just use
	// another index for the next operations since texture A was already in the
	// current active array texture
	auto mat = materials.get_active_state();
	if (texture == NULL)
	{
		// we dont need to unbind anything just reduce the impact of the texture to 0
		mat->texture_alpha = 0.0f;
	}
	else
	{
		unsigned int texture_index = 0;
		if (texture_pool.bind(texture, &texture_index, std::bind(&IntermediateRenderer::flush, this)))
		{
			// this means we flushed
			// this will start a new draw call
			// refresh the state, usually means we grab the first
			// material index again (0)
			mat = materials.get_active_state();
		}

		// just set the constant buffer values
		// and unless we flushed nothing will change
		// we will just continue to build our vertex buffer
		mat->texture_index = reinterpret_cast(texture_index);
		mat->texture_alpha = 1.0f;
	}
}
Since we do use bitmap font rendering we can use the same rendering function when drawing a letter, as when we would draw any other textured rect. So the next step would be to create a function to render this textured rect efficiently. Here is my implementation in c++ for rendering a simple rect. RECT_DESC just holds attributes like position, width, color and uv coordinates. It is also important to note that model_id and mat_id will be included in each vertex in the format DXGI_FORMAT_R8_UINT
void IntermediateRenderer::draw_rect(const RECT_DESC & desc)
{
	// this will switch what buffers we are pushing data to
	// so even if we switch from trianglelist to linelist
	// we dont need to flush but the rendering order will be wrong
	set_draw_topology(D3D11_PRIMITIVE_TOPOLOGY_TRIANGLELIST);

	// here we just get the currently active material and model states
	// model contains transformation data
	auto mat_id = materials.use_active_state();
	auto model_id = models.use_active_state();
	push_stream_ids(6, model_id, mat_id);

	// currently I am not using any index list, but might do in the future if I feel
	// I could benefit from it
	// its important to keep these sizes known at compile time
	// so we dont need to allocate temporary space on the heap somewhere
	Vector3 position_data[6] = {
		Vector3(desc.x, desc.y, 0),
		Vector3(desc.x + desc.width, desc.y, 0),
		Vector3(desc.x, desc.y + desc.height, 0),
		Vector3(desc.x, desc.y + desc.height, 0),
		Vector3(desc.x + desc.width, desc.y, 0),
		Vector3(desc.x + desc.width, desc.y + desc.height, 0)
	};

	Vector2 texcoord_data[6] = {
		Vector2(desc.u1, desc.v1),
		Vector2(desc.u2, desc.v1),
		Vector2(desc.u1, desc.v2),
		Vector2(desc.u1, desc.v2),
		Vector2(desc.u2, desc.v1),
		Vector2(desc.u2, desc.v2)
	};

	// i will switch this from float4 to an unsigned int
	// in the future so each vertex becomes much smaller
	// the desc.color_top and desc.color_bottom are already
	// uint32 formats
	Vector4 ctop(desc.color_top);
	Vector4 cbottom(desc.color_bottom);
	Vector4 color_data[6] = { ctop, ctop, cbottom, cbottom, ctop, cbottom, };

	// this will just copy in our stack data to the vertex buffers
	position_stream->push(position_data);
	texcoord_stream->push(texcoord_data);
	color_stream->push(color_data);
}
Then later in the shader we use the material id that is located in each vertex and lookup the material from the Material constant buffer.
// instead of a normal array, we use an array of textures
Texture2DArray Texture : register(t0);

// each material is 8 floats
struct Material
{
	float4 color;
	float texture_index;
	float texture_alpha;
	float a; // padding
	float b; // padding
};

// by having 256 different material at the same time
// we can draw 256 different entities in only one draw call
cbuffer MaterialBuffer : register(b0) { Material material[256]; };

struct Vertex
{
	float4 position : SV_Position;
	float3 vposition : Position0;
	float3 normal : Normal0;
	float2 uv : Texcoord0;
	float4 color : Color0;

	// this is how we control what material
	// to use for what vertex, its only 1 byte in size
	// for a value range of 0-255
	uint material_id : Color1;
};

Result main(Vertex input)
{
	// lookup material
	Material mat = material[input.material_id];

	// read from the right texture
	float4 texel = Texture.Sample(Sampler, float3(input.uv, mat.texture_index));

	//... rest of shader
}
Libraries used
Window and input was done just using WINAPI Font rendering was done using freetype2
Conclusion
I presented the theory and some code for my approach to render a real time GUI, this is far from everyone's need but I think it could prove useful to other engine tinkerers. By using Texture2DArray we created a system to prevent creating new draw calls when switching textures and by packing the fonts in the same manner as the GUI graphic we could draw text and art at the same time. I am well aware that this article does not include everything about the mixed immediate UI but if people are interested I might create an article about that as well.
I just want to say one last thing about performance, I have not made any comparisons to other libraries but I can use this system in a reasonably complex scene and have almost zero impact on frame time, this is of course using a reasonable UI as well.


You might want to switch away from normal text rendering and opt for SDF(signed distance field) fonts instead. Than all you need is one page of font data to render it in all sizes. It will also give you crisper glyphs in the rendering than minification and magnify between two glyph sizes, and you most likely end up with a smaller font texture:).
Also I would step away from texture based UI systems, because you can create nicer looking UIs with materials and proper shading effects on the object. This will most likely start to introduce a lot of instance rendering in the pipeline, in which case you generally end up with a similar drawcount.
One other note I noticed later on, you need to stay away from knowing x,y,z positions in the logical code of a UI widget, it should never know anything about the position of an element on screen. The logical side of a UI is allowed to send actions to the rendering side of UI, eg: button_down_action triggers button_down_animation, however this link is not specified through the logical button sending that specific animation.
Treat it like HTML and CSS where HTML is the layout and applies a CSS style to an object. This will allow for tweaking of your objects without having to change the HTML layout. This same separation goes for the divide between logic and rendering code of a UI.