
What is a particle explosion effect? When most people see a particle explosion effect in a video game, often times they believe that what they're seeing is a simulation - some sort of next-generation fluid mechanics, calculated in real-time by a high-powered video card. However, what they're actually seeing in an explosion effect could be compared to throwing a bunch of photos of flames, sparks and clouds at a movie camera.
Whether you're an experienced video game developer or an avid player interested in game mechanics, we've broken down the process of developing an in-game particle effect into the following bite sized steps.
NOTE: Many images link to videos.
Intro to Sprites and Emitters
The beginning of the design for any in-game effect starts with sprites. Sprites are flat, two-dimensional images or movies that are integrated into a larger effect. We can better illustrate the idea of sprites by demonstrating how to make a simple mist particle effect using only one type of sprite.How to Create Sprites
Step 1:Create an image of mist in Adobe Photoshop or other photo editing software program. You can also scan a photograph of mist or use footage from a short movie, just as long as the image has transparency on the edges.
Step 2:
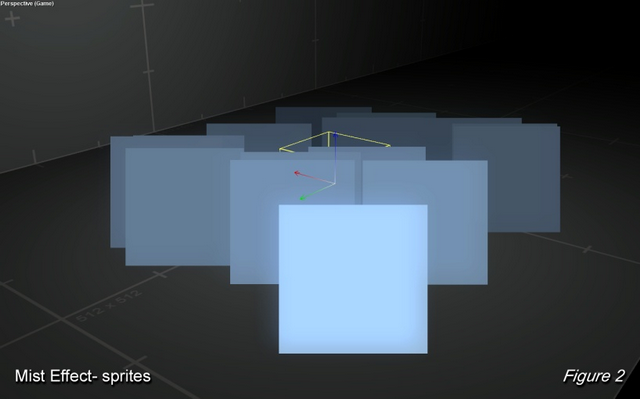
Using your game engine software, create a sprite emitter, which will generate sprites, or particles. These particles will appear as plain squares until the image texture is applied. Figure 2 shows
the beginning of a mist particle effect before the actual image has been applied to the sprites. This may not look much like mist at first, but these squares are what the Effects Artist is usually
working with behind the scenes. In this case, the sprites all line up to face the camera so you can never see them edge on.
Step 3:
Apply the mist image, or texture, to the individual particle sprites. In figure 3, you can see how one texture or a series of textures is applied to the sprites.

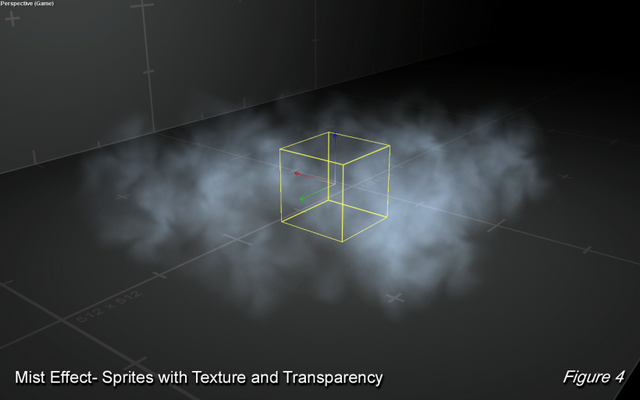
Figure 4 shows the sprites with the mist texture applied and the image transparency turned on. The transparency is added to the mist texture in Adobe Photoshop using the image's Alpha Channel. The yellow wireframe box and arrows in the middle represent the emitter, which is the point of origin and the control mechanism for a single set of sprites. All sprites generated by a single emitter use the same texture and move in roughly the same way.
">
Step 4:
To create movement in the sprites, go into the sprite emitter settings and determine the timing, motion, scale, and orientation of the sprites. A sprite emitter can be set to send sprites in a wide
range of directions from 0-360 degrees, much like a lawn sprinkler. In most effects, the Effects Artist uses the motion of overlapping sprites to try to hide the fact that they are using individual
sprites. As you can see in Figure 4, this gives the overall effect a more natural feel. Note that color and transparency can also be controlled.
Figure 5 shows how some of these settings can be adjusted. Motion controls that were used to make the sprites move like mist can be adjusted to make them behave like a fountain. Sprites can also have a constant downward acceleration based on in-game "gravity." The sprites in Figure 5 are moving in only one direction, while being pulled by gravity. They also increase in size over their lifetime.
">
Putting the Sprites in Motion
Now that you've learned how to create sprite emitters, it's time to create the Particle Explosion Effect.In the previous section, we created a mist effect using a single emitter. But effects are often made with several emitters that play on top of each other, each with different textures, motions and timing. To make the Explosion Effect we'll first need to make each emitter and then put all of the emitters together into one effect.
">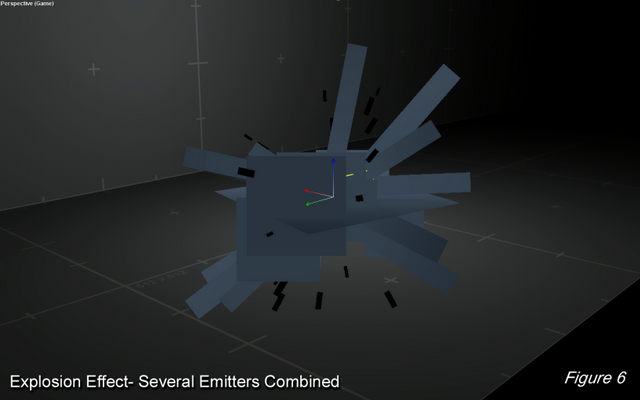
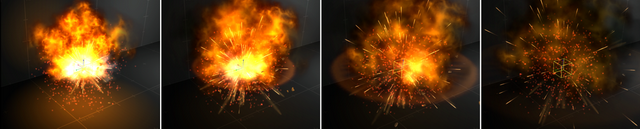
Figure 6 shows a collection of sprite emitters without their textures, each generating sprites of different sizes and moving at different angles and speeds. All the emitters combine to make a single explosion effect. Each type of sprite is sent from its own emitter, flying out from the center of the explosion effect, and in most cases growing larger and fading out over time.

Figure 7 shows the textures used for each emitter in the explosion.
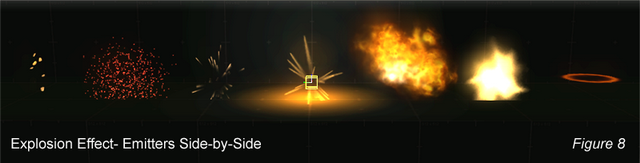
Figure 8 shows all the individual sprite emitters before combining them into a single Explosion Effect.
How to Create the Explosion Effect
(Note that the numbers given below correspond to Vicious Engine 2 and to this particular effect--different engines and effects have different relative values.) ">
Step 1:
Create the Flame/Smoke Emitter. This emitter should generate sprites that grow almost instantly at first, then drift apart with a slow rotation. The gravity setting on this emitter should be a
negative value, but close to zero, so the smoke will slowly rise over time, instead of falling. The color should start out bright yellow/orange and change to black quickly as the flame turns to
smoke. Apply the smoke textures shown in the upper left of Figure 7. The overall lifespan of the sprites should be roughly .5 seconds.
Step 2:
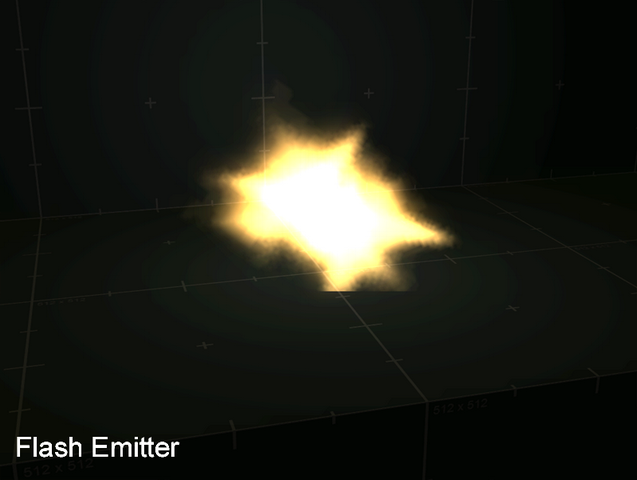
Create the Flash Emitter. This emitter uses the star-shaped textures shown in the upper right corner of Figure 7 and should grow almost instantly and fade just as quickly. It should be bright
yellow- almost white and should last about .2 seconds. It's possible to get by with just the Flash and Flame/Smoke Emitters, if you want to keep the overall effect simple.
Step 3:
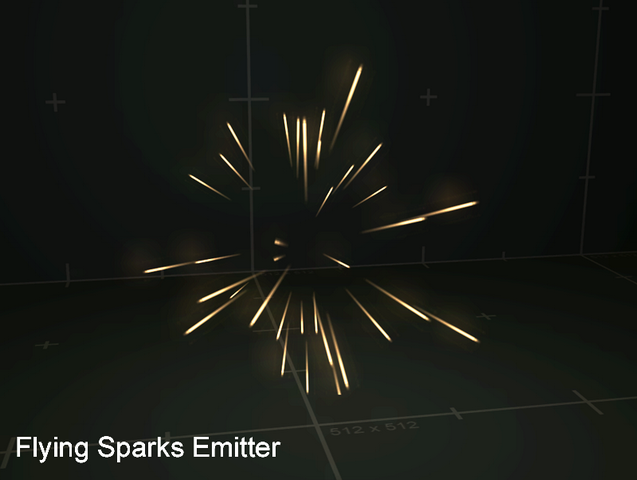
Create the Flying Sparks Emitter. This emitter should be long and thin. Instead of facing the camera, the sprites should be oriented along the direction of travel, to look like lines radiating
from a central point. Use the texture at the bottom right corner of Figure 7 and adjust the color, like most of the other emitters, so it looks gold. The speed should be around 10 meters per second.
The lifetime can vary from .5 seconds to 1.5 seconds, depending on how far you want the sparks to travel from the explosion.

Step 4:
Create the Smoke Trails Emitter. Like the Flying Sparks emitter, the Smoke Trails Emitter should be long and thin and be oriented along a path radiating from the center. But unlike the Flying
Sparks, which move away from the middle at a fast speed, the Smoke Trails sprites should move slowly, and grow quickly from the center of the overall effect by changing the scale over time. The
lifetime should be about .4 seconds. Use the textures from the bottom left of Figure 7.
Step 5:
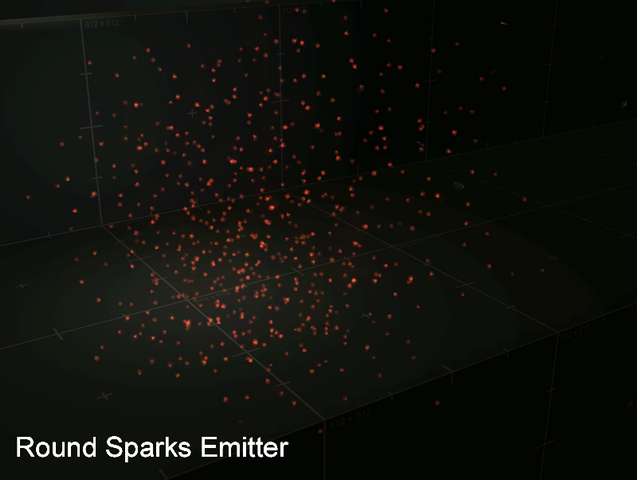
Create the Round Sparks Emitter. This emitter is similar to the Flame/Smoke Emitter and once again, the sprites fall up instead of down by using a negative number in the gravity setting
(-0.2). The sprites from this emitter should drift apart slightly as they rise. Use the snow-like texture shown in the bottom middle of Figure 7.
Step 6:
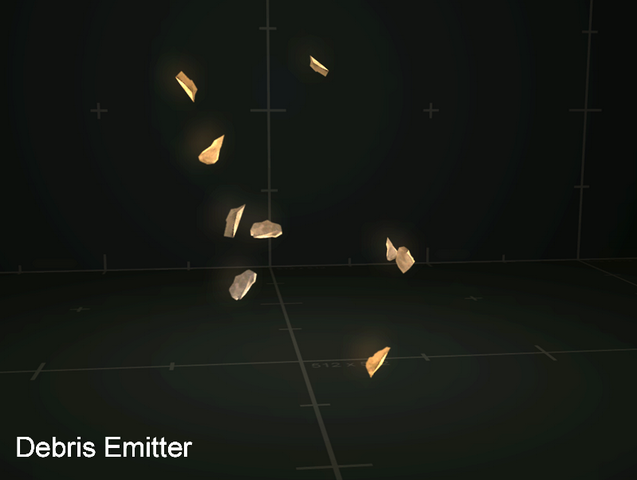
Create the Debris Emitter. These fast moving sprites should fly out from the center of the overall emitter. If possible, aim for the camera for dramatic impact. The color should start out
bright orange, to look like reflected light from the explosion, then fade to a neutral gray as the explosion dims. The sprites from this emitter should hang around longer than the others, with a
lifetime of about 1.5 seconds. The speed should be around 10 meters per second. Set the emitter's gravity to about .7 so the sprites look like they're falling slower than normal, and use
the chunky textures shown in the middle of Figure 7.
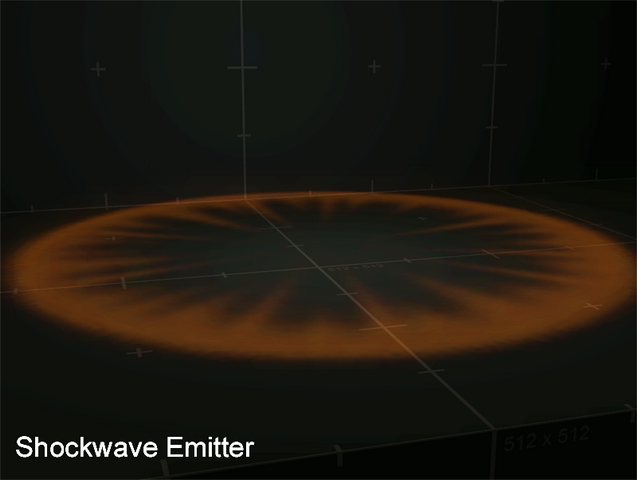
Step 7:
Create the Shockwave Emitter. This emitter consists of only one sprite that lies parallel to the ground. The sprite should grow quickly from the center and fade out just as quickly. It's
best when this sprite is kept very subtle and transparent. Use the ring-like texture from Figure 7.
Step 8:
Put all the Individual Emitters Together to Make the Particle Explosion Effect.
Watch a Demo Video
By using the same textures and changing some of the color, timing and motion values, you can create many variations on the same effect. These are samples created with Vicious Engine 2: ">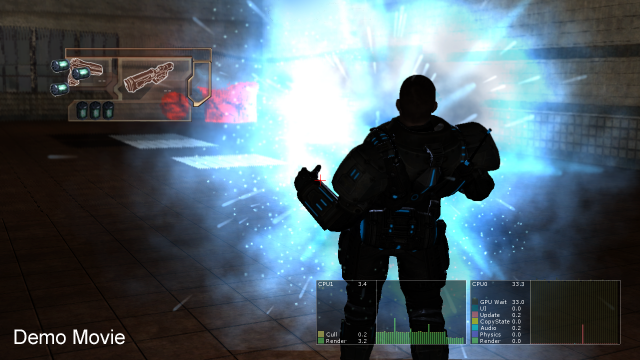
What Comes Next
At this point, the Effects Artist usually hands off the effect to a Sound Designer for audio, and a Gameplay Programmer for implementation into the game itself. There are usually some final revisions depending on where and how the effect is used within the game, but essentially the Effects Artist's work is complete.Please note: All effects and images shown in this article were created using Vicious Engine 2, developed by Vicious Cycle Software. You can use other game engines on the market to create the same effect.


None of the videos are available.