Last entry:
To start of, let me tell you that I was basically finished with the 2d-rendering after what I presented to you in the last article was done. So just for some amusement, I'll have to tell you right away that everything I did after that was pretty pointless and costed me an additional 3-4 weeks that any person who wanted to primarily work on their game could have spent on that. Oh, well.
In medias res:
So after I tortured you with nothing but text for the last two entries, lets start with some imagery that showcases what my latest effort was all about: Visual editing of a render-pipeline:
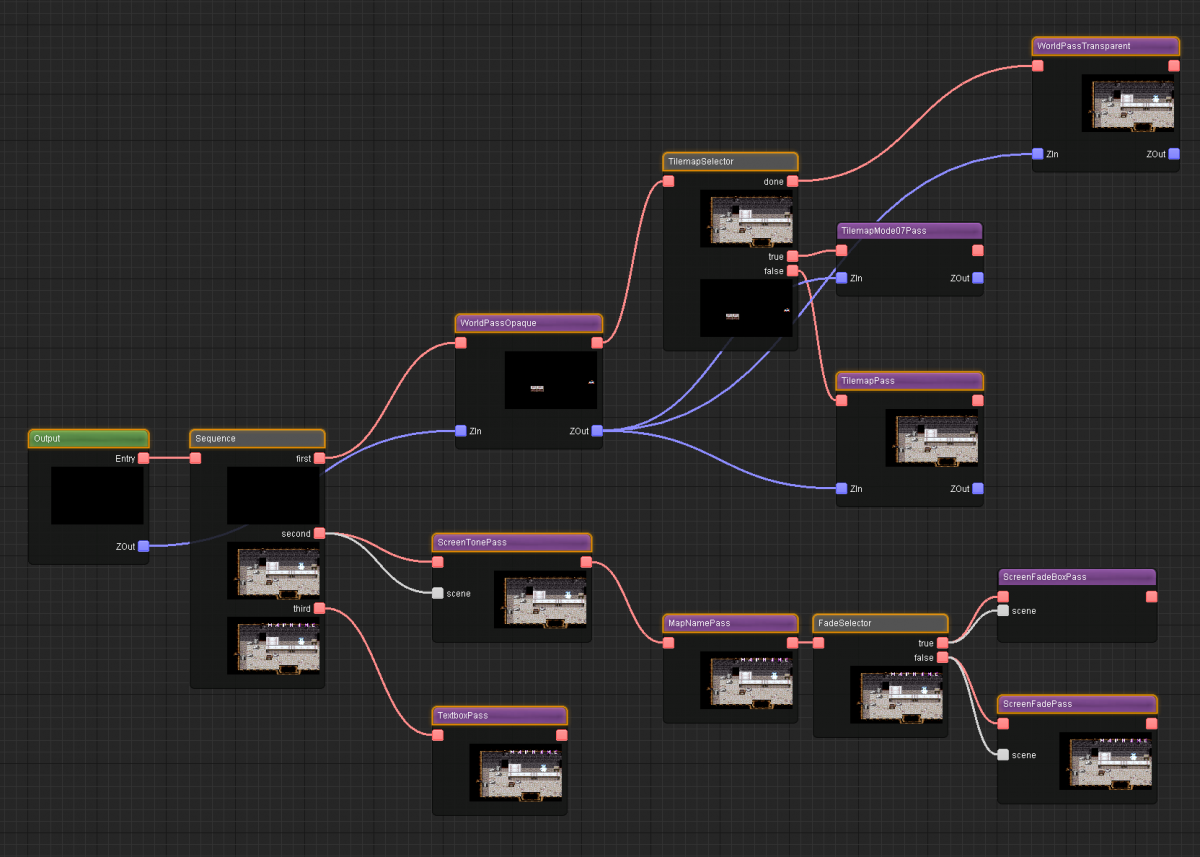
So what you can see is how a render-view is implemented using this visual scripting, if you will. Lets explain, how the whole thing works:
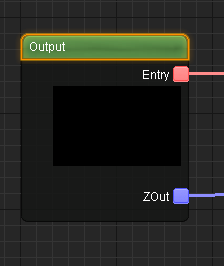
Lets start at the left side. The green "Output" node is actually the entry-point of the view. The red output-pin does two things: a) determine which pass to render next and b) pass a render-target to it. So the output-node obviously passes the output-render-target. Also the blue output-pin passes a zbuffer, in this case the views default zbuffer.
Also take a note of the black image under the pin - this is a preview of the output-render target at the time that this pin is executed. Right now its black since this is the beginning, but you should soon see what every stage adds to it.
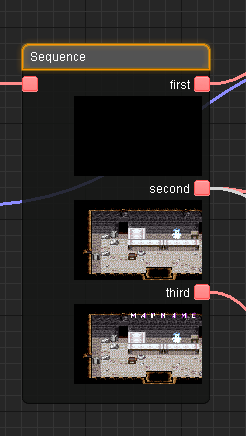
The next node, with the grey bar entitiled "Sequence" is a control-node. Its purely for cosmetical porpuse, allows to position other nodes vertically instead of horizontally and, as you may have quessed, renders its output-pins in descending order.
You should have noted the little images under each output-node.
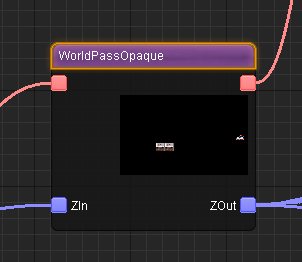
The first pass-node with the purple bar, called "WorldPassOpaque", is an actual pass, implemented much like you have seen in the last article. It will write to the render-target passed in through its input-pin, and use the zbuffer connected to it as well. This pass renderes all opaque entities (I'll get to why it does exactly that in a second).
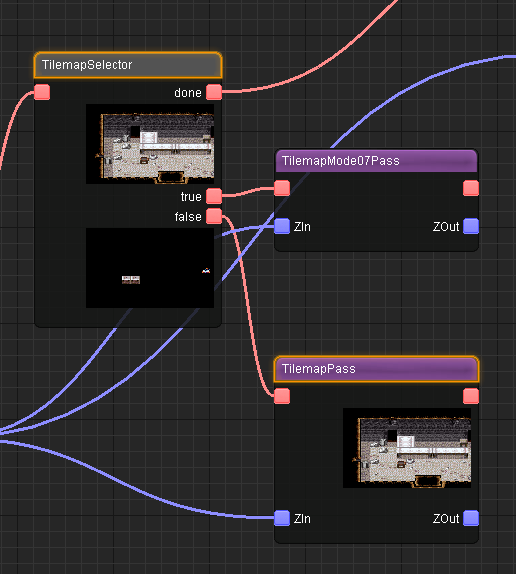
The next grey node called "TilemapSelector" is another primitive control node, usually called "Selector". You can assign custom names to your primitives for cosmetical and practical purposes. So what does a selector do? It chooses which adjacent pass is going to be executed, based on some boolean. To be precise, this selector is a SelectorSequence, a Selector that also has a "done" tag.
As you can see by the lack of orange top-border and no preview-image, TilemapPass has been selected, and TilemapMode7Pass has been ignored.
One more important part, if you noticed the white input pin - this is for when a node wants to read from an render-target. It accepts any regular output-pin as an entry.
The rest works exactly like that, until after the last pass the view is done. Now with that out of the way, lets talk about some details.
The nodes:
About the nodes themselves. There are pass-nodes and control-nodes so far, in the near future I also want to support view-nodes, so you can ie. put a separate world-view, that you can use to also render reflections for your game view.
But what can the nodes do? Oh, a lot of things, actually.
For example, they have attributes. Like I said, they can have a custom name, but also user-defined/pass-specific attributes, as you can see here:
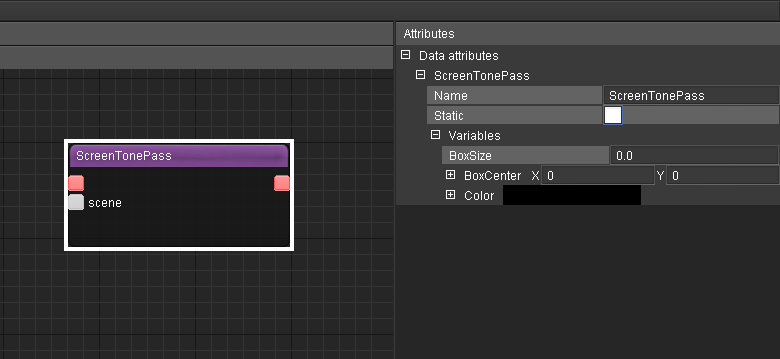
For a screen-tone pass, you can set the screentone actually while editing the pipeline! On the code side, right now the pass still has to write them to the cbuffer manually, but they get written to a member-variable of the pass directly, so its no big deal.
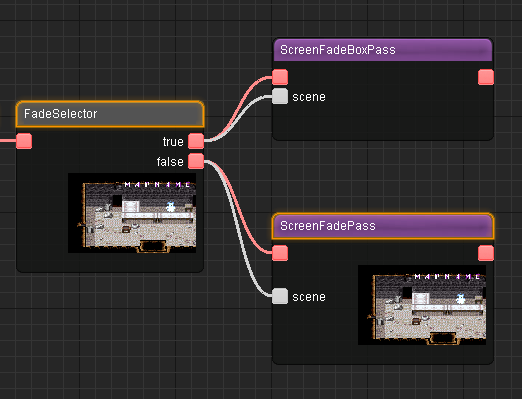
This is similar with all the other nodes - a selector has a bool which path to take, the WorldPasses are just one pass with a "transparent?" boolean, and so on.
Aside from that, nodes are only used in the setup-stage - they output resources, passes, are used to evaluate the actual path to take... but after that, they are thrown away and not used during the runtime. I initially had a different design, but decided to have it this way, as this guarantees minimal overhead, as well as gives a cleaner design IMHO.
The preview:
Actually, one of the things that really pushed me into building this visual system was the possibility of per-pass preview, as seen with the little thumbnails under each output pin. In other engines, you usually have a dropdown-list of some sort that lets you view different render-outputs right at the view. Now with this system, you can inspect it right where it originally came from, especially helpful if you are currently working on the pipeline, so you see instantly, live what each change does to the output.
One consequence of this is though, that certain things don't work how they used to. See how there is an opague and separate transparent world pass? This is because for this preview to work, every pass has to render its primitives at once (its not implemented that way without the preview attached, but still it has to function like this), meaning you cannot just have an "WorldPass", that outputs opague and transparent sprites, and then have a tilemap-pass that renders the map geometry (since all transparent sprites have already been rendered by then). Obviously you can eigther put the tilemap first (which will cause overdraw), or, as I've done here, split it into two separate passes.
Also, this is how the full working area actually looks like, with the preview. I've chosen a different setup for the attributes, to show you what the other passes actually do:
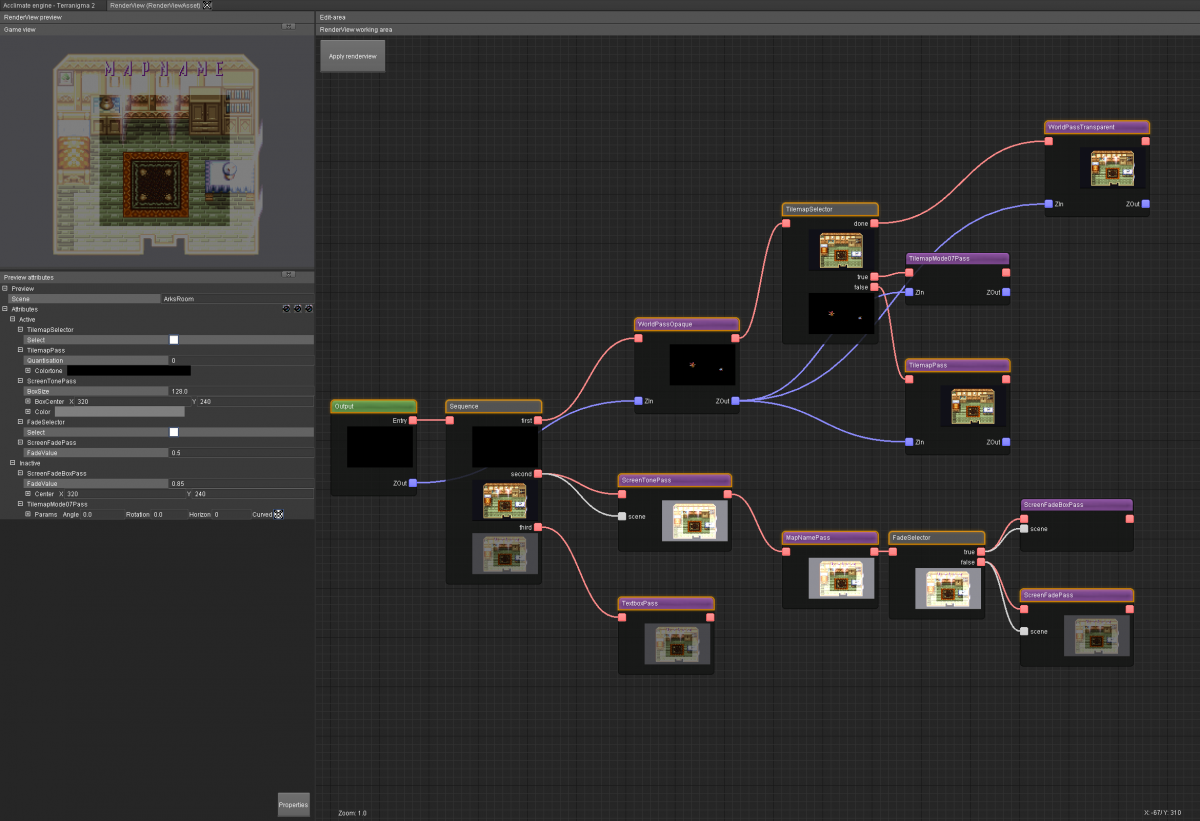
You can see that you can select and preview an entire scene on the top left, aside from the little thumbs, also you can tune the nodes attributes just for the preview, without changing the nodes settings.
Some design-insights:
Regarding control-flow, I wanted to have a rather minimalistic approach. Meaning pretty much the only thing you can do is to choose whether to go up or down on a Selector-node, and its depending on an external variable. I might have a "switch" statement of some sort at one point, but I really didn't want to put too much logic or scripting into this. Its just placing nodes, connecting them, and being happy about it.
One implication of this is also that when a certain attribute changes, ie. the selectors boolean, then the whole view has to be re-generated. I view this as ok, since its lot easier than figuring out which part of the pipeline to throw away, etc... and it shouldn't be that much of an issue, since usually this would only be used to branch seldomly-changing parts of the pipeline (like in my example, it would choose between Mode7 or regular tilemap rendering, which changes only when I enter or leave the worldmap).
On the other hand, I wanted to give full control over the programmer. For example, they could always just write a pass that internally switches a shader without triggering a full pipeline-flush, if they so desired. Also in the future I might apply optimizations that could really spare me destroying the whole thing, if ie. it only switches between two passes with identical input/output signature.
Also one thing that is important to note is that all render-targets, zbuffers etc... are handled automatically, this time around. I just set whatever format the view wants to output, and thats it. Also, ping-ponging now works automatically, too! See the write/read-input pin differenciation for that.
Conclusion:
I'm actually not fully done, there are a few points left, like:
- How to encapsulate multiple passes (ie. the tilemap vs. mode7 - thing is actually something that comes from the Tilemap plugin and should not bother the user of the plugin)
- How to set the attributes at runtime
- Some potential improvements for the future, thinking about 3d rendering
- ...
I'll handle this in a separate article at another time, I've written enough for today, I think :D
_______________________________________________
So before I finish, I'd like to ask you, the reader what you think of a system like this. Appearently I haven't seen anything like this so far, at least not with an visual interface. In my point of view, this is an execellent application for visual scripting, since its little logic and more data-flow between systems, in this case passes. It should allow for easy understanding and extending of the pipeline, both by core-developers, as well as potentially third-party users (think of trying to extented the render-pipeline of something like UE4 - which isn't really easy ATM).
Do you agree? Do you disagree? What are your thoughs on general, do you see any potential for improvement, or do you maybe dislike the idea as a whole? I'd glad if you let me know!

This is awesome!
I really struggle at times balancing render targets/textures/states etc and as you mentioned the debugging of such things is often a pain. Putting it all into a visual graph is a fantastic idea!
Would you foresee a user setting all this up once and then using the resulting engine structure throughout the application development life cycle or are you thinking someone would set up a unique arrangement per scene/level/model/whatever? If the flexibility is there from the get go the potential for diverse setups being swapped in/out is huge...
I think the power of this is in actually seeing the previews, decisions you make as a developer would change rapidly when being able to see an immediate result of a step in the chain.
Also in using a single effect or step in multiple instances without having to reiterate all the boilerplate. Just plug in that input/output node and go.
Good stuff!