I said last time I would outline my plans in an effort to force myself to stick to them. I still intend to do this but this post is about the stuff I have been playing with lately. The master plan is still fermenting nicely in the background.
In line with the master plan I am making a modelling app (just for my use - no intention of making it stable/professional enough for others). It has a functional UI now with multiple windows all with usual window functionality including child windows etc. There are some buttons and whatnot. Functional if not pretty.
Recently I read up on physically based lighting but sadly only understood about half of it. My maths isn't good enough to follow all of the details.
So I thought I would try to implement my own bodged form of it, on the CPU - not the GPU, one step at a time according to my eye.
Sounds crazy right? But this is my way. I didn't really understand the render pipeline and rasterization until I made a software (no GPU) version of a simple render engine. Understanding from implementation! I do it on the CPU as I have more control and can SEE what I am doing and change and tweak and debug freely - it is very important to me that I can actually see something when I make something. Its just the way I am wired. I learn a lot more too as I have to implement stuff myself.
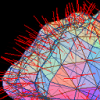
Anyway my WIP modelling app uses signed distance functions for shape definitions. This is part of my long term master plan (more on this in a later post). Each shape can have a material (or a blend between multiple materials) which are defined with Albedo, Patina, Roughness, Metallic, Emission and Opacity.
Combined with the physical dimensions of a shape and scene I can currently poll for and generate the following textures:-
Picking
Normal
Position
Depth
Albedo
Patina
Roughness
Metallic
Emissive
Opacity
AO (Ambient occlusion)
Thickness (two of these - one along view direction and one from inverted normal)
Now the fun bit - using all this information to make the final image!
First we do the Diffuse (including emissive) colour
What I did first was generate a scalar map of view angles (and in doing so get a Fresnel value) and similarly an (inverted) light scalar value.
For this test window in my app I only have 1 directional light (hard coded in) and 1 shape again hard coded in.
[sharedmedia=gallery:images:7803][sharedmedia=gallery:images:7804][sharedmedia=gallery:images:7801]
Next I got albedo and applied the light scalar to it.
[sharedmedia=gallery:images:7796]
Then I applied the emissive value. When emissive is max the amount of light hitting an object is imatterial - the object is fully lit from within. So I just blended the raw albedo colour with previous light and albedo colour.
*This is an animated .gif image - only plays once clicked on in my browser - is this true for everyone?*
[sharedmedia=gallery:images:7797]
Next some specular light!
So we have the Roughness term. Things get more interesting now. Roughness as I understand it says how concentrated the specular light is. Things I took away from reading about PBR is that the amount of light reflected cannot exceed what goes in. So if we have a rough surface that has a blurry/diffused specular component it must be duller than the same reflection on a smoother surface. The same amount of energy coming off of the material just spread over a larger area. I also understood glancing angles reflect more light. So I did this:-//Rough 1 = diffuse and blurry 0 = small and sharp//Observed above about 0.777 this looks wrong so cap and scale to 0.0 - 0.777roughnessCorrectionFactor = roughnessPtr * 0.7777f;roughness = smoothstep(1.0f - roughnessCorrectionFactor, 1.0f, max(lightDot, fresnel)) * (1.0f - roughnessCorrectionFactor);
The correction factor is based on visual results - if roughness got too high the specular was distributed too much and just looked washed out.
The Fresnel/LightDot bit is the glancing angles part.
It generates the following:-
*This is an animated .gif image - only plays once clicked on in my browser*
[sharedmedia=gallery:images:7800]
The Metallic term (as I understand it) has two properties. One is it says how much of the environment is reflected (some implementations refer to the Metallic term as shininess) but I cannot do this yet. I have not made any functionality for envirmont maps in my app yet. The second property is it dictates how much of the reflection is coloured by the lights colour and how much by the Patina. This was a hard concept for me but if you think about shiny copper (obviously very metallic) the reflections are not the enviroments original colour or the colour of the light source but a tinted colour from coppers... well its patina. No other word for it.
Anyway - no environment maps yet like I said - so all we can do is blend in Patina as the Metallic goes up.
*This is an animated .gif image - only plays once clicked on in my browser*
[sharedmedia=gallery:images:7799]
Next I added in the Opacity - literally set it to the alpha channel. This is wrong (well it doesn't look right anyway). I need to fix this by including the one or both of the thickness values I have. Still thinking about this.
I also added in an (excessive) corona based on emission. Although you cant see it here as I only have one shape with one material this is worked out per pixel.
Below is me fiddling with all the variables so far and how they interact.
*This is an animated .gif image - only plays once clicked on in my browser*
[sharedmedia=gallery:images:7794]
My TODO list for this PBR exercise
- Add environment map(s)
- Consider and rethink how we deal with opacity - especially with emissive materials.
- Add in ambient occlusion
- Maybe have a crack at subsurface scattering too ;)
Till next time

Nothing I have read in this post can actually be considered PBR. You have in fact just took the intuitive meaning of all those concepts and mixed them. A physically based approach should instead start from the ways a particular material interact with light.
The formulas and meaning of the various terms are actually completely wrong. The specular light is computed in an incorrect way and it does not behave like specular light at all. The metallic term is not shininess, but a parameter used
to interpolate between two very different material responses. A metal is very specular (even at normal incidence), it has a colored specular reflection and there is no diffused light. A dielectric has instead a mostly diffused response at normal incidence (only about 4% is reflected) and the reflection is white. There is no patina (not sure what you mean here). There are probably also other things.
While I agree implementing the concepts is the best way to learn, I think you should still try to read good resources on the subject and implement the concepts properly. If you just try to write things before really understanding them you risk to learn them wrong.