Hi everyone!
Another week, another update to the development blog for Mr Boom's Firework Factory!
The Easy Stuff: Creating the Stock Room
This week, I have been creating a way to reward players for successfully completing levels. Every time a level is completed with a three star rating (the best possible rating) the game will route the player to the stock room on the completion of the level. The stock room is an enclosed area, containing some junk and six boxes. Selecting from the boxes will reward the player with one of the following:
- A random power-up
- Nothing (along with a condescending message)
- A booby prize, for example a burned cereal box.
This new feature can be seen working in the video below:
The booby prizes, if won, will just stack to an inventory, e.g. multiples are represented by "x2", "x3" etc. These can't be gotten rid of an have absolutely no use except cosmetic, so I can imagine that the player may find a way to meta-game this, and i may add an achievement relating to this if there is time before release.
It is obvious on the video above that selecting boxes in the stock room is simple enough if the player is using a mouse and keyboard, simply clicking on a box will select it, and this is done effectively using the onclick events within blueprint on those particular components for the crates.
The More Interesting Stuff: Making This Work With A Gamepad
This becomes slightly more complex when dealing with a gamepad. Unreal Engine 4 has facilities when dealing with UMG for UI so that each control which can receive focus has a 'next' control for each direction, so if for example "Up" is pressed when focused on control A, it can be told that control B is "Up" in relation to it, and that control "B" should then receive focus.
When dealing with an actor built with components, which is not UI, we're out of luck and have to implement this ourselves. Time to roll up our sleeves and see how I did this!
Firstly, we must map out visually how each of the crates relate to each other.
Consider that each crate has an index number between zero and five, and that for each crate index, we have a table of relations based on the direction of travel for which is "nearest" to it in that direction:
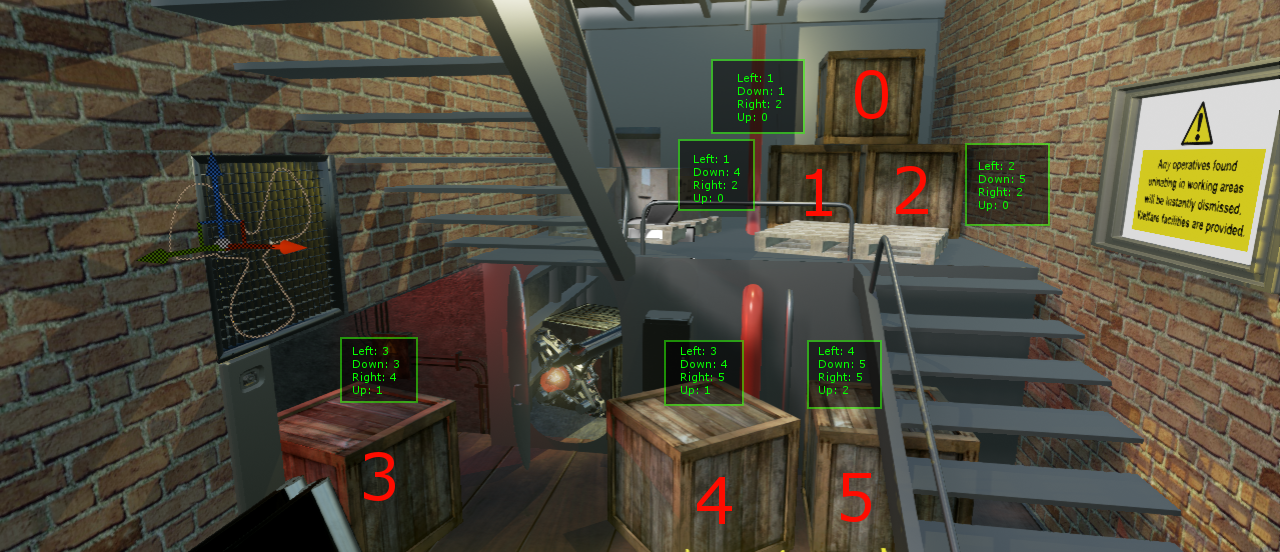
So, for example, if the current crate was crate index 1 and we wanted to move up, then the crate index would become 0. Similarly if the crate index was 0 and we wanted to move right, the crate index would become 2. We can represent the currently selected crate then as a simple integer value.
All clear on this? OK, let's continue!
Based on this layout, we can click on each of the components in the actor, and set up these representations using the tags within the component, always sticking to a uniform layout, tag index 0 representing down, index 1 representing up, index 2 representing left, and index 3 representing right:
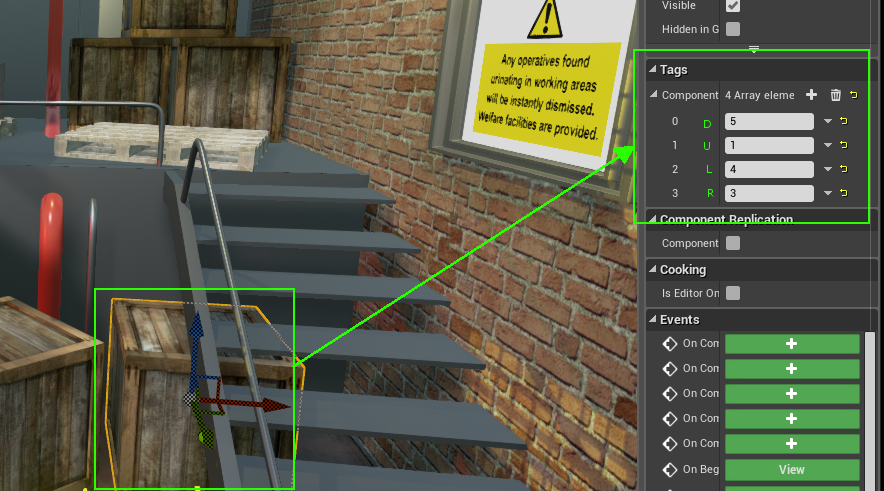
Once all these have been defined, we have a way, completely within data, and without having to adjust code, of being able to indicate the relationship between the components so we can navigate between them. All we need to do now is write some code to do it.
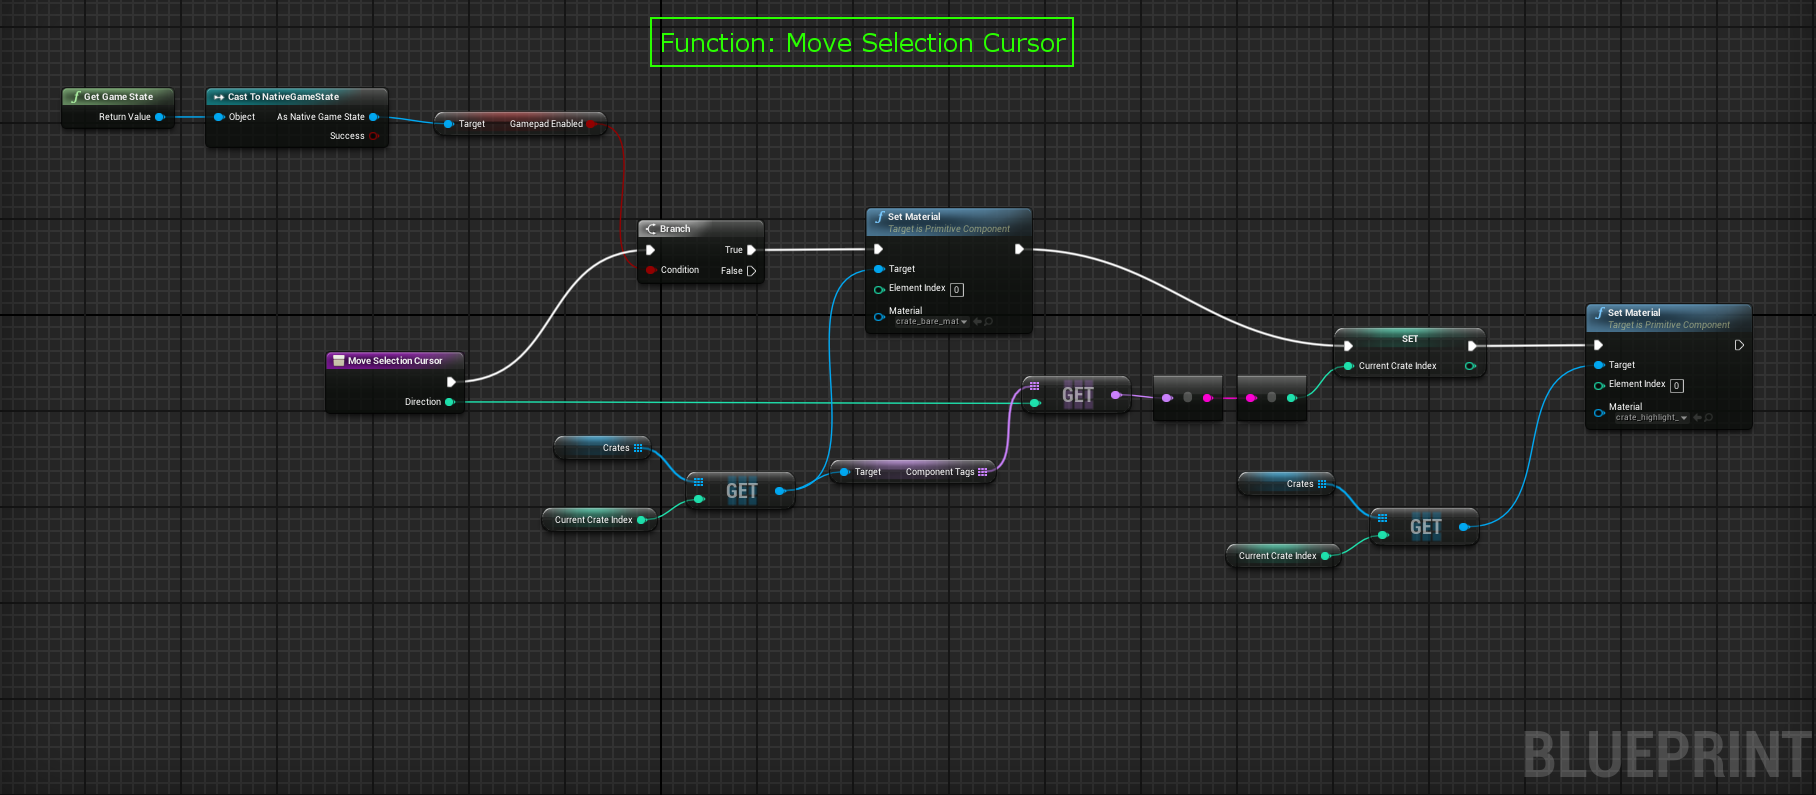
Firstly, we need a function which if given a a direction (as an integer) will update the current crate to a new crate, still going with the same constant directions as above, 0 = down, 1 = up, 2 = left, 3 = right. We'll call this function "Move Selection Cursor", because... well why not?:
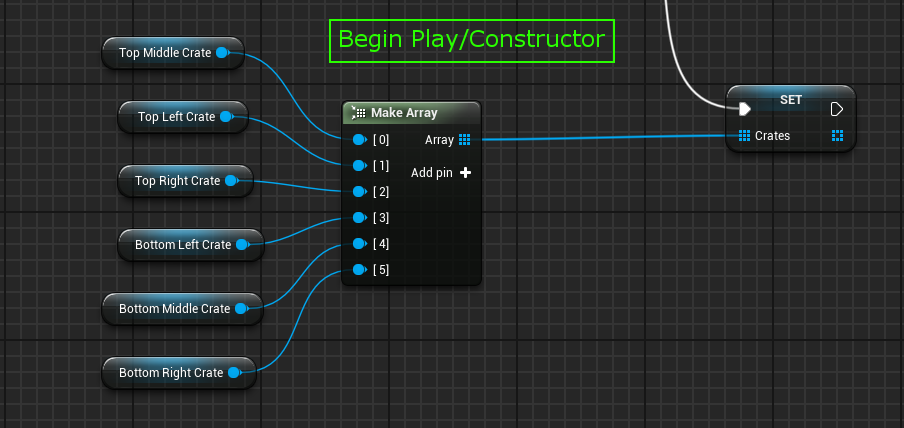
We will also need to define in the constructor, or in the Begin Play Event, the indices of each of the crates in a simple array (as a member variable of the actor class) which this function can use. Remember the order of the items in this array is important as we determined our layout in the first picture when we mapped out the relationships between the objects. If there were more objects or in different positions in relation to each other, this would need to be adjusted:
Once we have done this, it is a simple matter to attach five events to action mappings, which will allow us to detect input events from the gamepad, and route them to the functions we have created. For readability's sake, we can also define four constants (see the top left in the green square) representing our index values for up, down, left, and right respectively, which means that the code becomes more understandable, rather than just a mass of magic numbers between 0 and 3:
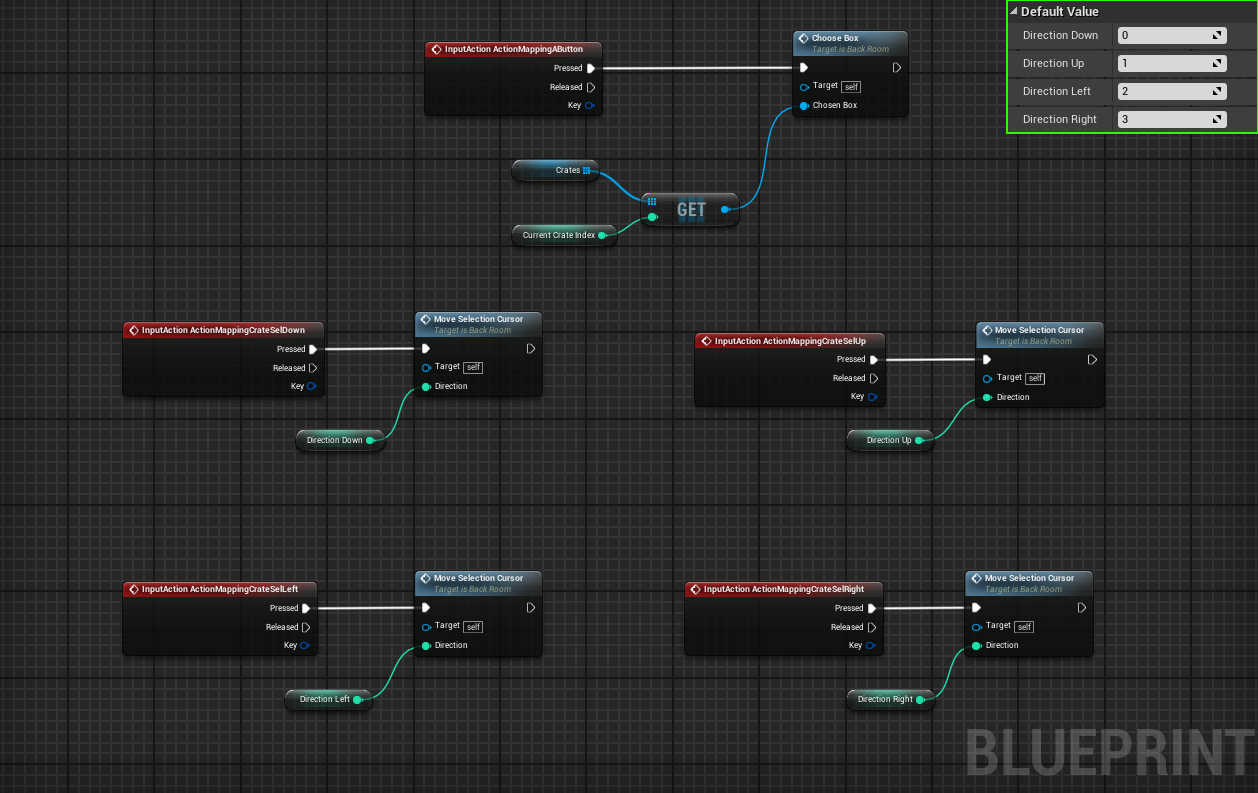
Once this is in place, as many before me have said, sometimes in jest and sometimes in seriousness, "it just works".
I hope you found this journey into the depths of my mind enlightening, please do comment and leave feedback if you have any questions or comments!
Stay tuned for more blog entries!


Simple enough feature, but I'm sure the rewards will be popular with players. Interesting reading how you got it working with a gamepad!")