Real-time lens blur

Started by
8 comments, last by STufaro 13 years, 9 months ago
[EDIT] I've revised this a lot since this original post - scroll down to the post with the larger JPEG for the final algorithm.
[/EDIT]


I started trying out a bokeh idea last night inspired by Lost Planet. The approach I came up with is really fast compared to non-fake bokeh effects, but I'm facing some stability/flickering problems -- if anyone's got any hints/advice/ideas of their own, I'm all ears ;)

I'm not actually doing any DOF-blurring at the moment, I'm just trying to isolate bright pixels and apply a fake out-of-focus bokeh effect to these bright pixels only (i.e. the flaring in the shape of the camera's aperture). I should be able to add a traditional blurred-DOF effect on top of this later.

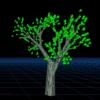
In other words, I'm not doing the blur demonstrated by this picture - I'm just trying to capture the effect that happens to the specular highlights on the glass when it goes out of focus:


Here's my recipe:

Short version:
1) Find bright pixels
2) Draw quads over them textured with hexagons/circles (multiplied with the bright pixel's colour).

Long version:
1) Render the scene.

2) Downsize the frame-buffer 16 times. Each down-sized pixel covers 256 (16x16) original pixels.
2.1) Each pixel in the down-sized buffer samples an 8x8 grid (offset half a pixel so that each sample is the average of 2x2 original pixels -- 8x8x4==256).
2.2) These 64 samples are compared to find the brightest one
2.3) The brightest sample's RGB, and it's x/y sub-offset are written to the downsized buffer (x/y are range 0-15, or 4 bits each, so they're packed into the 8 bit alpha channel).
2.4) Some kind of 'threshold' is applied (see below recipe) to determine if we actually want to apply fake bokeh to this bright pixel.

3) For each down-sized pixel over a certain brightness threshold, draw a quad at that pixel's center position, offset by it's packed x/y offset value.
3.1) The quad is textured with a "bokeh texture" - e.g. a circle/hexagon/octagon, depending on your "camera".
3.2) The quad can be scaled by the luminosity of the sample, or based on depth so out-of-focus points create bigger bokeh circles.
3.3) The "bokeh texture" is modulated with the samples RGB value and blended with the frame-buffer.


My "threshold" is currently:
1) The entire 16x16 block isn't bright (just a small bright point is present) - the brightest in the block is a certain luminosity-distance from either the dimmest or the average (not sure which to use yet).
2) The brightest is actually quite bright.
or in GLSL:
	color.rgb = colorMax.rgb * step( 0.75, lumMax-lumMin );	color.rgb = color.rgb * step( 0.95, lumMax );

Here's some programmer-art pictures, using additively-blended pentagons and a white border so you can easily see the quads:
bokeh3bokeh2bokeh1
My problem is that it's too unstable - you can get good results in still pictures, but when the camera moves, different pixels are chosen to 'flare up' each frame, resulting in horrible flickering of these "bokeh sprites". You can see above that as I rotate the camera, the guy's white collar goes from getting 3 flares, to none, back to 2.

[Edited by - Hodgman on July 18, 2010 8:41:46 AM]
Advertisement
I think the reason: if the camera moves, at least one row or column will change, so 16 pixels at a time. that's 1/16 of the whole thing.

I would try with a diamond shape instead: rotate the image with 45' then downsample.
or 40', maybe an arbitrary angle would be better. (Sorry, I haven't looked into the thing in detail, just a quick idea)

Or the good old interpolate between frames. So the bokeh will be a bit sluggish, but maybe that's fine.
Awesome effect. I love bokeh, so much that spent millions of dollars on building a depth of field adapter for my video camera so I could make grainy movies full of bokeh.

You have an interesting approach here--more thinking than I would have put into this at first, but now that you are describing your problem, I'm having ideas.

I know you say that you're not doing DOF blurring just yet. One thing I would like to mention--the blurs don't pick out the specular highlights, although it does seem that way sometimes. The blurs happen to the whole image, and you _notice_ the specular highlights because they most obviously get blurred against a dark background. In fact, the entire image behind your subject is being blurred with what Photoshop would call a "lens blur" (just a convolving filter like you plan to apply for your DOF blur). The size of the blur is a function of your depth of field and your distance only, not the luminosity, if I remember right (correct me if I'm wrong though!).

Lens blur is imperfect though; take a look at this page on bokeh at Wikipedia, particularly the faux-bokeh shown at the bottom. You don't really get a choice of apertures, which I think is why we need your effect. You might have already known all that though--in which case, sorry I digress!

Ultimately I think we need a way of blurring the specular highlights using your aperture shape, which are getting slightly muddled in your downsampling (and so a new pixel gets the chance to be "brightest" each time).

This sounds simple, and I am not a shader pro or familiar with GLSL, but is there a way you can operate on the specular value of your stuff (input to the pixel shader maybe? I'm not sure where that comes together, to be honest!) and apply your effect to things with a specular value >0.5? I'm also not sure that that would work for light sources, though, which are also a wonderful source of bokeh blurs.

One other thing--I notice your blurs from the floor are getting drawn in front of your character. Just out of curiosity, how are you going to stop that from happening (I'm still learning shaders bit by bit here, there's probably an awesomely easy way to do it, so sorry for the dumb questions!)?

I might be going down the wrong path with that; it's getting late for me. Let us know how this turns out though, I'm very interested in this effect!

-- Steve.
Quote:Original post by STufaro
The blurs happen to the whole image, and you _notice_ the specular highlights because they most obviously get blurred against a dark background.
Yeah this is purely for speed - I can't operate on every pixel, so I'm trying to prioritise the bright ones to recieve the effect because they're the most noticable. However, I tried altering it so that if a 'bright' pixel can't be found in one of my 16x16 buckets, I still perform the effect anyway and it probably looks better than ignoring the dark pixels.
Quote:The size of the blur is a function of your depth of field and your distance only, not the luminosity, if I remember right (correct me if I'm wrong though!).
Yeah using luminosity to scale the highlights actually looks pretty wrong - it should be pretty simple to tie it into the same formula that the traditional DOF blur will use to determine how out-of-focus a point is (once I add regular blurring!). However, because I'm ignoring 99% of the image during this effect (one pixel blurs out per 16x16 block) I might have to add a subtle opacity/size bias towards the bright pixels still to get it to look right.
Here's some pics with a "bad bokeh" (hard edge) texture, notice the dark circles in the second pic look a bit strange:
bokeh4bokeh5
Quote:This sounds simple, and I am not a shader pro or familiar with GLSL, but is there a way you can operate on the specular value of your stuff (input to the pixel shader maybe? I'm not sure where that comes together, to be honest!)
In my lighting model, I actually can seperate the specular contribution from the diffuse lighting when doing post effects, thanks! Prioritising 'specular' might be a good idea -- or maybe even prioritising diffuse over specular because it's less prone to change due to camera movements? I'll have to experiment with this.
Quote:One other thing--I notice your blurs from the floor are getting drawn in front of your character. Just out of curiosity, how are you going to stop that from happening?
Yeah I haven't tackled that yet - I do know the depth of the "bokeh-ing" pixel, and the depth of the things it's drawing over though, so I should be able to do a depth-test of some kind here.

However, I do have the problem that these 'bokeh sprites' aren't sorted with regards to each other - so a distant 'bokeh blur' can still draw over the top of a close one... Anyone know of an easy GPU-side sorting method? :(
[EDIT]Actually, the problems with inter-sprite-sorting and the problems with dark pixels just go away if they're rendered additively instead of trying to kludge around with alpha blending - maybe I can do a separate render of just bokeh on a black background like below, and then composite the result with the scene later:
bokeh9bokeh9
Quote:Original post by szecs
Or the good old interpolate between frames. So the bokeh will be a bit sluggish, but maybe that's fine.
This worked pretty well - I added interpolation over a few frames just by enabling alpha blending with a constant alpha value when writing into the down-sampled buffer (I also had to re-arrange my packing to put x/y sub-offsets into two channels, because the packed format doesn't blend properly :(). Unfortunately it doesn't remove the source of the 'popping' - it does make it a lot more bearable though =)


While I was playing around with this algorithm, I also realized that it might be useful for painterly-rendering - here's a picture with a 'paint blob texture' instead of a 'bokeh texture' - with a whole selection of different paint blob types and a way to select suitable ones you might be able to get an interesting art style from it:
painterly

[Edited by - Hodgman on July 13, 2010 8:52:40 AM]
I'm leaning more towards trying to create an actual real-time "lens blur" instead of just a few "bokeh sprites" now.

I've made a few changes that produce much better quality images:
* Removed the 'interpolate between frames' trick, it's actually causing more flicker than it's solving now.
* The sub-offset calculation is a weighted average of all sub-offsets (weighted by their luminance), instead of just using the offset of the brightest pixel. Location shifts are much more smooth.
* Carefully making sure all energy from the original image is conserved.
** Using the average luminosity of the source 16x16 block, not just the brightest pixel.
** The average luminosity of the "bokeh/lens texture" is also calculated, and then both these average lum's are used as follows:
scale = 16;//size of the sample areasize = 32;//size of the lens sprites (should be based on DOF calculations)spriteColor = avgSample*scale*scale / (size*size*avgTexLum);//conserve energy when scattering
Below is an example with a hexagonal lens sprite. As in my last post, I'm additively drawing all these "lens sprites" over a black background (instead of blending over the original image). An interesting side effect is that it causes a slight vignetting effect (because no light is scattered in from outside the screen), but I kind of like the artifact ;)


[Edited by - Hodgman on July 18, 2010 8:16:48 AM]
I know I'm kind of treating this post like a dev-blog, but I've pretty much completed the effect and may as well post the final ingredients ;P


The idea is to draw a picture of what the camera's lens aperture looks like (I'm using the texture of a hexagon below), and then use that to implement efficient lens-blur in screen-space by gathering chunks of light and then scatter those chunks by drawing textured-quads using VTF.


1) Divide the screen into 16x16 chunks. Calculate the average colour of these chunks, and a an average screen-pos weighted by luminosity (the "sub-offset"). This is so the sprites don't move in 16px jumps, but instead move smoothly across the screen.
You can of course use numbers other than 16, but this seems to be a good balance between speed and quality (plus it means you can pack the sub-offset into 8 bits if you wanted to).

2) Calculate a "DOF mask" for your scene. I used 8 bits as a near-blur-mask, 8 bits for far-blur-mask and 16 bits for linear depth.
I'm using two separate masks so in the future I can dilate the near-blur mask to get better blurry edges on close objects.

3) Additively blending to a black surface, draw one 2D quad at the location of each chunk (thats (width/16)*(height/16) quads).
In the vertex shader:
Offset the quad with the chunks "sub-offset".
Fetch the linear-depth value at the center of the quad (pass to pixel shader).
Color the quad with the chunks average color.
Use the combined DOF masks as an alpha value, and to scale the average color.
Use the combined DOF masks to scale the quad (higher near/far blur mask value means bigger quads).
In advance, measure the average luminosity of your lens texture, make sure you're scattering the right amount of energy by scaling your average up by the chunk-size, then down by the sprite-size and luminosity (code in previous post). I also clamp this energy multiplier to 0.0/1.0 so small sprites don't 'explode' in brightness.

In the pixel shader:
Fetch the linear-depth value at this pixel, compare to the one passed in from the pixel shader. Use smoothstep to create soft edges where this sprite intersects closer geometry.
Fetch the 'lens texture' and multiply with the color passed in from the vertex shader.

4) Compose the render from (3) over your scene using pre-multiplied-alpha blending.

Here's the results:
that looks pretty cool already! I would love to see a small video! And maybe use different shapes, so it does not look too much like a grid (especially the part close to the camera looks unnaturally repetitive). Still i think with a little tweaking this could look better that most DOF implementations out there, and might even be cheaper.
I agree with everything mokaschitta said! It looks really interesting. I'm pretty interested in your painterly effect - when your camera moves, does the screen still "pop", or did the weighted luminance fix it? I'd imagine that would be a very neat effect, but very hard on the eyes if it pops too much.

Also, even though I know it's not physically accurate - have you tried using the bokeh in a different way? It'd be very cool to see something this applied to a SSAO pass.
This is pretty much how Capcom does DOF in Lost Planet's DX10 mode. They use vertex texture fetching and geometry shaders to create hexagons, the size of which vary depending on their distance to the focal plane. Since they render in HDR overbright objects glow nicely when out-of-focus.
Hodgman,

I'm sorry I haven't been on GD Net as religiously as I would have liked to be to follow this! This is truly excellent, and I don't think anyone minds you treating this thread like a dev-blog. At least I don't :)

So the sub-offset was the way to go--good find for working on the downsampled map! I think my curiosity about the specular value of the pixels might have been too much work per-pixel, so I'm very happy to see the downsampled map work in some way (even if it worked "as fast," it would still bug me that it was per-pixel for some reason). Thanks for keeping us posted on the technique--one day I'll write a game and look back to this :). I think your DOF blur implementation will complete it and give you a very convincing effect once you've tweaked it as necessary.

Nice job!
ratings++;

-- Steve.

This topic is closed to new replies.

Advertisement