I've read many tutorials that focus on lighting in a 3D environment and can't seem to get it to apply to my 2D world on large scale. So my first question is, does anyone have any good tutorials or books on lighting (possibly including setting up the camera as well, as this is my big problem with setting up lighting to work properly) specifically in a 2D environment? I know this first question is a lot to ask for, so here's my other one.
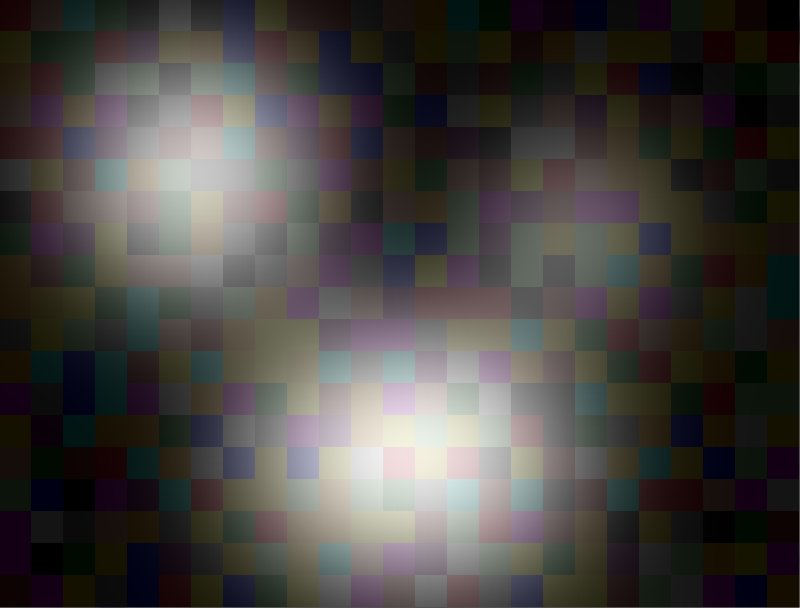
Rather than going with a complex lighting, I decided on using another type of method using simple lightmaps. I didn't want to go terribly complex with this, so I created a sample lightmap as seen on the first link below. My goal was to make it look something like the 2nd link (done in photoshop using, multiply filter and opacity set to 90%). However, I can only seem to get it at best to look like the 3rd link. My code for drawing the lightmap is below, can anyone give me any pointers on how to make it look more like the 2nd link?
Also I do need to mention, for the 1st result (3rd image), to get the correct opacity, I did have to change the alpha values for the drawmap to 20. While the inverted image has no change in opacity.
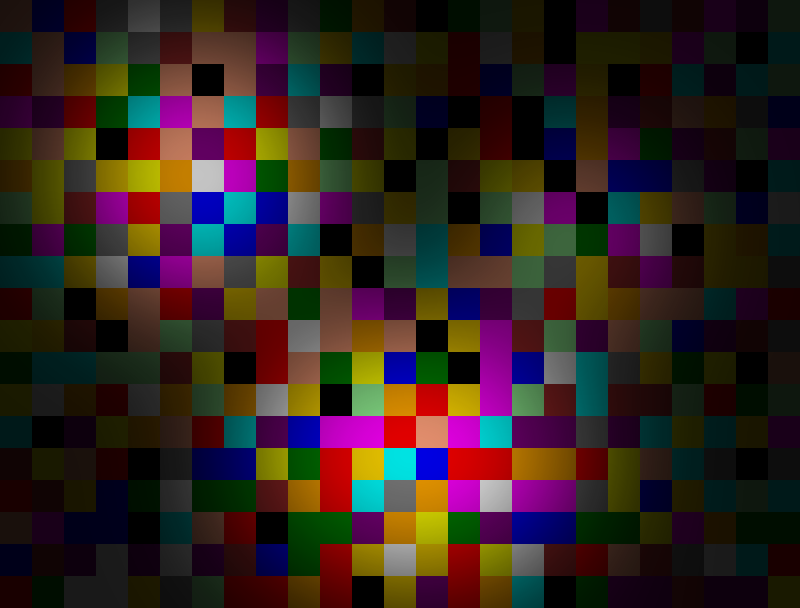
Please ignore changes in the background tiles, I just generated a random multi-colored floor for testing purposes.
My sample lightmap:

What I want to look like:
What it does look like:
Without the lightmap:
Inverted lightmap is almost what I want:

The drawing code (createmap/drawmap just draws multicolored rectangles at 32x32 intervals for the size of the form):
Public Structure ColorVertex Public Position As Vector4 Public Color As Integer Public TexturePos As Vector2 End Structure Public Structure Vertex Public Position As Vector4 Public TexturePos As Vector2 End Structure Shared Sub Main() form = New RenderForm("Test Build " & My.Application.Info.Version.ToString()) form.MaximizeBox = False form.FormBorderStyle = FormBorderStyle.FixedSingle form.ClientSize = New Size(800, 608) 'Create a device passing the device and form. _Device = CreateDevice(form) CreateMap() Dim lightMap As Texture = Texture.FromFile(_Device, "lightmap.png") Dim lightVertices() As Vertex = { New Vertex() With {.Position = New Vector4(0, 0, 0, 1), .TexturePos = New Vector2(0, 0)}, New Vertex() With {.Position = New Vector4(800, 0, 0, 1), .TexturePos = New Vector2(1, 0)}, New Vertex() With {.Position = New Vector4(0, 608, 0, 1), .TexturePos = New Vector2(0, 1)}, New Vertex() With {.Position = New Vector4(800, 608, 0, 1), .TexturePos = New Vector2(1, 1)} } MessagePump.Run(form, Sub() _Device.Clear(ClearFlags.Target, Color.Black, 1.0F, 0) _Device.BeginScene() DrawMap() _Device.SetRenderState(RenderState.AlphaBlendEnable, True) _Device.SetRenderState(RenderState.SourceBlend, Blend.SourceAlpha) _Device.SetRenderState(RenderState.DestinationBlend, Blend.One) _Device.VertexFormat = VertexFormat.PositionRhw Or VertexFormat.Texture1 _Device.SetTexture(0, lightMap) _Device.DrawUserPrimitives(PrimitiveType.TriangleStrip, 2, lightVertices) _Device.EndScene() _Device.Present() End Sub ) For Each item As Object In ObjectTable.Objects item.dispose() Next End SubIf you need any of my other source for this project let me know. I only included what I thought was relevant.