I noticed we are now at least 3 on this forum, trying to create a proper car simulation. It seems everyones main goal is to create something fun (drifts...), based on realistic physics, but not too hard for the player. So closer to something like GRID than Forza.
I think i am right when i say this : we all want the kind of fun we can find in games like NFS. If a game like NFS or GRID (or even the Steam racing casual games) can only be achieved by using some cheats or specific player input tweaking, i suppose we all want to know what they are.
What i propose here is :
- Share the fundamental basics every car simulation based on newton physics should have. eg : weight transfer, pacejka-like curves for getting output of SR/SA....
- Share one or two basics car models and parameters to be sure we are talking about the same thing.
- Share some reference values/behaviours in predetermined situations, so that everyone can compare their own values with some reference to know if things are going right or wrong.
- Share math/physics formula, tips & tricks, or cheats & shortcuts that would allow us to make the game more fun. Because we must not forget, it is all about fun in the end.
I would try to maintain the first post as updated as possible as people bring their contributions. So if this thing is going well, it could be a very good starting point in the future for programmers wanting to create their own car simulation.
I'll start to fill the blanks, and i hope the car experts will bring their knowledge to be sure future readers won't be misleaded by the things listed here.
One of the goals here is to cover 2D and 3D games, as the car behaviour will be similar in both situations.
Part 1 - What should i absolutly do to make this a fun game with drifts, skids and such things ?
Let's make an exhaustive list of things needed to achieve a drifting behaviour on a racing car.
- Get basic newton physics right : forces, acceleration, torque, integration. You can use a physics engine for this, like box2d or PhysX.
- At first use a 1ms timestep to update the simulation at a decent rate and avoid bad approximations.
- Create 4 wheels and attach them to the body.
- Use wheel distance to CG to calculate weight transfer lateraly and longitudinal. Combine those two.
- Use real car suspension/springs/anti roll bars, or the weight transfer will just be instantaneous and make the car highly unstable.
Subsidiary question : is it vital to have proper car suspensions ?
- Use some "soft" player inputs, and try to limit steer angle at high speed to get good lateral forces, or the car might be totally uncontrolable. Or use realistic driving accessories.
- Find out velocity for each wheel contact patch, transformed in the wheel space. So if the wheel is heading 45° and the car going straight, the front wheels will have both X/Y velocities, as rear wheels will only have Y (if Y is front).
- Use the powered wheels velocity to determine motor RPMs. Based on player throttle input, and engine torque curve, generate a torque force for powered wheels.
- Apply torque on wheel so it increase their angular velocity.
- Calculate wheel slip angles and slip ratios.
- Use a plotted pacejka curve, or a real formula to find out the normalized force the tire must produce front/lat.
Subsidiary question : is it vital to have the original formula instead of a simple pre-plotted curve ?
Subsidiary question : is it vital for nice drifting to have combined lateral/front formula ?
Subsidiary question : is it vital for nice drifting to feed directly the real load to the formula ? If i multiply the normalized 1N value by the wheel Fz result is supposed identical right ?
- Create a vector for front/lat forces, and check this vector on friction circle/ellipse. Cut any part which is not inside the circle.
Subsidiary question : should ellipse max values be the same as pacejka normalized max values ?
- You can now multiply the remaining vector by the wheel weight (Fz)
- For the longitudinal component of the force, reintegrate it in the wheel (with the radius), so it decrease their angular velocity. That part is what makes the wheel angular velocity adapt to the car speed.
- Apply the resulting forces to the body, at the attach point of the wheel, or directly the contact patch in 3D, and calculate resulting torque/acceleration on the body.
- When 4 wheels have generated torque/forces for the car body, integrate those values in the physical engine to produce velocity and move the car.
- Apply damping forces (rolling friction, air drag). It is not supposed to be vital to car behaviour, but it might help a little. It will mostly influence acceleration time and maximum speed.
That should be all what is needed to get a car simulation right. At least theorically. I think i have forgotten nothing.
Subsidiary question : is it vital to have proper car suspensions ?
Subsidiary question : is it vital to have the original formula instead of a simple pre-plotted curve ?
Subsidiary question : is it vital for nice drifting to have combined lateral/front formula ?
Subsidiary question : is it vital for nice drifting to feed directly the real load to the formula ? If i multiply the normalized 1N value by the wheel Fz result is supposed identical right ?
Subsidiary question : should ellipse max values be the same as pacejka normalized max values ?
Part 2 - The reference car(s)
The goal of this part is to have reference values for a classic car, so we can compare our values and behaviours.
The classic car inspired from some Corvette C5 values and other frequent values seen here and there. Let's call it X-Car-1
[spoiler]
/** GENERAL BODY CONFIGURATION **/

// Length of the car (m)

body_length = 4.57;

// Width of the car (m)

body_width = 1.87;

// Mass of the car in Kgs

body_mass = 1500;

// Inertia of the car

// Rectangular box inertia formula is : (mass * (boxWidth² + boxLength²)) / 12 --- (height doesnt count)

body_inertia = 3000;


/** WHEEL ATTACH POINT AND STATIC WEIGHT DISTRIBUTION **/

// Vertical distance from front axle to gravity center horizontal line (if car is heading vertical)

geometry_frontAxleDistanceToCG = 1.60;

// Vertical distance from rear axle to gravity center horizontal line (if car is heading vertical)

geometry_rearAxleDistanceToCG  = 1.60;

// Horizontal distance from any wheel attach point car vertical middle line

geometry_wheelDistanceToCarCenter = 0.80;

// Height of the CG (in meters)

geometry_heightOfCG = 0.30;


/** ENGINE SETUP **/

// Values of the power curve for each RPM

engine_torquePowerCurveValues = [ 400,  430,  448,  460,  480,  486,  480,  500,  550,  500];

// Values of the RPMs for the power curve

engine_torquePowerCurveRPMs   = [1000, 2000, 2500, 3000, 4000, 4500, 5000, 5500, 5800, 6000];

// Used in dev to quickly enhance engine power by a flat multiplier

engine_torquePowerCurve_multiplier = 1;

// RPMs at wich the driver should shift up

engine_shiftUpRPMs = 5800;

// RPMs at wich the driver should shift down

engine_shiftDownRPMs = 3000;

// Some values used to slow down car engine when no throttle is applied

engine_brakeCurveValues = [  -40,   -40,  -50,  -60,  -70,  -80, -100];

// The RPM values

engine_brakeCurveRPMs   = [ 1000, 1050, 2000, 3000, 4000, 5000,  6000];

// Used in dev to quickly enhance engine brake curve effect by a flat multiplier

engine_brakeCurve_multiplier = 1;

// The gear ratios of the gearbox

engine_gearRatios = [-2.90, 2.66, 1.78, 1.30, 1.10, 0.96, 0.80];

// The differential ratio (between gearbox output and motorized axle input)

engine_differentialRatio = 3.42;

// Efficiency of power transmission

engine_transmissionEfficiency = 0.7;

// Ratio of power going to rear axle (1 means 100%)

engine_rearAxlePowerRatio = 1.0;

// Ratio of power going to front axle

engine_frontAxlePowerRatio = 0.0;


/** WHEELS SETUP **/

// Time in seconds to reach max steering angle

wheel_steerSpeed = 0.500;

// Maximum steer angle when the car is stopped/low speed (in radians !)

wheel_steerAngleMax = Math.PI / 4;

// If setted to yes, the driver will not be allowed to steer to much at higher speed

wheel_optimizeSteerAngle = true;

// Adjusts autosteer level, from 0 to 1 : 1 will be perfect knowledge of actual cruise speed

wheel_optimizeSteerAngleValue = 1.0;

// Bonus : autosteer formula | max_steer = Math.min(maxSteerAngle, Math.PI/2 - Math.acos(peakLateralSlipAngleInDegrees / absFrontSpeed))

// Inertia of the wheel

// TODO : it should depend of the actual gear but i have no formula for it

wheel_inertia = 25;

// The radius of the wheel (in meters)

wheel_radius = 0.33;


/** FRONT FRICTION FORCES SETUP */

// The front pacejka curve values for a load of 1N (for slip ratio output)

friction_front_longitudinalPacejkaCurve_valuesFor1Nload = [0,   1.00,   1.20,   1.30,   1.20,   0.90,   0.70];

// The front pacejka curve slip ratios corresponding to the above force outputs

friction_front_longitudinalPacejkaCurve_slipRatioValues = [0,   0.01,   0.03,   0.05,   0.10,   0.20,   1.00];

// Used in dev mode to multiply pacejka output for testing purposes

friction_front_longitudinalPacejkaCurve_valuesMultiplier = 1;

// The front pacejka curve values for a load of 1N (for slip angle output)

friction_front_lateralPacejkaCurve_valuesFor1Nload = [0,	0.10,	0.20,	0.30,	0.41,	0.49,	0.58,	0.66,	0.73,	0.80,	0.87,	0.92,	0.97,	1.01,	1.05,	1.08,	1.11,	1.13,	1.14,	1.15,	1.16,	1.15,	1.10,	1.03,	0.94,	0.79,	0.66,	0.55,	0.50,	0.46,	0.39];

// The front pacejka curve slip angles corresponding to the above force outputs

friction_front_lateralPacejkaCurve_slipAngleValues = [0,	1.00,	2.00,	3.00,	4.00,	5.00,	6.00,	7.00,	8.00,	9.00,   10.00,   11.00,   12.00,   13.00,   14.00,   15.00,   16.00,   17.00,   18.00,   19.00,   20.00,   25.00,   30.00,   35.00,   40.00,   50.00,   60.00,   70.00,   75.00,   80.00,   90.00];

// The slip angle for which you get maximum force

friction_front_lateralPacejkaCurve_slipAngle_peakGrip = 20;

// Used in dev mode to multiply pacejka output for testing purposes

friction_front_lateralPacejkaCurve_valuesMultiplier = 1;

// The front traction ellipse longitudinal friction limit

friction_front_longitudinalLimit = 1.30;

// The front traction ellipse lateral friction limit

friction_front_lateralLimit = 1.30;


/** REAR FRICTION FORCES SETUP */

// The rear pacejka curve values for a load of 1N (for slip ratio output)

friction_rear_longitudinalPacejkaCurve_valuesFor1Nload = [0,   1.00,   1.20,   1.30,   1.20,   0.90,   0.70];

// The rear pacejka curve slip ratios corresponding to the above force outputs

friction_rear_longitudinalPacejkaCurve_slipRatioValues = [0,   0.01,   0.03,   0.05,   0.10,   0.20,   1.00];

// Used in dev mode to multiply pacejka output for testing purposes

friction_rear_longitudinalPacejkaCurve_valuesMultiplier = 1;

// The rear pacejka curve values for a load of 1N (for slip angle output)

friction_rear_lateralPacejkaCurve_valuesFor1Nload = [0,	0.10,	0.20,	0.30,	0.41,	0.49,	0.58,	0.66,	0.73,	0.80,	0.87,	0.92,	0.97,	1.01,	1.05,	1.08,	1.11,	1.13,	1.14,	1.15,	1.16,	1.15,	1.10,	1.03,	0.94,	0.79,	0.66,	0.55,	0.50,	0.46,	0.39];

// The rear pacejka curve slip angles corresponding to the above force outputs

friction_rear_lateralPacejkaCurve_slipAngleValues = [0,	1.00,	2.00,	3.00,	4.00,	5.00,	6.00,	7.00,	8.00,	9.00,   10.00,   11.00,   12.00,   13.00,   14.00,   15.00,   16.00,   17.00,   18.00,   19.00,   20.00,   25.00,   30.00,   35.00,   40.00,   50.00,   60.00,   70.00,   75.00,   80.00,   90.00];

// The slip angle for which you get maximum force

friction_rear_lateralPacejkaCurve_slipAngle_peakGrip = 20;

// Used in dev mode to multiply pacejka output for testing purposes

friction_rear_lateralPacejkaCurve_valuesMultiplier = 1;

// The rear traction ellipse longitudinal friction limit

friction_rear_longitudinalLimit = 1.30;

// The rear traction ellipse lateral friction limit

friction_rear_lateralLimit = 1.30;


/** DRAG FRICTION FORCES SETUP **/

// The air drag value, wich is multiplied by speed²

// Bonus : air drag formula

// AIR_DRAG_FORCE_CONSTANT =  0.5 * Cd * A * rho

//  Cd = coefficient of friction  > depends on the shape of the car and determined via wind tunnel tests (Approximate value for a Corvette: 0.30)

//  A is frontal area of car	> approx. 2.2 m2

//  rho (Greek symbol )= density of air > 1.29 kg/m3

// AIR_DRAG_FORCE_CONSTANT = 0.5 * 0.30 * 2.2 * 1.29 = 0.4257

friction_air_drag = 0.4257;

// The rolling friction value, wich is multiplied by speed (applied blindly in X, Y)

friction_roll_drag = 15;


/** CAR SUSPENSION SETUP **/

// TODO : implement real car suspensions

// Flat front/rear weight transfer division

suspension_frontRearWeightDisplacement_divider = 2;

// Flat lateral weight transfer division

suspension_leftRightWeightDisplacement_divider = 4;

// Time for a new load value to be fully applied in milliseconds

suspension_timeToReachForce = 1500;
[/spoiler]
To be honest i must say this reference values don't make a nice car. I'll post a general handling video soon.
Here are some parameters taken from Edys Car Vehicle Physics for the Red Pickup you can try in the demo. Some of the values can be monitored with B and the SHIFT+B in the demo. I post it here to give some elements to discuss about as a part of those values are not present above, and for some i just dont know what they mean. Any idea / insight would be appreciated.
[spoiler]

[/spoiler]
Part 3 - Reference handling and values
The goal of this part is to put the car in a typical situation with controlled environment, and to look at what happens. Game may be written in Java, .NET, Unity or whatever, if you have taken control of the physics, and if you have the right car parameters, the values should look like these.
X-Car-1_T01 : apply 100% throttle for 10.00 seconds
Coming soon...
X-Car-1_T02 : launching directly the car with a front velocity of 50 meters/s
Coming soon...
X-Car-1_T03 : launching directly the car with a side velocity of 50 meters/s
Coming soon...
X-Car-1_T04 : launching directly the car with an angular velocity of 10 radians/s
Coming soon...
X-Car-1_T05 : launching directly the car with a combined front/lateral velocity : 50m/s in each direction
Coming soon...
X-Car-1_T06 : launching directly the car with a combined front/lateral velocity : 50m/s in each direction and a 10 radians/s angular velocity
Coming soon...
X-Car-1_T07 : apply 100% throttle for 10.00 seconds, then without releasing throttle, press the right key for the next 10.00 seconds (right + full throttle)
Coming soon...
X-Car-1_T08 : apply 100% throttle for 10.00 seconds, then release throttle, and press the right key for the next 10.00 seconds (right + free roll)
Coming soon...
X-Car-1_T09 : apply 100% throttle for 10.00 seconds, then apply brake, and press the right key for the next 10.00 seconds (right + brake)
Coming soon...
X-Car-1_T10 : a controled drift situation (still have to find a reference test)
Coming soon...
Part 4 - Tips & tricks
This part is still R&D, and i am more open to debate and wanting to collect ideas and tests than trying to explain to do this or not. I do not have the solution for doing most of those things anyway.
List of "legit" tricks :
- Limit maximum steer angle according to speed & max grip peak SA
- Same for throttle/brakes with peak slip ratio output
- Decrease gently (or not) steer angle after input release
- Be aware (you, programmer) of when a drift situation occurs and change car control inputs to help player have more fun
- Instead of modelizing a complex combined front/lat grip formula, just determine how much percent of lateral grip you lose in function of the slip ratio
Cheap tricks or cheats :
- If player apply throttle, just directly add front Y velocity to car
- Disable real front/rear weight calculations. Just decide of a prefixed weight change on acceleration/braking situations
- Gently decrease forces near/after traction circle max value, instead of just cutting it
- Rotate directly car velocity vector by a very small percent of the front wheels slip angle
- Use a linear slipAngleInRadians * someConstant formula for lateral pacejka output
Part 5 - Reference formulas and ressources
More content to come...
Reference physics formulas, tutorials and references...
Part 6 - Questions, FAQ, things we don't know
Questions :
- What is the formula to have a friction ellipse instead of a circle ?
- Where can we find a simple formula for combined long/lat grip ?
- Should we apply a static friction force or something like that or just pacejka ?
FAQ :
- Should i apply forces lateraly to car body or to the wheel ?
To the wheel.
- More classic question and answers to come...
- What value can i use to decide if i must draw lateral drift skidmarks ?
- What value can i use to decide if i must draw burnout skidmarks ?
I am a little bit tired, but i will update with more basics.
I'm looking forward to read your answers and contributions, if anyone interested !
/** GENERAL BODY CONFIGURATION **/
// Length of the car (m)
body_length = 4.57;
// Width of the car (m)
body_width = 1.87;
// Mass of the car in Kgs
body_mass = 1500;
// Inertia of the car
// Rectangular box inertia formula is : (mass * (boxWidth² + boxLength²)) / 12 --- (height doesnt count)
body_inertia = 3000;
/** WHEEL ATTACH POINT AND STATIC WEIGHT DISTRIBUTION **/
// Vertical distance from front axle to gravity center horizontal line (if car is heading vertical)
geometry_frontAxleDistanceToCG = 1.60;
// Vertical distance from rear axle to gravity center horizontal line (if car is heading vertical)
geometry_rearAxleDistanceToCG = 1.60;
// Horizontal distance from any wheel attach point car vertical middle line
geometry_wheelDistanceToCarCenter = 0.80;
// Height of the CG (in meters)
geometry_heightOfCG = 0.30;
/** ENGINE SETUP **/
// Values of the power curve for each RPM
engine_torquePowerCurveValues = [ 400, 430, 448, 460, 480, 486, 480, 500, 550, 500];
// Values of the RPMs for the power curve
engine_torquePowerCurveRPMs = [1000, 2000, 2500, 3000, 4000, 4500, 5000, 5500, 5800, 6000];
// Used in dev to quickly enhance engine power by a flat multiplier
engine_torquePowerCurve_multiplier = 1;
// RPMs at wich the driver should shift up
engine_shiftUpRPMs = 5800;
// RPMs at wich the driver should shift down
engine_shiftDownRPMs = 3000;
// Some values used to slow down car engine when no throttle is applied
engine_brakeCurveValues = [ -40, -40, -50, -60, -70, -80, -100];
// The RPM values
engine_brakeCurveRPMs = [ 1000, 1050, 2000, 3000, 4000, 5000, 6000];
// Used in dev to quickly enhance engine brake curve effect by a flat multiplier
engine_brakeCurve_multiplier = 1;
// The gear ratios of the gearbox
engine_gearRatios = [-2.90, 2.66, 1.78, 1.30, 1.10, 0.96, 0.80];
// The differential ratio (between gearbox output and motorized axle input)
engine_differentialRatio = 3.42;
// Efficiency of power transmission
engine_transmissionEfficiency = 0.7;
// Ratio of power going to rear axle (1 means 100%)
engine_rearAxlePowerRatio = 1.0;
// Ratio of power going to front axle
engine_frontAxlePowerRatio = 0.0;
/** WHEELS SETUP **/
// Time in seconds to reach max steering angle
wheel_steerSpeed = 0.500;
// Maximum steer angle when the car is stopped/low speed (in radians !)
wheel_steerAngleMax = Math.PI / 4;
// If setted to yes, the driver will not be allowed to steer to much at higher speed
wheel_optimizeSteerAngle = true;
// Adjusts autosteer level, from 0 to 1 : 1 will be perfect knowledge of actual cruise speed
wheel_optimizeSteerAngleValue = 1.0;
// Bonus : autosteer formula | max_steer = Math.min(maxSteerAngle, Math.PI/2 - Math.acos(peakLateralSlipAngleInDegrees / absFrontSpeed))
// Inertia of the wheel
// TODO : it should depend of the actual gear but i have no formula for it
wheel_inertia = 25;
// The radius of the wheel (in meters)
wheel_radius = 0.33;
/** FRONT FRICTION FORCES SETUP */
// The front pacejka curve values for a load of 1N (for slip ratio output)
friction_front_longitudinalPacejkaCurve_valuesFor1Nload = [0, 1.00, 1.20, 1.30, 1.20, 0.90, 0.70];
// The front pacejka curve slip ratios corresponding to the above force outputs
friction_front_longitudinalPacejkaCurve_slipRatioValues = [0, 0.01, 0.03, 0.05, 0.10, 0.20, 1.00];
// Used in dev mode to multiply pacejka output for testing purposes
friction_front_longitudinalPacejkaCurve_valuesMultiplier = 1;
// The front pacejka curve values for a load of 1N (for slip angle output)
friction_front_lateralPacejkaCurve_valuesFor1Nload = [0, 0.10, 0.20, 0.30, 0.41, 0.49, 0.58, 0.66, 0.73, 0.80, 0.87, 0.92, 0.97, 1.01, 1.05, 1.08, 1.11, 1.13, 1.14, 1.15, 1.16, 1.15, 1.10, 1.03, 0.94, 0.79, 0.66, 0.55, 0.50, 0.46, 0.39];
// The front pacejka curve slip angles corresponding to the above force outputs
friction_front_lateralPacejkaCurve_slipAngleValues = [0, 1.00, 2.00, 3.00, 4.00, 5.00, 6.00, 7.00, 8.00, 9.00, 10.00, 11.00, 12.00, 13.00, 14.00, 15.00, 16.00, 17.00, 18.00, 19.00, 20.00, 25.00, 30.00, 35.00, 40.00, 50.00, 60.00, 70.00, 75.00, 80.00, 90.00];
// The slip angle for which you get maximum force
friction_front_lateralPacejkaCurve_slipAngle_peakGrip = 20;
// Used in dev mode to multiply pacejka output for testing purposes
friction_front_lateralPacejkaCurve_valuesMultiplier = 1;
// The front traction ellipse longitudinal friction limit
friction_front_longitudinalLimit = 1.30;
// The front traction ellipse lateral friction limit
friction_front_lateralLimit = 1.30;
/** REAR FRICTION FORCES SETUP */
// The rear pacejka curve values for a load of 1N (for slip ratio output)
friction_rear_longitudinalPacejkaCurve_valuesFor1Nload = [0, 1.00, 1.20, 1.30, 1.20, 0.90, 0.70];
// The rear pacejka curve slip ratios corresponding to the above force outputs
friction_rear_longitudinalPacejkaCurve_slipRatioValues = [0, 0.01, 0.03, 0.05, 0.10, 0.20, 1.00];
// Used in dev mode to multiply pacejka output for testing purposes
friction_rear_longitudinalPacejkaCurve_valuesMultiplier = 1;
// The rear pacejka curve values for a load of 1N (for slip angle output)
friction_rear_lateralPacejkaCurve_valuesFor1Nload = [0, 0.10, 0.20, 0.30, 0.41, 0.49, 0.58, 0.66, 0.73, 0.80, 0.87, 0.92, 0.97, 1.01, 1.05, 1.08, 1.11, 1.13, 1.14, 1.15, 1.16, 1.15, 1.10, 1.03, 0.94, 0.79, 0.66, 0.55, 0.50, 0.46, 0.39];
// The rear pacejka curve slip angles corresponding to the above force outputs
friction_rear_lateralPacejkaCurve_slipAngleValues = [0, 1.00, 2.00, 3.00, 4.00, 5.00, 6.00, 7.00, 8.00, 9.00, 10.00, 11.00, 12.00, 13.00, 14.00, 15.00, 16.00, 17.00, 18.00, 19.00, 20.00, 25.00, 30.00, 35.00, 40.00, 50.00, 60.00, 70.00, 75.00, 80.00, 90.00];
// The slip angle for which you get maximum force
friction_rear_lateralPacejkaCurve_slipAngle_peakGrip = 20;
// Used in dev mode to multiply pacejka output for testing purposes
friction_rear_lateralPacejkaCurve_valuesMultiplier = 1;
// The rear traction ellipse longitudinal friction limit
friction_rear_longitudinalLimit = 1.30;
// The rear traction ellipse lateral friction limit
friction_rear_lateralLimit = 1.30;
/** DRAG FRICTION FORCES SETUP **/
// The air drag value, wich is multiplied by speed²
// Bonus : air drag formula
// AIR_DRAG_FORCE_CONSTANT = 0.5 * Cd * A * rho
// Cd = coefficient of friction > depends on the shape of the car and determined via wind tunnel tests (Approximate value for a Corvette: 0.30)
// A is frontal area of car > approx. 2.2 m2
// rho (Greek symbol )= density of air > 1.29 kg/m3
// AIR_DRAG_FORCE_CONSTANT = 0.5 * 0.30 * 2.2 * 1.29 = 0.4257
friction_air_drag = 0.4257;
// The rolling friction value, wich is multiplied by speed (applied blindly in X, Y)
friction_roll_drag = 15;
/** CAR SUSPENSION SETUP **/
// TODO : implement real car suspensions
// Flat front/rear weight transfer division
suspension_frontRearWeightDisplacement_divider = 2;
// Flat lateral weight transfer division
suspension_leftRightWeightDisplacement_divider = 4;
// Time for a new load value to be fully applied in milliseconds
suspension_timeToReachForce = 1500;
To the wheel.


 Or you have eliminated any numerical instability issue in your simulation and just have forgot about it ^^ Anyway it is not that hard to emulate some equivalent to SR with similar results, but improved stability. My lateral forces are quite stable too at 50Hz, the difference is not really noticeable with 1000Hz.
 (seriously). Right now, my best hope to control the drifts without having a naturally oversteering car is to have better load transfer calculations and to stop to apply Fz linearly after normalized pacejka output. Maybe i am once again very wrong to hope that it will greatly improve car handling and capabilities... :'(
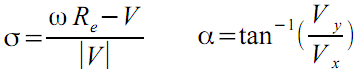
 wherever you found these info they are just wrong all the way. Your wheel angular speed should be a function of all the torques (and forces transformed to torque) acting on the entire transmission system, from the engine to the wheels. All these are integrated with the same formulas and, unless they are wrong, deltaT won't change the result in any tangible way. You should make sure to double check your sources because the big risk here is you claiming to have a solution to a problem that never existed in the first place but it's just a result of your fantasy.