3 hours ago, Michael Aganier said:
to make 1 animated skeleton and be able to use it to animate multiple characters and export them into spritesheets. Is that possible with blender?
Yes, all good 3D software can do this. If you want to to target different proportions you will also need to learn the Inverse Kinematics in Blender. It takes a while but once you know how to use it, you will be able to make animations at a faster and easier.
3 hours ago, Michael Aganier said:
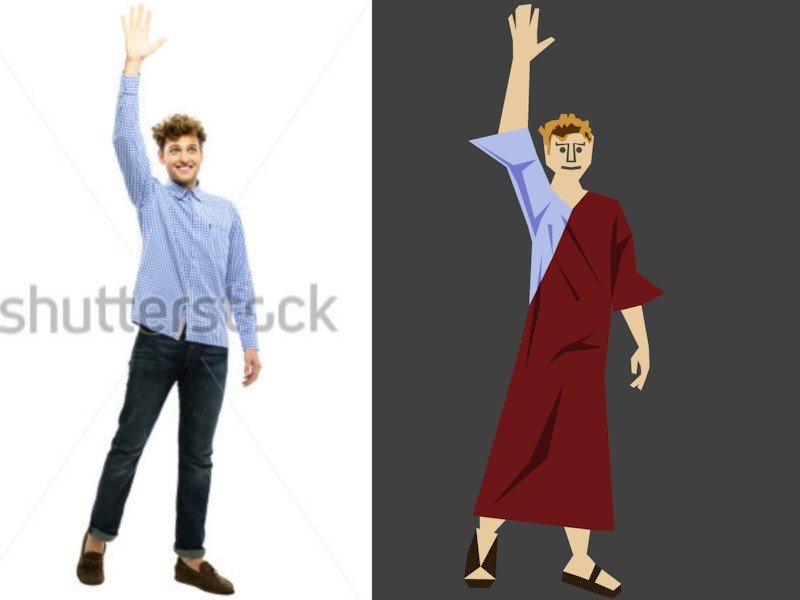
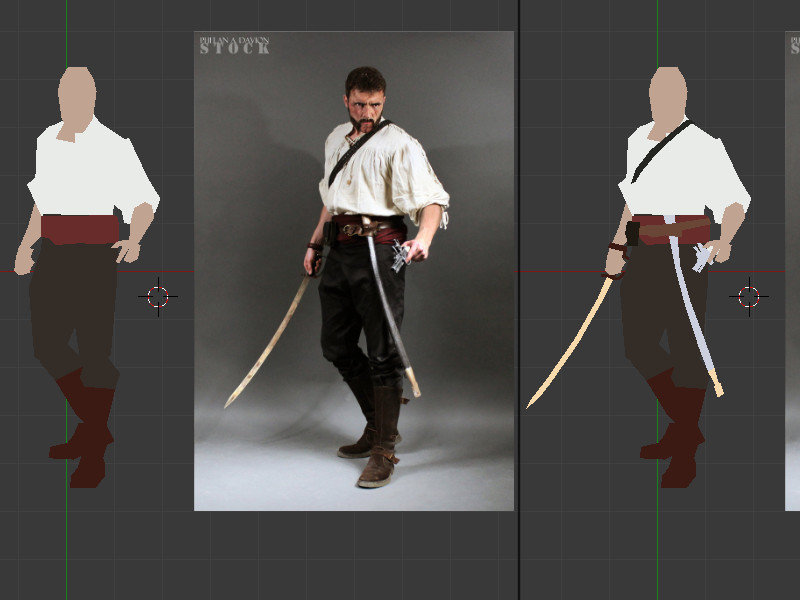
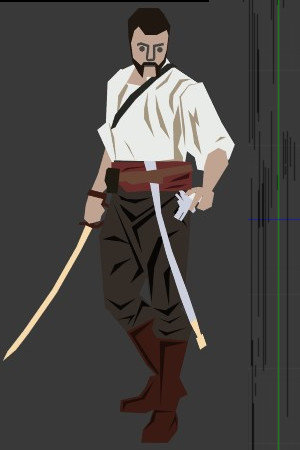
Also, could you describe how you've done your vector character? Is the whole model 1 piece? Did you made each pieces separately? What kind of lighting did you render with? I'd love to see in action how you go through that process.
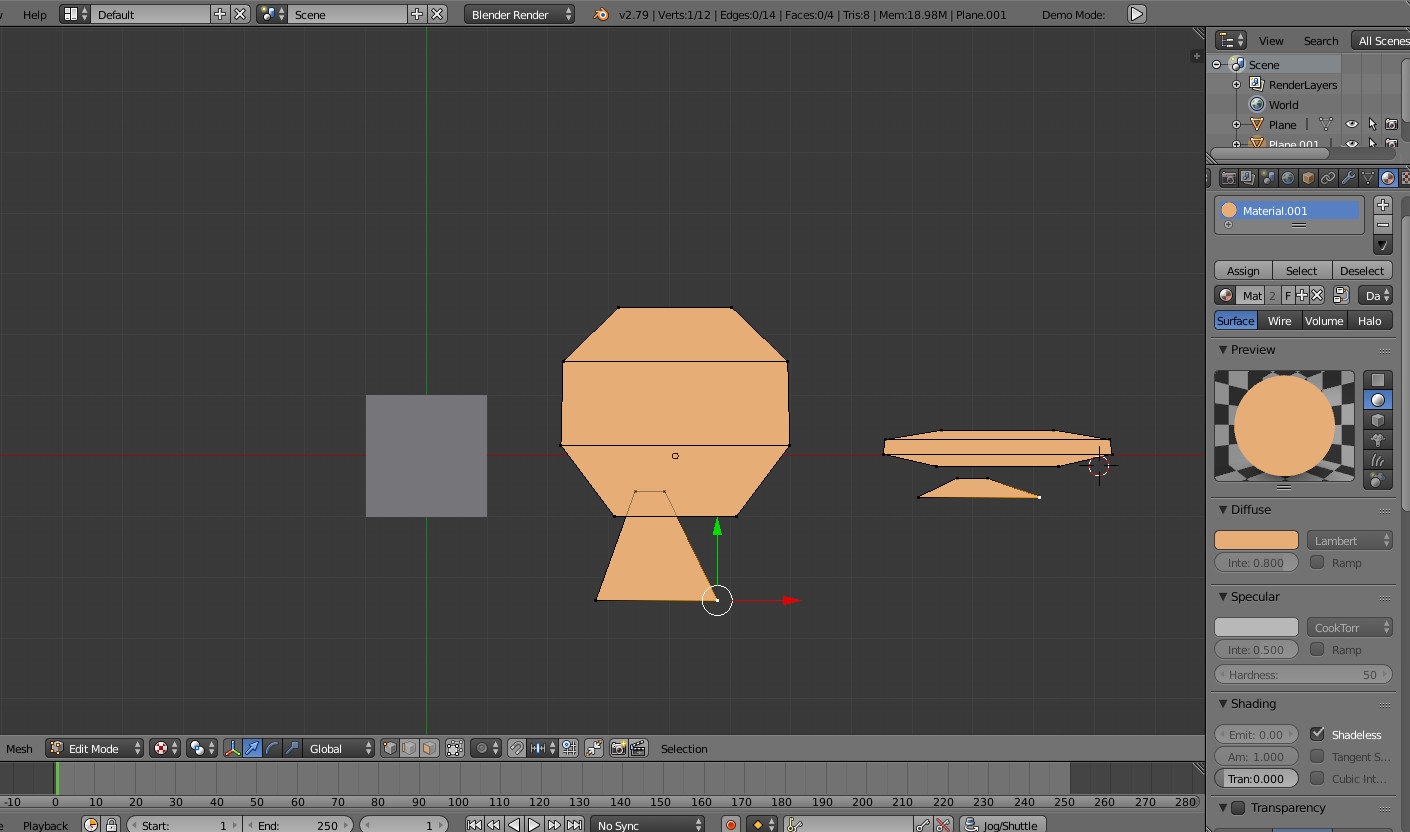
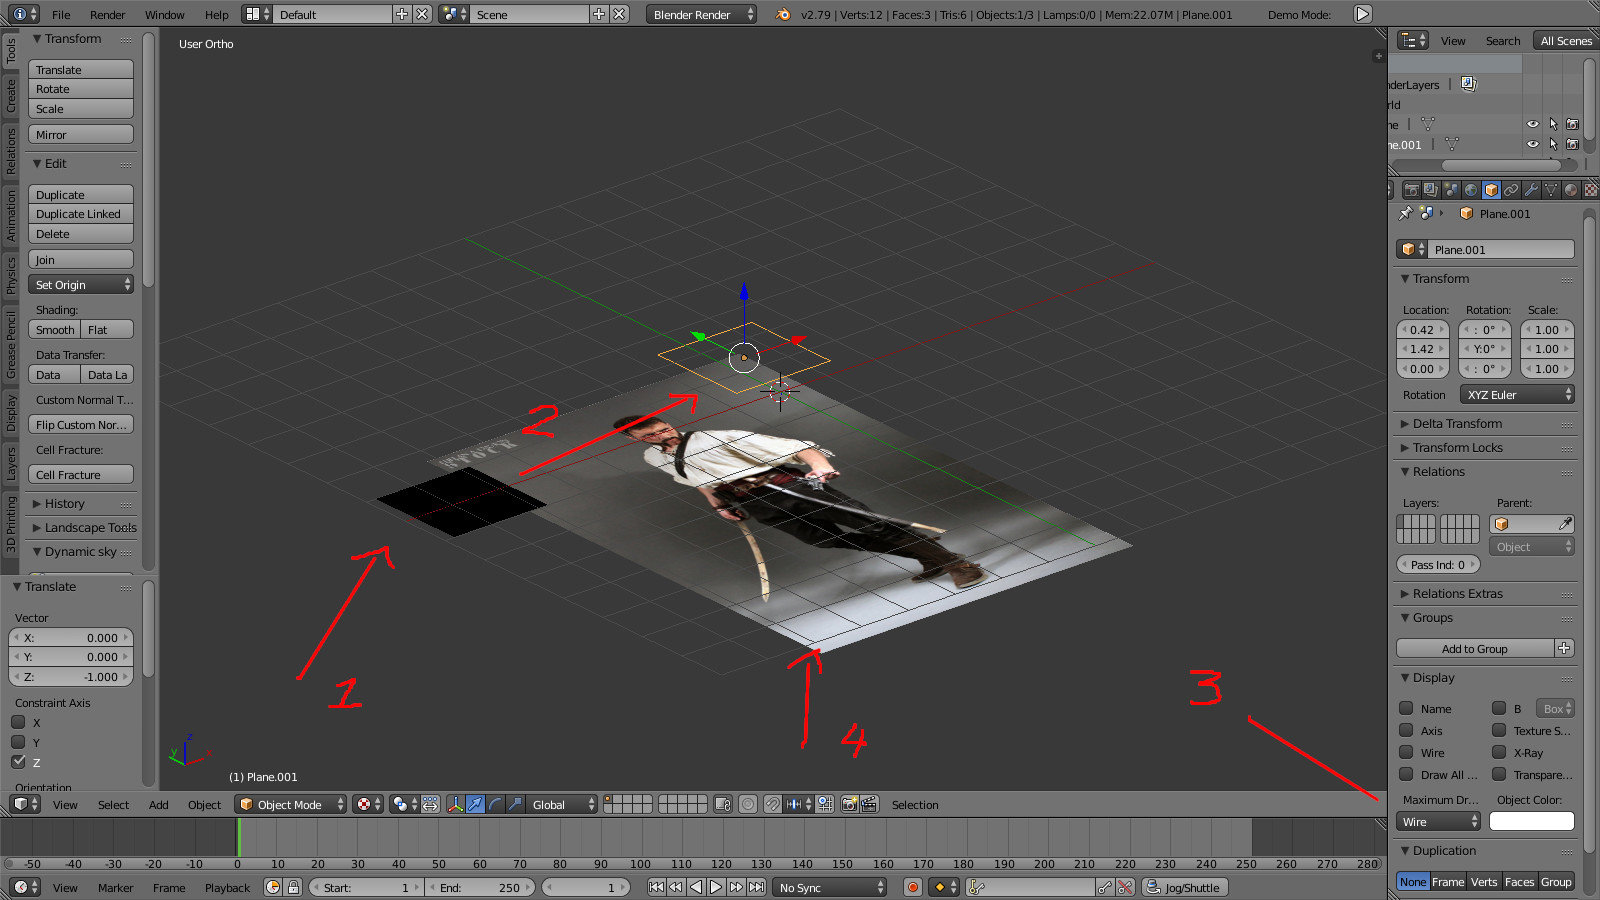
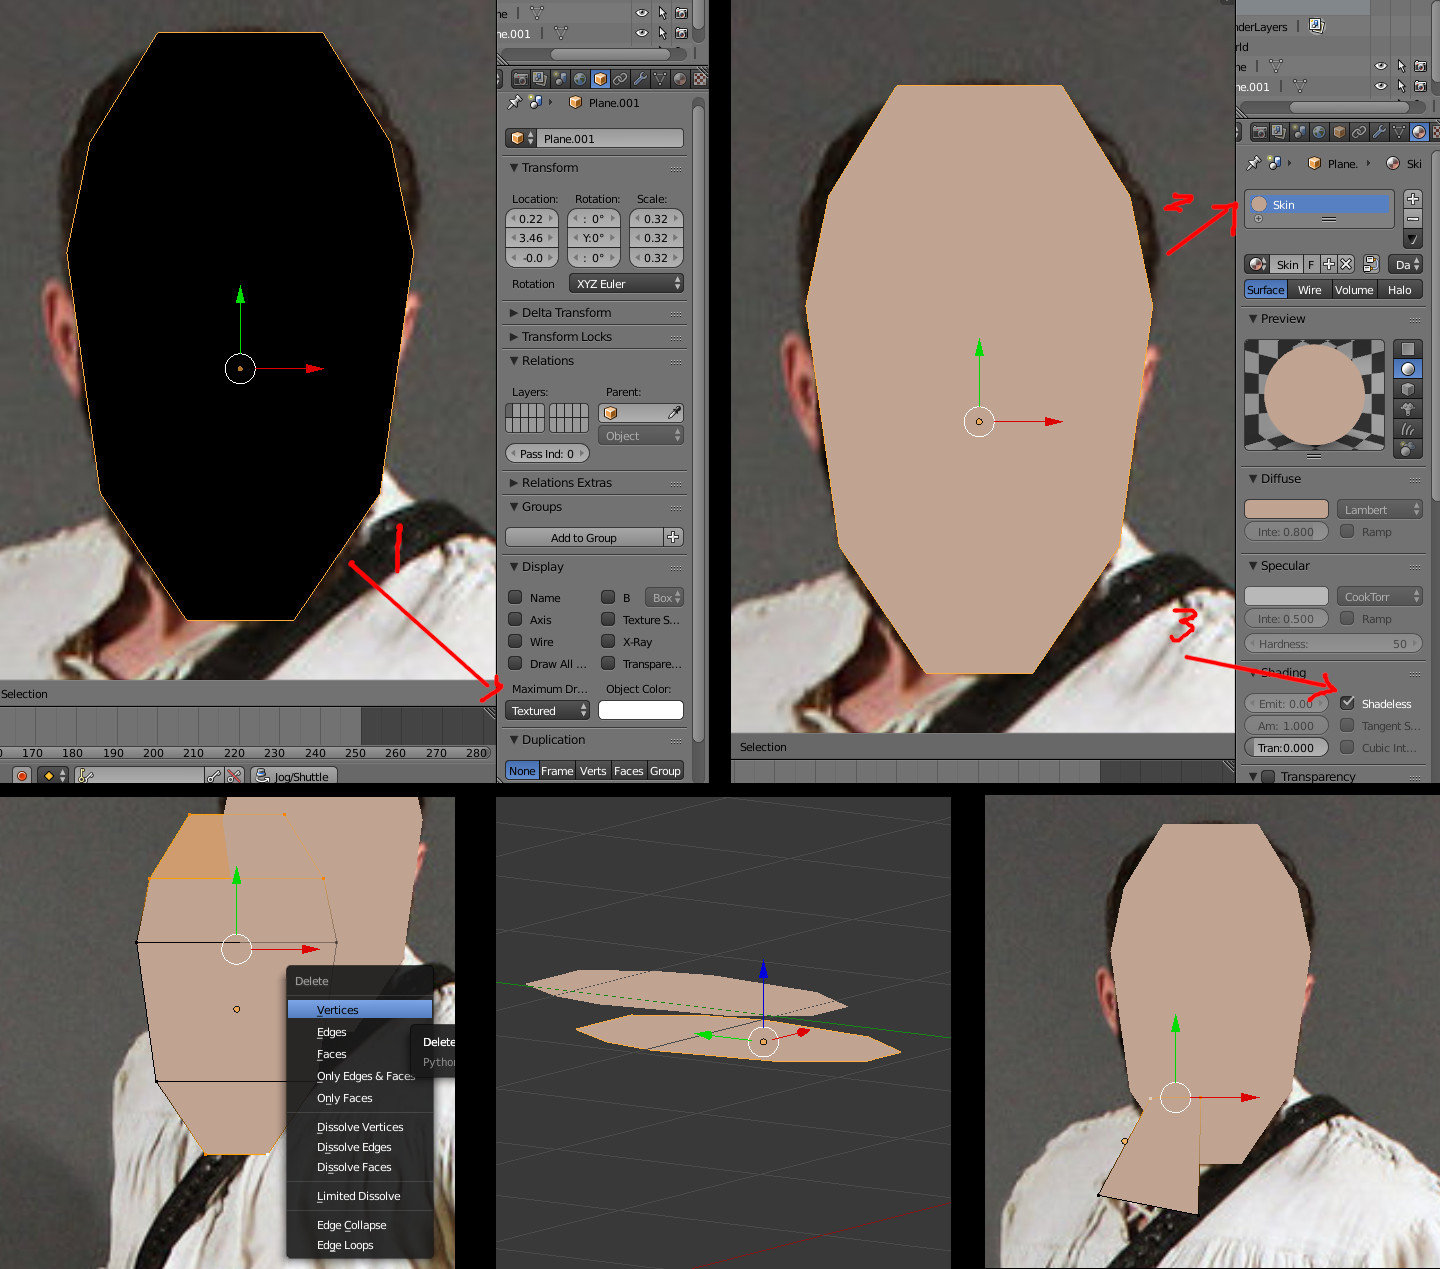
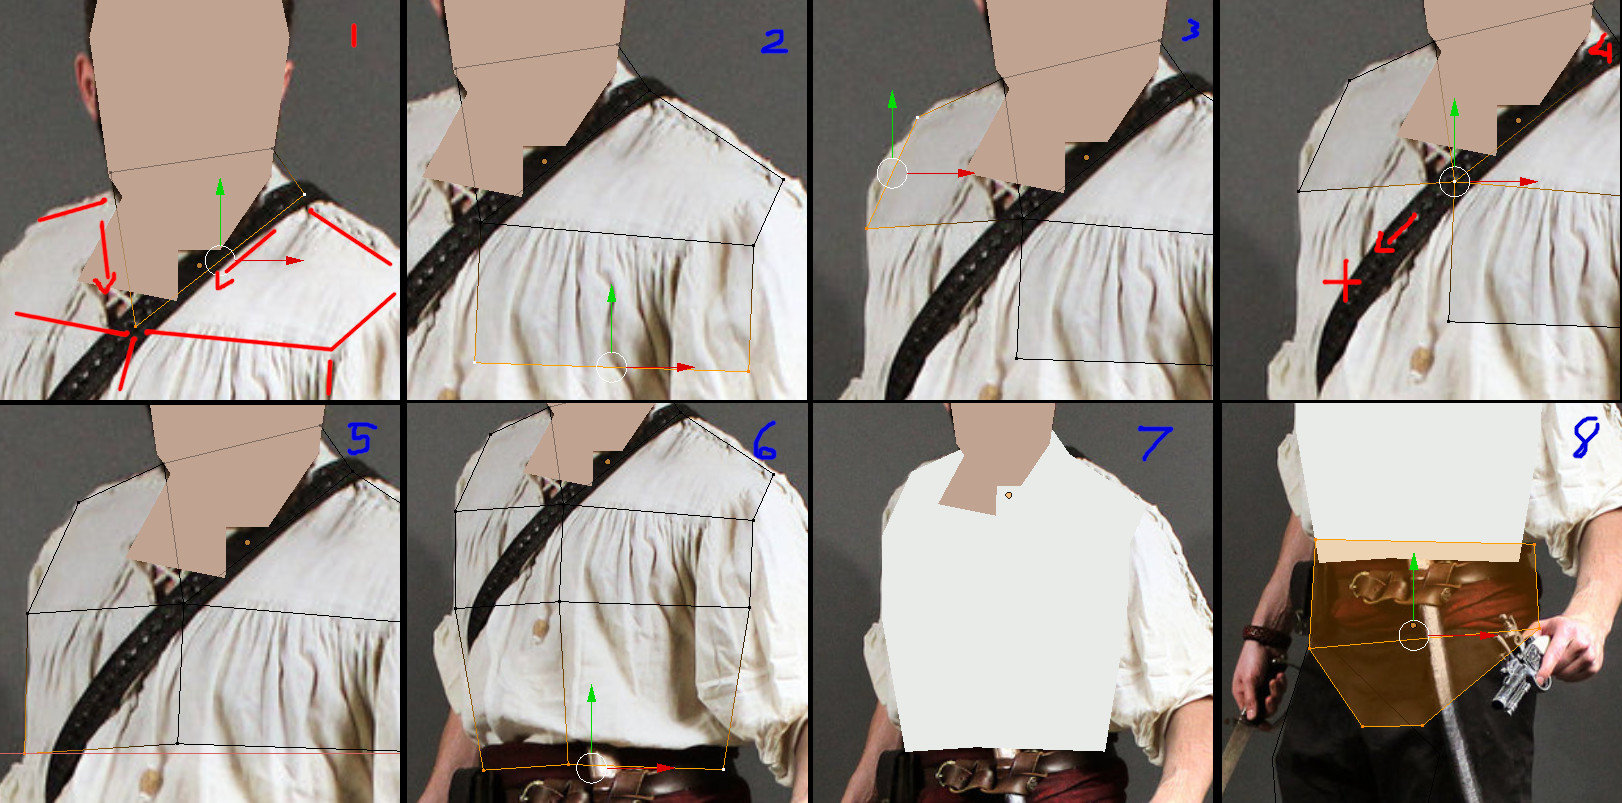
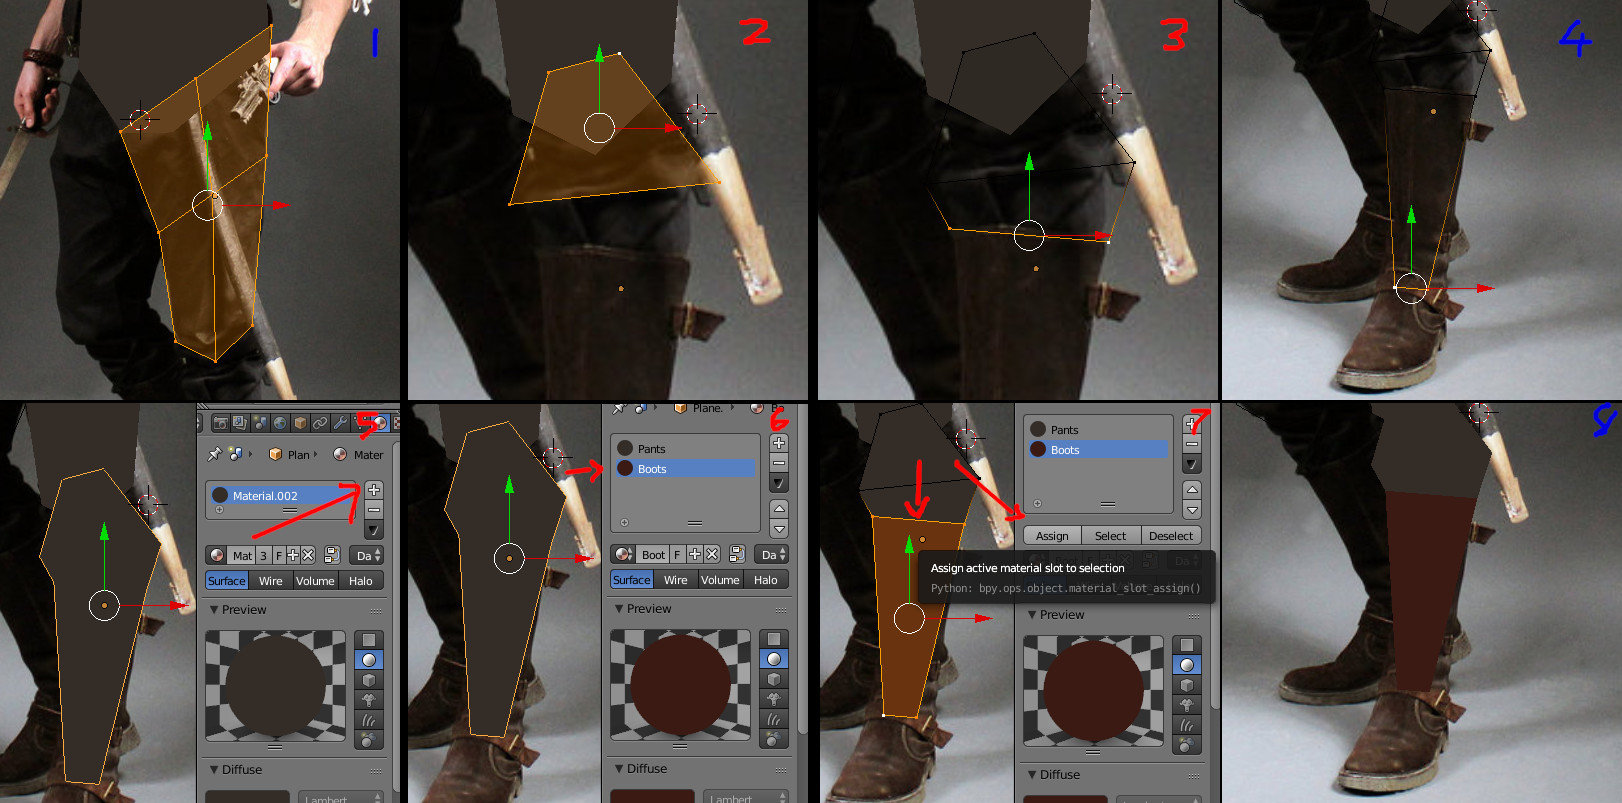
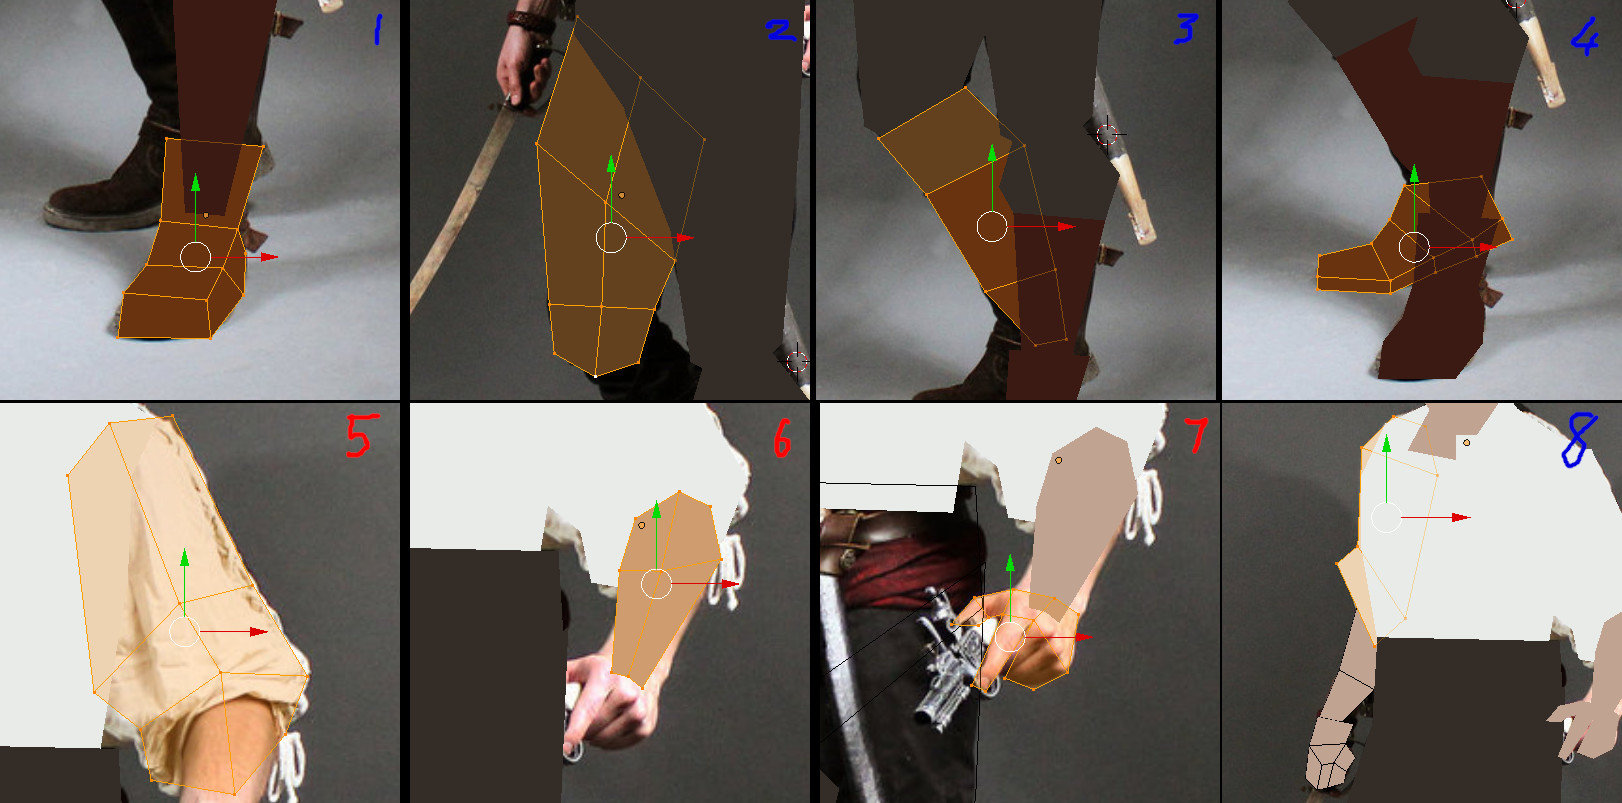
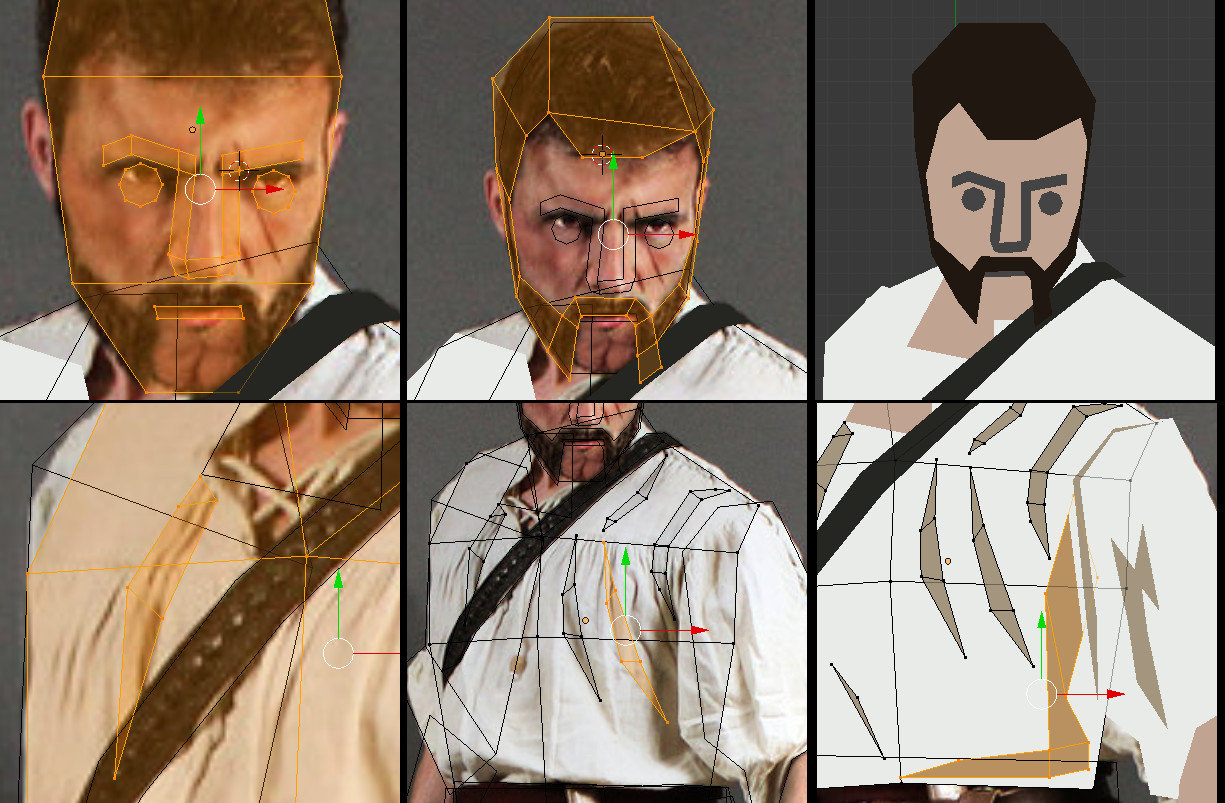
I used a flat plane. Then in edit mode shaped it by moving vertices around and extruding edges where I wanted.

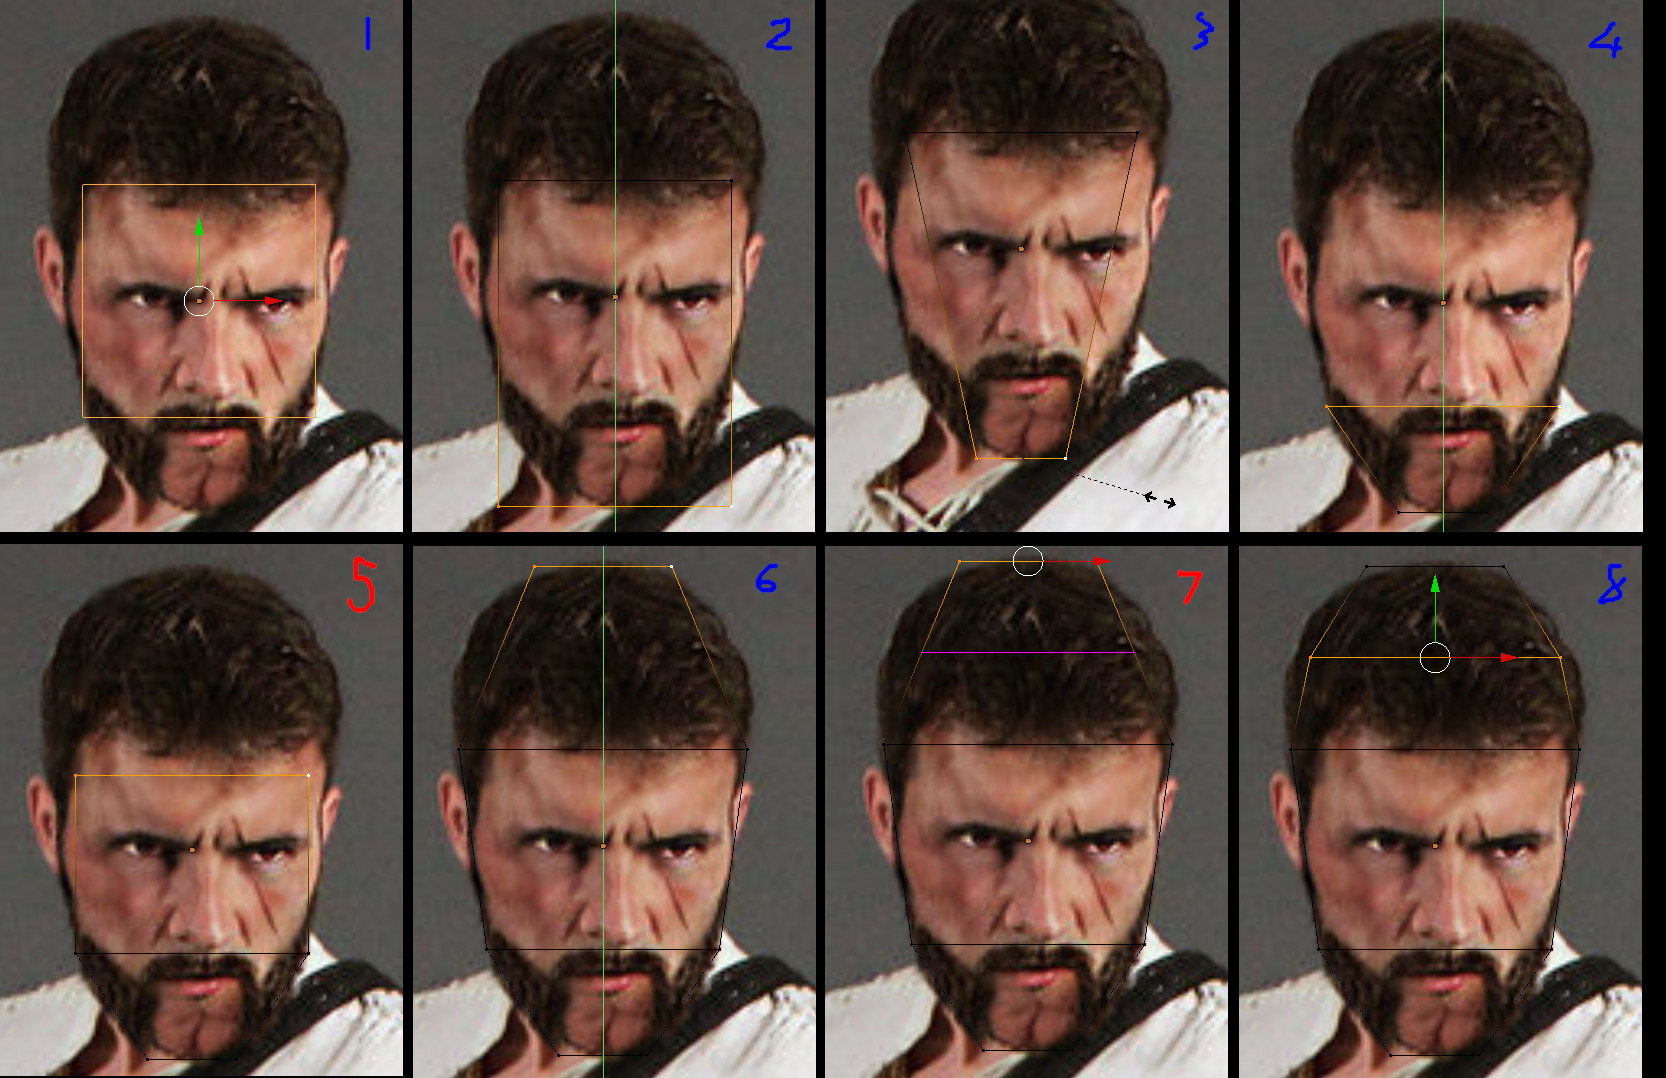
Use the move, rotate and scale tools to move your vertices in Edit Mode (TAB_KEY), to edit a plane like the one in the left of the image.
To the right you can see it rotated it to show what it looks like. Parts that should be under parts, should really be under them.
You can see my material would be a single color with "Shadles" enabled for a flat single color look. All the parts of the same color would share a material.
In edit mode, select a vertice (right click), then hold down the CTRL key, then click somewhere to "draw" a vertice. F_key allows you to fill 3 or more vertices to make a polygon.
Unfortunately I deleted the one I made and right now I am a bit busy. Tomorrow I will make a proper example for you. The above should help you a bit for now.
3 hours ago, Michael Aganier said:
I've readed all of section 1, though it's only about basics and interface.
Just remember that Blender's real interface is your keyboard. They take the stuff that normally bloats the screen and move it down to the keyboard.
Most of your buttons are centered around "WASD", just like a game. If you mess up: Shift+C is the camera reset, it also Resets the cursor.