
Hey everyone!
I couldn't find any rules about posting so I'm sorry if I've ignored some ?.
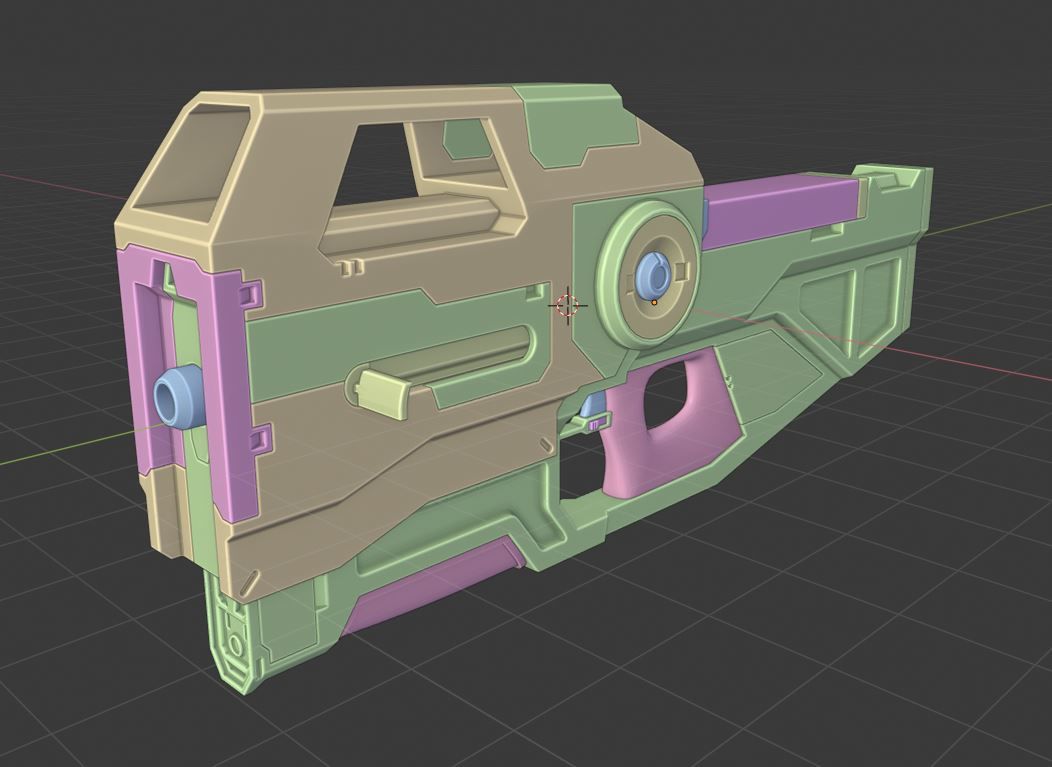
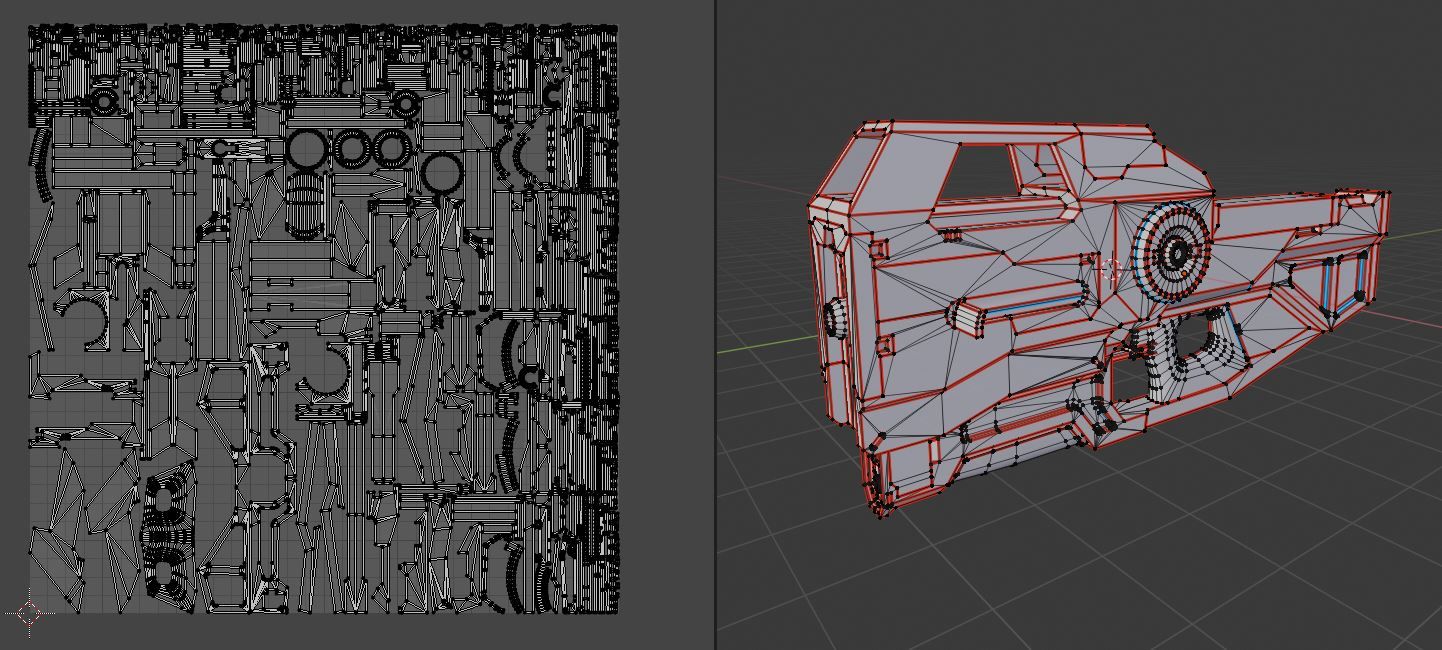
I'm trying to figure out how to properly unwrap (and in general prepare) a low poly model for a high poly hard surface model (below) in Blender and bake it in Substance Painter. I keep ending up with an overall low resolution because of all the clutter in the UV map. All the meshes are split by the panel lines so I can cleanly bake via mesh name in Substance, but the low poly is exported as one mesh.
What I did with my last model was make a seam on every sharp edge, so that the bevels had no seams in them when baked to a normal map. I also found that putting a little interior 'lip' on all the panel lines gave the best result for baking the bevels cleanly. This means I've got a lot of individual pieces to unwrap, which was manageable on my last model, which was a smaller and less detailed handgun so I could let Blenders automatic island packer organise everything and it still looked good (resolution-wise). However on this model, there's way more UV islands to deal with, and as you can see my main panels are suffering resolution wise (That's them in the bottom left corner of the UV map).
I'm quite new to this and don't have a mentor or even some friends in the field ?, so I was wondering if anyone who makes hard surface game assets could help me out or give me some advice? I'm not even sure if I'm following the correct workflow. It worked with my last project, but it doesn't look like its the right way to do it ?. I've tried separating the unseen 'lips' from the main UV islands and reorganising the UV map myself, but there's just so many little bits and pieces, it feels impractical and that I'm doing it wrong.


