Introduction
The C4 game engine has to be one of the best kept secrets in the independent gaming community. It has been in development by the principal developer, Eric Lengyel, for several years. It supports many advanced features such as real-time dynamic shadows for any number of lights, fully calculated specular or micro-facet reflections on any surface, and comes with a robust editor to import and prepare geometry for the game engine. It also implements a robust portal culling system, including support in the tools for building portaled level geometry.
Once you buy the engine for $200, you get not only free updates for the life of the engine, but also the full source code. This is quite comparable to the offering that Garage Games has for the Torque Game Engine, but the comparison stops there. Where Torque needs long lighting compile phases, C4 just runs once you've saved your level. Where Torque code resembles a tentacle monster, with tendrils reaching from all place to any other place, the C4 code is very modular and easy to find your way around. Where Torque exporters for packages such as 3ds Max are notoriously finicky and crashing, C4 uses COLLADA for importing any geometry from anywhere. And where Garage Games never answers questions, Eric provides top-notch service and bug fixing through the C4 forums. Perhaps the only reason Eric can do that is that C4 doesn't have as big a following, so it might be in my best interest to not turn you on to C4 :-)
C4 does miss some things that are available in some other game engines, though. It is currently mostly an indoors engine (with outdoors being next on the road map). The physics is quite basic -- spheres and rays collided against the ground, with simple euler based physics. And, last, there is no real scripting language in C4. There are triggers, and controllers, and a visual macro package that can run in response to triggers, but any "real" coding has to be done in C++.
Another thing missing in C4 (and missing in TGE, too), is support for navigation and path finding for NPCs. I spent the last few evenings trying to work something out, mainly for the challenge, and the chance to experience C4 in a little more depth. This article presents my findings, which includes source code and some advice about how to use it with the C4 engine.
While the source code included doesn't expose any C4 code (doing so would be against the C4 license agreement), but it will use the general framework of C4 in its Locator markers and Controller node attachments. However, you can use these same techniques implemented in this code, in some game of your own, as long as you have the same features available to you: placing markers in the world, finding these markers, and testing whether you can move through the world along a given direction or not.
Requirements
The requirement for this navigation system is to make it possible to plan a path, for a player character or non-player character, from point A to point B within the game world, without too much burden on the CPU at runtime. While there are some systems that can do this entirely automatically, the system I present here is implemented based on hints given by the level artist. This has two benefits: First, it allows the artist to express things he knows about the navigability of a level, that an automatic algorithm might not. Second, it's a lot simpler to implement!
The implementation will construct a graph of "navpoints," where each navpoint is connected to some other navpoints in a directed graph approach. An edge in this graph from navpoint A to navpoint B means, that if an NPC starts at point A, and aims at point B, and walks forward, he will get to point B (unless some other movable obstacle is in the way).
There is an additional gnarl, in that the NPC will not be right on one of these navpoints when it needs navigation services, and the final destination (say, the player, or some in-game goal) may not be right at a navpoint either. Thus, we need to be able to get to the closest navpoint from where we currently are, and we need to be able to get from the endpoint of the navigation path to the destination location.
So, to put it all in one place:
- The artist or level designer places navpoints in the level editor, to indicate generally navigable areas.
- These navpoints are discovered during level loading, and the connectivity between them is automatically calculated.
- Navpoint system provides a function "find the navpoint closest to point P, from which you can actually get to P."
- Navpoint system provides a function "find the navpoint closest to point Q, such that you can get from Q to that navpoint."
- Navpoint system provides a function "find a path along the navpoint mesh that travels from navpoint A to navpoint B."
Finding the Navpoints
In the C4 editor, you can place "Locator" markers. You do this by opening the Marker page, selecting the Locator tool, and clicking in the world editor. Once a Locator is placed, you can move it around with the node movement tool, and you can do Get Info on the marker to set the Locator Type, a four-letter code that is used in the game to understand what kind of marker it is.
In the system I implemented, the artist will place Locator markers and make them of Locator type "navi". The system will then find connections between markers on level load time. The component that does this connection finding is a Controller. Controllers are one of the main ways of getting custom code into the C4 scene graph. Any node can have zero or one controllers assigned to it, and the controller can expose Settings which are edited on the node in the World Editor.
I wanted to be able to create different kinds of nav meshes, say for wheeled vehicles versus kangaroos, so I decided that each NavmeshController instance will only consider "navi" Locators that are direct children of the controllers node. Thus, the artist will place all the locators, select them all, and Group them together. You will then add the "Navmesh" controller to that Group node, and set pathfinding parameters (such as jump height) on that controller.
Thus, in the NavmeshController::Preprocess() function, which is called when the level first starts up, the Navmesh finds all its children that are Locators of type "navi," and then proceeds to test connectivity between each pair of markers. To prevent this from taking a very long time (N-squared ray casts), the artist can set a maximum distance (radius plus vertical displacement) in the controller settings, and any pair of locators that are further away than this will not be considered as a connected pair. The connected neighbors for each navpoint are then stored in an array. I chose one global array with a separate index table for cacheability, but I think the code would have been cleaner if I just stored one small array for each navpoint. This connectivity array is not stored in the level file; instead it's calculated each time the level starts up. For my small test levels, that operation is so fast you can't measure it; for a really large level, it might make sense to allow saving the calculated connectivity.
Finding Navigability
In my first implementation, I just cast a ray from point A to point B to see whether there was anything in the way. This was great at making NPCs not walk through walls, but they would gladly throw themselves into a lava canyon that was between two separate ledges, as long as the raycast from a navpoint on ledge A to ledge B was unimpeded.
To improve this behavior, I first added the capability for an artist to mark, for a given navpoint, which other navpoints should NOT be considered reachable, even if the raycast says it is. While this allows problem cases to be manually fixed, it turned out to be a cumbersome process, and because of that, very fragile in the face of change to the level geometry.
To even be able to debug these problems, I added a command to the C4 command console which shows and hides navmeshes in the world. To be able to tell different meshes apart (meshes that come from different NavmeshController instances, and thus different groups of "navi" locators), I added a mesh display color property to the controller. I also added some functions to re-build the navigation mesh at runtime, and to list the general status of the navigation mesh system.
Other problems with the generated mesh included very complex interconnectivity, where a navpoint in the corner of a room might be connected to every other navpoint in that room. While technically correct, this creates meshes that look bad (but might play very well). To work around this issue, I added a feature in the calculation where connectivity between two navpoints will not be considered if other connected navpoints are "closer" and in the "same general direction."
At this point, with enough manual tweaking, and setting the global "radius" and "vertical" values according to the level, something playable could be created.
Refining Navigability
Throwing yourself in a lava moat does not count as "intelligent" behavior for an NPC. While working around it with explicit node pair exclusion might work for a tortured artist, it won't work when trying to solve the problem of moving from a random point P to the closest navmesh point. Thus, a better way of finding navigability over some area of level must be found.
I decided to brute-force it. Once I know that there's not a wall between point A and point B, I walk the extent of the ray and sample the height difference along the path. If there is a drop, it doesn't matter, as it's OK to jump off ledges. As long as the drop is not too steep! I added a parameter to the controller for what's considered too steep. Additionally, if a single step up is too steep, the NPC won't be able to climp or jump up, so I added another parameter to the controller for what's considered too steep. Last, I added a third parameter to determine how far to step in each iteration of finding the height profile. This will let artists make navmesh compilation a little faster on levels that don't have complex ramps, moats or other height complexity, while allowing for a very fine-grained navigability determination on harder levels.
The nice part of it is that this function can be used both when calculating navigability during start-up, and when trying to find the closest navmesh point that you can actually get to.
Using the Code
Just add the NavmeshController.cpp and NavmeshController.h files to your "Game" DLL MSVC project and build (this is typically "Game.dll" or "SimpleChar.dll" or "Skeleton.dll" depending on how you started your game).
In your World subclass Render() function, after calling World::Render(), you migth want to call MaybeRenderNavmeshes(). This will draw the navmeshes in wireframe, if the console command to turn them on has been run. ("navmesh show")
If the level designer has built one or more nav meshes, they will be automatically created when the level is loaded. To actually get ahold of one, by name of the group node containing the controller, call GetNavmeshController("name"). If you pass NULL for name, the first navmesh (in scene graph unpacking order) will be returned; this is mostly useful when you have only one navmesh.
To plan a path from point A to point B, call NavmeshPathCreate(begin, end). This will do initial path planning to get to the navmesh, and will then navigate through the mesh to the desired destination. Each step for your navigating character, you'll want to call Move(pos, &dir), passing in your current position, and getting out a desired direction to move in. Once you're done with the navigation (either at the destination, or choosing a different goal), call Dispose() on the returned NavmeshPath.
The NavmeshControllers will be deleted when the level is unloaded, so you do not need to separately manage their lifetime.
Reading the Code
You can download the code in an archive. Some things about the code might be worth mentioning, though.
First, the specific use of templates is a pattern that I use quite often, but might confuse you if you haven't seen it before. When you create a large number of objects of the same general kind, such as settings controls in a GUI, and also wanting to marshal/demarshal data that those same controls act on (or perhaps saving/loading to file, etc), it's nice if you don't have to update a zillion places each time you add a new member variable. To solve that problem, I use a single visitor function, that visits all the member variables, passing in various information about each member as it's being visited. While the file saving code might not care what the title of the member should be when displayed in a GUI, it also doesn't really hurt. Thus, for each operation on the members, a separate actor is created and passed to the visitor function. Most of those actors can actually be re-used between object implementations, so while it's a lot of code to write a single float to a file, or create a single text edit control, it saves a lot of code in the long run. Given that I added different control parameters while moving along with the implementation, I believe this pattern paid for itself during this development effort alone. Any new controller I write for C4 will be a pure time win -- not to mention the bugs I avoid by doing each thing only in one place!
Next, the implementation uses no private or protected members. This is in general a pretty bad idea, if you want to expose the implementation. However, the navmesh implementation is in a .cpp file, so no client of the navmesh can poke at those non-private members, so in this case, it's actually a benefit. Some of you may know of this as "interface programming." Unfortunately, the rest of C4 does not use interfaces; instead it uses concrete classes with sometimes deep inheritance, and heavy use of private members. The draw-back, as I'm sure you know, is that any change to an implementation detail (such as the type of a member variable) will cause a re-compilation of every client of that class, even if the functional interface to the class has not changed.
The A-star function (called NavmeshController::AStarSearchIntoWalkPath) is all one big function, but I believe it's OK to make it one function, as it keeps all the concepts in one place for this algorithm. I will not explain A-star in depth, as there are many tutorials on that on the web, except to say that this implementation shows A-star on a generalized directed graph, rather than just the boring old square tiles most often illustrated. Read the comments for more information!
Finally, the versioning mechanism used in the file I/O is something you might want to pay attention to. It allows you to add new members to an existing data type, and have them persist in newly saved files, while still correctly opening older file versions. In fact, with only a little bit of code change, you could even support writing older versions of files!
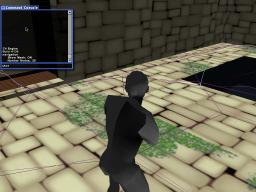
The 'navmesh' console command
In the console, once a navmesh is instantiated, you can use the navmesh command to get some useful feedback about the navmeshes and how they do path finding. Here are some example commands.
navmesh show
Final notes
I release the pathfinding code under the MIT license, which basically means that you're free to use it for any purpose, as long as my copyright is retained, and as long as you indemnify and hold harmless me for any damage resulting out of your such use, because I claim no merchantability or fitness for a particular purpose of the code.
I would like to thank Eric Lengyel for writing the C4 engine. I would like to thank the community at the C4 message boards for feedback on the initial implementation and this article. I would like to apologize to my wife, as I've been all grumpy sitting up until the middle of the night writing this code and article. And don't forget to download the code!
Thanks for reading.