Rendering a .fbx Skinned Mesh in DirectX 9
Bobby Thurman
Why
Autodesk .fbx skinned meshes are pretty darn easy to come by, they look great, are economical, but example code to load, animate, and render them isn't so easy to find. Autodesk provides an openGL example, but the example only does software vertex processing. This covers a DirectX example for .fbx files with hardware vertex processing.
Basic Example Link
https://drive.google.com/open?id=1av3J1Kl0QBRbpEep448oKlzXnqmFBV_T
Assumptions
⦁ You need Visual Studio 2019 Community edition to run this project. It's free.
⦁ This code is mostly DirectX 9 specific. It's in the title, but I'm listing it here none-the-less. I pre-installed DirectX SDK version June 2010.
⦁ You have some working knowledge of how DirectX works. There are a lot of books on DirectX. Frank Luna books are my favorite.
⦁ We do need to use a shader to render the skinned mesh, so please be familiar with how DirectX shaders work.
⦁ You'll need to install the Autodesk SDK. I installed Autodesk SDK version "2019.0". Remember to move the 32-bit libfbxsdk.dll to the project folder. Other versions may work too, but the interfaces tend to change a bit between versions of Autodesk.
⦁ You should understand how skinned meshes work with bone influences and the bone matrix vector. If you don't understand this, then it's probably a good idea to read a book or a web page on this topic first.
⦁ I tend to use DirectX terms instead of OpenGL or Autodesk terms.
Limitations
In order to keep the example direct and simple, I've left off a few standard features you'd expect to see in a rendering example:
⦁ No lighting to be seen here- When the mesh is rendered, and the texture color is sampled and returned by a trivial pixel shader. There are plenty of lighting examples, and I do grab the normal vector of the vertices for you, but I'm not doing anything with it.
⦁ No lost device support - for some graphics cards, you will lose the device if you move your window from one monitor to a second monitor. Especially if the monitors are driven by different graphic cards. Most of the DirectX examples supplied by Microsoft show you how to handle this quite well.
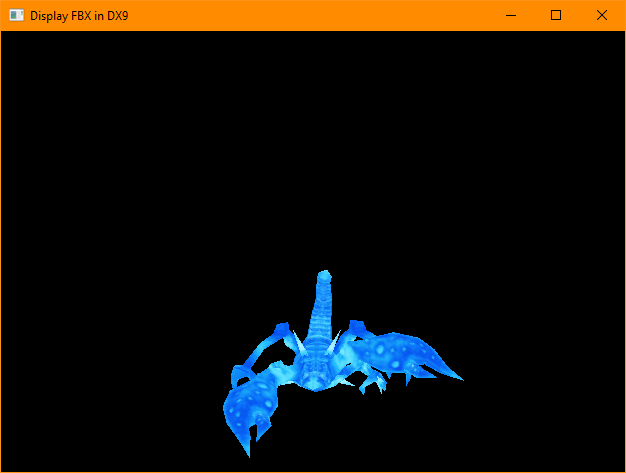
⦁ This example may not work with any random .fbx mesh. This example assumes the mesh is skinned and has at least one animation. The provided .fbx and .dds files have been tested.
⦁ Static meshes definitely won't work correctly, but you can probably re-use much of the mesh loading code for static mesh support. Think of it as extra credit?
⦁ I'm using an external .dds texture to the skinned mesh. I do grab the texture name in the example just to show you how it's done, but the texture I actually use is hard coded. If you want to use the texture the artist intended, it's not hard to fix up the example. I've often found that models may have many alternate textures, so you end up overriding the texture name in the model.
⦁ I'm doing nothing with the mesh's material. You can see where I grab the name of the material though.
⦁ Only the first animation is played. The example loops the first animation it finds in the .fbx file. If you trace where we find the first animation, you can see where we see the other animation names as well. It'll take some work, but you can grab the other names and switch on the other animations as well. Autodesk provides examples on how to do this. Most .fbx meshes have a single animation with all the animations crammed together in a single track, but you can also have them separated too.
⦁ Bone arrays of 50 or less only - this example won't properly render examples with more than 50 bones. You can also adjust the size of the bone matrix array in the example .cpp code and shader code (.fx). However, I have a second iteration of the example that shows you how to get around this limitation by rendering the mesh in pieces.
⦁ This example only handles one model at a time. If you were to productize this code for a game, you should probably separate the SingleFbxMesh object into half a dozen objects to handle bringing up Autodesk just once, loading the model info once, and sharing the model info between all the model instances. Also, you'd need to create a few objects to handle the animation properly.
⦁ I'm not showing you how to do animation blending. The Autodesk SDK doesn't give you a lot of help with generalized blending. If you want to blend two animations together with matching durations and matching animation offsets, you're in luck. Autodesk supports you. Otherwise, you must decompose the animation keys into quaternions and interpolate/blend them yourself.
Code Organization - you might want to open the first example and follow along.
main.cpp: This provides a simple scaffolding for rendering our Skinned mesh.
- WinMain(): creates the window, calls init(), and services the windows event queue. While we are looking for windows events, we also call advanceTime on the g_SingleFbxMesh object. We will discuss what happens in advanceTime later. We also call render(). We will continue to loop over the events, advancing time, and rendering until PostQuitMessage is called.
- init(): creates the DirectX device object and tells the g_SingleFbxMesh to load itself. We will go into the loading of the mesh later.
- render(): First we build up the worldViewProj matrix to send to the fbx mesh as it renders. The calls to the g_pd3dDevice are standard DirectX calls to render a mesh, so I won't discuss them here. I'll discuss the render call to g_SingleFbxMesh later.
- shutdown(): This is called when the escape key or the close box of the window is pressed. It simply cleans up all our allocated objects and shuts down Autodesk and DirectX.
tAutodeskMemoryStream.cpp: This is a super simple wrapper that allows the Autodesk SDK to read an .fbx out of memory versus from a file. I found this object in the Autodesk forums. The good news is that it's faster to ready your files in a single memory buffer and let Autodesk just chomp on the memory buffer instead of hitting the disk multiple times. If you think otherwise, then it's not hard to remove this memory reading feature. (trivia) If you're making a game, it's common to compress or package your .fbx files into larger and opaque files. You probably won't have the luxury of having your .fbx files sitting out in the open in a directory.
SingleFbxMesh.cpp: This is the beef of this example. I'll discuss the public interfaces here, but I'll get into the innards of the mesh loading later. This file is too big and has too much responsibility, but I figure it'll make the example simpler to look at?
- SingleFbxMesh(): creates the Autodesk SDK manager object.
- ~SingleFbxMesh(): destroys the Autodesk SDK manager object.
- load(): loads the .fbx file. There is a surprisingly huge amount of work in order to load a .fbx skinned mesh with Autodesk. The details will be discussed down below in Loading the Model. Besides loading the model, we also allocated many of the DirectX resources we will need to render the mesh such as the texture, shader effect, vertex declaration, and the mesh buffers such as the index and vertex buffer. Most of these buffer allocations are the same stuff you'd do for a static mesh. Skinned meshes are just like static meshes except they have extra vertex info such as bone weights and bone indices.
- release(): Release the DirectX index and vertex buffers, and clear the vector.
- advanceTime(): This method just gets the current global time, converts it to animation time, and builds the bone matrix array needed to render the mesh for the next frame. I'll go more into detail about this in Creating the Bone Matrix Array.
- render(): after loading the model and creating the bone matrix array, it's surprisingly easy and fast to render the skinned mesh. If you compare it to any other example of rendering a static mesh in DirectX, you won't see much of a difference. The only difference is the loading of the bone matrix vector. This vector is what allows the bones to move or animate the vertexes. If you were to set the bone matrix vector to all identity matrices, then the mesh would be stuck in the bind-pose. (trivia) Meshes are created and rigged in their bone pose. The limbs are posed far apart so the rigging is easier. For humans, the arms are often outstretched in the crucifixion pose, but our scorpion looks more normal.
Loading the Model
Loading the model is where most of the heavy lifting occurs. It is also where most of the Autodesk SDK mysteries are revealed. SingleFbxMesh::_loadModel() is a good place to start. Here are the steps:
- First we load the .fbx file into a memory buffer.
- Feed the memory buffer to the tAutodeskMemoryStream object.
- Give the tAutodeskMemoryStream to the importer.
- We do a few checks on the importer. The most import part is to ensure the mesh is in triangles. DirectX loves triangles.
- Load all the bones and maintain their parent/child relationships. Each bone has a name as well as a few matrices used to calculate the bone matrix vector. We recursively load the bones by going down the root node of the scene. This means the bone array is ordered so that the parent of a bone comes before the child. This comes in handy later.
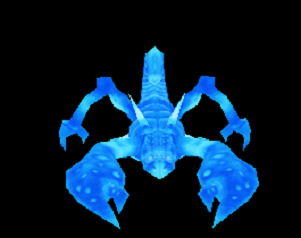
- Load all the meshes. Our example only has a single mesh, but this example will probably work with multiple meshes too. We are loading a scorpion, but if we had a human knight with armor pieces and a sword, then we could have a lot of different meshes. The body, helmet, plate mail armor, and sword could each be separate meshes.
Loading the Mesh
First we load up all the standard vertex info for the mesh. This info includes things such as the point in model space, the normal vector and the texture UVs. The SingleFbxMesh::_loadMeshPositionNormalUV() method contains this code, and it's mostly stolen from Autodesk's own examples. We also need to normalize those normal vectors.
Next we load all the skin vertex info for the mesh. Each vertex may include up to four bone influences per vertex. It's very unusual for a vertex to have more than four, but if we do, the code is supposed to throw away the least important influences. The method SingleFbxMesh::_loadMeshBoneWeightsAndIndices() contains most of the code for loading this skinned mesh info. I grabbed most of this code from an example by Doug Rogers.

Once we have the skinned mesh vertices fully loaded, we will need to normalize the bone weights. The bone weights are stored as bytes in a 32-bit or four byte number. The sum of all four bytes should be around 255. Normalizing the weights is a simple matter of summing the four weights, dividing the weights by the total weight, then multiplying the result by 255.

Vertexes come out of a .fbx file fully elaborated. So, if you have a cube mesh, it'll have 36 vertexes. (3 vertices per triangle, 2 triangles per side, 6 sides per cube, 3 * 2 * 6 = 36) Also, the indices for the vertices are just numbered from 0 to 35 because we just made them up. We could just render the mesh as a triangle list and be done with it. Instead, we are going to use a vertex and index buffer, so we need to compress the vertex buffer first by looking for repeated vertices. After compression, the cube mesh will only have 8 vertices, but the index buffer will still have 36 entries with indices between 0-7. Since index entries are only two bytes in side, it's a big savings. My algorithm for vertex compression is brain dead inefficient, simple, and readable. Feel free to make a more efficient one. (evil laughter)
Now we have a loaded mesh, it has normalized normals, normalized bone influences, and the vertices are compressed!
Creating the Bone Matrix Array
It's the bone matrix array that gives our vertex shader the values that will make our scorpion animate. So it makes sense that each frame will require a new bone matrix array. So for each frame, we call SingleFbxMesh::advanceTime() to re-build the new bone matrix array. This method simply calculates the current animation time by getting the current time and modulating it with the animation duration. This animation is pretty trivial and almost never good enough for production code. The exception is a mesh with one animation that repeats endlessly such as a windmill?
SingleFbxMesh::_buildMatrices() does the heavy lifting. The first step is to update all the nodeLocalTransforms in the bone vector. The nodeLocalTransform is the motion of a single bone in bone space.

We need these bones to affect one another appropriately. For example, the shoulder bone position affects the arm and finger bones. We take care of the parent/child movement relationships in the SingleFbxMesh::_calculateCombinedTransforms() method. Reading this method, you might be puzzled as to why we aren't traversing this vector as a tree. Instead, we are sequentially going through the vector from beginning to end, but we can do this because the parents always come BEFORE the children. (as mentioned above) Also, the root is a special case since it has no parent.
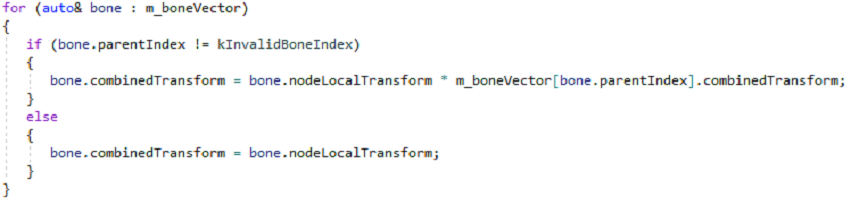
The bone matrix is calculated by multiplying the bone offset by the bone.combined transformation. The bone offset matrix translates between bone and model space. We loaded the offset matrix when we loaded the skin vertex info. The combinedTransform is what we calculated above. The resulting matrix is what we need to render.

Shader for the Skinned Mesh
The shader for a skinned mesh is pretty much identical to a static mesh except for the vertex shader. For a static mesh, you'd take the vertex position, and multiply them by the worldViewProj matrix, and return the result as the homogeneous position.
For a skinned mesh, you'll need to do some processing on the vertex position before you multiply it by the worldViewProj matrix. You'll have 4 bone influences for your bone position. If you have fewer than 4 (which is usually the case), then it's okay because the weight of the bones with no influence will equal to zero. So the vertex shader will go through all four potential influences, multiply the vertex position by the appropriate bone matrix, and scaling it by the weight.
  for (int indice = 0; indice < 4; ++indice)
  {
     float normalizedBoneWeight = boneWeights[indice];I mad
     float4x3 boneMatrix = gBoneMatrices[boneIndices[indice]];
     blendedPosition += normalizedBoneWeight * mul(inPos, boneMatrix);
  }
Getting Around the 50 Bone Matrix Array Size Limitation
Your artist just created an .fbx file with 200 bones, but your shader has a limit of 50 bones. How do you render this monstrosity? One easy solution is to increase the bone limit, but that might not be possible.
One not-so-easy solution is to break the mesh into pieces where each piece has 50 or less bone influences. The second example includes this mesh breaking code.
The method SingleFbxMesh::_breakModelAlongBoneMatrixArraySize() is a pretty readable method that iterates through the vertices of a skinned mesh, and tries to place them in one of the mesh pieces. Once again, the function isn't totally optimal, but it seems to have some pretty decent results.
Each mesh piece has its own list of bone influences. This means the bone matrix vector is different per mesh. This is taken care in the example.
You can artificially decrease the bone matrix array size in the example down to 12, 20, or 25 and see what happens. One nice things about the example code is we do not use a bone if none of the vertices reference it. This often happens for endpoint bones or root bones.
The example still does the matrix calculations for all the bones though. Sometimes you might want these bone values because it'll help you place an item on a special location specified by the artist. For example, a riding bone for a horse that will bounce the rider up and down as it gallops.
Bone Reduction Example Link
https://drive.google.com/open?id=17te17SPNFEN-wuxxlXgkHiTaEbHutMKC
Performance
You may notice that our scorpion model loads up in less than a second. I had another model with 60+ sub models and about 50+ animations. This model took about 7 seconds to load. Just realize that Autodesk might export the skeleton for each mesh, so the size of the file also starts to balloon. In the case of my large file, it was 30+ megabytes.
Multi-threading Woes
I fully integrated this code into my own game client code. Sadly, after adding a second .fbx mesh into my client, I started to get sporadic crashes. After some debugging and reading, I realized the Autodesk SDK cannot render and load meshes in separate threads. So, if you want to use the Autodesk SDK in separate threads, you must use a mutex to keep the threads from killing each other. A better option is to preload the meshes you will need. This isn't a very practical fix for an open-world type of game. Yet another option is to try to preload as much as possible in the loader thread without using Autodesk, then create the scene in the render loop. Doing all the autodesk loading offline, then saving off the skinned mesh will save you a lot of time. Also, you could save off the animation keys too. It'll definitely make loading use less processing -- especially if you just load it into a structure and do some pointer fix-ups. In the case of my 30+ megabyte model, the size was reduced to below 1 megabyte. I eventually chose to not use the Autodesk SDK.
Credit
Nothing happens without help from others. Here is how I gathered enough info to write this article.
⦁ Ken Wright: I totally stole his example framework he used for a fur shader example. http://www.xbdev.net/directx3dx/specialX/Fur/index.php
⦁ Doug Rogers: I stole some of the loader code from an example he made that also loaded an .fbx mesh. http://dougrogers.blogspot.com/2012/10/fbx-viewer-3.html
⦁ The scorpion model was created by 3DRT (www.3drt.com), and used with permission. They have a lot of great stuff.


thanks for sharing, it seems to be amazing, but i can't run the code, sdk version 2019.0