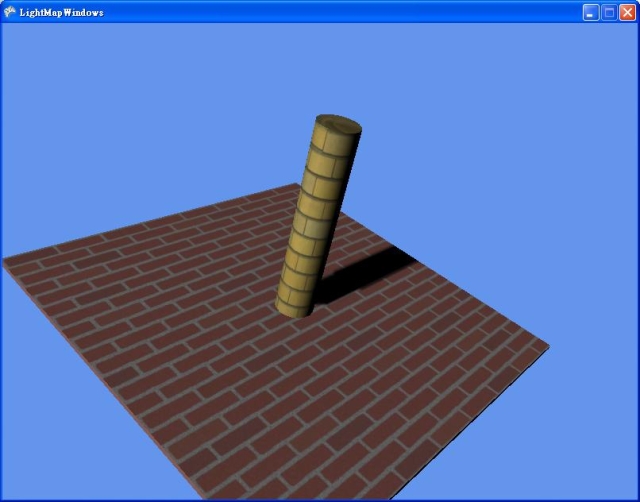
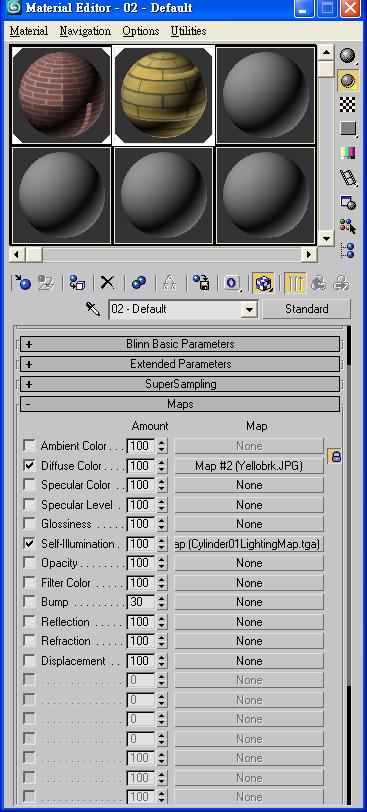
How can we generate a light map? We can use the "render to texture" function of 3ds Max to generate a light map and save the texture coordinates in UV Channel 2. The light map is storing the intensities of light on the object's surface. It can be an RGB color texture. When we render a model with light map, each pixel from the usual color map is modulated by the color stored in the light map (access via the second texture coordinate stored in the FVFData block of a .X file).

You can find the complete source code (for XNA Game Studio 3.0) for this article and 3ds Max files here
W,S,A,D to move the camera, click and drag mouse middle button to rotate the camera
Part 1: Create 3D models and their light maps
Step1: (file: Content\step1, original material.max)
Add Box and Cylinder - Assign textures to their Diffuse Maps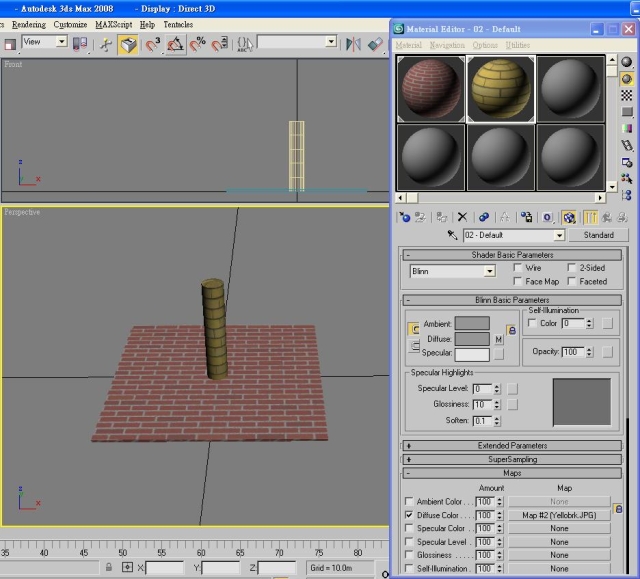
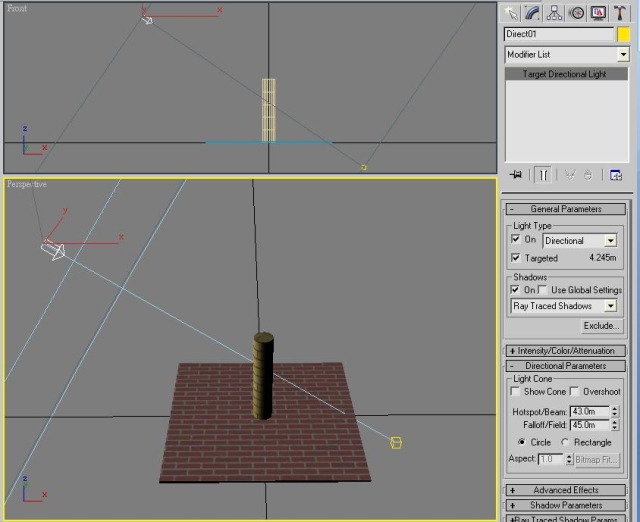
Add Target Directional Light
Shadows:
- Lenable Shadows [V] on
- select "Ray Traced Shadows" or "Shadow Map"
Step 2: (file: Content\step2,render t texture.max)
Selected Box and Cylinder
Rendering -> Render to Texture
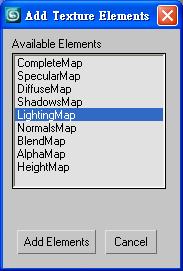
Output Page:
- push "Add" button and select "LightingMap" in Add Texture Elements
- set Target Map Slot as "Self-Illumination"
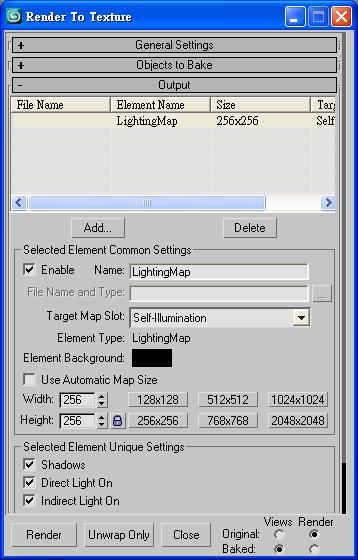
- click the radio of "Output Into Source"

- Object==>set "Use Automatic Unwrap"
- set Channel as2
Delete the "Target Directional Light"
The light map will be generated and assigned automatically in the "Self-Illumination" map
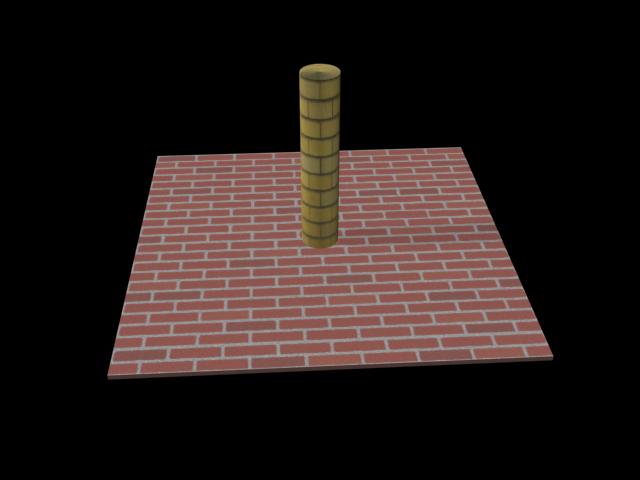
Push F9 or click "Quick Render", the shadow will appear on Box01 and Cylinder01
Step3: (file: Content\step3,use shader.max)
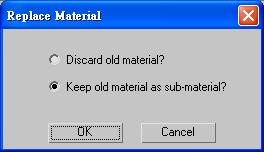
Select Box1 and Change Material to be Direct Shader and "Keep old material as sub-material"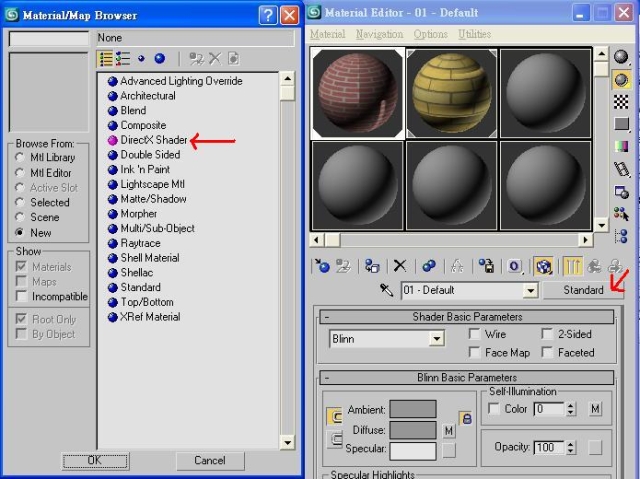
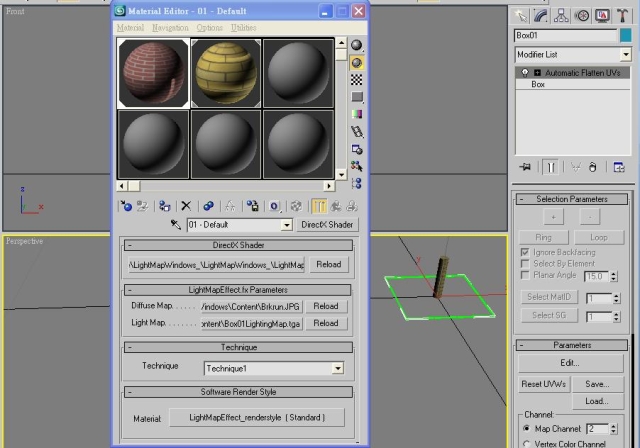
Select the Shader of "Content\LightMapEffect.fx"
Assign the Diffuse Map and its Light Map and Select the Technique as "Technique1"
Push F3 to show the Box01
Push F9 or click "Quick Render", the shadow will appear on Box01 and Cylinder01(the scene without light object)

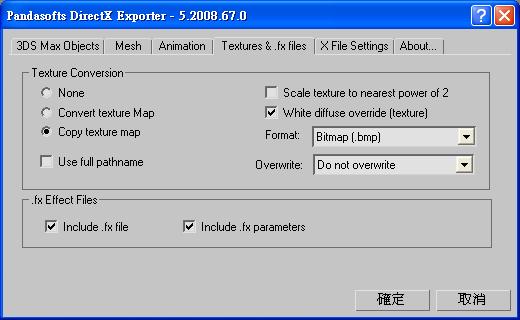
Step4: Export 3D Models with Panda plug-in
At last, you can export the model using the Panda plug-in; the second texture coordinate will be written into the FVFData block in the .X file. Remember to enable the "Include .fx file" and "Include .fx parameters" options.
Step5: Show the light map result
Use the max file of Step2If you want to see the light map in 3ds max with sharp shadow, you must re-assign the new materials (with DirectX Shader - LightMap) to Box01 and Cyliner01.
Open Material Editor and click the new material slot
DirectX Manager page:
- Select LightMap and enable "Enable Plugin Material"
- BaseTexture: RedB.jpg [V]
- Mapping channel=1
- light map: Box01LightMap.tga [V]
- Mapping channel=2


Part 2: XNA Project (LightMapWindows)
Step 1
- Load model and measure its size
- Add camera (reference Book: Learning XNA 3.0 chapter11 Flying Camera)
namespace LightMapWindows
{
 ///
 /// This is the main type for your game
 ///
 public class LightMap : Microsoft.Xna.Framework.Game
 {
  GraphicsDeviceManager graphics;
  SpriteBatch spriteBatch;

  //add
  ContentManager content;
  BasicModel basicModel;
  Camera camera;

  public LightMap()
  {
   graphics = new GraphicsDeviceManager(this);
   Content.RootDirectory = "Content";

   //
   content = new ContentManager(Services);
   content.RootDirectory = "Content";

   IsMouseVisible = true;
  }

  protected override void LoadContent()
  {
   // Create a new SpriteBatch, which can be used to draw textures.
   spriteBatch = new SpriteBatch(GraphicsDevice);

   // TODO: use this.Content to load your game content here
   camera = new Camera(this);
   Components.Add(camera);

   basicModel = new BasicModel();
   basicModel.LoadModel(content, @"pillar");
   basicModel.MeasureModel();

   camera.SetSpeed(basicModel.GetModelRadius() / 100.0f);

   float modelRadius = basicModel.GetModelRadius();
   Vector3 modelCenter = basicModel.GetModelCenter();
   Vector3 eyePosition = modelCenter;

   eyePosition.Z += modelRadius * 2;
   eyePosition.Y += modelRadius;

   float aspectRatio = (float)Window.ClientBounds.Width / (float)Window.ClientBounds.Height;

   float nearClip = modelRadius / 100;
   float farClip = modelRadius * 100;

   camera.SetCamera(eyePosition, modelCenter, Vector3.Up);
   camera.SetFOV(MathHelper.PiOver4, aspectRatio, nearClip, farClip);
  }
Step 2
- Render model with its effect instance
  protected override void Draw(GameTime gameTime)
  {
   GraphicsDevice.Clear(Color.CornflowerBlue);

   // TODO: Add your drawing code here

   basicModel.DrawLightMap(camera);
   //basicModel.Draw(camera);//basic effect

   base.Draw(gameTime);
  }

namespace AkBasicModel
{
    class BasicModel
    {

......

  public void DrawLightMap(Camera camera)
  {
   //Set transfroms
   Matrix[] transforms = new Matrix[m_model.Bones.Count];
   m_model.CopyAbsoluteBoneTransformsTo(transforms);

   //Loop through meshes and their effects
   foreach (ModelMesh mesh in m_model.Meshes)
   {
    foreach (Effect effect in mesh.Effects)
    {
     //Set Effect parameters
     effect.CurrentTechnique = effect.Techniques["Technique1"];
     effect.Begin();
     effect.Parameters["World"].SetValue(GetWorld() * transforms[mesh.ParentBone.Index]);
     effect.Parameters["View"].SetValue(camera.view);
     effect.Parameters["Projection"].SetValue(camera.projection);
     effect.End();
    }
    //Draw
    mesh.Draw();
   }
  }
