This whitepaper was originally posted on the Unreal Engine Blog bySebastien Miglio at https://unrealengine.com/en-US/blog/create-photoreal-car-windows-in-unreal-engine. The original whitepaper by Min Jie Wu and edited by Robb Surridge is available for download at here. Republished with permission.
Automotive glass can be a particularly challenging element for real-time automotive rendering.
In the real world, car windows involve a complex interplay of light as it passes through multiple layers of material with different physical properties. These results can be difficult to imitate in a real-time renderer, while achieving an acceptable balance between physical realism and a fast enough frame rate. And to make things even more difficult, the windows of a car naturally attract the viewer’s attention — especially the windshield. Any unrealistic artifacts or reflections can easily destroy the overall effect of an otherwise high-quality rendering.
This paper describes an approach to designing windshields in Unreal Engine 4 that delivers photoreal results in real time.
See the results of this technique in the award-winning short film, The Human Race:
Mesh Structure
This technique begins with the way the windshield is modeled.
The windshield needs to be made up of four independent meshes or mesh groups. Each of these four meshes needs to be single-sided.
The following diagram summarizes the layout of the meshes:
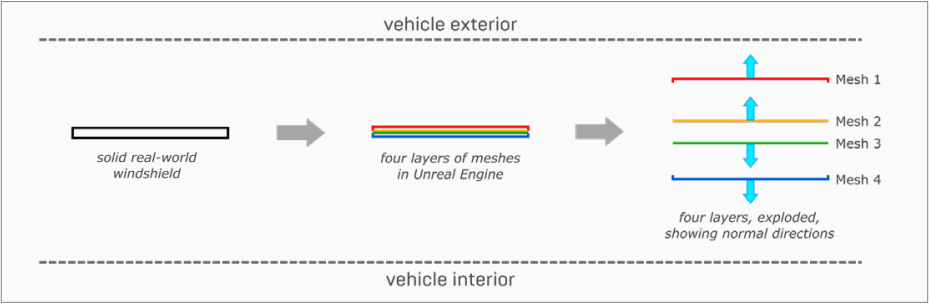
Figure 1: Mesh layout
- There are two outer layers of the windshield, Mesh 1 and Mesh 2, that have their normals pointing outward toward the exterior of the vehicle. These are represented by the red and yellow lines.
- There are two inner layers, Mesh 3 and Mesh 4, that have their normals pointing inward toward the inside of the vehicle. These are represented by the green and blue lines.
This detail view shows how these four meshes are arranged with respect to each other in 3D space:

Figure 2: Mesh arrangement in 3D space
Mesh 1, the exterior reflective layer, forms the outer skin of the windshield. It will provide the reflections that you see from outside the vehicle. Its normals point outward from the vehicle.
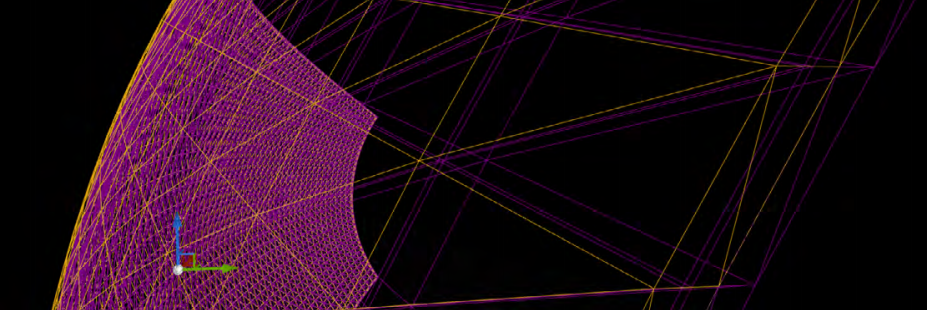
Figure 3: Mesh highlighted in orange
At a distance of half the windshield’s total thickness, you have Mesh 2, the outer tint layer. When you look at the windshield from the outside, this layer tints your view of the inside of the car according to the color of the glass. Its normals also point outward, in the same direction as Mesh 1.
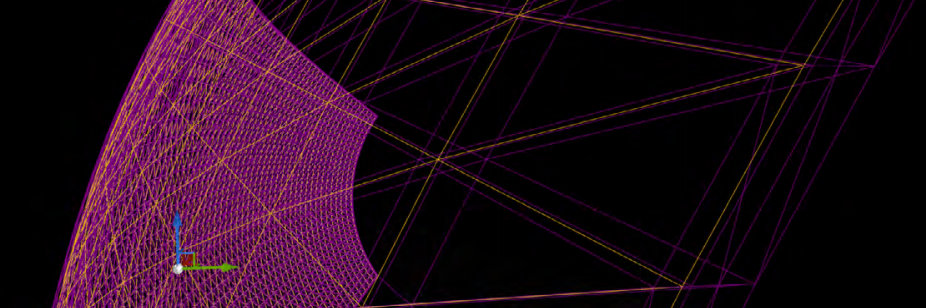
Figure 4: Mesh 2 highlighted in orange
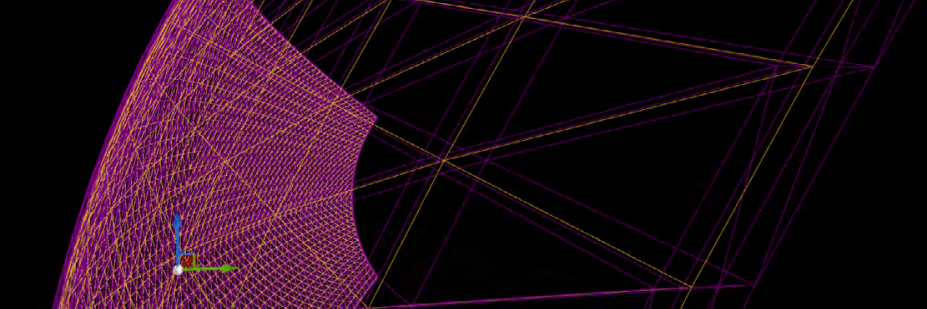
Figure 5: Mesh 3 highlighted in orange
Back to back with Mesh 2, you have Mesh 3, the inner tint layer. When you look out through the windshield from inside the car, this layer tints your view of the outside surroundings according to the color of the glass. Its normals point inward.
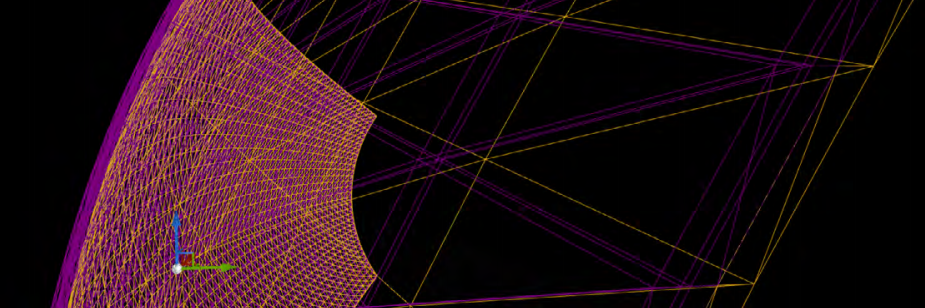
Figure 6: Mesh 4 highlighted in orange
Finally, at the innermost extent of the windshield, Mesh 4 provides the reflections of the interior of the car that you see when looking out from the inside. Its normals point inward.
The following image shows the Static Mesh Actors for these four meshes in the World Outliner in the Unreal Editor:
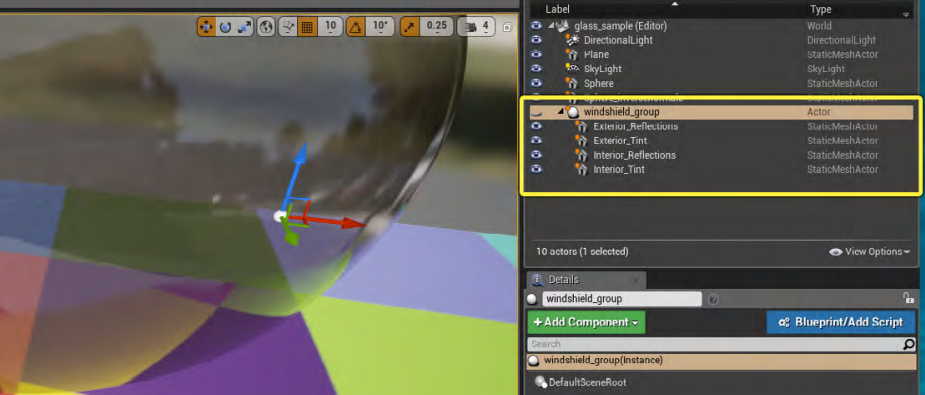
Figure 8: Static Mesh Actors in the World Outliner
Below, all four layers are shown in the viewport of the Unreal Editor, in wireframe and lit modes:
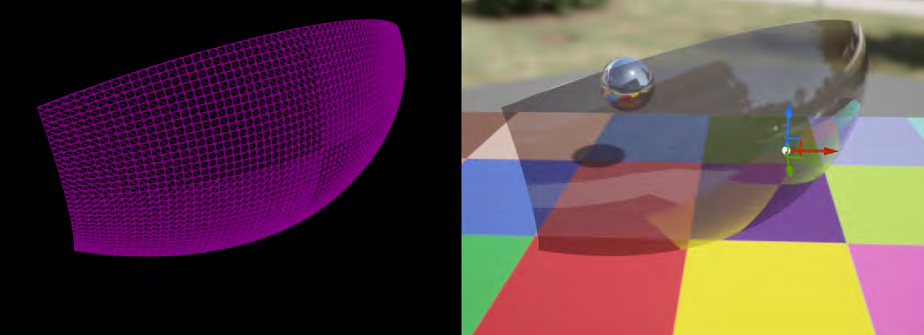
Figure 9: Four layers in the viewport
Material Design
This technique requires two different translucent Materials:
- A reflective Material, which you’ll apply to the exterior and interior surfaces of the windshield.
- A tint Material, whose only job is to color the things that you see through the glass.
Material 1: Reflective
The goal of this Material is to handle only the light that gets reflected off the glass. We want this layer of the windshield to be fully transparent when we look at it straight on, but very reflective when we look at it at a grazing angle.
To model this in Unreal Engine, we need to start with a translucent Material. When you select your Material’s output node in the Material Editor, set the following values in the Details panel:
- Set the Blend Mode to Translucent.
- Set the Lighting Mode to Surface TransparencyVolume.
- Enable Screen Space Reflections.
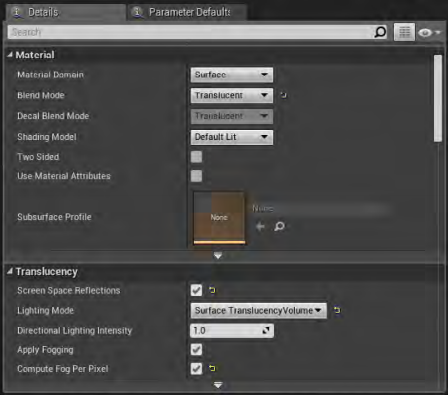
Figure 10: Details panel in the Material Editor for the reflective Material
In the Material’s graph, we set it up as a mirrorlike chrome, but we also tie its opacity to the camera’s viewing angle using the Fresnel node.
- Make the Base Color white.
- Set the Metallic and Specular inputs to 1.0.
- Set the Roughness input to 0.0.
- Ordinarily, a white, perfectly reflective, and perfectly metallic surface would have the appearance of smooth chrome. However, we also attach the Fresnel node to the Opacity input of the material’s output node. This makes those crisp reflections appear only where the curvature of the glass causes us to see it at a sharp enough angle for the Fresnel function to begin affecting the opacity. Anywhere the viewing angle is close to the normal of the mesh, the glass remains clear.
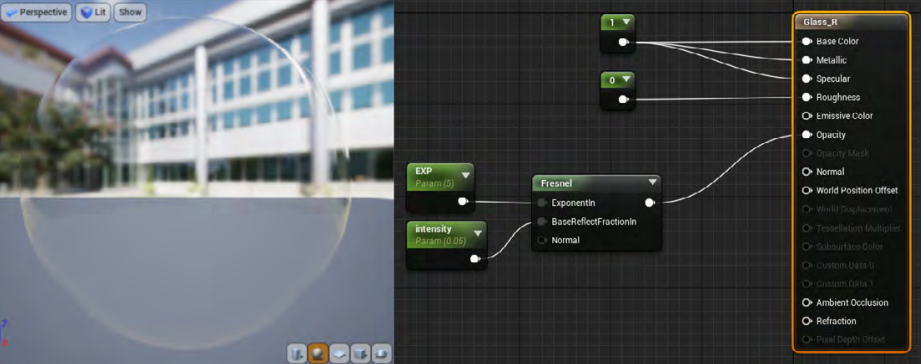
Figure 10: Materials graph
Car windshields typically use an athermic glass, which has slightly more reflectance than plain glass. The following image illustrates how the reflectivity of the athermic material changes over different wavelengths of incoming light:
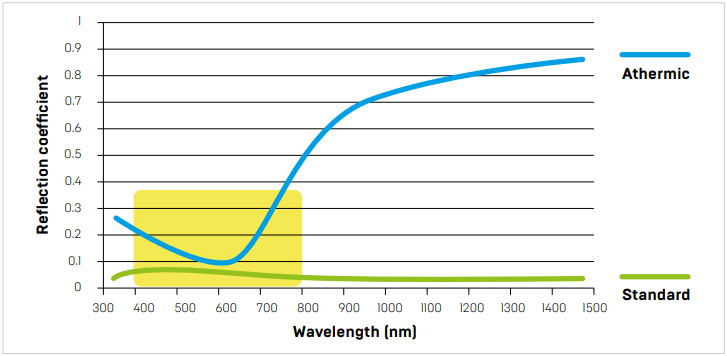
Figure 11: Material graph for the reflective Material
To simulate this physical property, and make your reflections fit your scene more accurately, you can adjust the values of the Exponent and BaseReflectFraction inputs that you pass to the Fresnel node (called EXP and Intensity respectively in the Material shown above). This gives you control over the strength of the reflections and how they fade over the curvature of the glass.
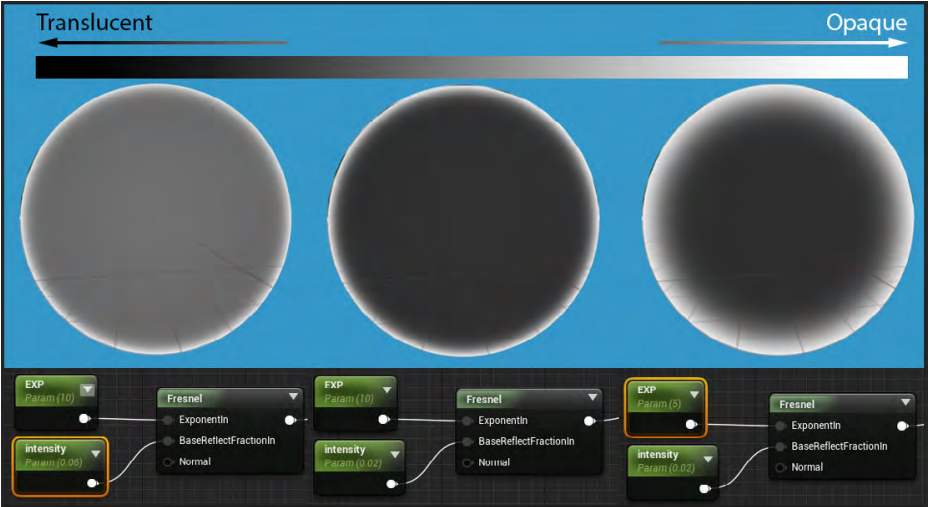
Figure 12: Effect of passing different input values to the Fresnel node
Material 2: Tint
The goal of this Material is to handle only the light that passes through the glass. We want this layer of the windshield to ignore reflections completely, but to color light that passes through the glass according to the tint of the windshield.
To model this in Unreal Engine, we need another translucent Material. When you select your Material’s output node in the 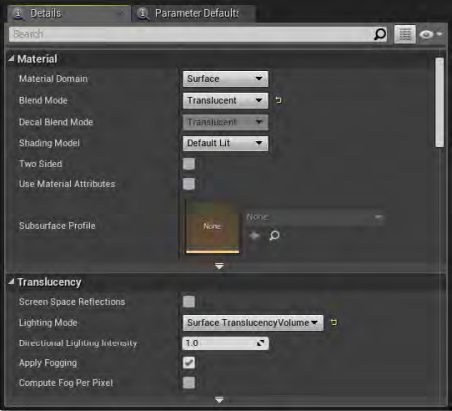 Material Editor, set the following values in the Details panel:
- Set the Blend Mode to Translucent.
- Set the Lighting Mode to Surface TransparencyVolume.
- This time, disable Screen Space Reflections. For this Material, we want to avoid all specular and reflective contributions.
A simple way to set up the graph for this Material is to use a constant Opacity setting.
- Make the Base Color the color of the glass.
- Always use a Specular input of 0.0. This allows light to pass evenly through the glass.
- Use a Roughness input of 1.0.
- Use the Opacity channel to control how dark the glass is — that is, how much of the interior of the vehicle you can see from the outside. You can vary this value freely to make the tint effect as strong as you need it to be.
Figure 13: Details panel in the Material editor for the tint Material
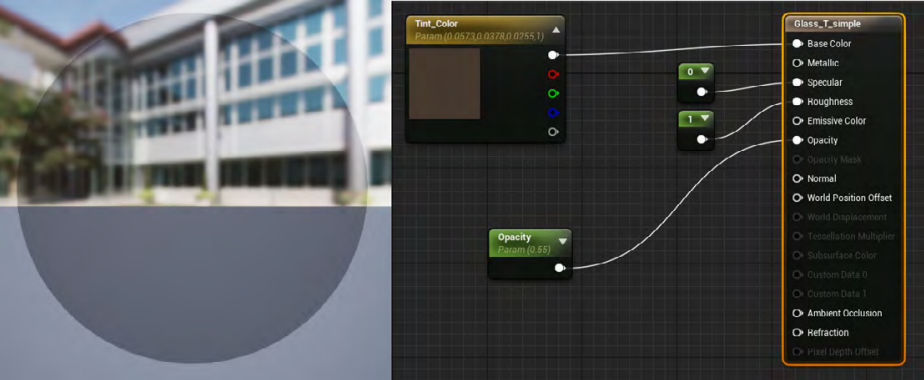
Figure 14: Material graph for the tint Material
A slightly more sophisticated setup is to vary the opacity of the glass based on the viewing angle of the camera, as we did in the reflective Material above. In the reflective Material, increasing opacity adds to the strength of the reflections. However, in the tint Material, increasing the opacity simulates the greater absorption of light as it passes through the glass at a sharper angle. The effect is that as your viewing angle increases, less light comes through the glass, and the objects on the other side become harder to see.
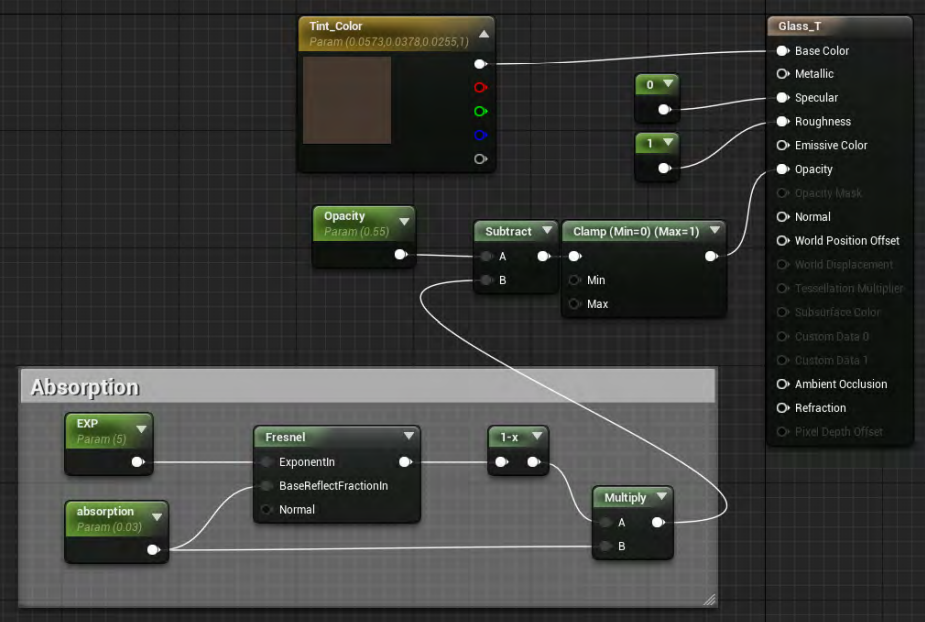
Figure 15: Material graph for the tint Material, with optional absorption setup
You can control the strength of the effect by raising or lowering the value of the absorption parameter shown above. However, this effect works best when you keep it very subtle. If you choose to use absorption, we recommend keeping the value below 0.1.
Mesh and Material Assignments
Now that you have your Static Mesh Actors and your two Materials ready, you need to assign the correct Materials to the correct Actors:
- Mesh 1, the exterior reflective layer: Assign the Reflective Material.
- Mesh 2, the outer tint layer: Assign the Tint Material.
- Mesh 3, the inner tint layer: Assign the Tint Material.
- Mesh 4: the interior reflective layer: Assign the Reflective Material.
Sorting Translucency
The final step in using this technique is to set up the translucency sort priority for the four Static Mesh Actors. 
When Unreal Engine needs to render multiple translucent objects that overlap in the camera view, it has to draw the objects in back before the objects in front. To figure out the drawing order, it compares the distance from the camera to the origin point of each object’s bounding box. Although this works most of the time, this strategy is not perfect; it can occasionally result in the rear object being drawn in front.
To avoid that possibility, we can give the Engine a hint by setting the Translucency Sort Priority option for each of the four Static Mesh Actors in the Level.
To find this option, select the Static Mesh Actor for each part of the windshield in either the Viewport or the World Outliner, scroll down in the Details panel to the Rendering section, and expand the advanced properties.
Set the Actors to use the following values:
- Mesh 1: 1
- Mesh 2: 0
- Mesh 3: 0
- Mesh 4: 1
With these settings, the Engine always chooses to render the inner layers of the windshield behind their corresponding outer layers. This retains the correct order for windshield rendering even if the camera flies into or out of the car.
Conclusion
With four Static Mesh Actors and two Materials set up as described above, you can achieve high-quality, realistic, and performant glass for any automotive rendering project in Unreal.
Learn more about Unreal Engine at https://unrealengine.com.