
Generalized Platformer AI Pathfinding
In this article, we'll explore a powerful, general technique to guiding "jump and run" style AI through a platforming course to reach an arbitrary destination. This method works with both static geometry and moving level elements, like elevators or wheels.

Preamble
If you're writing a "jump and run" style platformer game, you're probably thinking about adding some AI. This might constitute bad guys, good guys, something the player has to chase after etc... All too often, a programmer will forego intelligent AI for ease of implementation, and wind up with AI that just gives up when faced with a tricky jump, a nimble player, or some moving scenery. This article presents a technique to direct AI to any arbitrary static location on a map. The path an AI takes may utilize many well-timed jumps or moving scenery pieces, as long as it starts and ends in a stationary location (but this doesn't always have to be true). We'll cover the basic idea and get an implementation up and running. We'll cover advanced cases including moving platforms/destructible walls in a future article. This Technique is used in the game Nomera, at www.dotstarmoney.com or @DotStarMoney on Twitter.
Getting Ready
Before we begin, it's good to have a working knowledge of mathematical graphs and graph traversal algorithms. You'll also need to be comfortable with vector maths for pre-processing and finding distances along surfaces. This technique applies to levels that are composed primarily of static level pieces with some moving scenery, and not levels that are constantly morphing on the fly. It's important to have access to the static level collision data as line segments; this simplifies things though this technique could easily be extended to support any geometric objects you use for collision.The Big Idea
In layman's terms: As a developer, you jump around in the level between platforms, and the engine records the inputs you use from the point you jump/fall off of a platform, until the time you stand on the next one. It counts this as an "edge," saving the recorded inputs. When an AI wants to path through the level, he treats the series of platforms (we'll call them nodes from here on out) as vertices, and the recorded edges between them as a graph. The AI then takes a path by alternating walking along nodes, and taking the recorded input along edges to reach a destination. There are many important distinctions we'll need to make, but for now, just focus on the broad concepts. The technique we'll use is a combination of two algorithms. These are, creating the pathing graph, or "creating the data structure AI will utilize to path through the level" and traversing the pathing graph, or "guiding the enemy through the level given a destination". Obviously the latter requires the former. Creating the pathing graph is summarized as follows as follows:- Load the level static collision data and compute from it a series of nodes.
- Load any recorded edges (paths) for the level and add these to their respective start nodes.
- Using the enemy collision model and movement parameters, record paths between nodes and add these to the graph.
- When exiting the level, export the recorded edges for the level.
- Recieve a destination in the form of a destination node, and distance along that node; Calculate similar parameters for the source (starting) node.
- Compute a path, using any graph traversal algorithm from source to destination where the path is a series of nodes and edges.
- Guide the AI across a node to an edge by walking (or running, whatever the AI knows how to do) to reach the correct starting speed of the next edge in the path.
- Once the AI has reached the start location of the next edge in the path to some tolerance in both position and velocity, relinquish automatic control of the AI and begin control through the edges frame by frame recorded input.
- When recorded input ends, give control back to the automatic movement for whichever node upon which the AI stands.
- Repeat the last three steps until the destination has been reached
Implementing Pathfinding Step by Step
Creating the Pathing Graph
The pathing graph is made up of platforms/nodes, and connecting nodes to nodes are recordings/edges. It is important to first write hard definitions for what constitutes a platform, and what constitutes a recording. A node/platform has the following properties:- It is a subset of the line segments forming the level geometry.
- Assuming normal gravity, all segments in the node are oriented such that their first vertex has a strictly smaller x coordinate than their second. (this would be reversed for inverted gravity)
- Each subsequent segment in the node starts where the last segment ended.
- Each segment in the node is traversable by an AI walking along its surface

 NOTE: this image has a small error: 26 and 1 are two different nodes, but as you can see, they should be the same one.
 - An edge has a start position, and destination position on two different nodes (though it could be the same node if you want to create on-platform jump shortcuts!)
- An edge has a series of recorded frame inputs that, provided to an AI in the edge starting position and starting velocity, will guide the AI to the position specified by the destination position

Traversing the Pathing Graph
Before we dive into how we use the pathing graph, a word on implementation. Since we're essentially recording AI actions across paths, it's a good idea to have your AIs controlled with a similar interface as the player. Let's say you have a player class that looks something like this: class Player{ public: // ... void setInputs(int left, int right, int jump); // ... private: // ... } Where "left, right, and jump" are from the keyboard. First of all, these would be the values you record per frame during edge recording. Second of all, since the AI will also need a "setInputs" control interface, why not write a REAL interface? Then it becomes reasonably more modular: enum PC_ControlMode{ MANUAL, RECORDED } class PlatformController{ public: // ... void setManualInput(int left, int right, int jump); void bindRecordedInput(RecordedFrames newRecord); int getLeft(); int getRight(); int getJump(); void step(timestep as double); // ... protected: PC_ControlMode controlMode; RecordedFrames curRecord; void setInputs(int left, int right, int jump); // ... } class Player : public PlatformController{ // ... } class AI : public PlatformController{ // ... } Now, both AI and player classes are controlled using an interface that's extendable to switch either between manual control or recorded. This setup is also convenient for pre-recorded cut scenes where the player loses control. Okay, so we want black box style methods in our AI controller like: createPath(positionType destination); step(double timestep); Where the former sets up a path between the current position and the destination position, and the latter feeds inputs to setInputs() to take the AI to the destination. In our step by step outline, createPath forms the first two steps and step, the last three. So let's look at creating the path. A path will consist of an ordered sequence, starting with an edge, of alternating nodes and edges, ending in the final edge taking us to the destination node. We first need to be able to identify our current position, be it in the air or when resting on a node. When we're on a node, we'll need a reference to that node and horizontal position along it (our generic position remember?) To build the path, we use a graph traversal algorithm. In my implementation, I used Djikstra's algorithm. For each node we store, we'll also store with it the position we'd wind up in given the edge we took to get there (we'll call this edgeStartNodeCurrentPositionX for posterity's sake). Therefore, edge weights are computed for a given edge like so: edgeFrameLength = number of frames in the edge recording walkToEdgeDist = abs(edgeStartX - edgeStartNodeCurrentPositionX) edgeWeight = edgeFrameLength * TIMESTEP + walkToEdgeDist / (HORIZONTAL_WALKING_SPEED) if(edgeDestinationNode == destinationPositionNode){ edgeWeight += abs(edgeEndX - destinationPositionX) / (HORIZONTAL_WALKING_SPEED) } As you can see, our final edge weight is in terms of seconds and is the combination of the time taken in the recording, and the time taken to walk to the start of the edge. This calculation isn't exact, and would be different if sprinting was part of enemy movement. We also check to see if we end on the destination node, and if so, the walking time from the edge end position to the destination position is added to the weight. If we can calculate our edge weights, we can run Djikstra's! (or any other graph traversal algorithm, A* is fine here if you use a "euclidian distance to the destination" type heuristic). At this point, you should have a path! We're almost there, and to cover the 4 steps of the outline, there's not a lot to do. Basically, we have two procedures that we switch between depending on whether or not we stand on a node, or are being controlled by an edge recording. If we're on a node, we walk from our current position in the direction of the edge we have to take next. Now I mentioned previously that we also need to know the starting velocity of recorded edges. This is because, more often than not, your AI might have a little acceleration or decceleration when starting or stopping from walking. One of these transitional speeds may have been the point when the target edge began. Because of this, when we're walking towards the edge start location, we might have to slow down or back up a bit to take a running/walking start. Once we reach the start position of the edge we're going to take, more than likely, our position will not match the edge start position exactly. In my implementation the position was off rarely more than half of a pixel. What's important is that we reach the edge start position within some tolerance, and once we do, we'll snap the position/velocity of the AI to those of the edge start position/velocity. Now we're ready to relinquish control to the edge recording. If we're on an edge, well, each frame just adopts the controls provided by the edge recording and increase the number of the recorded frame that we read. Thats it! Eventually, the recording will finish, and if the recording was frame perfect, the AI will land on the next node and the node controls will take over. Some Odds and Ends
There are a few things you can do to tune this technique for your game. It's highly recommended that you add an in-game path recording and deleting interface to help you easily build level pathing: Nomera takes about 10m to set up level pathing and its pretty fun too. It's also convenient to have nodes extracted automatically. While you technically could do it yourself, adding automatic extraction makes the workflow VASTLY easier. For fast retrieval of node parameters, Nomera stores all of the nodes in a hash table and all of the edges in lists per node. For easy display, edges are also stored in a master list to show their source/destination lines on the screen. If you didn't notice already, static interactive pieces like ladders or ropes that aren't collidable objects are automatically handled by this technique. Let's say you need to press "up" to climb a ladder, if that "up" press is recorded and your AI uses a similar interface to the one previously proposed, it will register the input and get to climbing.Wrap Up
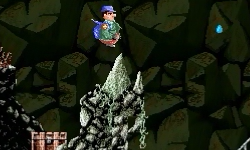
We've looked at a way to guide AI around a platforming level that works regardless of collision geometry and allows AI to take the full potential of their platformer controls. First, we generate a pathing graph for a level, then we build a path from the graph, and finally we guide an AI across that path. So does it work? Sure it does! Heres a gif: These guys were set to "hug mode." They're trying to climb into my skin wherever I go.
 Update Log
27 Nov 2014: Initial Draft 4 Dec 2014: Removed a line unrelated to article content.Related Tutorials
What To do If Your Game Received a Copyright Complaint
This tutorial explains how to respond to copyright complaints and why you shouldn't be scared of Apple's emails. It inc…
 IvanFedyanin

Video Game PR Basics
A brief guide to the very basics of video game public relations.
 Felicia McEntire
Building a Discord
Mega Cat Studios walk us through the journey the followed in setting up their Discord server.
Mega Cat Studios

Publishing 103 - What Publishers Look For in Games
A detailed look at what publishers want from a game, and the materials that you as a developer should have prepared.

Publishing 102 - How To Find The Best Publisher For You
In this article, I will be detailing the tactics you should use while you are on the search for the best publisher. It’…

A Guide to DIY Market Research for Indie Game Devs
Ah, market research. Just seeing those words probably sent shivers down your spine. Market research for indie game devs…
 Damien Yoccoz
Discussion