Introduction to Unreal Kismet
"Kismet is a visual scripting system you can use to create complex scripted sequences quickly and easily, with surprisingly little programming knowledge." That marketing-speak is true enough, but it doesn't even begin to describe how vital Kismet is to your gameplay. Virtually every interesting thing your game needs to do during gameplay will need to use Kismet in some way. This includes tasksas simple as opening a door and as complex as launching just the right event when a player holds a specific object at a critical location in your level. This chapter reveals Kismet's immense power and shows how you can use it in your own levels.Kismet: The Big Picture
In form, Kismet appears as a network of modules, known as sequence objects, connected by wires (see FIGURE 9.1). Each one of the sequence objects performs a specific function, and the wires connecting them are used to transmit information from one sequence object to another. Although these networks can appear to be very complex, you will quickly discover that their creation can be quite simple.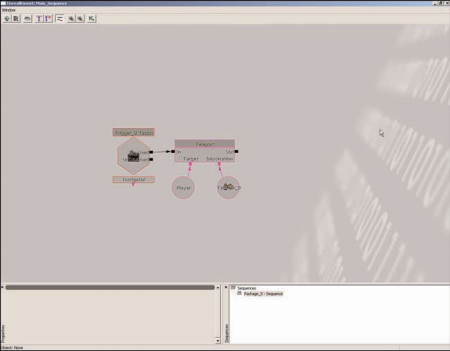
FIGURE 9.1 This simple Kismet sequence would teleport a player when he comes in contact with the trigger.
The sequence shown in Figure 9.1 could be written out in English as follows:
When the player touches Trigger_0, teleport the player to the location of Teleporter_0.
Kismet is the backbone of level interactivity, as it provides a way for artists (the non-programming type, that is) to create complicated scripts to power the levels that they have designed. The purpose of this chapter is to get you quickly in tune with how Kismet works, and enable you to create a series of gameplay-based sequences. As we progress, the tutorials you complete become more and more complex, enabling you to see how to create sequences ranging from extremely simple to moderately elaborate.
Accessing Kismet
Now that you know essentially what Kismet is, let's take a brief look at where you're going to find it in Unreal Editor, along with a quick look at its interface (see FIGURE 9.2).Kismet is most directly accessed by clicking the Open Kismet button located in the middle of the toolbar. You will also be able to access Kismet from within the UI Editor system, which we do not cover in this introductory text.
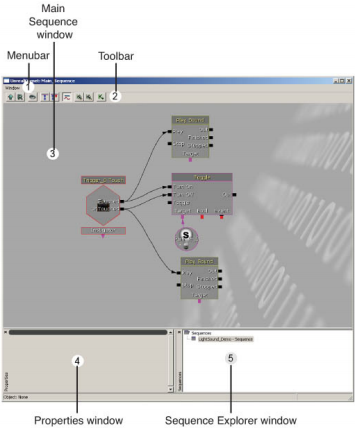
FIGURE 9.2 The Kismet interface
Okay, you know generally what it is, where to find it, and a bit of what it looks like, so let's get our hands dirty and create an actual Kismet sequence! In TUTORIAL 9.1, you create a simple light switch using Kismet.
TUTORIAL 9.1: Triggering Lights with Kismet
Step One
Open Unreal Editor and launch the DM-Ch_09_KLightSound_Start.ut3 map file included with the files for this chapter. This is a simple platform level that includes only a single dim light for navigation (see FIGURE 9.3). We now set up a system by which we can turn on a second light and eventually play a sound.Step Two
In the Perspective viewport, right-click near a corner (any corner will do) of the level's main platform and choose Add Actor > Add Trigger from the Context menu.Immediately open the Properties window for this new actor (by double-clicking it or pressing F4). Within the Display category, set the bHidden property to False by un-checking its checkbox. This enables us to see the trigger while play testing the level (see FIGURE 9.4).
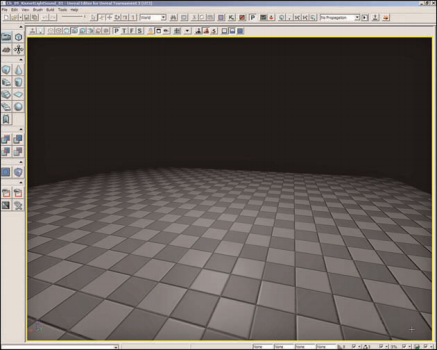
FIGURE 9.3 The DM-Ch_09_KLightSound_Start.ut3 level appears to be only a blank platform.

FIGURE 9.4 Here you can see the trigger placed on the corner of our level.
Step Three
We now need a toggleable light. Follow these steps to create one:- From the Unreal Editor main menubar, choose View > Browser Windows > Actor Classes.
- From within the Actor Classes browser, expand Light > Point Light and select PointLightToggleable (see FIGURE 9.5).
-
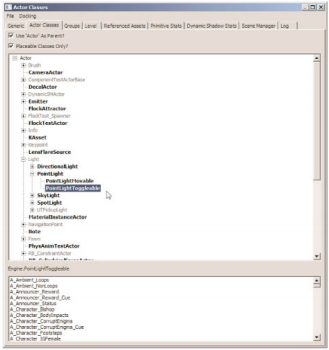
FIGURE 9.5 The pertinent classes have been expanded to show the PointLightToggleable actor. - In the Perspective viewport, right-click on the opposite corner of your level away from the trigger, and choose Add PointLightToggleable Here.
- Use the Translation Widget to move the light up from the floor of the level (see FIGURE 9.6).
- Open the Properties window for the light, and under the Light category, expand LightComponent and uncheck the bEnabled property. This causes the light to be switched off when the level starts.

FIGURE 9.6 Place the light above the opposite corner from the trigger.
Step Four
Click the Open Kismet button to open the Kismet Editor. We now create a simple sequence to turn our light on and off when our player comes in contact with the trigger.Step Five
We begin by establishing our event, which keeps track of when the player touches the trigger. In the Perspective viewport, select the trigger actor. Then, in the Kismet window, right-click on a blank area of the Sequence window and choose New Event Using Trigger_1 > Touch from the Context menu. This creates a new Touch event, enabling us to initiate actions when the player comes within the contact radius of the trigger (see FIGURE 9.7).Step Six
We now need to establish the action that takes place when the trigger is touched. In a blank area of the Sequence window, somewhere to the right of the Touch event, right-click and choose New Action > Toggle > Toggle. You can reposition the Toggle sequence object by Ctrl-dragging it, just as you move objects in the Material Editor (see FIGURE 9.8).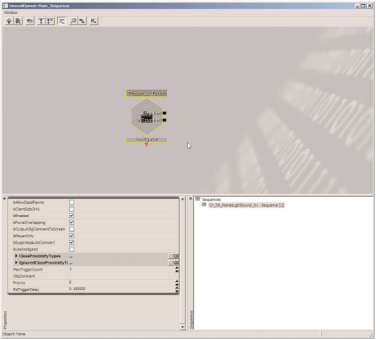
FIGURE 9.7 The new Touch event has been created.
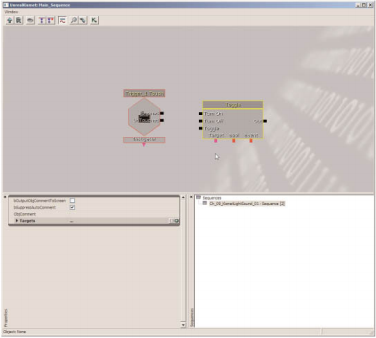
FIGURE 9.8 Place the Toggle action sequence object just to the right of the Touch object.
Step Seven
Creating the Toggle sequence object is not enough. We need to tell Kismet exactly which object we are toggling. To do this, follow these steps:- In the Perspective viewport, select the PointLightToggleable created earlier.
- Back in the Kismet window, right-click in a blank area of the Sequence Window beneath the Toggle object and choose New Object Var Using PointLightToggleable_1. This creates a variable that is tied directly to the PointLightToggleable actor in your level (see FIGURE 9.9).
-
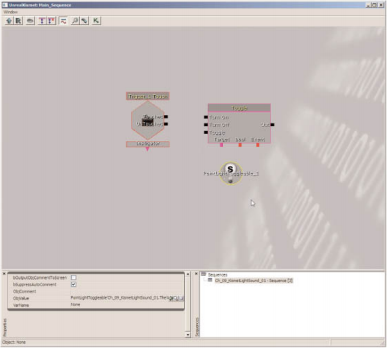
FIGURE 9.9 You now have a new object variable that designates the PointLightToggleable actor. - On the Toggle object, you see a small pink input box underneath the word "Target." Drag a wire from that input and connect it to the PointLightToggleable_1 variable. The Toggle object is now connected to the light, and is able to turn it on and off (see FIGURE 9.10).
Step Eight
The last thing left to do is connect our Touch event to our Toggle action, which tells Kismet to Toggle the status of the light when the player comes into contact with the trigger.Drag a wire from the Touch output of the Touch object, and connect it to the Turn On input on the Toggle object (see FIGURE 9.11).
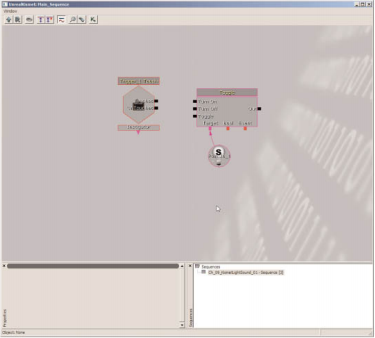
FIGURE 9.10 With the new object variable connected to the target of the Toggle, Kismet can now use the Toggle to affect PointLightToggleable_1.
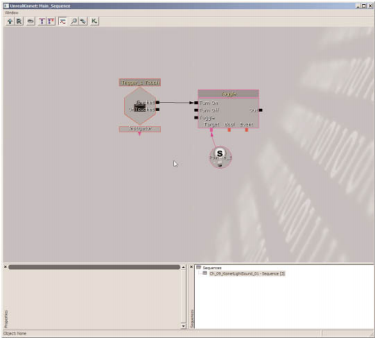
FIGURE 9.11 Once we have connected the two sequence objects together, Kismet knows to "fire" the Toggle sequence object as soon as the player touches the trigger.
Step Nine
Click the Build All button and save the current level.Try out your new trigger by testing the level. You may click the Play In Editor button located on the right side of the toolbar (we've already placed a PlayerStart for you), or right-click on the floor and choose Play From Here.
Your level begins with very dim lighting. When you run your character into the trigger, the light switches on. However, at this time, the light only turns on once and remains on indefinitely. Later, in TUTORIAL 9.2, we change the Touch event so that it can be fired multiple times, as well as reprogram the sequence to turn off the light when we are no longer in contact with the trigger. We also take a look at triggering sound effects when our trigger is touched and "un-touched."
Anatomy of a Sequence Object
Now that you've created a simple sequence, let's analyze sequence objects for a moment. First, along the sides of a sequence object, you generally find a series of inputs and outputs, with inputs being on the left and outputs on the right. The inputs on the left side of a sequence object are intended to receive a signal from another sequence object. This signal activates the sequence object in some way. Some sequence objects have only a single input on the left, typically named In.Other sequence objects, such as a Toggle, contain many depending on how the sequence object functions (see FIGURE 9.12).Sequence objects can also have many outputs along their right side as well. Such sequence objects typically handle different sets of sequences, and the multiple outputs enable you to choose which sequence is fired. For example, a Condition sequence object can compare two values, and use one output if Value A is greater than Value B, or another output if Value B is greater than A (see FIGURE 9.13).
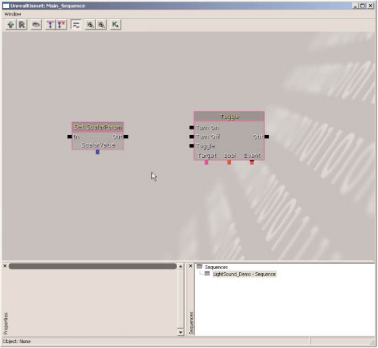
FIGURE 9.12 On the left, the Set ScalarParam sequence object has only one input, whereas the Toggle on the right contains many.
FIGURE 9.13 Here you can see a Condition sequence object, with its multiple outputs each connected to different sequences.
Along the bottom of a sequence object, you can also find a series of inputs and outputs.However, the inputs and outputs found along the bottom of a sequence object allow for interaction with variables, not with other sequence objects. These inputs and outputs can be differentiated from one another by the shape of the connector. An input always has a square-shaped connector, whereas an output has a triangular shape (see FIGURE 9.14).
FIGURE 9.14 The sequence object shown in the picture has both inputs and outputs along the bottom, for receiving data from and sending data to different variables.
Types of Sequence Objects
There are five types of sequence object available in Kismet. They are events, actions, variables, conditions, and Matinee objects. In this section, we give a brief description of all five, starting with the three most frequently used.Events
Events are the beginning of every Kismet sequence. An event is, simply put, something that happens inside your level. This can be when a player touches an object, uses a trigger, damages or destroys another actor, or a variety of other occurrences. There are also remote events, which you can fire as a part of an existing sequence. The most important thing to keep in mind is that events are the first step in a sequence, in that they "send the initial signal" (see FIGURE 9.15).
FIGURE 9.15 This Touch event has two different outputs--one for when the trigger is touched, and another for when the player breaks contact with the trigger.
Actions
Actions are the counterpart to events, and are the most frequently used type of sequence object. An action can take on many forms. In general, an action object performs a specific task when it receives a signal from an event or other sequence object. The tasks are too many to be listed here, but can include such things as changing a material instance parameter, teleporting the player to a new location, changing the value of a variable in the sequence, and many more. By stringing together a series of different actions, you can create very intricate networks (see FIGURE 9.16).Variables
Just as in code scripting, variables are used to store certain types of data. You can store Boolean values, integers, floating point values, strings, vectors, and objects in variables. Variables are read by actions in your sequences, allowing for data input to control how the actions work. For exam- ple, if you need to teleport a player to the location of Teleporter_1, you would need one variable to represent the player and another to represent the Teleporter_1 actor.
FIGURE 9.16 Here you can see a series of actions all strung together to create a complex effect.
Variables can also be written to in a sequence. By using the outputs found along the bottom of an action or event, you can store a given value in a variable for use later.Variables are color-coded as to what types of data they can store (see FIGURE 9.17). The color-coding is as follows:
- Boolean values: Red
- Integers: Cyan
- Floats: Blue
- Objects: Pink
- Strings: Green
- Vectors: Yellow
- Union (typeless): White
Conditions
Conditions are simply testing objects. You can use them to test whether one value is greater than or less than another, whether one object variable is equal to another, and much more. Conditions do not directly affect your level, but instead control the flow of your Kismet sequence, enabling you to trigger one part of a sequence or another based on a certain condition (see FIGURE 9.18).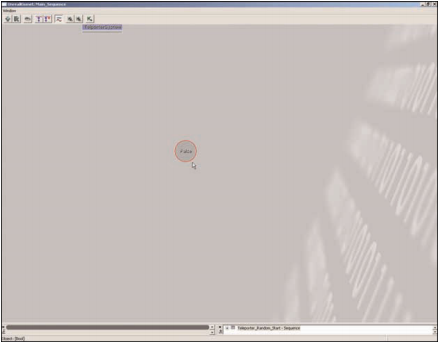
FIGURE 9.17 Variables appear as small circles containing some sort of label.
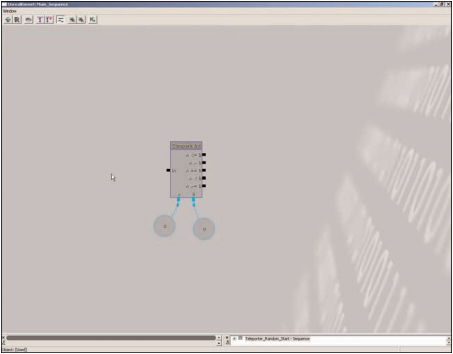
FIGURE 9.18 This condition object is testing the value of two integers.
Matinee
Matinee objects are used to control matinee sequences in game. Although it is true that Matinee and Kismet are inexorably intertwined in Unreal Engine 3.0, we do not go into great detail on using Matinee until Chapter 10, "Unreal Matinee."Kismet Sequence Flow
Although working with Kismet is fairly simple, there are a few things that you must understand about how data is passed along its networks. First and foremost, with a few exceptions, Kismet relies on two main things: events and actions. An event calls on an action, which can then call on other actions, trigger remote events, and so on.The most important aspect to understand about Kismet sequence flow is that all actions must be "fired" by something, usually by an event. An action sitting by itself is never activated, and therefore never affect the level. This demonstrates the vital importance of the In and Out connections on the left and right side of actions and events.
As a fun little analogy, you can think actions as explosives, events as detonators, and the lines connecting them as the wiring between the two. By itself, an action, or explosive, does nothing. When you wire it to an event, or detonator, you get an interesting effect.When you wire a detonator to a series of explosives that in turn ignite other detonators and explosives, you get a glorious effect that can truly bring the house down (see FIGURE 9.19)!
In TUTORIAL 9.2, we see how we can supplement our original sequence we created in TUTORIAL 9.1 by simultaneously playing a sound when we toggle the light on and off.
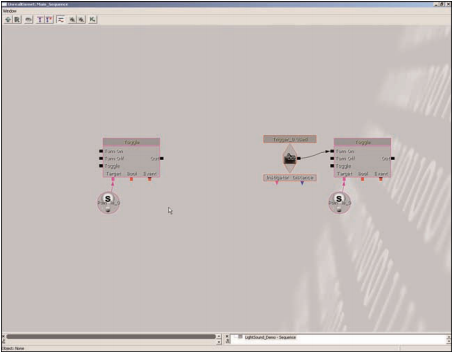
FIGURE 9.19 The sequence on the right has only an action, meaning that it is not activated. The sequence on the left is activated via a Used event, meaning that it fires when a player uses a
particular trigger actor
TUTORIAL 9.2: Repeated Triggers and Firing Simultaneous Actions; Playing Sounds While Toggling Lights
Step One
Continue from TUTORIAL 9.1 by opening the DM-Ch_09_KLightSound_Start.ut3 level you saved. If you have not yet completed TUTORIAL 9.1, you can open Ch_09_KLightSound_01.ut3 map included with the files for this chapter.Step Two
We need to set up our trigger system so that it can be initiated an infinite number of times. However, this does us no good unless we take into account the ability to also switch the light back off. Follow these steps to reprogram our sequence so that the light can be turned on and off based on whether or not the player is touching the trigger:- Click the Open Kismet button to open the Kismet Editor.
- Select the Touch event. In the Properties window of the Kismet Editor, set the MaxTriggerCount property to 0 (you may have to scroll the properties area down to see it). This effectively removes the maximum number of times the event can be fired (see FIGURE 9.20).
-
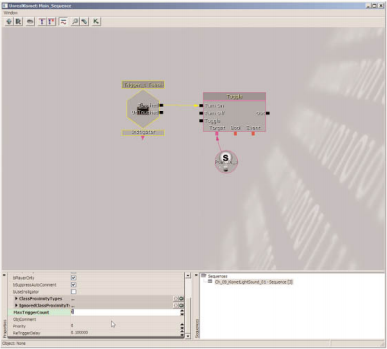
FIGURE 9.20 Here you can see the Properties window of the Kismet Editor. Notice that the MaxTriggerCount for the Trigger object has been set to 0. - Drag a wire from the UnTouched output of the Touch event to the Turn Off input on the Toggle object. This means that when our player is no longer in contact with the trigger, the light automatically switches off (see FIGURE 9.21).
Step Three
Save your progress and test your level. You'll now notice that the light turns on when the trigger is touched, and turns back off when you step away from the trigger. Exit the Play In Editor window by pressing Esc when finished.TIP: As an alternate method to achieve a very similar result, you could connect both the Touch and UnTouch outputs to the Toggle input of the Toggle object!Step Four
We now enhance our example to play sounds. In the Generic browser, open the Chapter_09_KismetContent.upk package included on the DVD with the files for this chapter. Inside this package, you will find a group named SoundCues (see FIGURE 9.22).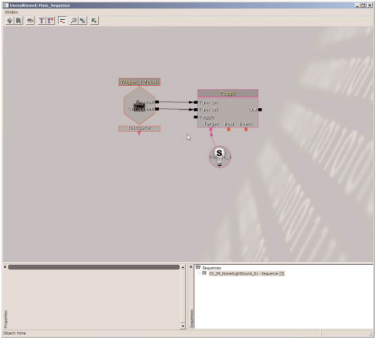
FIGURE 9.21 Now that we have wired UnTouched to Turn Off, Kismet disables the light as soon as the player steps away from the trigger.
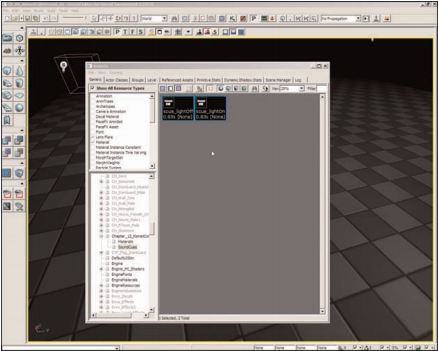
FIGURE 9.22 In the Generic browser, open the KismetSounds package and expand the SoundCues group. Make sure you see the sCue_lightOn and sCue_lightOff objects.
Step Five
Time to bring these sounds into our Kismet sequence:- In the Kismet Editor, right-click on a blank area of the sequence window directly above the Toggle object. In the Context menu, choose New Action > Sound > Play Sound. This creates a new Play Sound sequence object (see FIGURE 9.23)
-
FIGURE 9.23 Place this first Play Sound object just above the Toggle object. - Go to the Generic browser, and within the Chapter_09_KismetContent.upk package, expand the SoundCues group. Select the scue_lightOn sound cue object.
- Back in the Kismet Editor, select the top Play Sound object. In the Properties window of the Kismet Editor, click on the Play Sound property and then click the Use Current Selection in Browser button. This should place the scue_lightOn sound cue into the property. NOTE: When playing sounds using Kismet, you can only use SoundCue objects--not WAV files.
- Drag a wire from the Play input of the upper Play Sound object to the Touched output of the Touch event. The lightOn sound now plays when we touch the trigger. Note that we did the wiring backwards this time (see FIGURE 9.24).
-
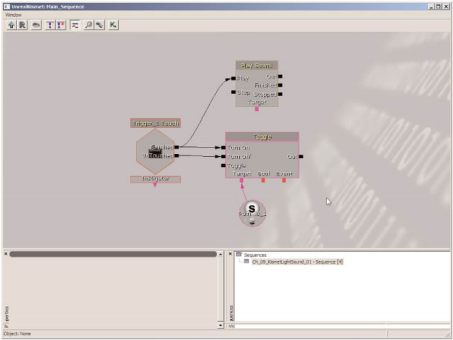
FIGURE 9.24 The Play Sound object has been wired into the Touch object. - Using the same process described previously, create a new Play Sound object, placed below the Toggle object. Connect the scue_lightOff sound cue to this Play Sound object, and connect its Play input to the UnTouched output of the Touch event. This causes the lightOff sound to play when we break contact with the trigger (see FIGURE 9.25).
Step Six
Save and test your level. Notice that one sound plays when the light comes on, and another sound plays when the light goes off.
FIGURE 9.25 Here you can see the second Play Sound object below the trigger, connected to the UnTouched output of the Touch object.
Conclusion
You've now seen how you can branch off a sequence so that you can perform many different actions in unison. Throughout the rest of the chapter, you will see a variety of other gameplay-oriented sequences, with each getting more intricate than the last.We start by showing how you can change a material parameter during gameplay through the use of Material Instances. Although this example is fairly simple, you can use it in conjunction with what you learned in the chapters over materials to control a variety of different material effects. For more information on materials, please see Chapter 6, "Introduction to Materials."
In TUTORIAL 9.3, we show how to use Kismet to affect materials in your levels during gameplay.
TUTORIAL 9.3: Using Kismet with Simple Material Instances
Step One
Launch the Unreal Editor and open the DM-Ch_09_KMatInst_Start.ut3 map included with the files for this chapter. You see a small, glowing, red sphere. The material on this sphere is connected to a material instance, which gives us access to change its color from red to blue (see FIGURE 9.26).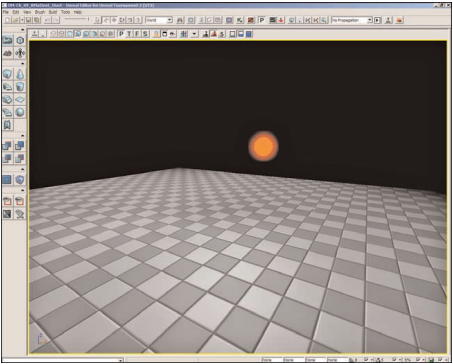
FIGURE 9.26 The MaterialInstance_Demo shows a simple level in which we change the color of a glowing sphere by affecting its material instance with Kismet.
Step Two
Add in a new Trigger object just across the level from the sphere, and uncheck its bHidden property (remember, it's under the Display category) so that it is visible during gameplay (see FIGURE 9.27).Step Three
Select the trigger and open the Kismet Editor. Right-click and choose New Event Using Trigger_1 > Used from the Context menu. This initiates the sequence whenever the player walks up to the trigger, looks at it, and presses the Use button (E key by default).Set the MaxTriggerCount property for this event to 0. Then, uncheck bAimToInteract. This keeps players from having to look directly at the trigger when it is used, enabling them to watch the sphere instead (see FIGURE 9.28).
NOTE: This level requires the Chapter_09_KismetContent.upk package, included with the files on the DVD for this chapter. If the sphere appears gray instead of red, locate and open this package, and then reload the level.
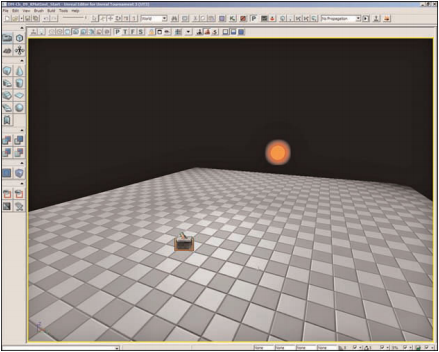
FIGURE 9.27 The new trigger has been placed just across from the sphere.
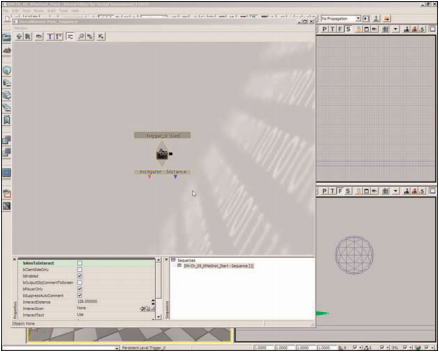
FIGURE 9.28 We have now created a new Used event in the Kismet Editor.
Step Four
What we want to have happen is that when the player uses the trigger, the ball changes from red to blue, and then back to red after a delay of about 2 seconds. More precisely, we want to change the value of the RedBlue scalar parameter within the material from 0 to 1, and then back to 0. We start just by changing the color to red:- Right-click in the Sequence window to the right of the Used event, and choose New Action > Material Instance > Set ScalarParam from the Context menu (see FIGURE 9.29).
-
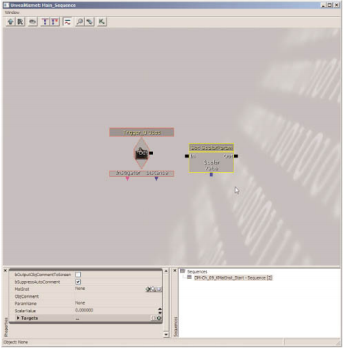
FIGURE 9.29 Place the new Set ScalarParam object just to the right of the Used object. - In the Generic browser, open the Chapter_09_KismetContent.upk package and select the mat_RedBluePulsar_inst material instance constant. Once selected, you can close the Generic browser.
- Select the new Set ScalarParam object, and in the Properties window of the Kismet Editor, select the MatInst parameter and click the Use Current Selection in Browser button. NOTE: If nothing appears when you click the Use Current Selection in Browser button, it is possible that you selected the parent material instead of the material instance. If this is the case, make sure to go back into the Generic browser and open up the material instance constant.
- Click on the ParamName property, and type redblue for its value. You will notice its case change to say RedBlue. This is an indication that Unreal recognized the parameter's name (see FIGURE 9.30).
-

FIGURE 9.30 Here you can see that the RedBlue parameter has been entered into the ParamName property. - Set the ScalarValue property to 1.
- Drag a wire from the Out output of the Used event to the In input on the Set ScalarParam object (see FIGURE 9.31).
Step Five
If we were to test the level at this point, all we could do is turn the light to blue. We now need to put in the delay system that sets the color back to red. Exit the Play In Editor window (Esc) and open the Kismet Editor. NOTE: You may test the level at this point, but remember to stand close to the trigger before hitting the Use (E) key.- Duplicate the existing Set ScalarParam object by using Ctrl-W. TIP: Kismet objects may be duplicated by using Ctrl-W, but you can also copy/paste them with Ctrl-C, Ctrl-V!
- Move this duplicate to the right of the original, leaving enough room for another sequence object to be placed in between (see FIGURE 9.32).
- Set the ScalarValue property of this new Set ScalarParam to 0, which changes the color back to red.
-
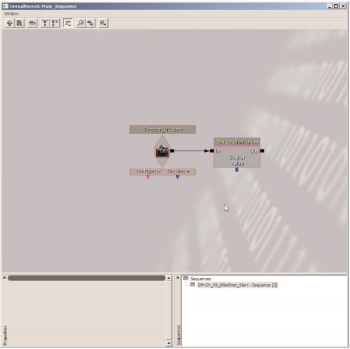
FIGURE 9.31 The Used object has now been wired to the new Set ScalarParam object, enabling us to change the color of the material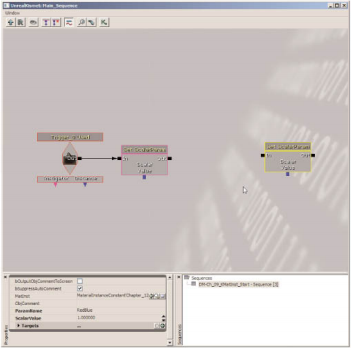
FIGURE 9.32 You can now see the duplicate of the Set ScalarParam. We use this new object to set the color of our material back to red. - Right-click between the two Set ScalarParam objects and choose New Action > Misc > Delay from the Context menu. Place this new object directly in-between the two Set ScalarParams (see FIGURE 9.33).
-

FIGURE 9.33 The new Delay object causes a timed delay to take place between when the material is changed to blue and when it automatically resets to red - Select the new Delay object, and in the Properties window of the Kismet Editor, set the Duration property to 2.
- Drag a wire from the Out of the first Set ScalarParam object into the Start input of the delay. Then, drag another wire from the Finished output of the delay in to the In input of the second Set ScalarParam (see FIGURE 9.34).
Step Six
If you test your level now, you will see that if you use the trigger, the color of the sphere changes to blue, then hold for two seconds, and then switch back. However, we have one more problem. If you exit the level while the sphere is blue, it is still blue when you re-enter the level. Let's fix this now: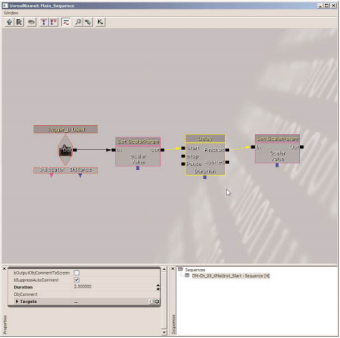
FIGURE 9.34 The delay has now been wired into the sequence.
- Right-click on a blank area of the Sequence window and choose New Event > Level Startup (see FIGURE 9.35).
-
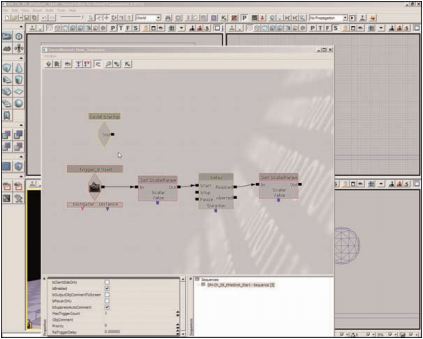
FIGURE 9.35 Place this new Level Startup object above the main sequence - Drag a wire from the Out output of this event into the In input of the second Set ScalarParam, which is currently at the end of your previous sequence (see FIGURE 9.36).
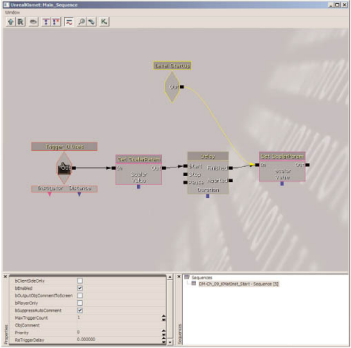
FIGURE 9.36 Connect the Level Beginning's output to the input of the second Set ScalarParam object.
In this way, you are reusing an existing sequence object to reset your color, rather than creating a new one. You are, of course, welcome to use a new Set ScalarParam object if you like, which may help with readability of the sequence.
Step Seven
Save and test your level.Simple Kismet Sequences
Another important operation you may need to perform in your levels is the spawning of actors. As an example, perhaps you need a series of objects to spawn when your player enters a specific room. In this next proof-of-concept level, we spawn rigid bodies whenever a player uses a trigger. We also place a second trigger that enables the player to delete all rigid bodies in the level, through the use of an object list.An object list is a type of object variable that, instead of storing a single object, contains a list of many objects. You can use a series of actions to populate, control, and clear this list throughout your sequence. Using an object list can have great advantages over creating many different object variables, especially when spawning new objects into the level.
TUTORIAL 9.4 demonstrates two important concepts for using Kismet. The first is the spawning of actors,which enables the designer to add objects into a level during gameplay.We also show how to log information during a Kismet sequence, which can be crucial when trying to debug errors in your Kismet sequences.
TUTORIAL 9.4: Spawning Actors with Kismet and Logging Sequences
Step One
Launch the Unreal Editor and open the DM-Ch_09_KSpawn_Start.ut3 map included with the files for this chapter. This is a tall level with a series of pegs against one wall. You notice some simple placeable actors near the top of the level, and two triggers near one corner.Step Two
In the Front viewport, select the leftmost trigger (Trigger_0), and in the Kismet Editor, right-click and choose Create New Event using Trigger_0 > Used to create a new Used event with this trigger.Set the MaxTriggerCount property to 0, and uncheck bAimToInteract.
Step Three
Repeat all of Step 1 to create a second Used event for Trigger_1, and move it somewhere below the first. Don't forget the MaxTriggerCount and bAimToInteract properties (see FIGURE 9.37)!Step Four
The first thing we need to do is spawn our actor. The TestPlaceableActors located near the top of the level serve as spawn points so that we can get some level of randomization in spawn positions. Follow these steps to get the proper actor in place:- Right-click in a blank area to the right of the Used event for Trigger_0, and choose New Action > Actor > Actor Factory.
- Connect the Out output of the Used event for Trigger_0 to the Spawn Actor input of the Actor Factory. This causes a new actor to be spawned every time the player uses the trigger (see FIGURE 9.38).
FIGURE 9.37 Both Used events have now been created.
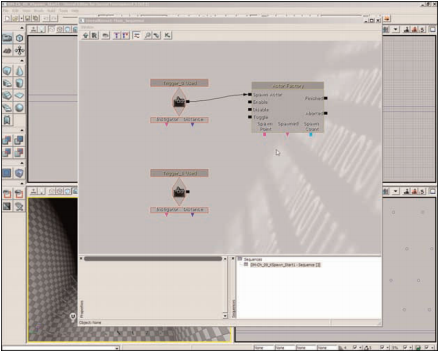
FIGURE 9.38 The actor factory has now been attached to the Used event for Trigger_0.
Step Five
Next, we establish the kind of actor we want to spawn.- Select the Actor Factory, and in the Properties window, locate the Factory property, and click the Add New Object button. From the Context menu, choose ActorFactoryRigidBody. A list of new properties appears for the rigid body (see FIGURE 9.39).
-
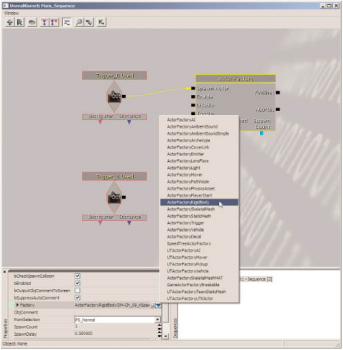
FIGURE 9.39 Here you can see the Context menu that appears when you click the Add New Object button. - Locate the StaticMesh property, and use the Generic browser to set the property to the sm_simpleSphere mesh, included in the KismetSpawn package.
Step Six
Now we need to set up where we want the rigid bodies to spawn.- With the Actor Factory selected, go to the Properties window and find the SpawnPoints property.
- Click the blank area next to the property, and then click the Add New Item button ten times to create ten different spawn points.
- Enter the following information into each index for the spawn points (see FIGURE 9.40):
- [0]: TestPlaceableActor_0
- [1]: TestPlaceableActor_1
- [2]: TestPlaceableActor_2
- [3]: TestPlaceableActor_3
- [4]: TestPlaceableActor_4
- [5]: TestPlaceableActor_5
- [6]: TestPlaceableActor_6
- [7]: TestPlaceableActor_7
- [8]: TestPlaceableActor_8
- [9]: TestPlaceableActor_9
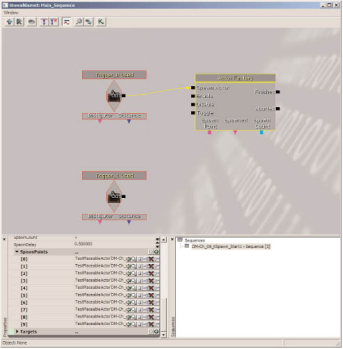
FIGURE 9.40 Your fully populated spawn points list should appear like so.
Step Seven
Our spawn points are in place, and at this point, we can effectively spawn a new rigid body each time we use Trigger_0. However, it would be nice if we could keep all of our rigid bodies in a list, so that we can destroy them all at once using Trigger_1. Use the following steps to use Kismet to create the list during gameplay:- Right-click to the right of the Actor Factory object and choose New Action > Object List > Modify ObjectList from the Context menu.
- Connect the Finished output of the Actor Factory to the Add To List input of the Modify ObjectList sequence object (see FIGURE 9.41).
-
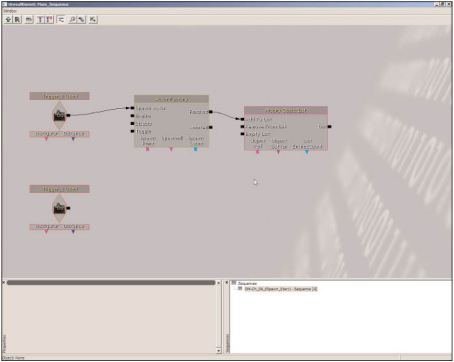
FIGURE 9.41 The Modify ObjectList is now attached to the Actor Factory sequence object. - We now create the list itself. Right-click beneath the Modify ObjectList sequence object and choose New Variable > Object > Object List from the Context menu. Connect the ObjectListVar output to this new variable (see FIGURE 9.42).
- We now need to provide an object that we can place into the list. Right-click beneath the Actor Factory object and choose New Variable > Object > Object. Connect the Actor Factory's Spawned output to this new vari- able, and connect the Modify ObjectList's ObjectRef input to it as well (see FIGURE 9.43). NOTE: You'll see three question marks (???) located within the new object variable. This is because we have yet to assign it a value in Kismet. However, you'll also notice that the Spawned output uses a triangle instead of a square, meaning it is outputting a value. The result of all of this is that the Actor Factory actually sends the name of the object into the blank object variable, and the Modify ObjectList object then reads that name andapplies it to the list.
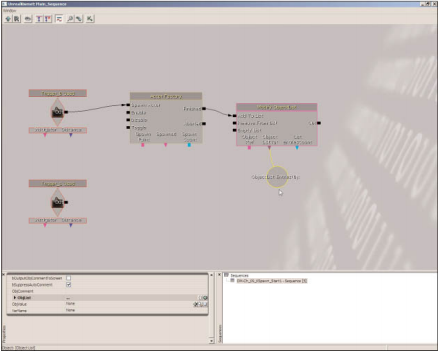
FIGURE 9.42 Our object list variable is now in place.
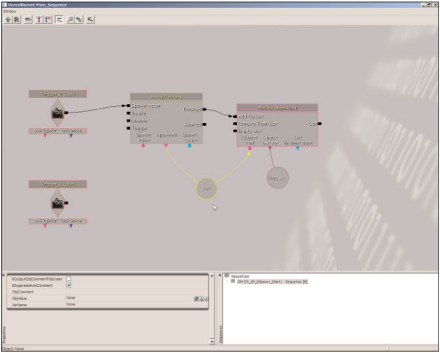
FIGURE 9.43 We now pass the current value of the Object variable into an entry of our object list.
Step Eight
We now need to log to the screen how many rigid bodies are in the level at any given moment.- Right-click in a blank area to the right of the Modify ObjectList sequence object, and choose New Action > Misc > Log.
- Connect the Out output of the Modify ObjectList sequence object to the In input of the Log (see FIGURE 9.44).
-
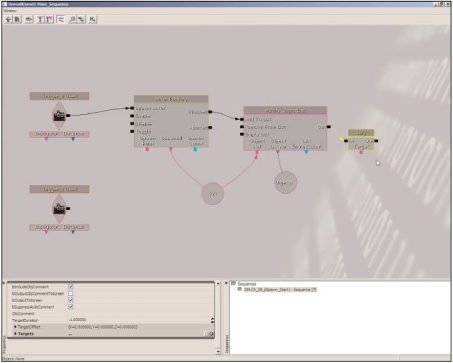
FIGURE 9.44 The Log object sends information to the screen during gameplay. It is most often used for debugging purposes. - We need to create a new Int variable to store the number, but this time we're going to use a shortcut. Right-click on the small teal triangle beneath the List EntriesCount output of the Modify ObjectList sequence object. From the Context menu that appears, choose Create New Int Variable. You can do this with any color-coded output!
- Now we need to send this information to our Log. However, if you look closely, you will notice that the Log currently has no inputs that accept Int data. We need to expose it.
Right-click on the Log and choose Expose Variable > Int - Int* from the Context menu. You will see an Int input appear on the bottom of the Log.
- Connect this new Int input into the Int variable (see FIGURE 9.45).
FIGURE 9.45 With our variables in place and connected, we can now output the number of rigid bodies in the list to the screen
Step Nine
We're almost finished. Now, all we need to do is use the objects contained in the object list to destroy all the rigid bodies in the level.- Right-click to the right of the Used event for Trigger_1. In the Context menu, choose New Action > Actor > Destroy.
- Connect the Out output of the Trigger_1 Used event to the Destroy's In input.
- Connect the Destroy's Out output to the Empty List input on the Modify ObjectList sequence object.
- Connect the Destroy's Target input to the object list variable (see FIGURE 9.46)
Step Ten
If you test the level right now, you'd see that the spheres were all just a little big. Fix this with the following steps:- In the Kismet Editor, select the Actor Factory and look under the Factor properties Find the DrawScale3D properties and set the following:
- X: 0.5
- Y: 0.5
- Z: 0.5
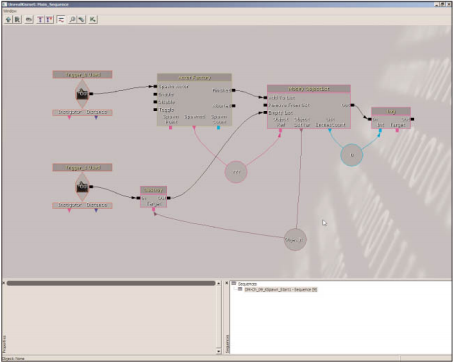
FIGURE 9.46 Your completed network should look something like this.
