For one of the upcoming projects (which will follow in some of the following posts), and as it had to fit the lore of the game, a black hole was necessary. Before going forward - let me add an image of what result I want to achieve:
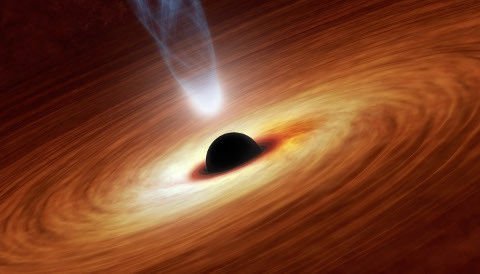
Artist conception of black hole - NASA/JPL-Caltech
While the image is similar to the final effect I wanted to achieve, I did some changes on the effect to be more colorful and bright - but the original idea was from this image.
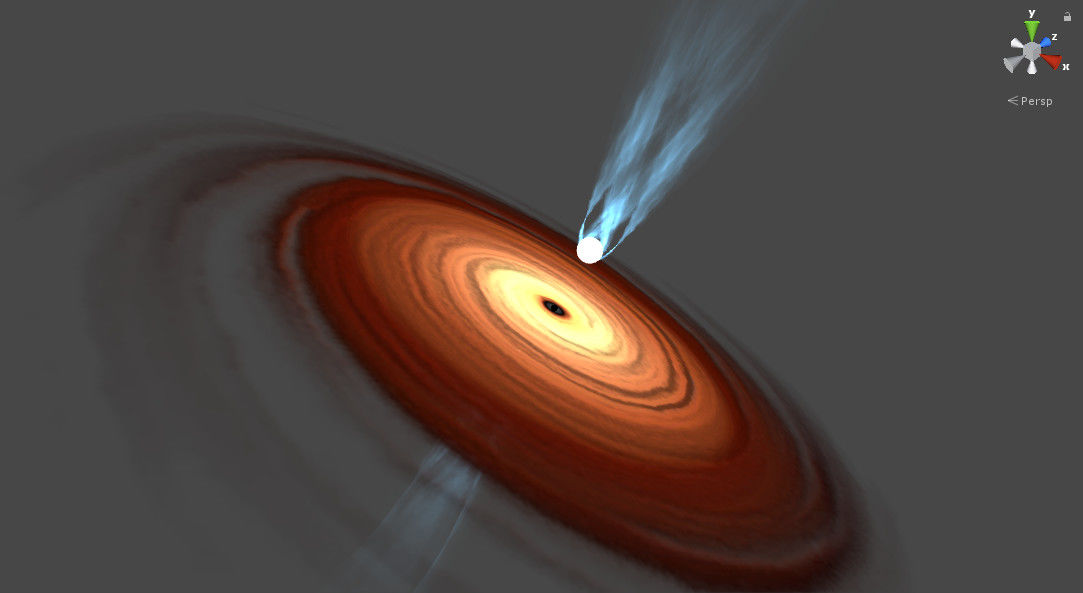
The effect is actually separated in 3 major parts - Disk, Streaks and Post processing.Of course there is also the core of the black hole (which is just a small sphere, with black color).
Disk
The disk around black hole is actually just matter that rotates around the core. Depending on the distance from the core the average density will increase near the event horizon and decrease further from it. Near the core the density can be so high that it may eventually have temperature close to star - therefore there might be high emissive energy - and therefore light.
Also, due to the time dilation (and therefore light having hard time escaping near the event horizon), the emissivity is getting lower very close near the event horizon. Anything beyond event horizon is invisible from the outside, because gravity there is so strong, not even photons can escape.
At least that is what I understand from the topic from physics point of view.
This actually explained what can be seen on the image and what is going on graphically, that is:
- The disk rotates around the core
- The density of disk decreases further from the core
- The emissive light decreases further from the core, and therefore some (outer) parts of the disk will be lit by inner part ... although inner part around the core has to be somehow darker
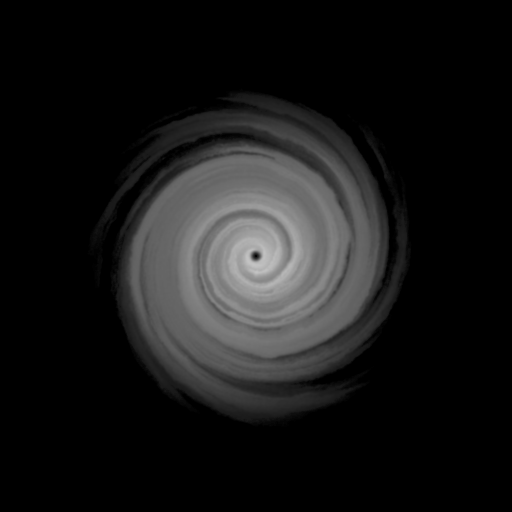
Which can be solved with simple texturing and some basic lighting of the result. Using whirl-like texture as a basis proved to be a good start for me. I started off by creating a whirl-like texture that would define density in various parts of the disk, which resulted in this:
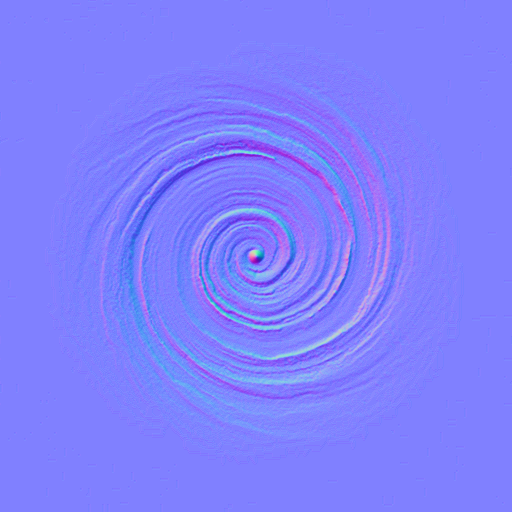
Generating a normal map for lighting from this is actually quite straight forward (and easy in Substance Designer F.e.) - and after short time, I also had a normal map:
Putting just these together with basic diffuse lighting (standard N.L) from the center (slightly above the plane) gives us some basic results:
Next thing is defining emissivity. This is done simply by using 1D gradient texture for which the coordinate will be distance from the center. The gradient I came up with is:

Notice the left part - which is near the event horizon.will give us similar feeling to the image as we're not jumping straight to bright value. Applying emissive value (as both - multiplier for the color, and as emission) gives us this look:
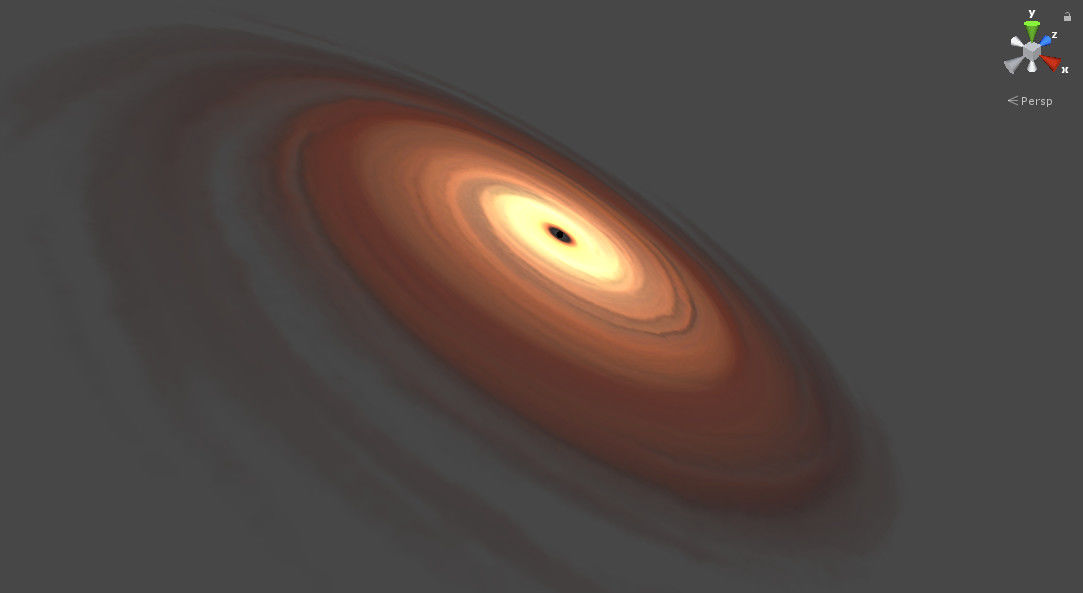
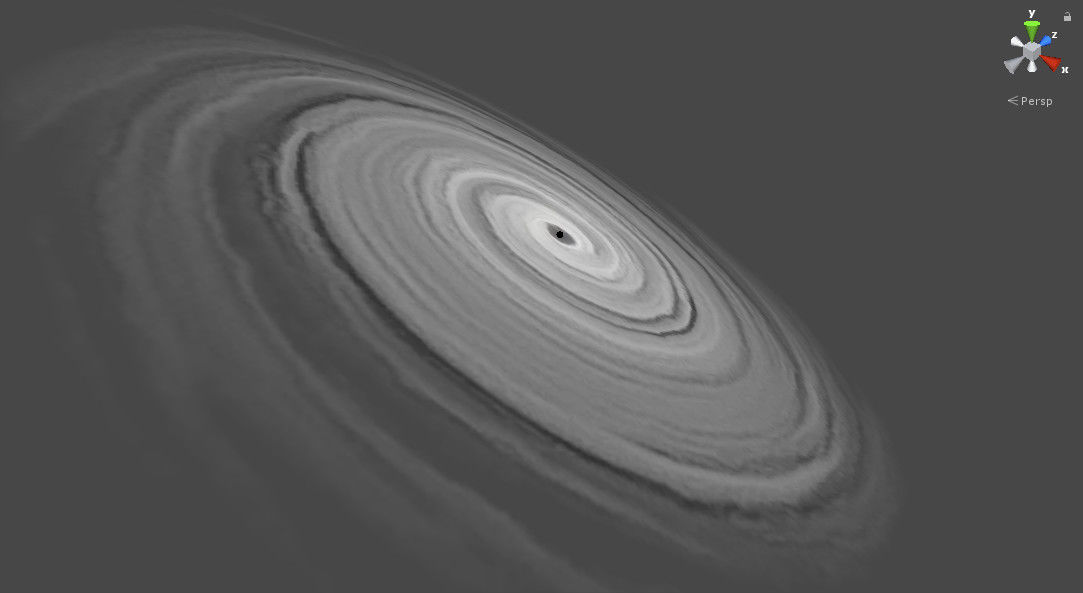
Which looks good enough already - I personally played a bit with values (mainly playing with contrast and other multiplication factors - F.e. for alpha channel/transparency), and ended up with this result:
Resulting pixel shader is as simple as:
fixed4 frag (v2f i) : SV_Target
{
	// Calculate texture coordinate for gradient
	float2 centric = i.uv * 2.0f - 1.0f;
	float dist = min(sqrt(centric.x * centric.x + centric.y * centric.y), 1.0f);

	// Lookup gradient
	float3 gradient = tex2D(_GradientTex, float2(dist, 0.0f)).xyz;

	// Light direction (hack - simulates light approx. in the middle, slightly pushed up)
	float3 lightDir = normalize(float3(centric.x, -centric.y, -0.5f));

	// Use normals from normal map
	float3 normals = normalize(tex2D(_NormalsTex, i.uv).xyz * 2.0f - 1.0f);

	// Simple N.L is enough for lighting
	float bump = max(dot(-lightDir, normals), 0.0f);

	// Alpha texture
	float alpha = tex2D(_AlphaTex, i.uv).x;

	// Mix colors (note. contrast increase required for both - lighting and alpha)
	return fixed4((gradient * bump * bump * bump + gradient) * 0.75f, min(alpha * alpha * 6.0f, 1.0f));
}
Streaks
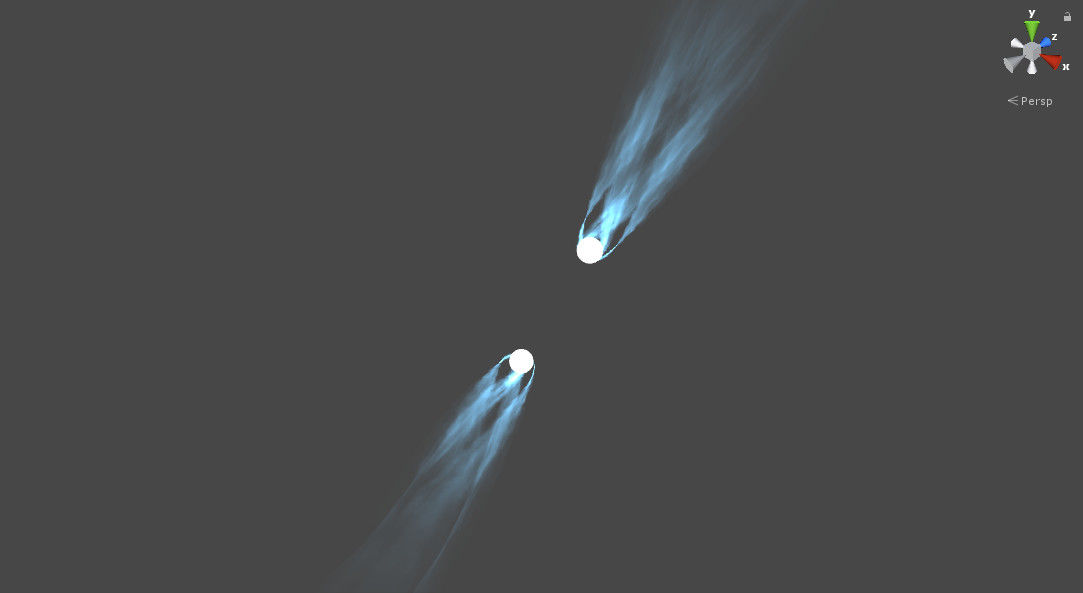
There are 2 streaks, directing upwards and downwards from the core. My intention was to make them bright compared to the core and blue-ish - to keep the background more colorful in the end.
Each streak is composed from 2 objects, a very bright white sphere (which will take advantage of used post processing effects to feel bright), and a geometry for the streaks (instead of using particles). The geometry is quite simple - looks a bit like rotated and cut hyperbole, notice the UV map on the left (it is important for understanding the next part):
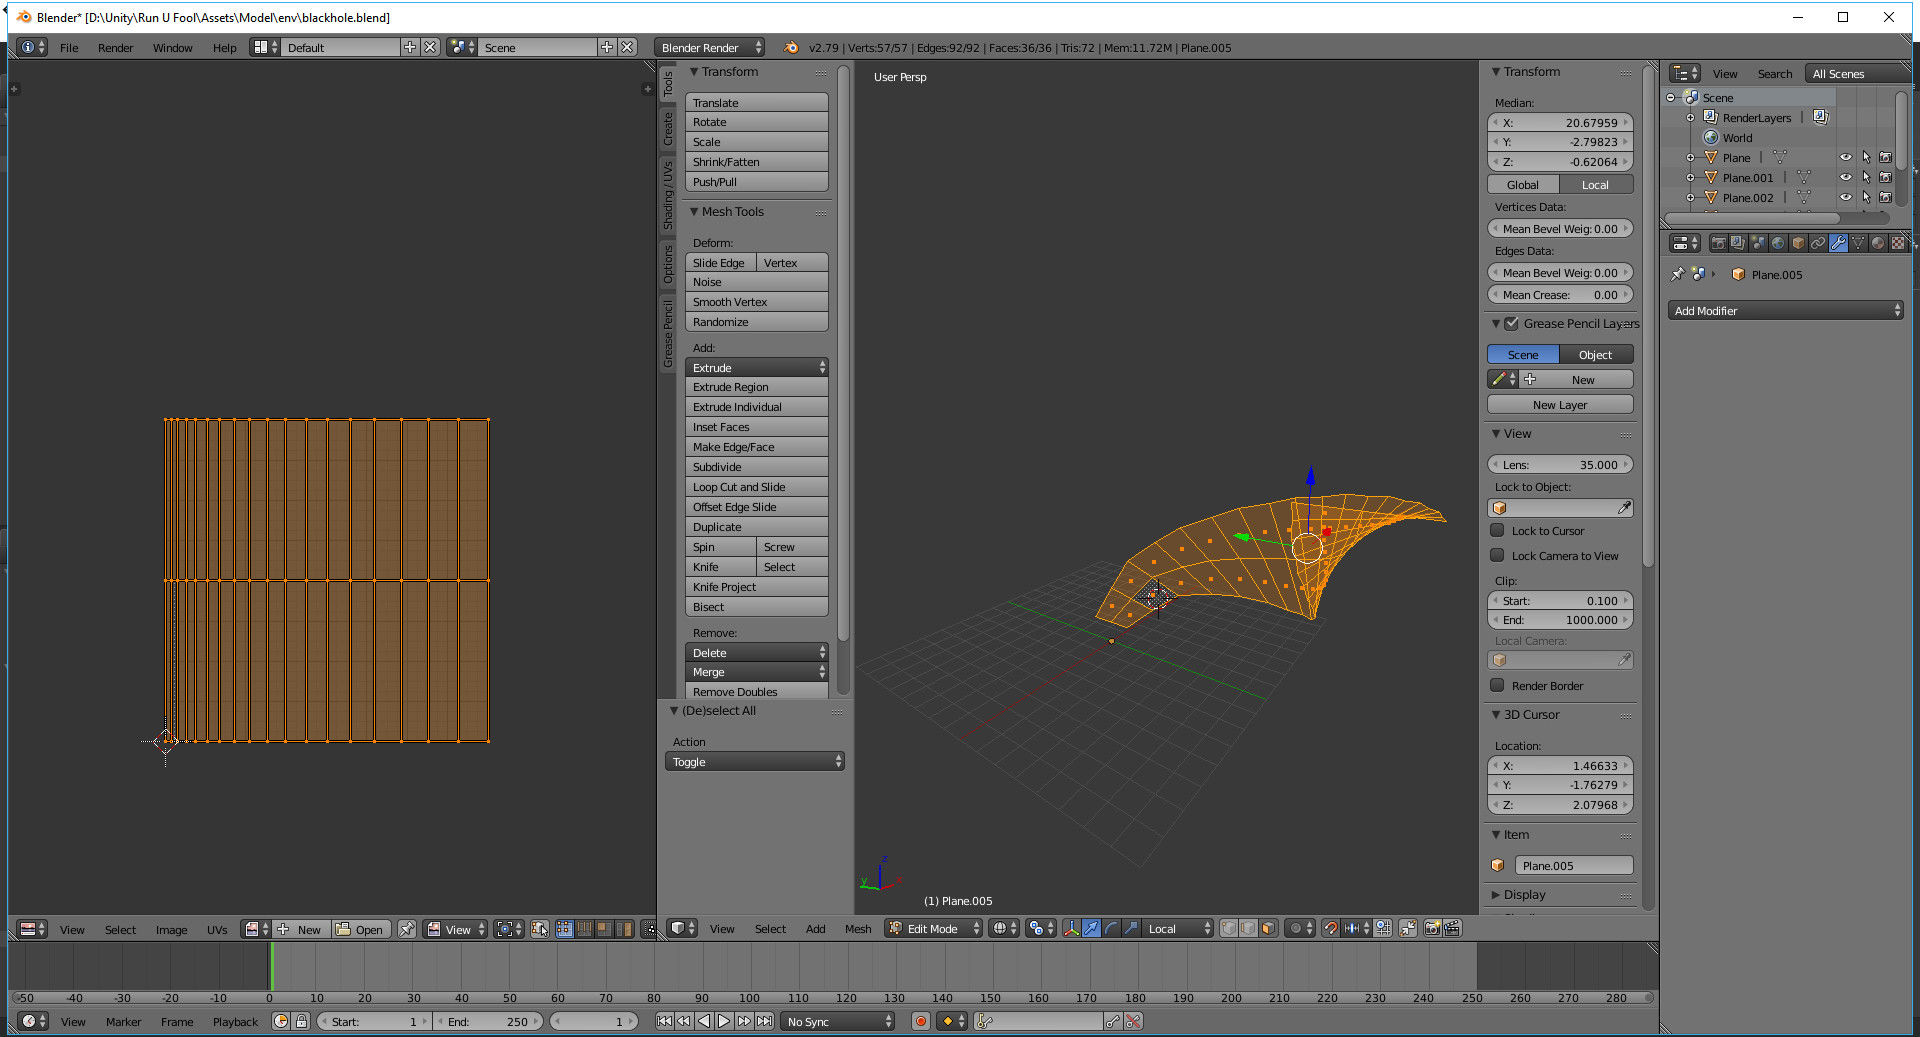
This geometry is there 4 times for each direction of the streak, rotated around the origin by 90, 180 and 270 degrees.
The actual idea for streaks was simple - have a simple geometry of cut surface, and roll a texture over it. Multiplying with correct color and distance from the beginning of the streak adds color effect that nicely fades into the background. To create a particles-like texture that varies in intensity I used Substance Designer again and come up with:

By simply applying this texture as alpha, and moving the X-texture coordinate the streak is animated, like:

Multiplying by wanted color gives us:
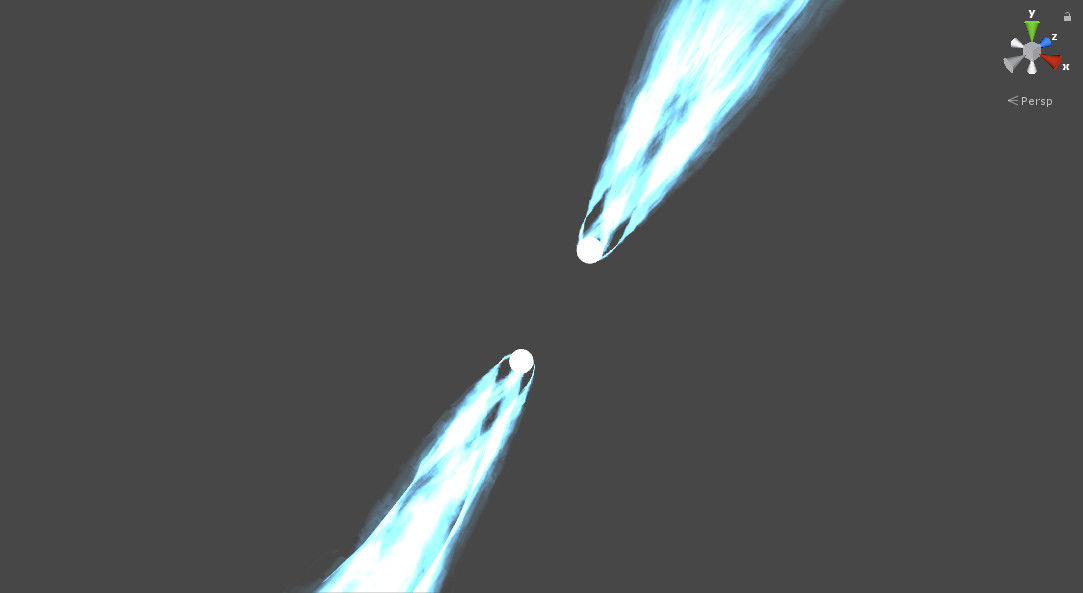
And multiplying by factor given by distance from the origin of the streak results in:
Which is actually quite acceptable for me.
For the sake of completeness, here is the full pixel shader:
fixed4 frag (v2f i) : SV_Target
{
// Texture coordinates, offset based on external value (animates streaks)
float2 uv = i.uv.xy + float2(_Offset, 0.0f);
// Alpha texture for streaks
fixed alpha = tex2D(_AlphaTex, uv);
// Distance from origin factor (calculated from texture coordinates of streaks)
float factor = pow(1.0f - i.uv.x, 4.0f);
// Multiplication factor (to 'overbright' the effect - so that it 'blooms properly' when applying post-process)
float exposure = 6.0f;
// Apply resulting color
return fixed4(exposure * 51.0 / 255.0, exposure * 110.0 / 255.0, exposure * 150.0 / 255.0, alpha * factor);
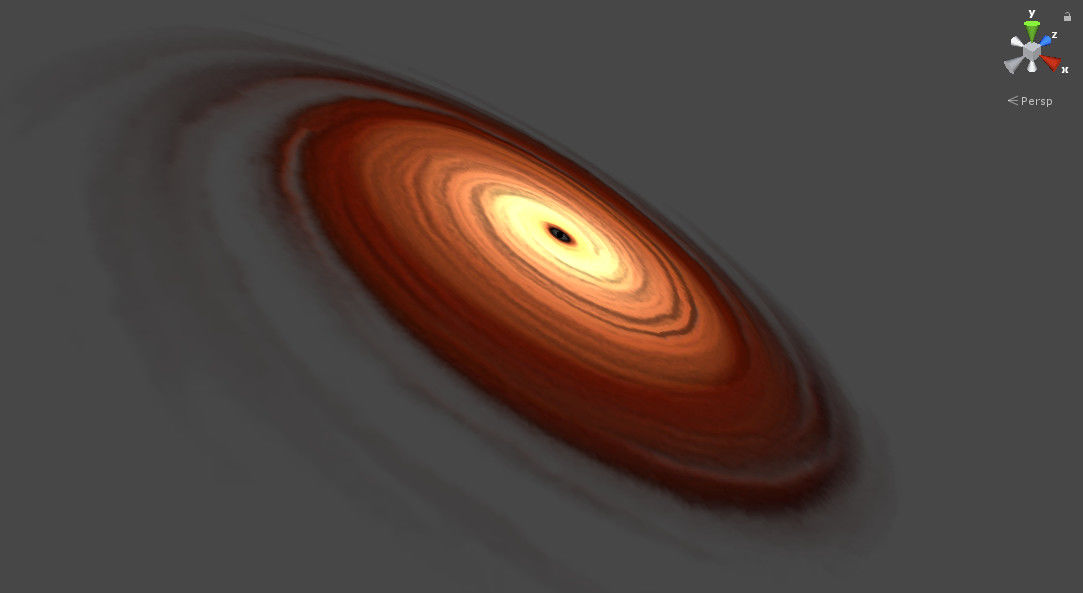
}Putting the effects together ends up in:
Post Processing
By using simple bloom effect, we can achieve the resulting final effect as shown in video, which improves this kind of effect a lot. I've added lens dirt texture to bloom. We need to be careful with the actual core - as that needs to stay black (I intentionally let it stay black even through the bloom). You can do this either by using floating-point render target before the bloom and write some low value instead of black (careful with tone mapping though - yet you might want to go even for negative numbers), or just render the core after the bloom effect.
The resulting effect looks like:
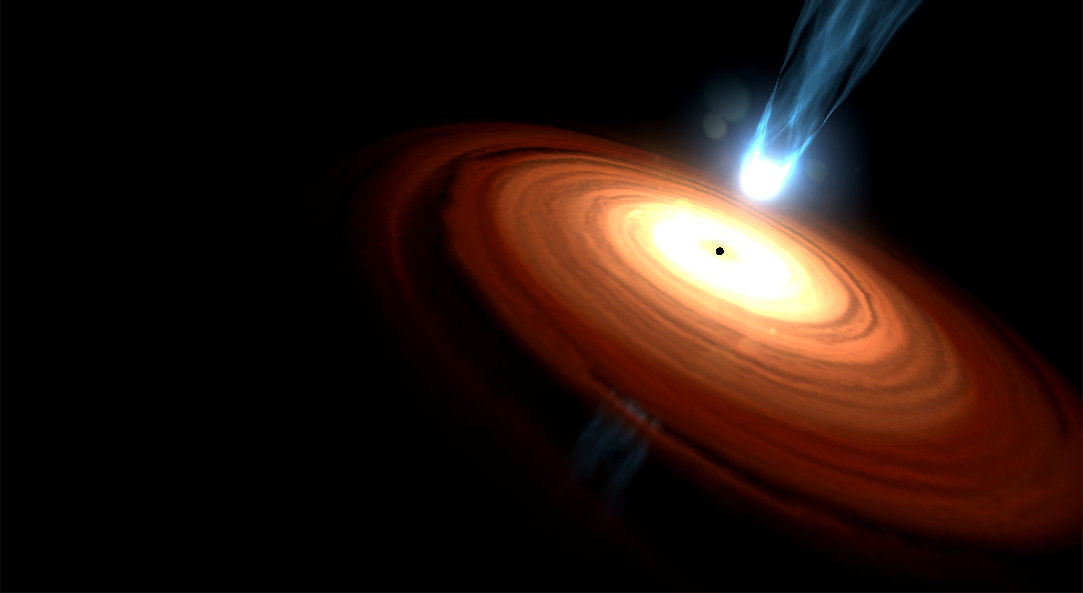
And as promised - a video showing the effect:


Nice work. Looks great!