[Help]Learner Trying to Learning Blender

Started by
6 comments, last by Nanoha 7 years, 10 months ago

Greetings folks for the gamedev.net,

I am Somar. I am 25 years old, married and father to a baby girl. For the past two weeks I have done what I wasn't able to do my entire life. I am learning how to make games. And I have already learned how to code in C#, use Unity and I even made a low poly model in Blender. Now I hit my first obstacle.

What I am trying to do is to aply a texture(in fact just aply color) a low poly model I made, the thing is, I am finding it more difficult than modelling itself and no tutorial is able to help me as all of them show a different and even more complicated way of doing it. Some paint it on Blender itself and others export the unwraped face to another software like Gimp.

I just want to learn the very basics of texturing, the easiest way to do it for a model with 222 tris.

Would be a bonus if there was a way to aply pixelart to the faces as a texture.

Thank you all in advance!

Ps.: I use the last version of Blender, last version of Unity 5 withC# and Visual Studio and GImp.

Advertisement

I've just struggled with this myself too. There is quite a lot involved in this, some of it is Blender specific and some is general. Blender also seems to have 2 different ways to get a texture on a model which I still don't understand. I can get what appears to be a diffuse mapped texture on it displaying in the 'texture' view but rendered view then uses materials which I couldn't for the life of me figure out how to get working correctly (even with all the tutorials). That's ok though because you can fiddle with the materials/textures in Unity,

First you need to unwrap your model, think of unfolding a paper cube, it'll make like a cross shape with 6 squares. How you unwrap your particular model will depend on the model itself and it can get very complicated, far more than I know.

In Blender, at the top there will be the screen layout chooser, it's probably on default. click it and change it to UV Editing.

Select your model, enter edit mode (tab) and press 'a' to select everything.

Then you can either click Mesh->UV Unwrap or just press 'u'. You get a variety of options here, choose 'unwrap'.

On the left you should now have your model flattened out, it might not be appropriate for what you want but it's a start. If you go to face select mode on your mesh and click on faces you will see that each face has a matching area on the left. If you were to have a picture on that piece then it would show up on your model.

On the left, if you click the UVs menu item at the bottom you can choose "Export UV Layout". You can then open that up in some image editing program and create a new texture just by drawing on the appropriate bits.

Once you have a texture go back to Blender. Make sure you have the object selected again, in edit mode and all the faces selected too. On the left click 'Image' on the menu bar, open up your new image which should then show. On the right change display mode to textured (it's one of the buttons at the bottom) and you should now see your model textured.

You can then export that model as an FBX and load it up in Unity. When I do that though I don't get it all nice and textured since I don't totally know what I am doing but your model now has UV coordinates and you have a matching texture so you can add that texture to Unity, create a material from it (set it as the diffuse map) and assign that material to your model. It will now be textured in game.

Obviously there is a lot more to it than that and I am very far from being an expert but hopefully it'll be of some use to you. There's so many topics in that process that it is far more difficult than one would initially think. I'm inclined to agree with you where you say it's more difficult than modelling itself.

Interested in Fractals? Check out my App, Fractal Scout, free on the Google Play store.

For a model in blender yo show uv textures, it needs to be assigned to a material. The material must be in use by the model for it to show up. This isn't Blender Specific.

The ability to see a texture applied to an object even though it is not part of the material is simply for previewing purposes.

I can't link you right now, phone, but if you google for some basic blender tutorials, nine times out of ten you will come across one that teaches you how to use its texturing utility.

It's pretty much like @Nanoha says. I use Blender also as engine editor with every "homemade" engine. Simply I can very easy script it, write exporters and I also worked out a workflow. Blender isn't very artist friendly, but once you get over certain UI solutions it turns to be one of the most powerful tools in world of 3D graphics ( do I have to add it costs nothing and it's opensource? ). Well I could be considered to be a Blender fanboy ;) but now seriously.

In Blender texturing may be done few ways. The easiest one, which I don't recommend is to use "texture face" feature in material ( every object has default material ). It simplifies a lot, also texture is visible in the editor views. You just need to unwrap UVs ( U ) - this will create UV layer, select option "Face textures" in the material properties . It's tells to replace object solid color with texture color. If this is all you need - UV coordinates that you can export and to have a preview in Blender - this is quick way to go. Next is using materials and texture slots. This is more complicated, but allows you to use multiple texture and multiple UV layers ( for example if you want to apply diffuse texture and lightmap etc. ).

One thing worth mentioning are seams. By marking seams you help unwrapping engine to distribute faces more efficient way. It will make also easier to paint on top of it.

When you export UV layout you fill it with texture. To help yourself with it first, in Blender you may paint texture onto the object. You may mark different sections of object by the color, so then you'll know which parts of layout cover which parts of mesh.

I've done a massive multi-part Blender text based tutorial series that will teach you everything you need to know to get started with Blender, starting from 0 experience.

If text isn't your thing, I also [did a video series](http://www.gamefromscratch.com/page/www.gamefromscratch.com/page/Blender-an-Hour-at-a-Time-A-Blender-Video-Tutorial-Series.aspx) that teaches Blender in 5 1 hour chunks.

Otherwise stick with it. It's daunting at first, but not as bad as people say.

First, there is vertex painting. This is the easiest way to get color onto your model. You go into vertex paint mode where you change from object to edit mode. This assigns colors to the vertices. This is old school model painting. Rarely does anyone do this anymore, but for simple crude models it's a quick way to "paint" them. This is mostly for making the model one solid color, not painting detail because you can basically only assign one color per triangle (actually one color per vertex).

UV wrapping is what you generally want. It won't make a cross shape unless it's a cube you're unwrapping. The first step is to define a seem where the model will be split so that the triangles can be laid out flat. I think that's one of the hardest parts of UV unwrapping. You do have to assign it a material. Most of the time, the materials and shaders in Blender are useless in terms of game models. But in this case you use one because the UV map has to have a material. There are YouTube videos on this kind of stuff. If you can do a cube, you're off to a good start. You should be able to export the UV map to a JPeg or something.

You take the UV map image and import it into Photoshop or some paint program. This is all your triangles of your model laid out flat. Texturing is difficult. It's an art form in and of itself, don't let anyone kid you. But there are some tricks and what not. Here's where you do the actual painting of the model.

The first thing to do is to make a layer where you save the triangles as lines. You want the lines of the triangles to be an overlay you can turn on and off and not mess up so that you can see where the triangles are actually at. This is super important. But you also want to be able to turn it off when you're done, unless you want to see the edges of the triangles on the final model (on rare occasion you might actually want that).

Another trick is to mask out the areas that are not triangle faces. Again, you can use the triangle image to do that. Then you can fill the area not used with black. And the mask will keep you from painting into the black area.

At that point it's largely just an art. Cheat when you can. You can often copy and paste textures. If you're modeling pants for a character, you can probably copy and paste an image of denim or something rather than trying to actually paint something that looks like denim. But texturing is tough.

Don't get that confused with specular and normal mapping. Both will use the same UV map, but the way they are produced is substantially different, especially the normal map. Although, they provide a lot of the detail you see in today's models. Normal mapping is mostly about taking your low poly model and making a super high poly model version of it which you then sculpt like clay. Then you bake a normal map using the UV map you made of the low poly model for the texture. Then you go back to the low poly model and apply the normal map to make it look as if it is the high poly version. But you still apply your original texture.

Once you have your texture image, you can import it back into Blender for viewing, but you don't have to. The main thing is that the JPeg (or whatever image format it is) ships with the model and that the UV coordinates are defined in the model file (by UV unwrapping). Of course, the UV map you created must match the texture you created. If you unwrap it again and change the mapping, your texture can be thrown in the trash because it's useless.

But that's basically the process. And as far as I know, it doesn't get any easier than that. You just have to learn to paint on the flattened UV map and it's largely painting skill at that point along with learning to distort it according to the stretch of the triangles.

If the posts above don't help, you can go on YouTube and search for "blender uv unwrapping tutorial". Start with a cube and then work on more complex shapes. Learn the basics with a cube, and then it just gets more difficult from there as your shapes become more complicated.
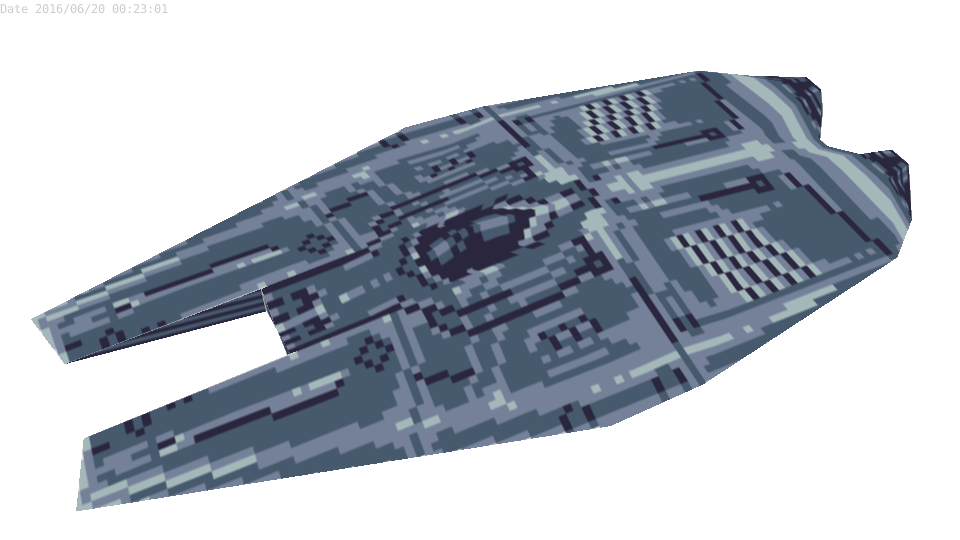
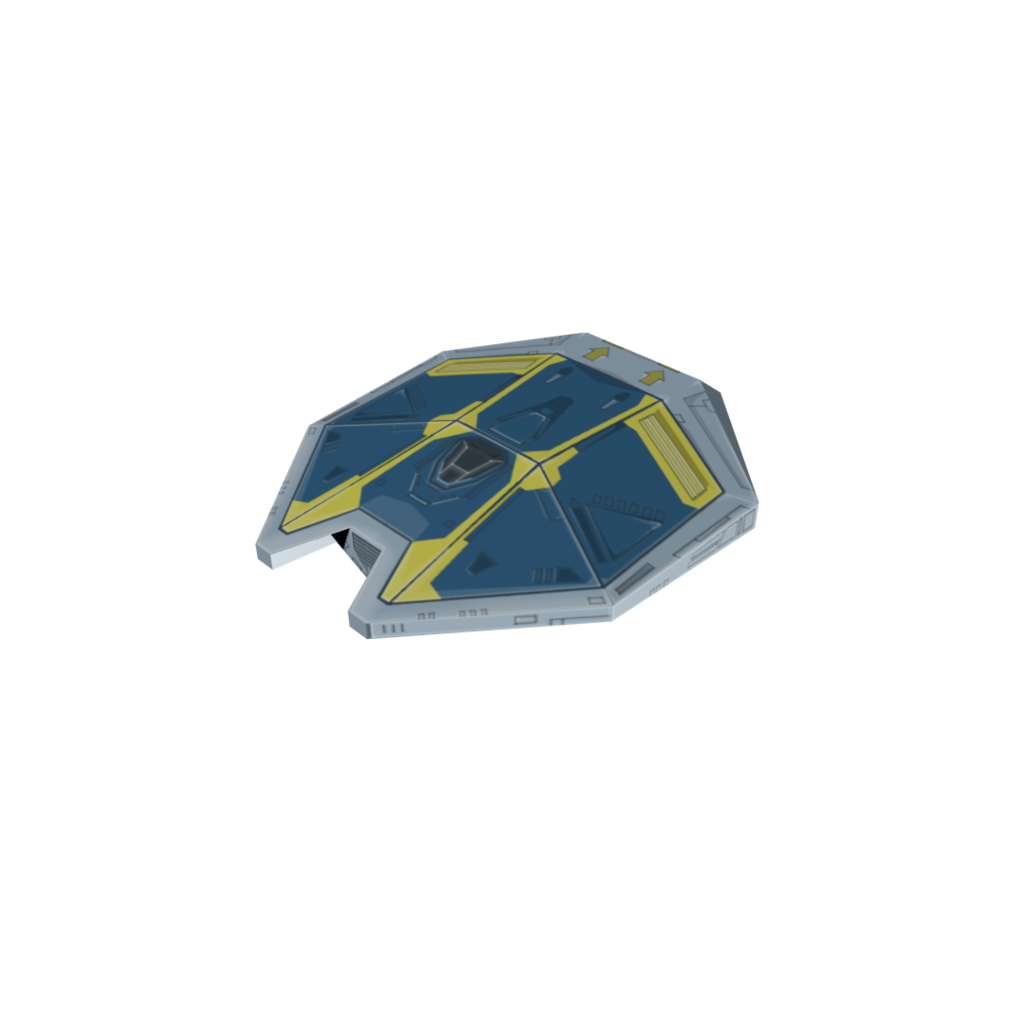
Thank you all. I was able to learn a lot in the past week. This is what I was able to do with a lot of research.

scarabhfmk1_zpsgrjrok8t.pngspaceshipone_zpspirive2f.png

Both are really low polygon models 200- tris. The first texture I made in pixelart or my actual "knoledge" of it and the second I tried to hand drawn. I am still learning a lot. But I am learning a lot at the same time.

[media]https:

[/media]

Looking good.

Interested in Fractals? Check out my App, Fractal Scout, free on the Google Play store.

This topic is closed to new replies.

Advertisement