Motivation
It's been a long time since I've done anything directly game related in my spare time. I work 40+ hours a week on video games and by the time I get home, I often can't summon up the motivation to do anything dev related at home.
Sure, I've still got ideas and desires to work on projects I've carried in my head (or as failed prototypes) for literally years, but when I sit down to work on them at home the mojo never seems to be there.
I was interested in participating in the recent Ludum Dare 33 game jam, but never go round to it - and I regret not doing it.
So, over labor day I decided to sit down and make a game; the simplest game I could put together in 48 hours with only me and no support.
Because I enjoy a little bit of the tech work (engines, frameworks, etc) I chose to start from scratch in MonoGame instead of going the traditional Unity/Unreal 4 route. I also wanted to make something that resembled a decent architecture and not just a smashed together hack - primarily because I intend to do this again and wanted a base to work from.
The Game
The game I picked was 2048 - the crappy mobile game from Kerchapp (which is a clone of 1024, which is a clone of Threes). If you've never played it, it's a game about matching pairs of numbers together to make their double, and repeating until you make a 2048 tile.
The reasons for picking this game:
[indent=1]? I play this game
[indent=1]? Easy game mechanics
[indent=1]? Minimal graphics requirements
[indent=1]? Minimal audio requirements
[indent=1]? Achievable in a weekend
[indent=1]? I stand a good chance of finishing it
The Tools
To do make this game, I used the following tools:
- Visual Studio 2013 (+ Resharper 8)
- MonoGame 3.4
- Pyxel Edit
- paint.net
I didn't get around to implementing audio, so didn't use any tool for that.
Day 1 Goals
I didn't make a concrete plan for putting this together, but I did set mini "goals" for what I wanted to see.
Here's my list of day 1 goals and which were achieved.
[indent=1]? Lay down the foundations; resource system, entity system, component system
[indent=1]? Throw together some crude graphics and get a game board on screen
[indent=1]? Implement the input system & basic movement rules for tiles
[indent=1]? Implement the "squashing" of two adjacent tiles when you move them together
[indent=1]? Add "game over" detection (no more moves) & game reset
[indent=1]? Add scoring + display of scoring on screen
Implementing the basics of the framework were pretty simple. I put together an architecture I've played with in the past - the Entity-Component & Services architecture. The idea of this is that we have GameObjects (entities), which have Components attached. Unlike systems such as Unity, my components don't contain logic (or if they do, it's calculations). Instead, logic is collected in GameServices, which have a Start/Stop/Update method.
To tie all this together, I have a simple Event system, which passes messages around between anyone who subscribes to a given type. I implemented a class called a GameObjectComponentView, which subscribes to the GameObjectComponentAdded/Removed messages (and GameObjectDestroyed) and filters them based on specified component types. This object then maintains a list of objects it knows about, allowing you to enumerate over them knowing that each of them have the components you need. This system formed the basis of most of my systems.
To draw the main game grid, I decided to use a TileMap. I created a crude TileMap2DComponent which held the state of the board (4x4) and held some texture atlas information about how to draw each tile. All of the game board tiles were held in a single texture, with each tile being 64x64 (too small). My texture map was 2 layers, one which had the actual pieces and the other which had a "frame" for each piece. I could have drawn the pieces with the frame over them, but I was lazy

Tying this all together, I created my game service called NumberGameService, which used the TileMap2DComponent and my new NumberGamePlayerComponent.
Input System
Now I had something on screen, it was time to start thinking about inputs. I followed the standard approach of creating a simple "state map" and "action map". Essentially I had a json file which describes the key actions (press/unpress) and states (pressed/not pressed) and how to map them to game actions.
A snippet of this file is here:[code=:0]{ "ActionKeys": [ { "Key": "Escape", "Action": "action.quit" }, { "Key": "Space", "Action": "action.newgame" }, ], "StateKeys": [ { "Key": "Up", "Action": "action.move.up" }, { "Key": "Down", "Action": "action.move.down" }, { "Key": "Left", "Action": "action.move.left" }, { "Key": "Right", "Action": "action.move.right" }, ]}
My input service would then monitor these keys and raise events with the corresponding action in them. For the day 1 implementation, I raised an event for each one - but this was changed in day 2.
Now I could raise an event based on input, it was a case of hooking my systems up to do this. The Event Manager I wrote could handle this with ease; it was a case of making my NumberGameService subscribe to specific events and pass it a lambda/delegate to handle it, eg:
_context.EventService.Subscribe(this, (evts, e) =>{ // do stuff});This proved to be pretty flexible for everything I needed - but I did optimize it a bit later.
Game Logic
With inputs ready to go, I finally started to implement the game logic. Initially, I started this in my NumberGameService but it rapidly became painful to verify and iterate on. To address this I created a NumberGameBoardLogic class, which had the methods MoveLeft()/MoveRight()/MoveUp()/MoveDown() and would modify the NumberGamePlayerComponent and the TileMap2DComponent. With this class, I set about writing some Unit Tests, whereby I could set the state of the board to some known state and then simulate a move, verifying it did what it was supposed to.
An example would be:[code=:0][TestMethod]public void MoveRight_MovesTileWhenSingleTileCanMoveRight(){ var uut = CreateUut((a, b) => 0); uut.ResetBoard(); uut.SetBoardTile(2, 0, TileType.Number1); var result = uut.Move(PlayerMovementState.Right); result.Should().Be(true); uut.GetBoardTile(2, 0).Should().Be(TileType.Empty); uut.GetBoardTile(3, 0).Should().Be(TileType.Number1);}
It's not a great example of a test, but I wrote several tests to cover all the various scenarios I could see. This proved incredibly useful to picking up places I broke the code when I changed things - especially when I came to add scoring. If anything, I wish I'd created far more tests than the ones I did.
Squashing Tiles
With the movement set up, I was ready to implement "squashing" and therefore scoring. To do this, I went back to my unit tests and started implementing the tests to show the results, then I went back and fixed the code to pass the tests. This proved to be useful, as I broke a few things that would have taken me a while to find!
The move and squash logic is brute force and isn't optimised; but for this project it was good enough!
It goes something like this:[code=:0]bool MoveDown(){ var score = _score; var moves = DoMoveDown(); SquashDown(); if (_score - score <= 0) { return moves > 0; } DoMoveDown(); return true;}
In case you don't know how 2048 works; a move basically pushes all the tile to extreme of the direction you tell it. So if you had a row like such:[code=:0]|2| | |2|
And moved right, the result would be:[code=:0]| | |2|2|
But then because these tiles moved together and have the same number, they get squashed...[code=:0]| | | |4|
There is a second move if a squash has occurred because you can end up in situations like this:[code=:0]|2|2|2|2|
Should become:[code=:0]| | |4|4|
And not:[code=:0]| |4| |4|
Or even:[code=:0]| | | |8|
After each move; the game spawns a new low tile in an empty spot and you keep going.
With all this implemented, I had something playable! And I ran out of time - it was getting late and I needed a screenbreak. I felt pleased that I had a playable thing at the end of the day - and it was as fun as the 2048 game.
It's worth noting that it looked like shit. Here's the programmer art screenshot of how the game looked at the end of day 1...
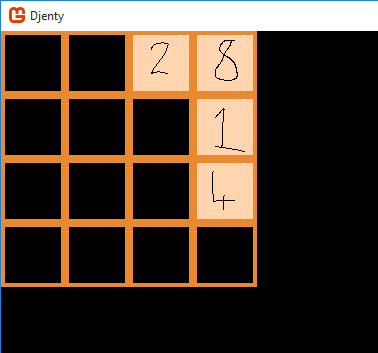
To quote @EGVRoom when he saw this image... "Mother of God!". And it's true, it was bad.
With Day 1 wrapped up, I laid down a few goals for Day 2 - implement the Game Over/Win conditions (to make it a "game") and to polish what I had.
But I'll leave that for my next entry.

Congrats on getting close to completion and having a playable game, really cool!
+ Thumbs up for testing, me myself being a big advocate :) !
There is no other way for doing any software development right ;)
(except for formal specification like Z notation and stuff like that, but that fails miserably when doing anything larger than a couple of hundred lines expressed in code) ...