 While making a roguelike game, procedural generation have to be quick and yet intriguing enough for the generated level to be fun to just pick up and play.
There are many ways to generate and laying out procedurally generated rooms. In The Binding Of Isaac, for example, you have many different types of regular room presets.
The generator just picks a preset based on things like room placement and size. Because those rooms are always of fixed size, this is a nice compromise. By having handmade presets the generated level is somewhat believable (i.e. there are no gaps or obstacles below a room door or secret room and whatnot).


Another example would be Nuclear Throne.
The game takes a different approach to procedural generation by keeping it relatively simple. Because it's not room-based like The Binding Of Isaac, there are more things like caves and large open area. The gameplay also plays into this, as the player needs to eliminate every enemy to spawn a portal to the next level.


Because my game is somehow more inspired by The Binding of Isaac, the right way to procedurally generate rooms would be to use presets, and this is how I make special rooms.
However, there's a big difference between The Binding Of Isaac and my game: my regular rooms aren't always the same size. This means that rather than having presets of regular rooms as well as special rooms I need something more flexible and, most importantly, dynamic..
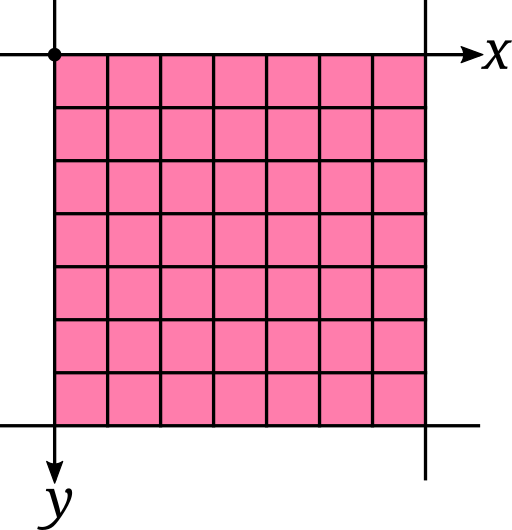
The anatomy of a Room
In my game, as I've said in a previous post, levels are big two-dimensional arrays from which the level geometry is generated. Every room of a level is made using a BSP tree. I won't go in details much on how rooms are generated, but in essence, we create a grid from which we trace a path between two rooms and sparsely attach bonus rooms along the way.
Because I already have rooms sizes and whatnot with that level generation, I could reuse the same idea for room layouts.
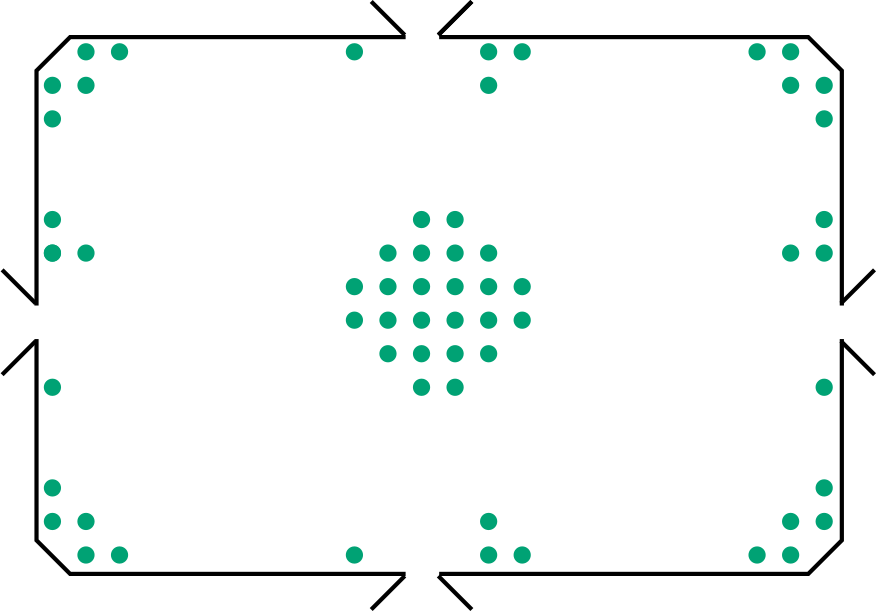
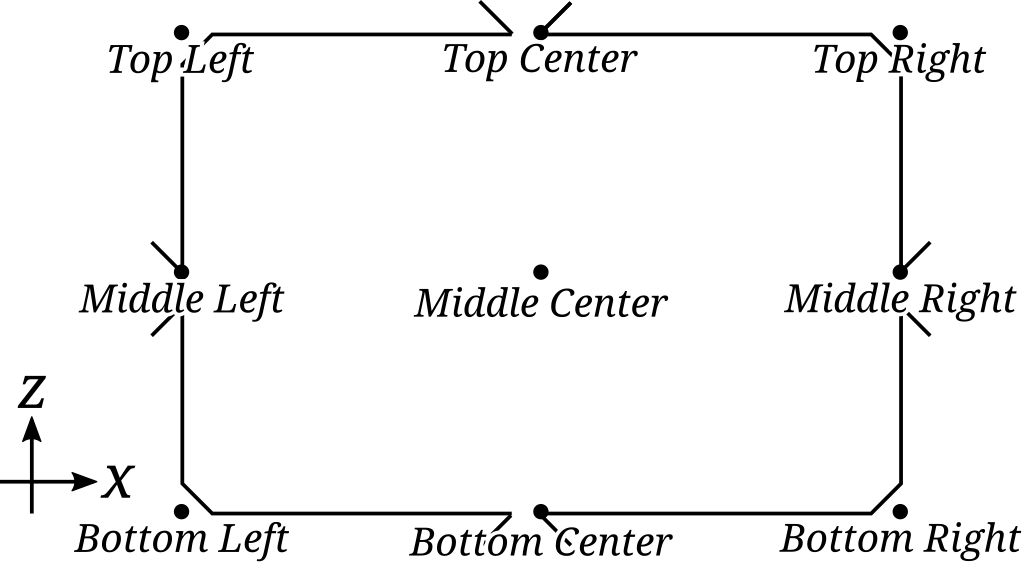
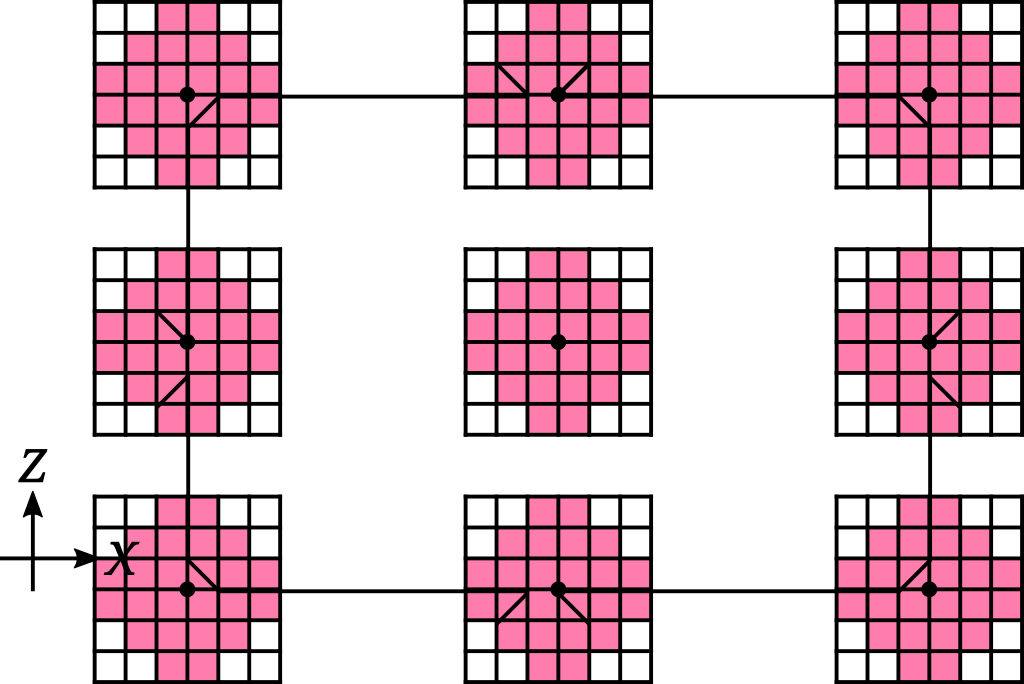
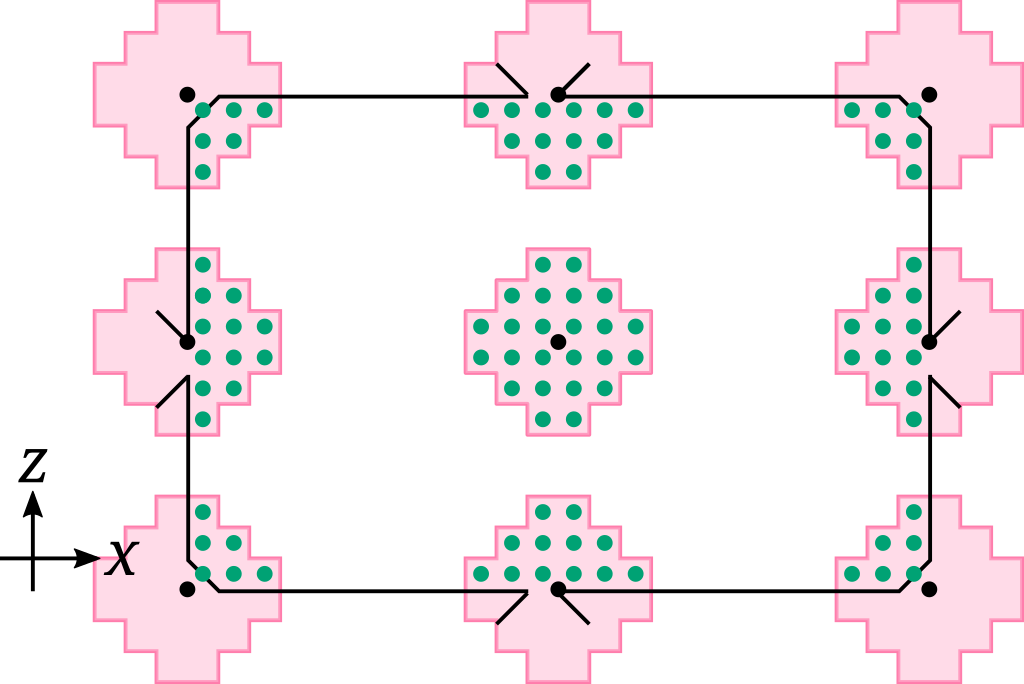
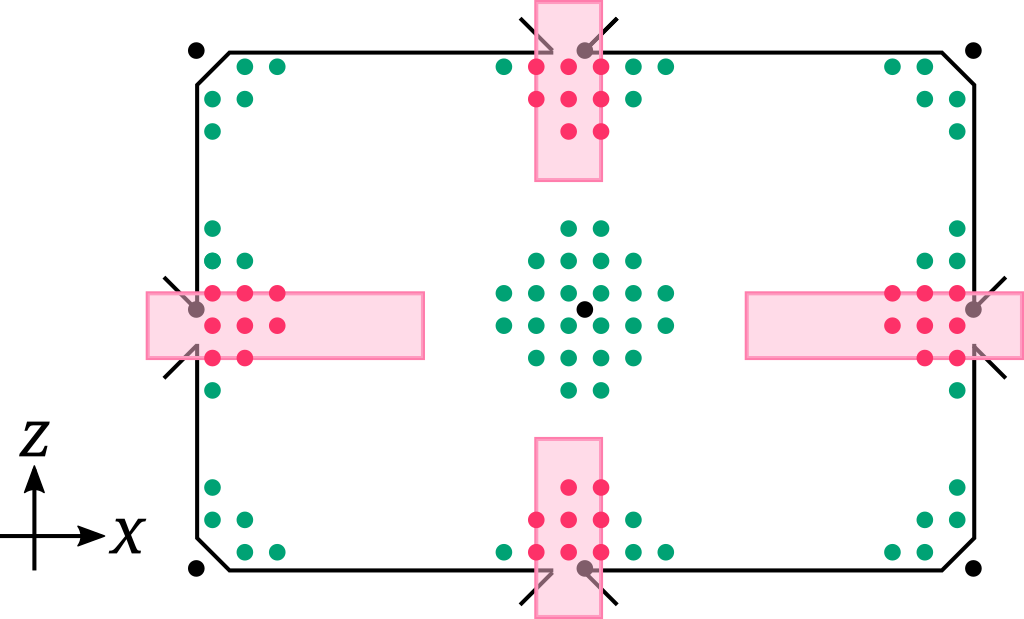
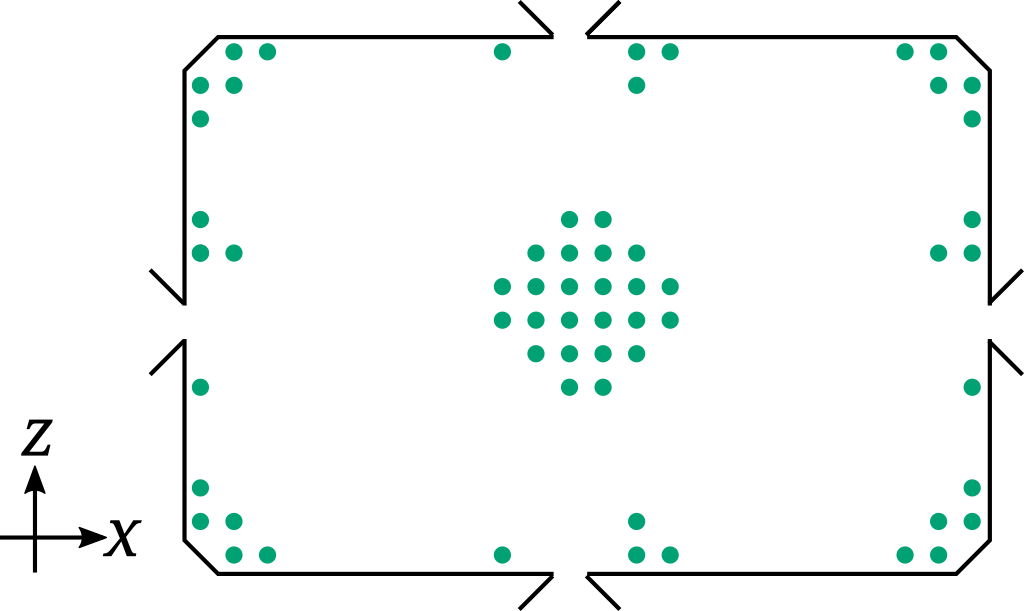
Within rooms, I've also set special anchor points from which props (or more precisely, prop formations, more on that later...) could be generated.
Basic Layouts
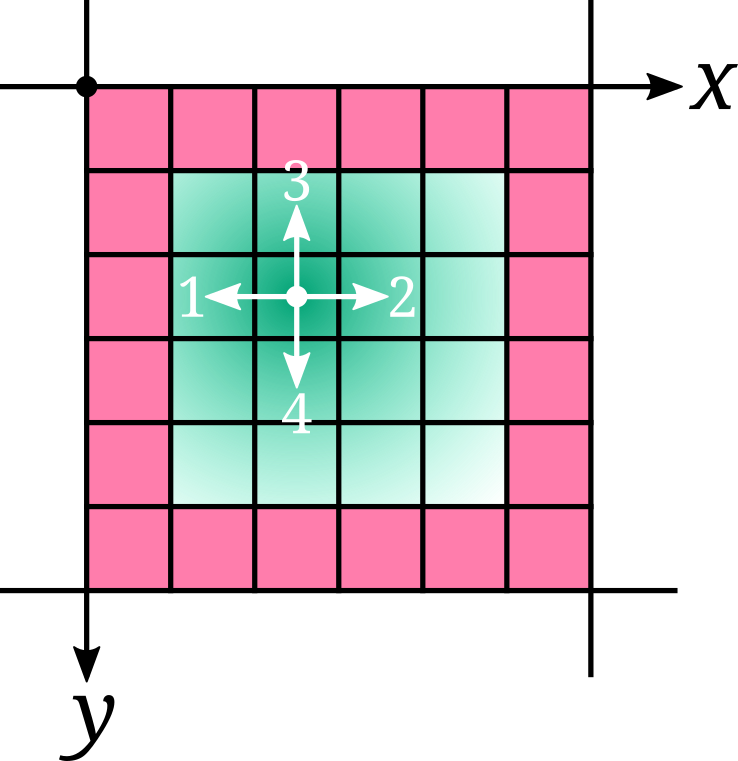
The idea here is to have room layout presets. Within those, presets are an array of prop formations, and each of these formations is linked to a specific anchor point.
A formation has a two-dimensional boolean array that indicates whenever or not there should be a prop here.

Let's take, for example, a diamond array:
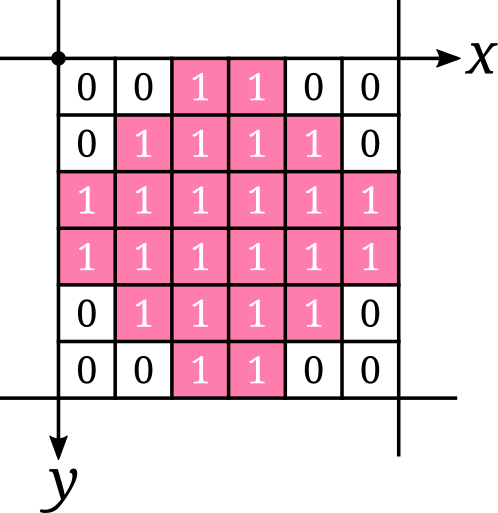
The dimension of the array depends on its rooms' dimensions. Here's how it's done:
\( size = \left \lceil \frac{2(max(RoomSize_{x},RoomSize_{y}))) }{ 3 } \right \rceil\)
In order to change the array's content we actually use common image manipulation algorithms...
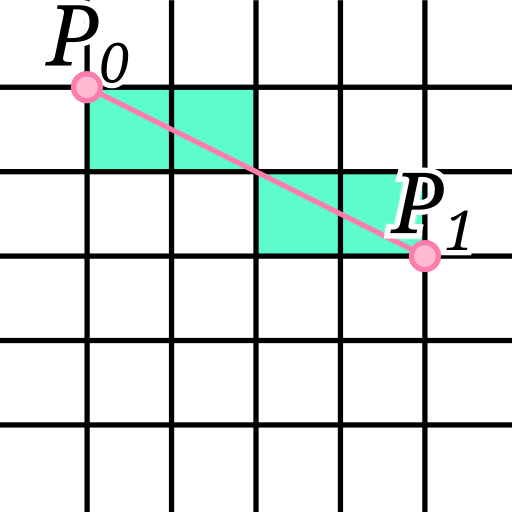
Bresenham's Line Algorithm
The first used algorithm is the Bresenham's Line Algorithm.
Its purpose is to simply render a line describe by two bitmap points onto a raster image.
To put it simply, we get the deviation (delta, or "d" for short) in both X and Y of each point of the described line and compare both of them.
Depending on the biggest, we simply incremate the point on that axis and colour it in.
Here's the implementation:
public void TraceLine(Vector2Int p0, Vector2Int p1)
{
  int dx = Mathf.Abs(p1.x - p0.x), sx = p0.x < p1.x ? 1 : -1;
  int dy = Mathf.Abs(p1.y - p0.y), sy = p0.y < p1.y ? 1 : -1;
  int err = (dx > dy ? dx : -dy) / 2, e2;

  while (true)
  {
    m_propArray[p0.x][p0.y] = true;
    if (p0.x == p1.x && p0.y == p1.y)
    {
      break;
    }
    e2 = err;
    if (e2 > -dx)
    {
      err -= dy; p0.x += sx;
    }
    if (e2 < dy)
    {
      err += dx; p0.y += sy;
    }
  }
}
Midpoint Circle Algorithm
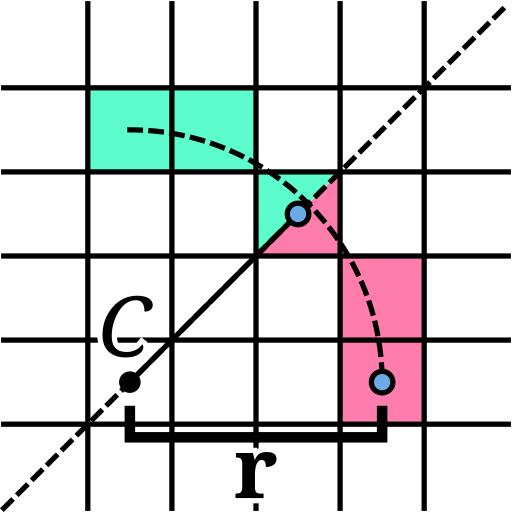
The midpoint circle algorithm is an algorithm used to render a circle onto an image.
The idea is somehow similar to Bresenham's Line Algorithm, but rather than drawing a line we draw a circle.
To do this we also need, for simplicity sakes, to divide the circle into 8 pieces, called octants. We can do this because circles are always symmetric. (It's also a nice way to unroll loops)
Here's the implementation:
private void TraceCircle(Vector2Int center, int r, AbstractPropFormation formation)
{
  int d = (5 - r * 4) / 4;
  int x = 0;
  int y = r;

  do
  {
    // ensure index is in range before setting (depends on your image implementation)
    // in this case we check if the pixel location is within the bounds of the image before setting the pixel
    if (IsValidPoint(center + new Vector2Int(x,y)) { formation.m_propArray[center.x + x][center.y + y] = true; }
    if (IsValidPoint(center + new Vector2Int(x,-y)) { formation.m_propArray[center.x + x][center.y - y] = true; }
    if (IsValidPoint(center + new Vector2Int(-x,y)) { formation.m_propArray[center.x - x][center.y + y] = true; }
    if (IsValidPoint(center + new Vector2Int(-x,-y)) { formation.m_propArray[center.x - x][center.y - y] = true; }
    if (IsValidPoint(center + new Vector2Int(y,x)) { formation.m_propArray[center.x + y][center.y + x] = true; }
    if (IsValidPoint(center + new Vector2Int(y,-x)) { formation.m_propArray[center.x + y][center.y - x] = true; }
    if (IsValidPoint(center + new Vector2Int(-y,x)) { formation.m_propArray[center.x - y][center.y + x] = true; }
    if (IsValidPoint(center + new Vector2Int(-y,-x)) { formation.m_propArray[center.x - y][center.y - x] = true; }

    if (d < 0)
    {
      d += 2 * x + 1;
    }
    else
    {
      d += 2 * (x - y) + 1;
      y--;
    }

    x++;

  } while (x <= y);
}
Flood Fill Algorithm
This is quite a classic, but it's still useful nevertheless.
The idea is to progressively fill a section of an image with a specific colour while
The implementation is using a coordinate queue rather than recursion for optimization sakes.
We also try to fill the image using west-east orientation. Basically, we fill the westmost pixel first, eastmost second and finally go north-south.
Here's the implementation:
public void Fill(Vector2Int point)
{
  Queue<Vector2Int> q = new Queue<Vector2Int>();
  q.Enqueue(point);
  while (q.Count > 0)
  {
    Vector2Int currentPoint = q.Dequeue();
    if (!m_propArray[currentPoint.x][currentPoint.y])
    {
      Vector2Int westPoint = currentPoint, eastPoint = new Vector2Int(currentPoint.x + 1, currentPoint.y);
      while ((westPoint.x >= 0) && !m_propArray[westPoint.x][westPoint.y])
      {
        m_propArray[westPoint.x][westPoint.y] = true;
        if ((westPoint.y > 0) && !m_propArray[westPoint.x][westPoint.y - 1])
        {
          q.Enqueue(new Vector2Int(westPoint.x, westPoint.y - 1));
        }
        if ((westPoint.y < m_propArray[westPoint.x].Length - 1) && !m_propArray[westPoint.x][westPoint.y + 1])
        {
          q.Enqueue(new Vector2Int(westPoint.x, westPoint.y + 1));
        }
        westPoint.x--;
      }
      while ((eastPoint.x <= m_propArray.Length - 1) && !m_propArray[eastPoint.x][eastPoint.y])
      {
        m_propArray[eastPoint.x][eastPoint.y] = true;
        if ((eastPoint.y > 0) && !m_propArray[eastPoint.x][eastPoint.y - 1])
        {
          q.Enqueue(new Vector2Int(eastPoint.x, eastPoint.y - 1));
        }
        if ((eastPoint.y < m_propArray[eastPoint.x].Length - 1) && !m_propArray[eastPoint.x][eastPoint.y + 1])
        {
          q.Enqueue(new Vector2Int(eastPoint.x, eastPoint.y + 1));
        }
        eastPoint.x++;
      }
    }
  }
}
Formation Shapes
Each formation also has a specific shape. These shapes simply define the content of the formation array. We can build these shapes using the previously mentioned algorithms. There are 9 different types of shapes as of now.
Vertical line
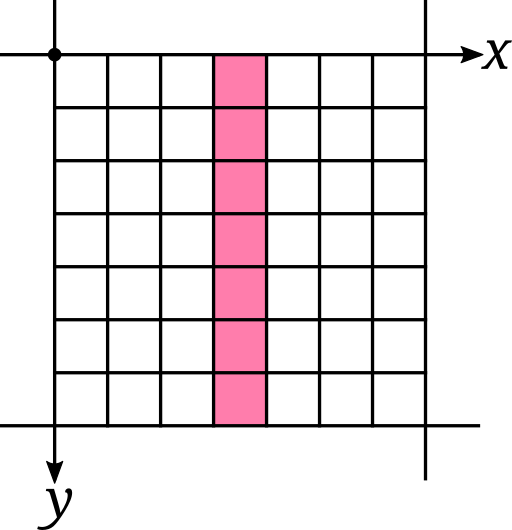
A simple vertical line of a width of one
Horizontal line
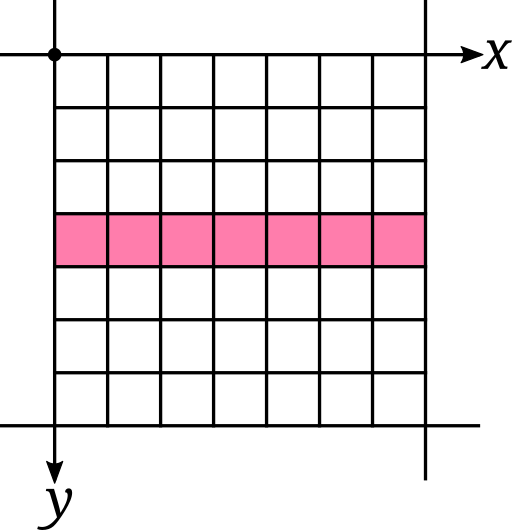
A simple horizontal line of a width of one
Diamond
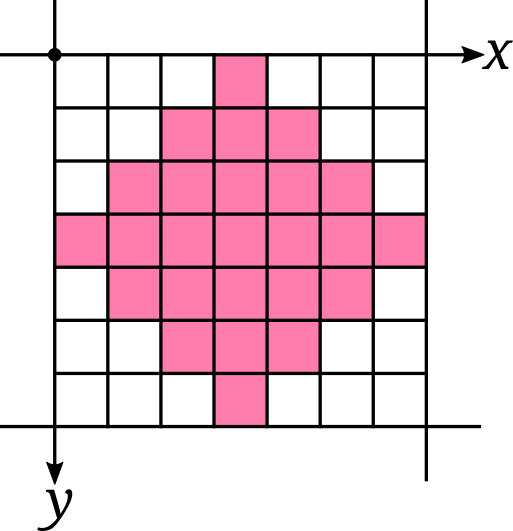
A rather nice diamond shape, especially pretty in corners
Circle

The circle is rendered using the Midpoint circle algorithm. Especially pretty in the center of rooms
Cross
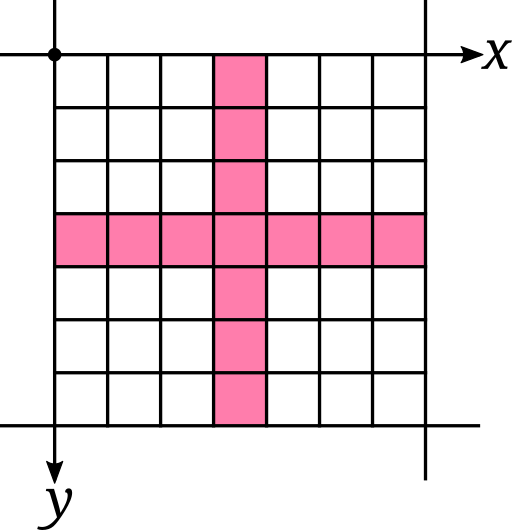
A simple cross shape, i.e a vertical and horizontal line align at the center.
X Shape
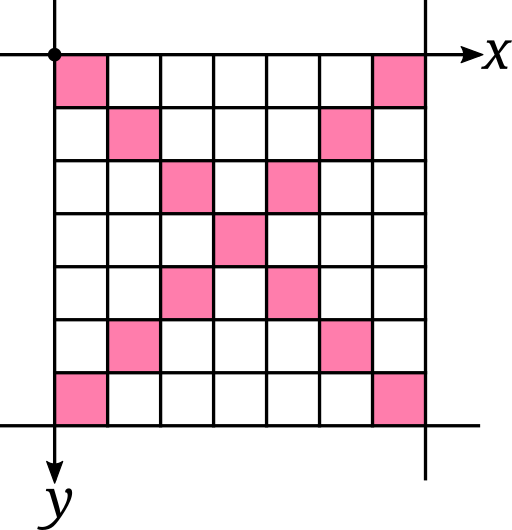
An "X" shaped cross, i.e two perpendicular diagonal lines align at the center.
Triangle
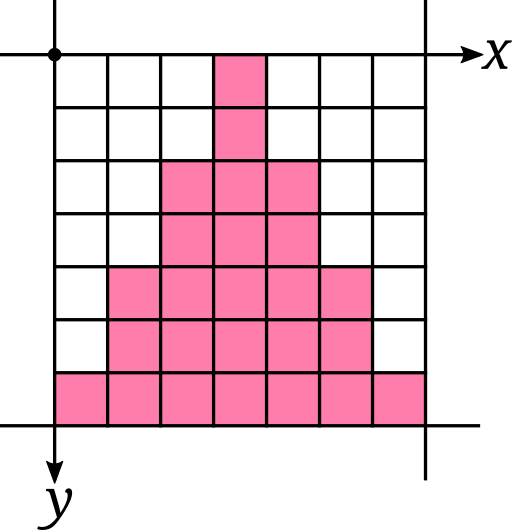
An Isocele triangle.
Square
A solid block. Every cell of the formation is essentially true.
Checkers

A nice variation of the square shape. Every other cell is false.
There might be more types of shapes as time goes by, but it's about it for now.
Placing props
Once the array is set, we simply need to place the actual props in the room.
Each formation is of an actual type, i.e. rocks, ferns, etc.
(For simplicity sakes, let's say that every prop is a 1x1x1m cube. This would simplify future steps.)
In order to find their position, we simply align the array's center to the formations' specified anchor point.
For each prop formation, we then instantiate props for each true cells while checking whenever or not the prop would be outside its room.
Afterwards, we do a precise position check to make sure no props are either partially or fully outside a room.
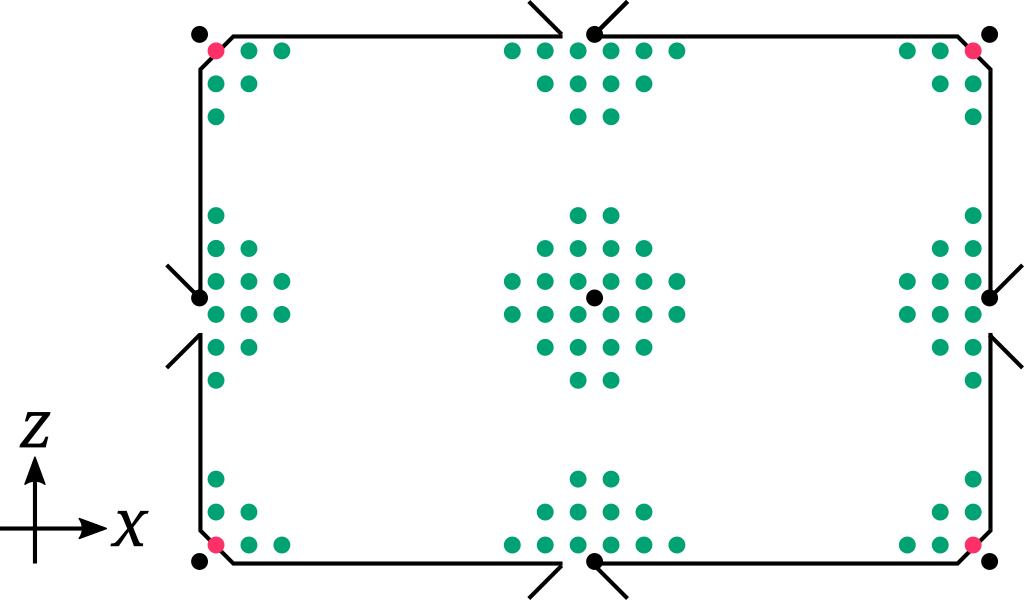
Finally, we make sure every room connections aren't obstructed with props.
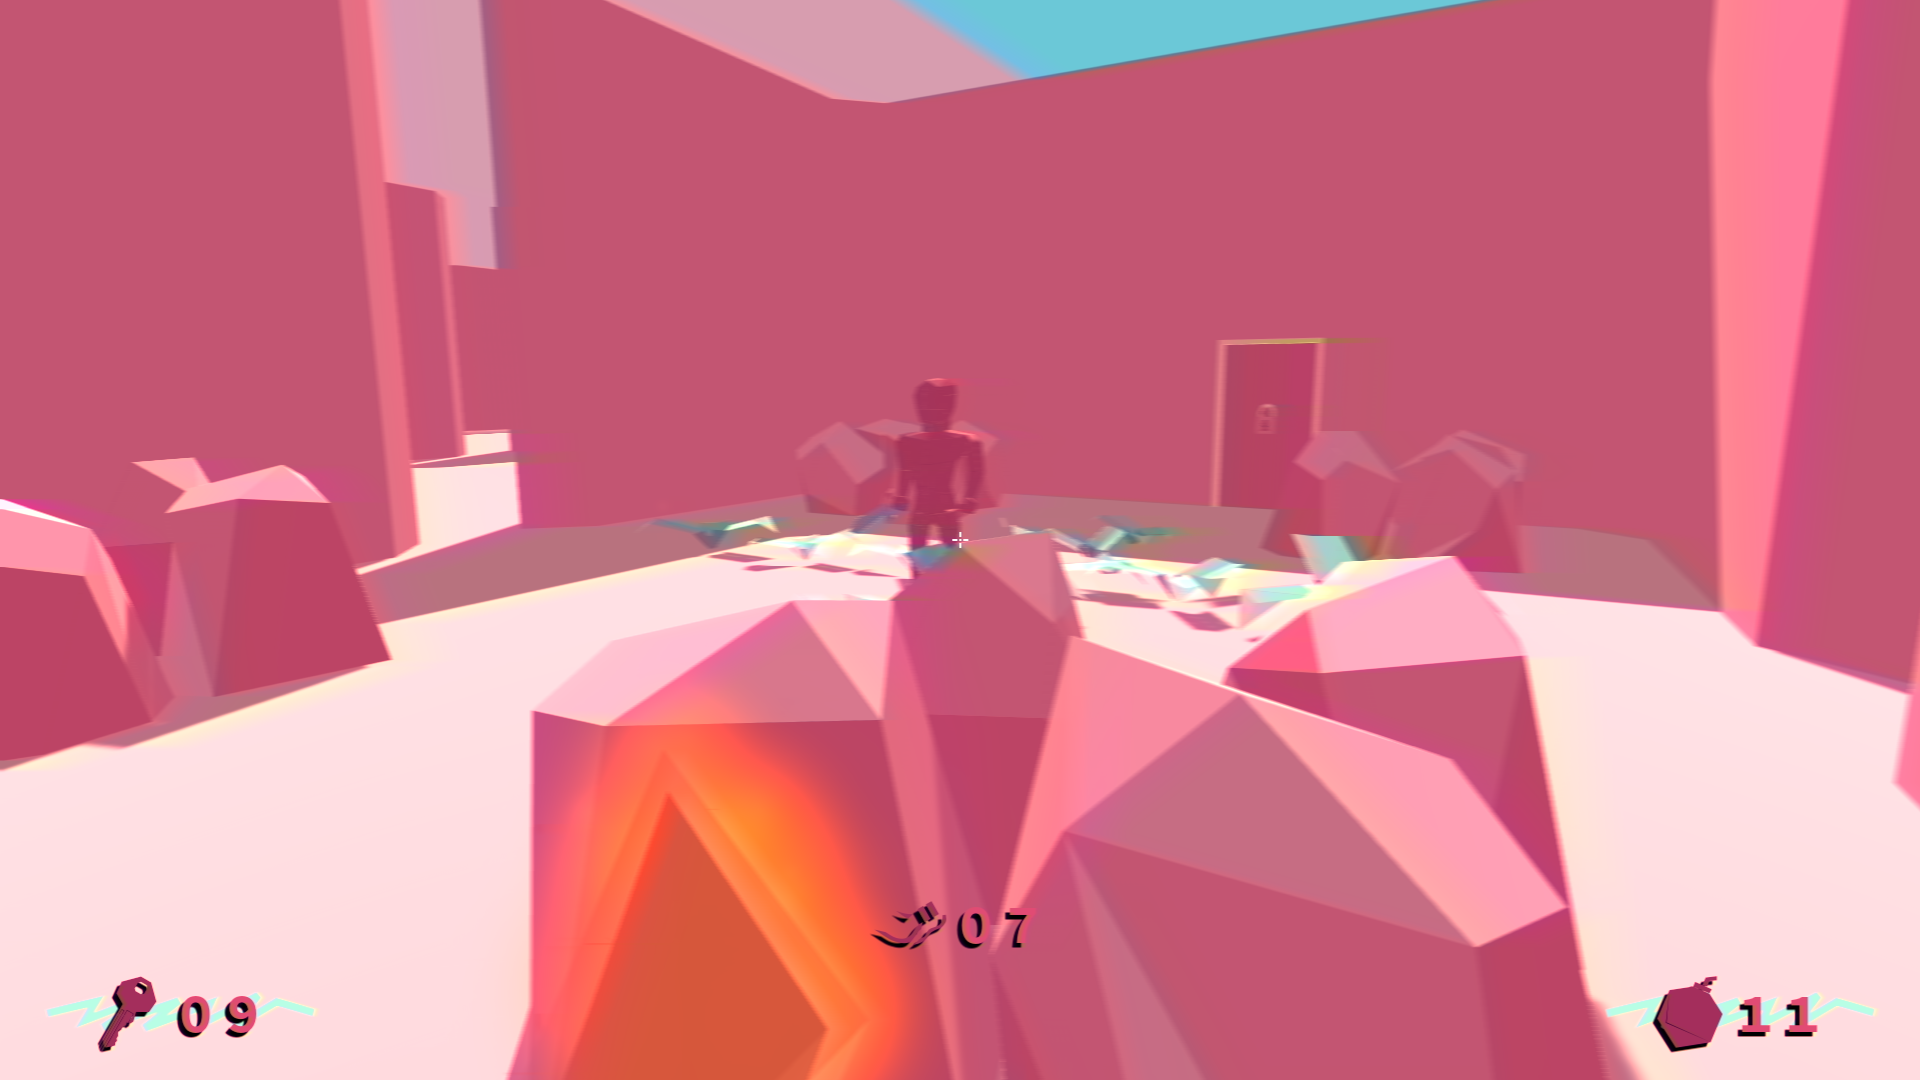
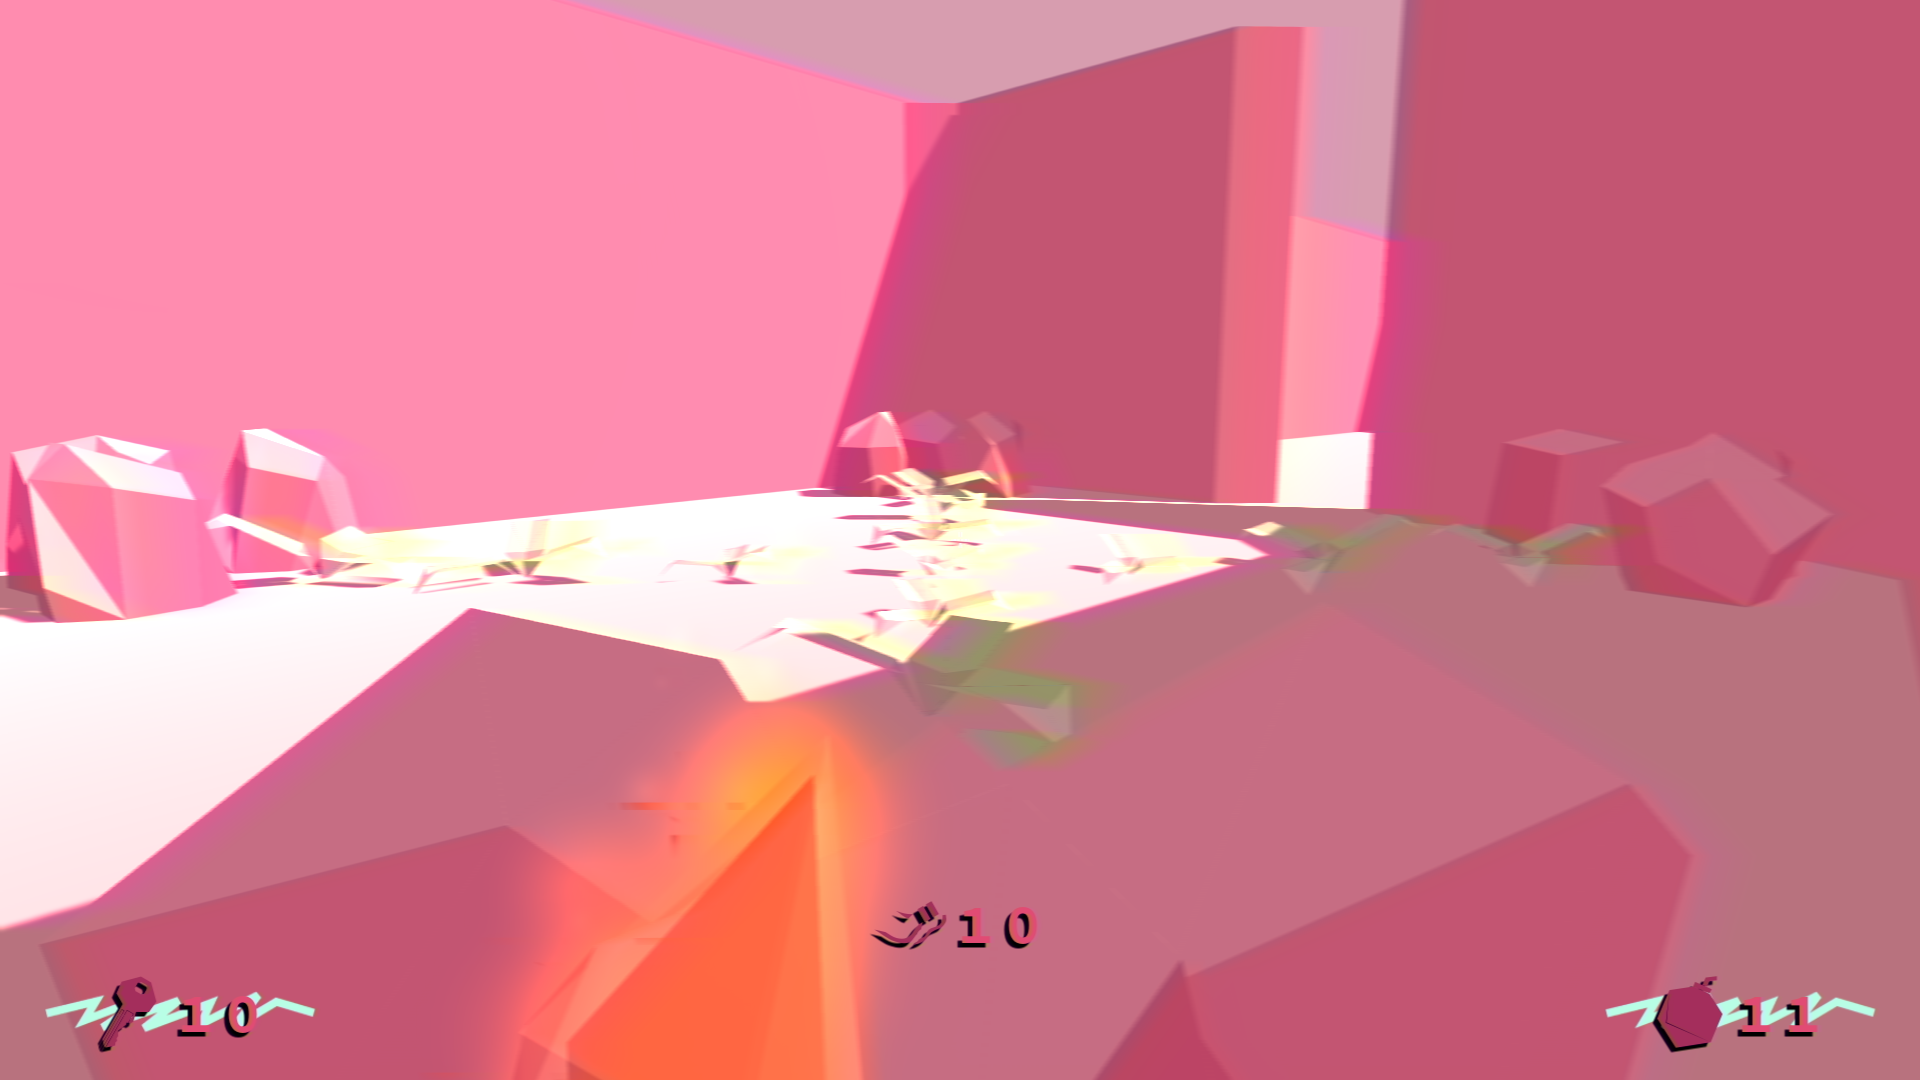
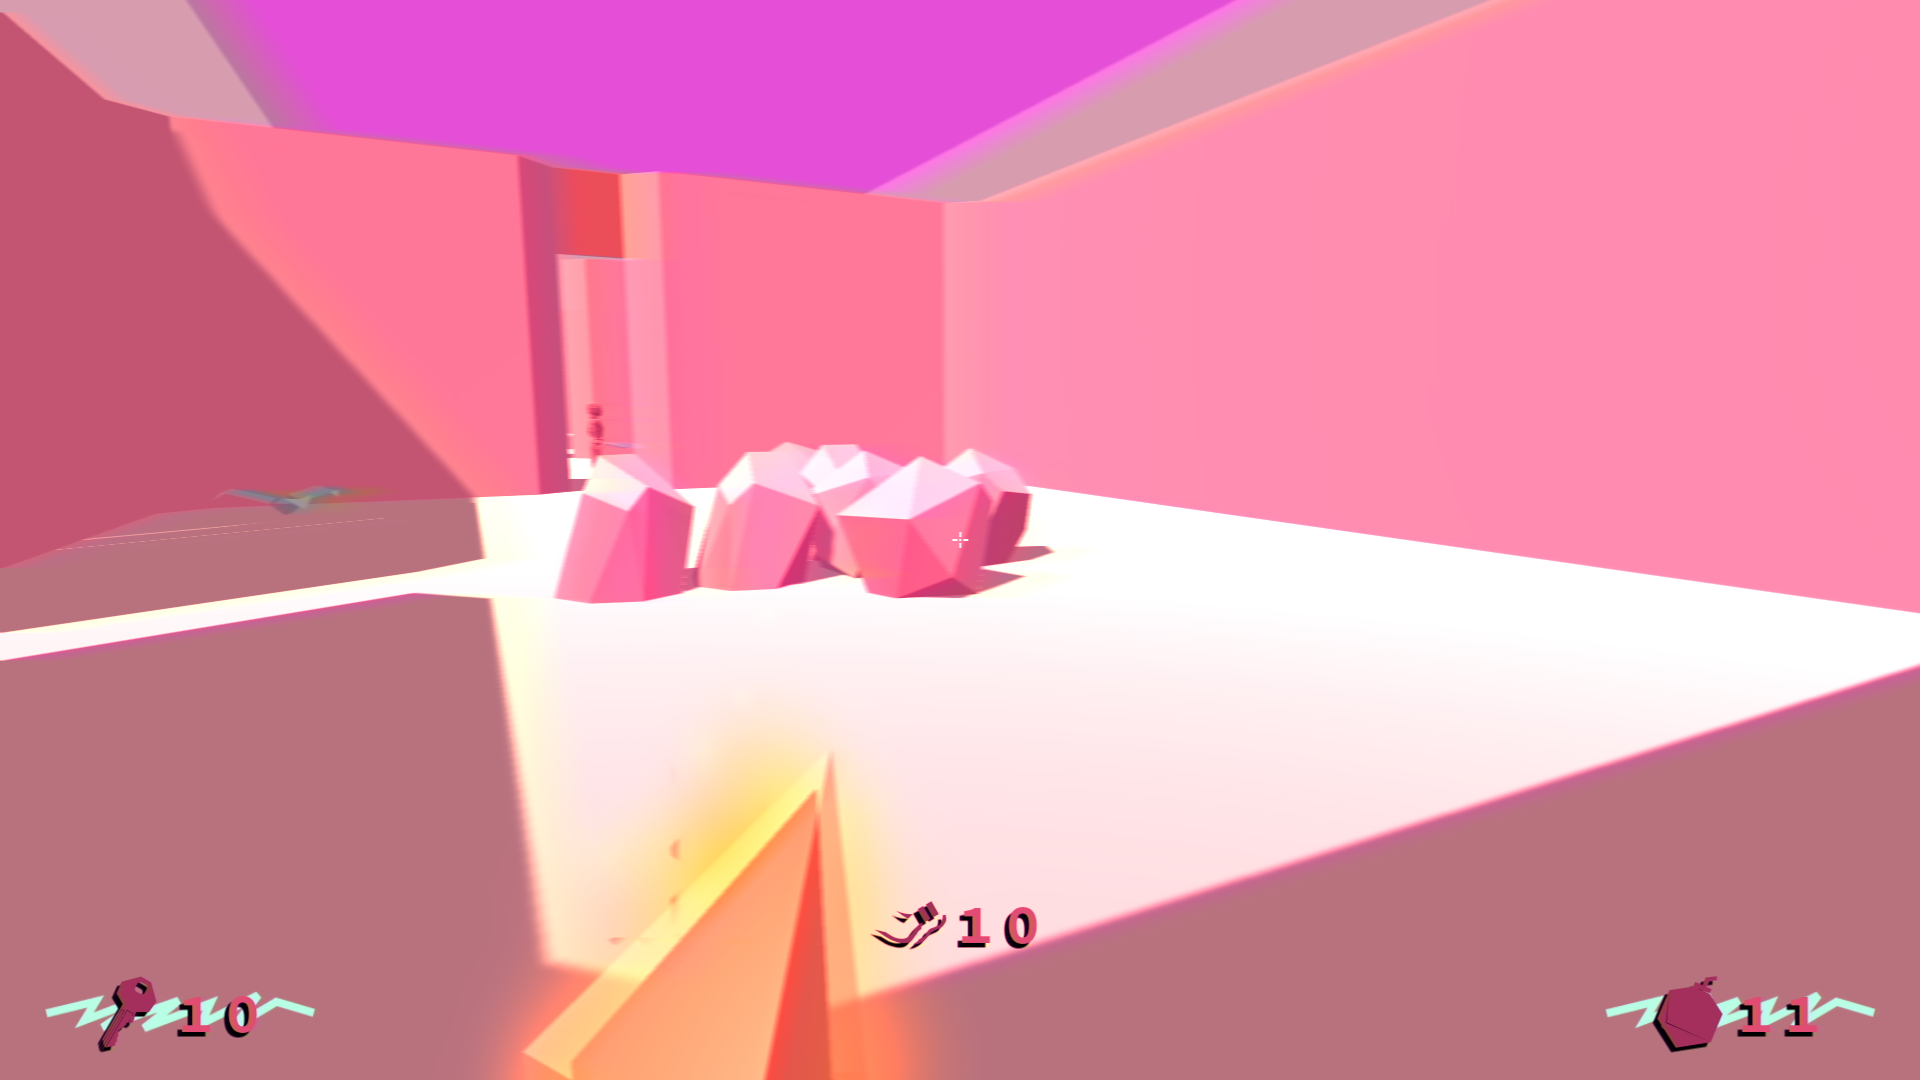
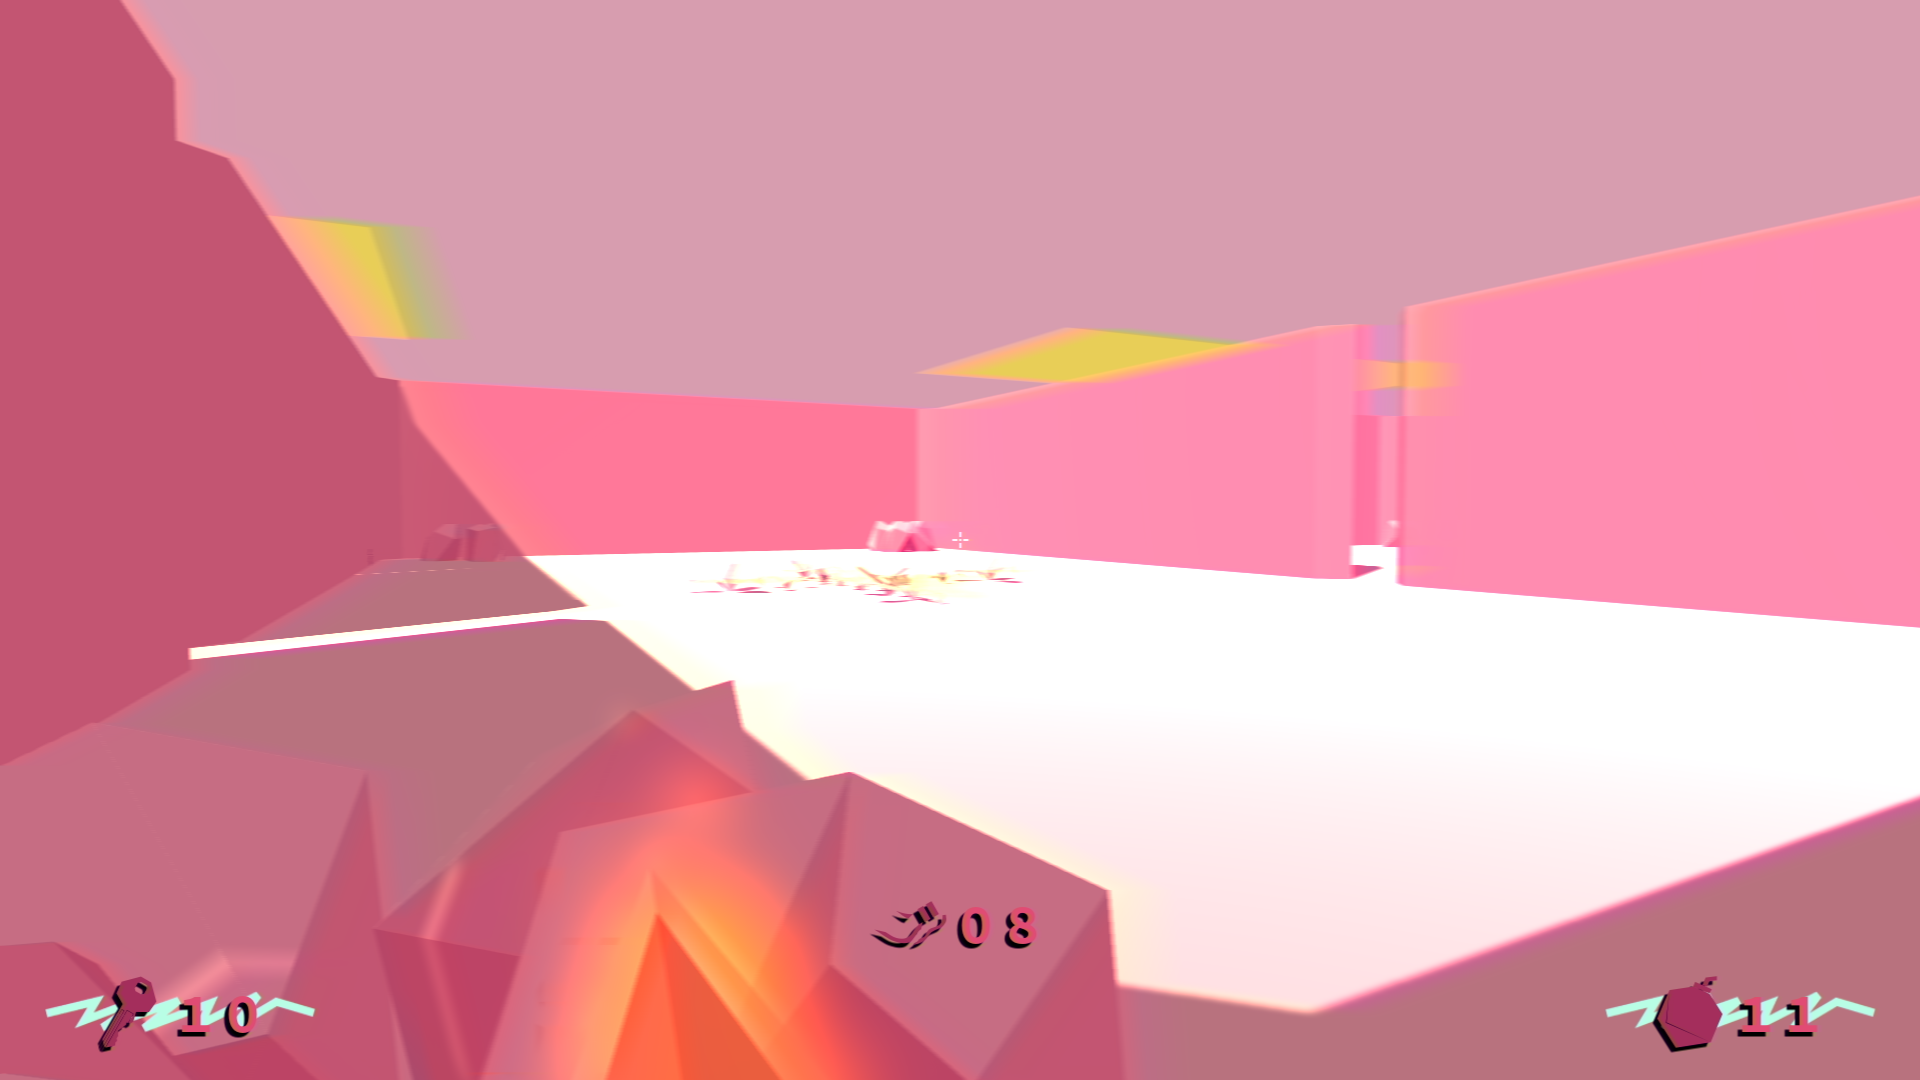
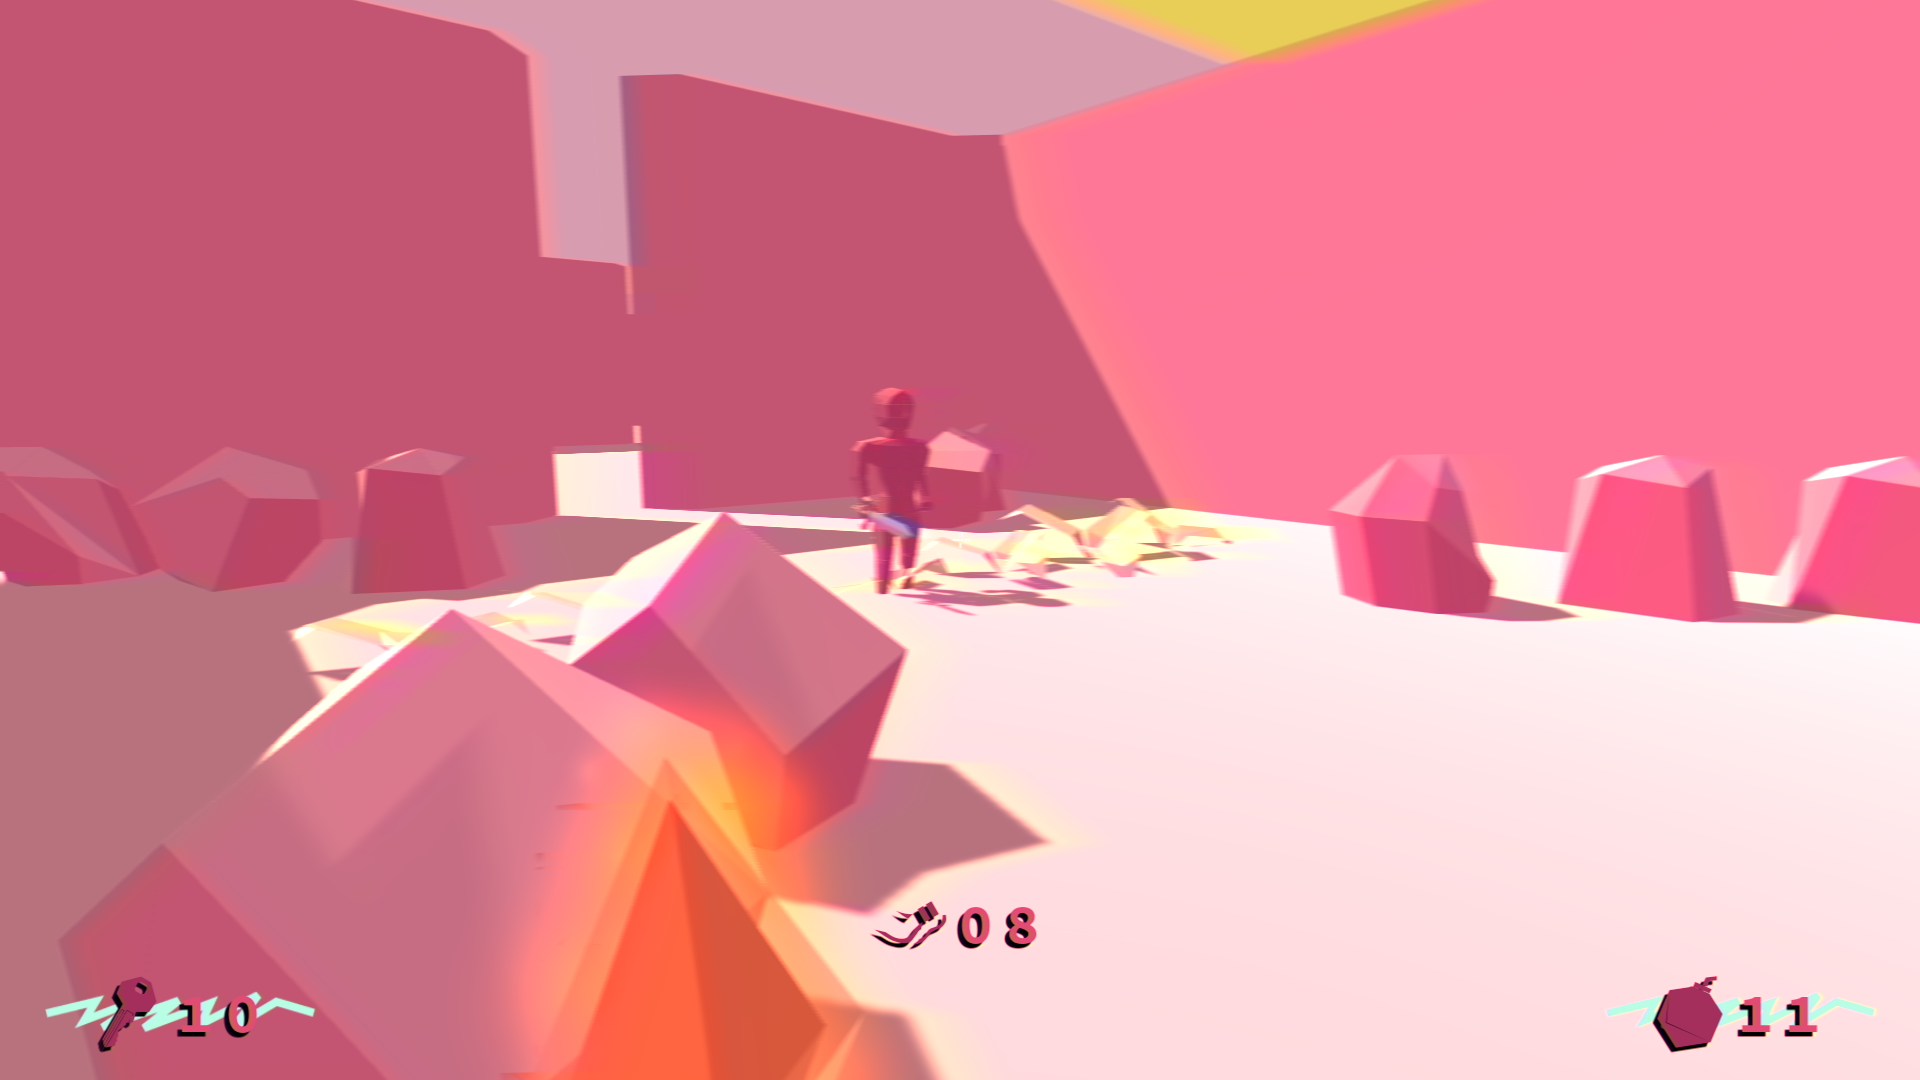
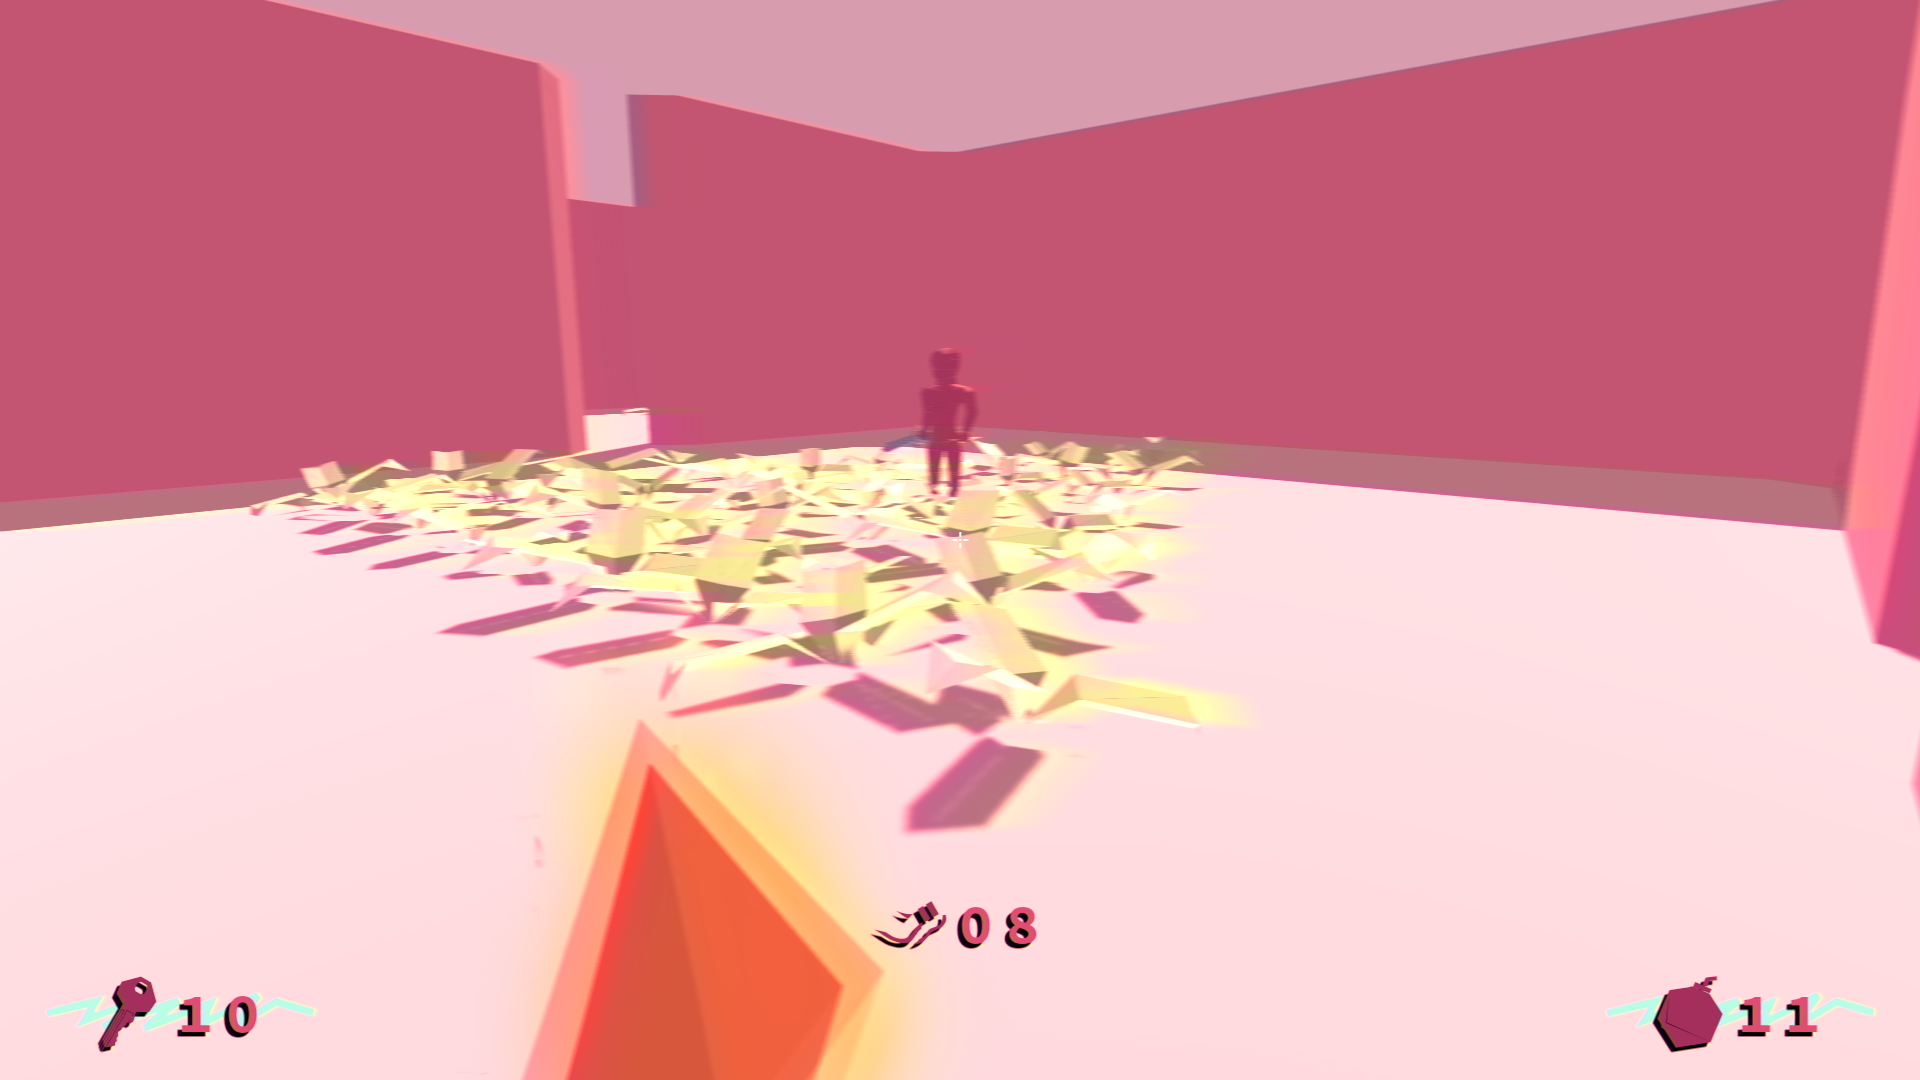
And voilà, we have a nicely decorated room
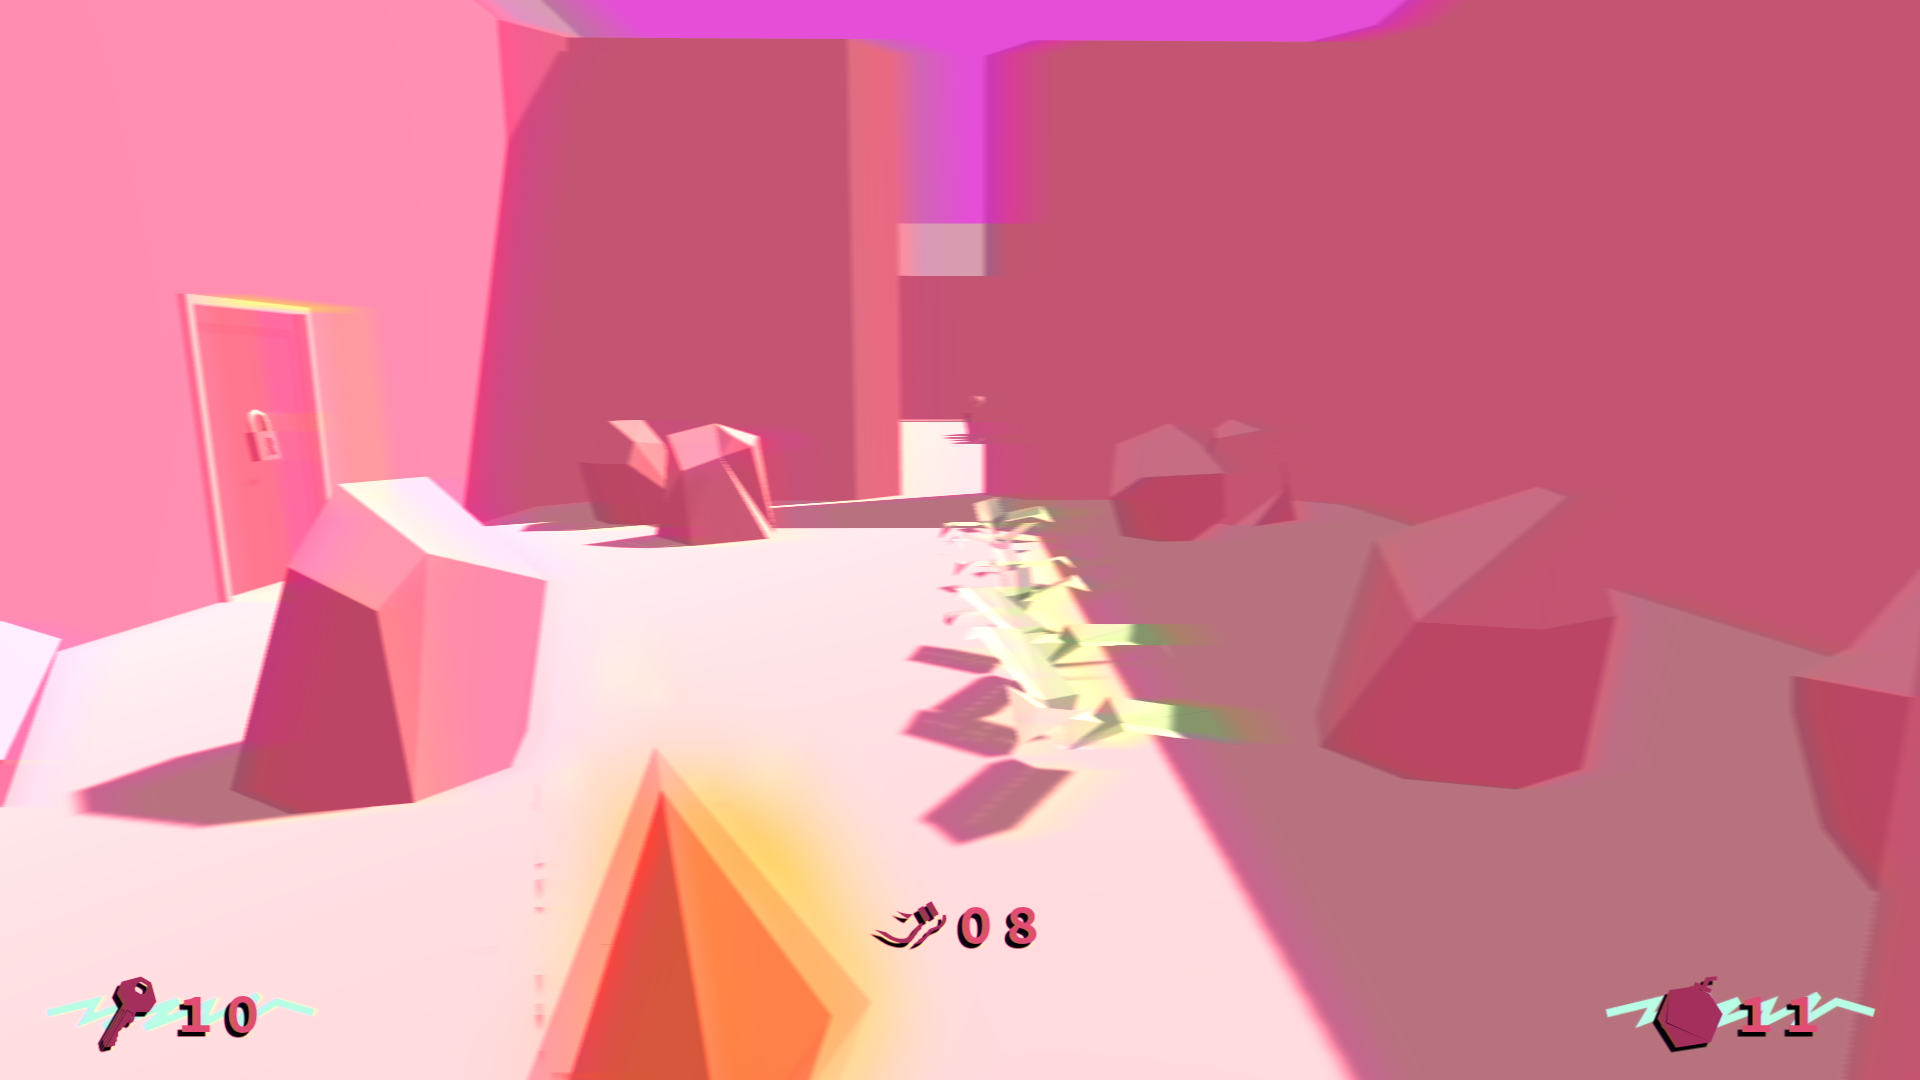
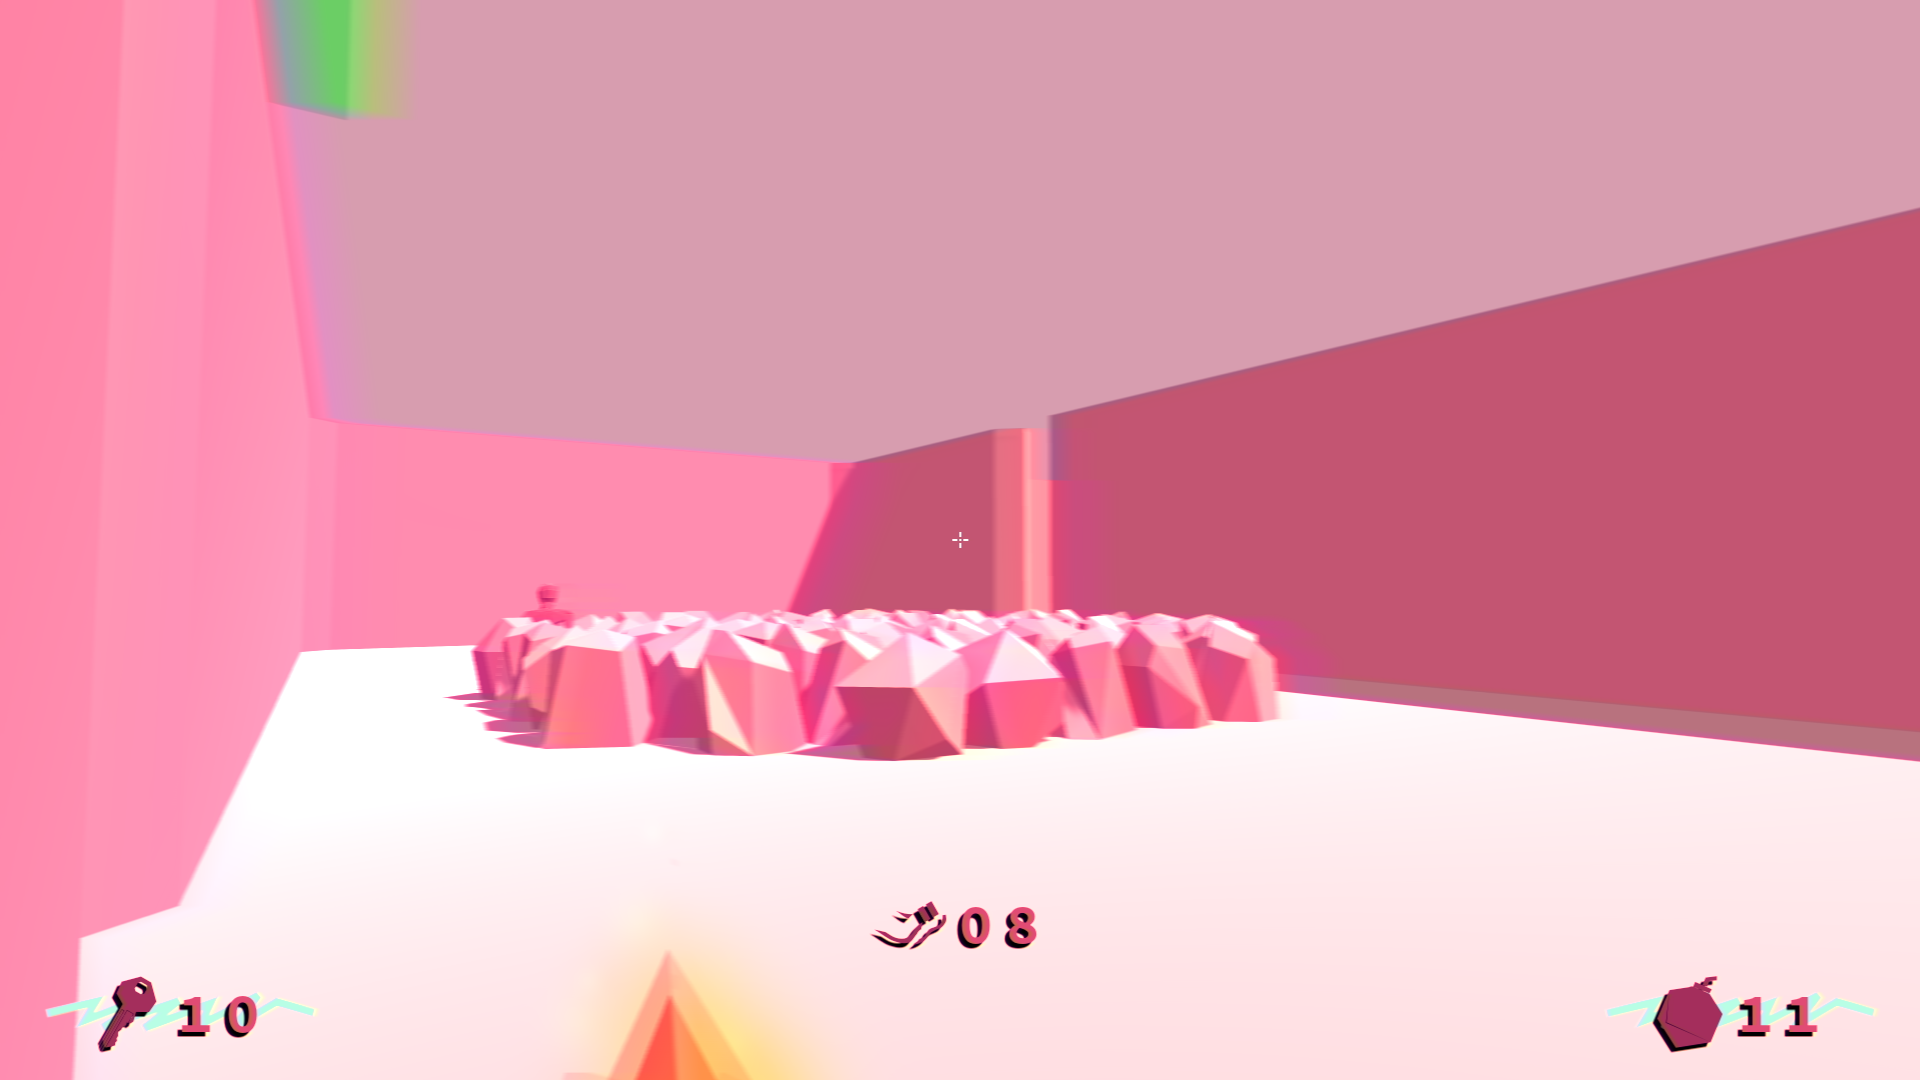
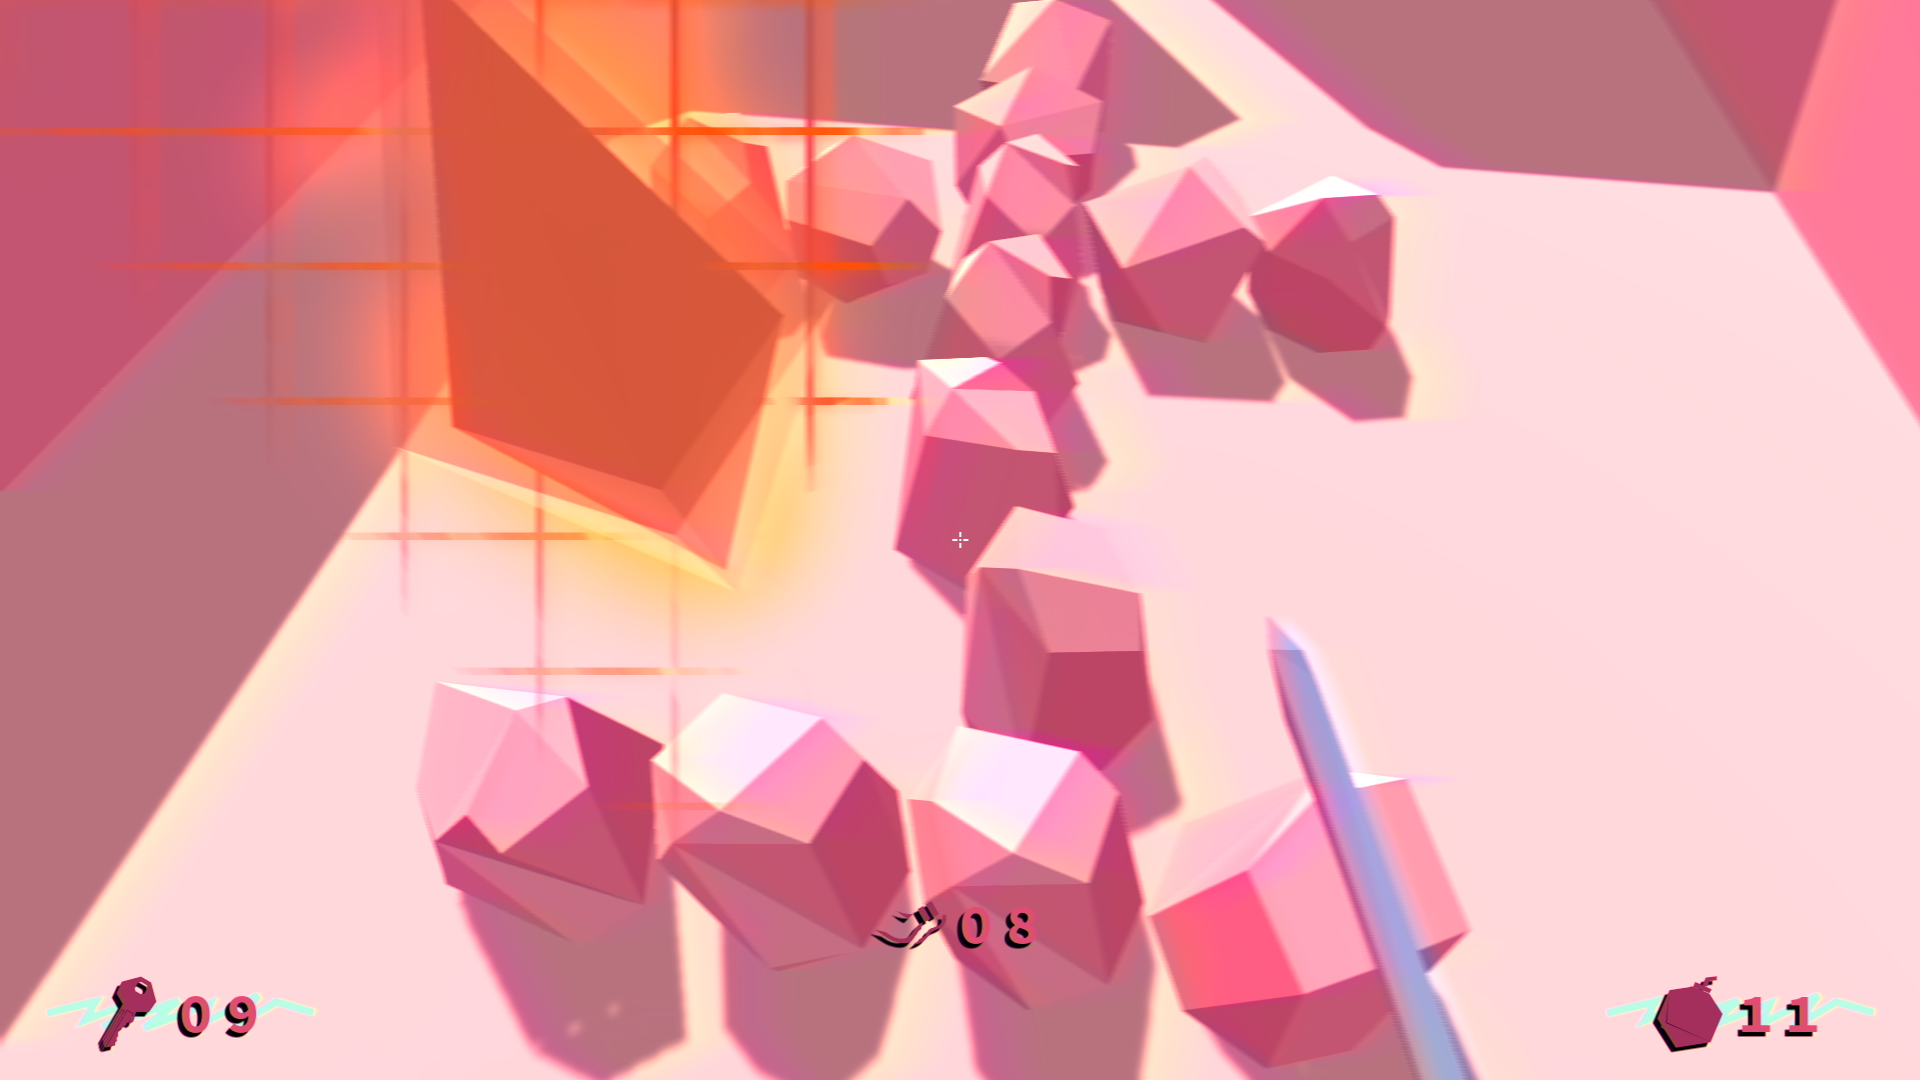
In Game Screenshots
Here's a couple of screenshots of what it looks like in-game


UPDATE: After thinking about it for a while, the checkered pattern was kinda removed.
Instead, it's a property of each prop formation.
This means that we can now have rooms that have checkered circles and diamond among other shapes...