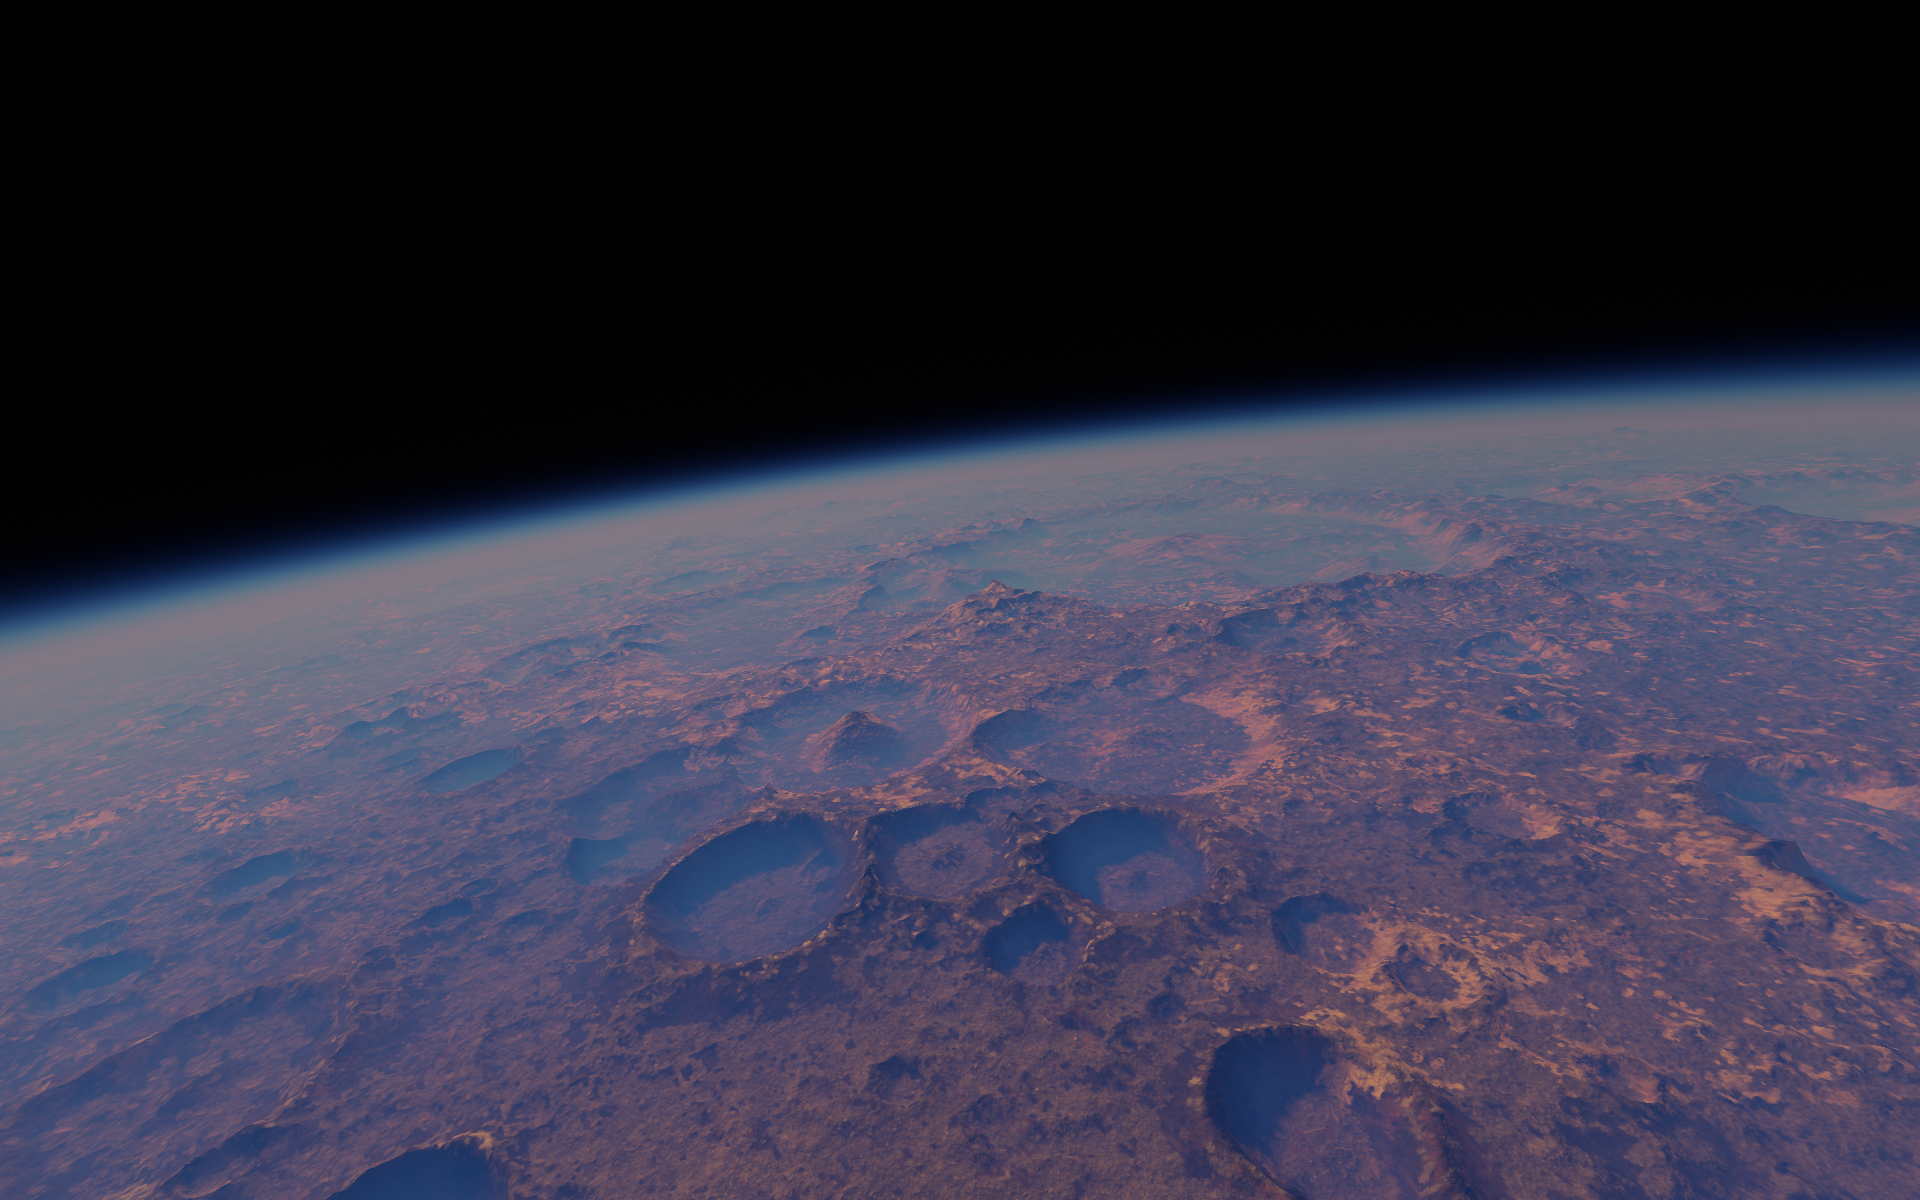
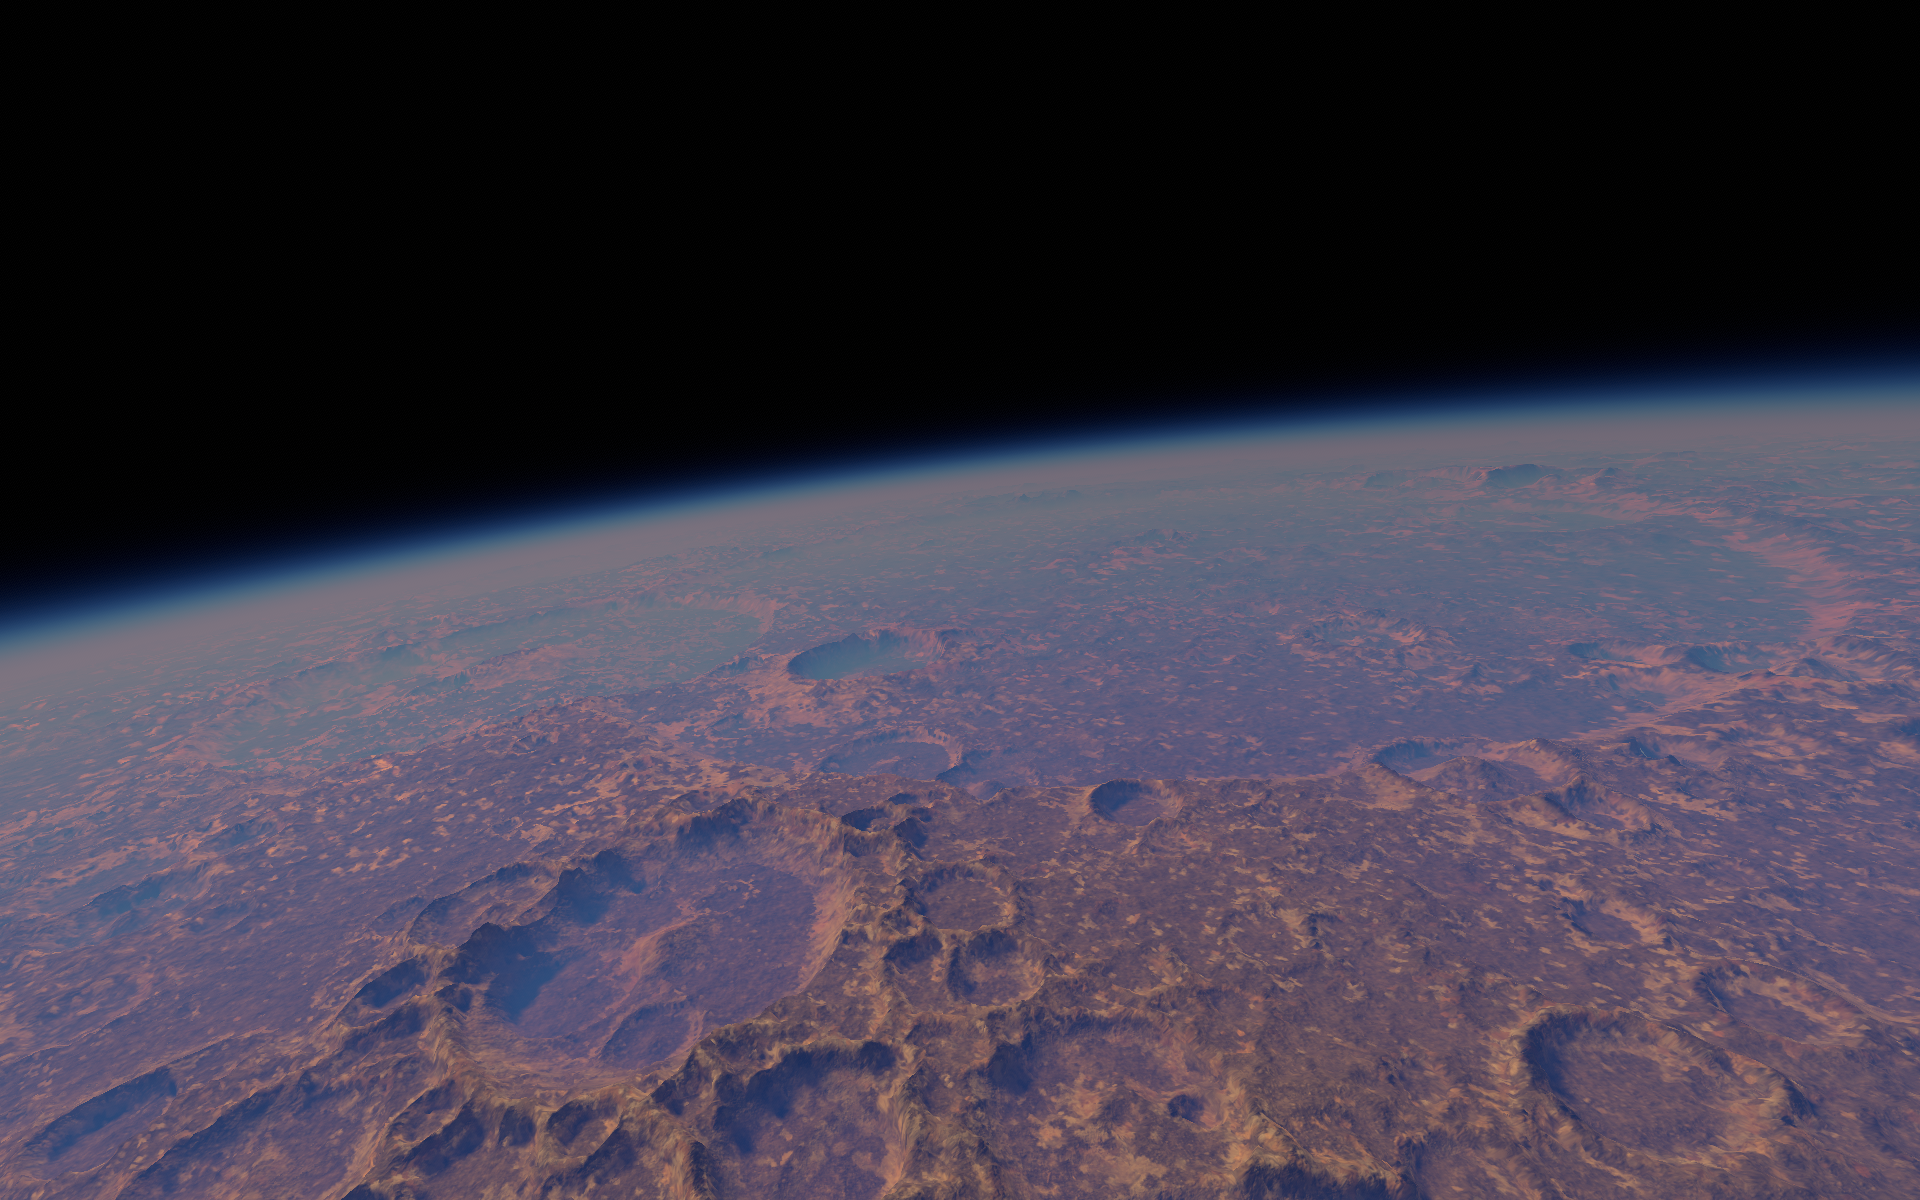
In the last few weeks I have been working on adding impact craters to my planet generator. These are an important part of the terrain for many astronomical objects. I aimed to produce realistic craters within the existing terrain generation and erosion framework.
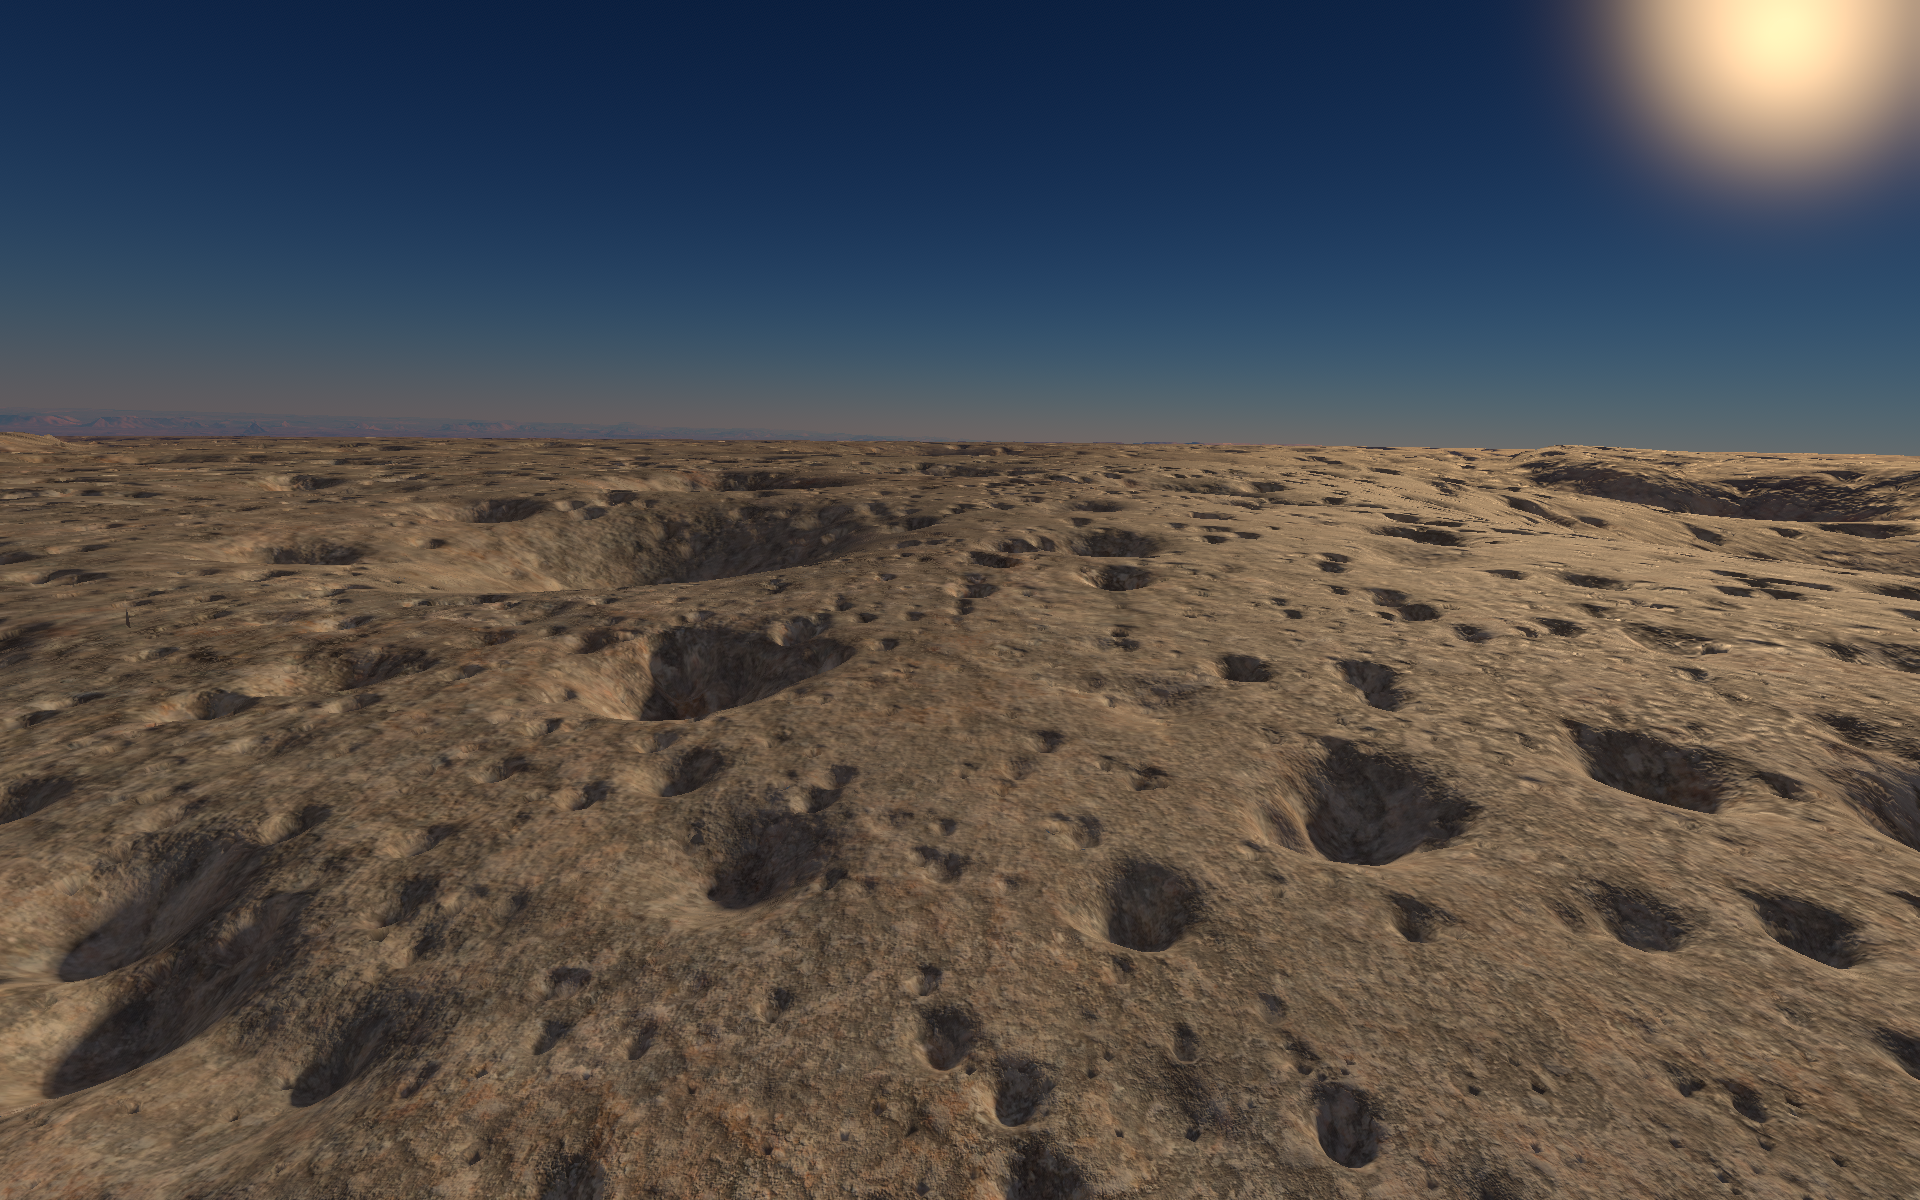
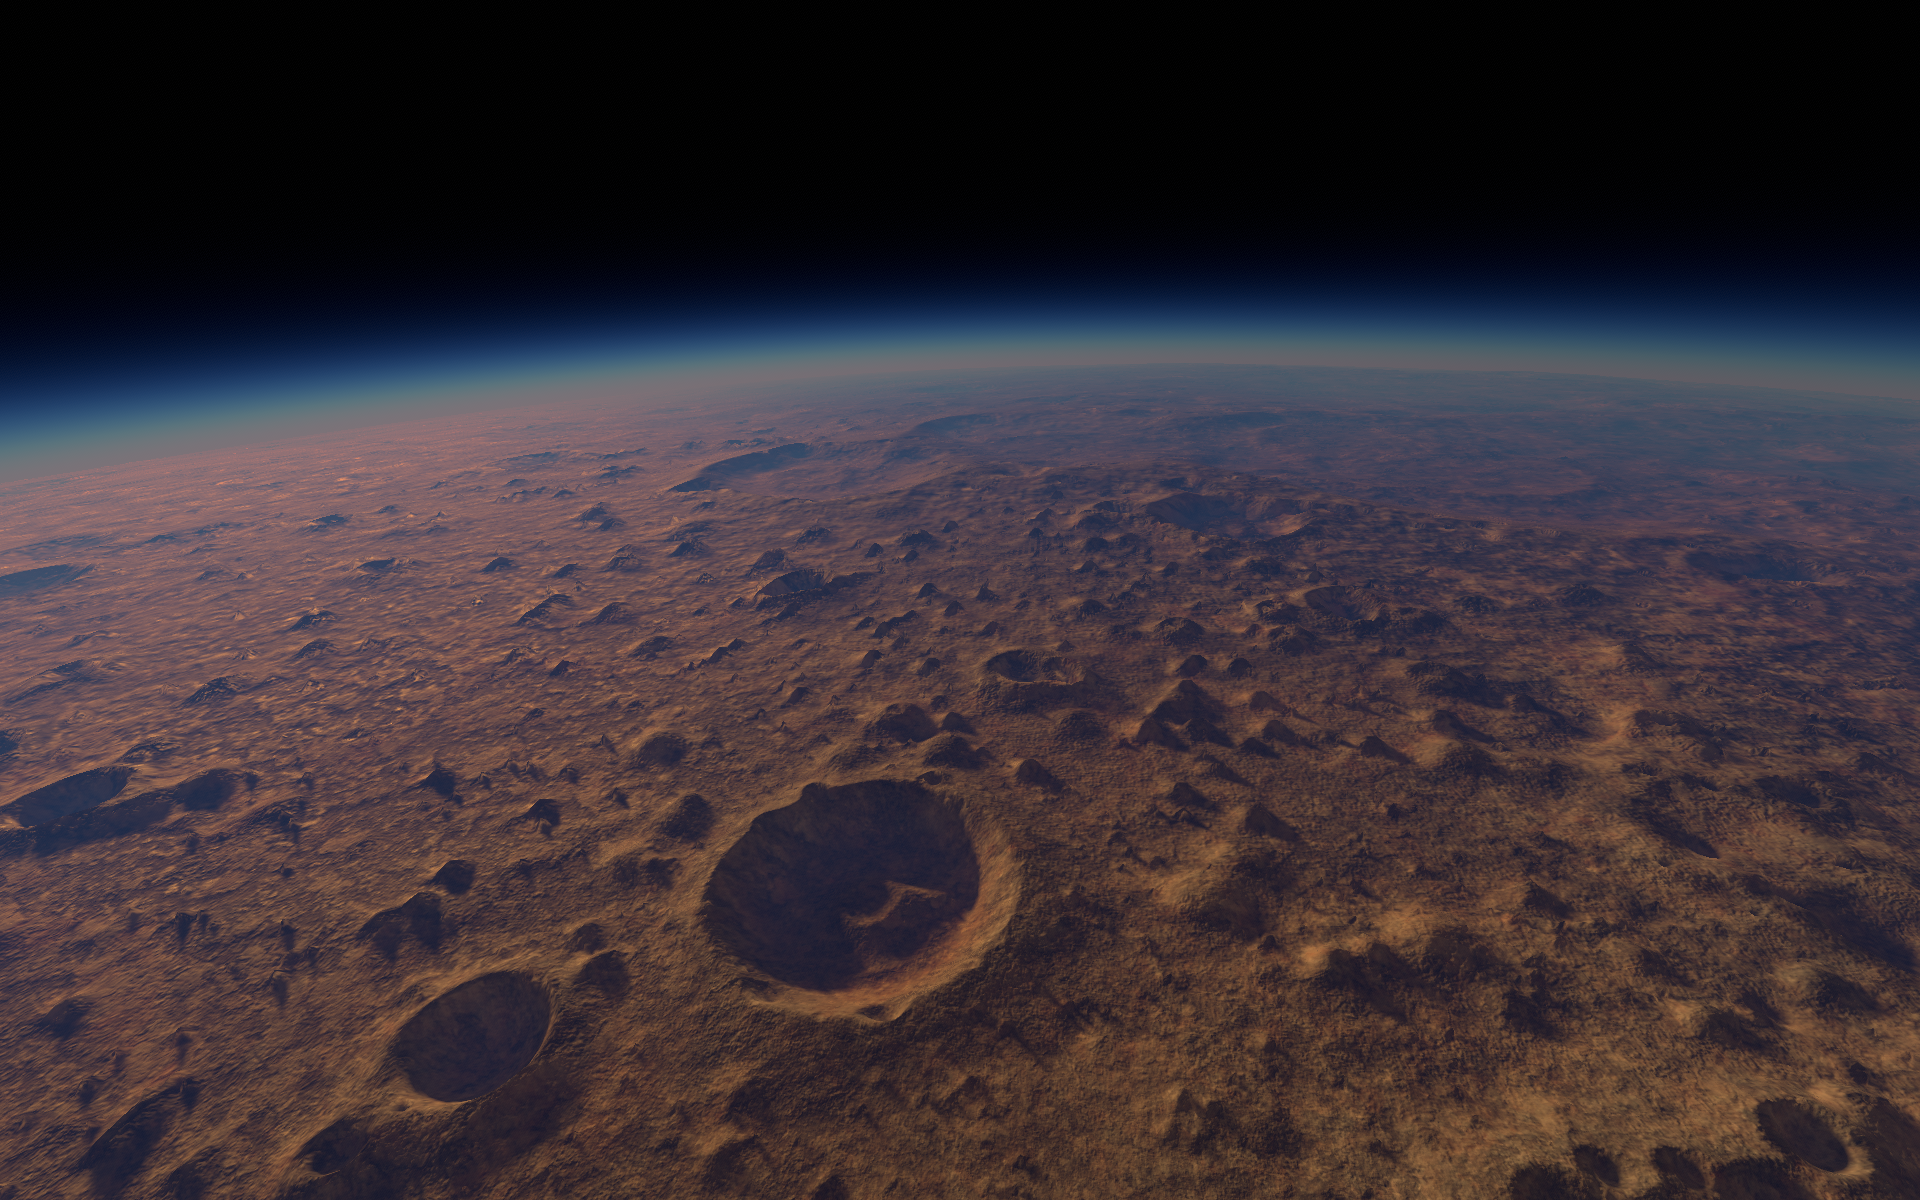
Preview of current results:

I tried two different ways of generating craters:
Method 1: Low-density upscaled noise
The first method was one that I stumbled upon accidentally. The idea was to use something similar to how I generate the terrain - recursively upscale noise from the parent tile and add white noise at the current tile's pixel scale. The difference is that the white noise added each time was modified so that it was mostly 0 values, where I could control the probability of a non-zero noise value (in range [0,1]). When this noise gets upscaled repeatedly using quadratic interpolation, the result is actually a circular mound or hole corresponding to each non-zero pixel at each tile LOD.
This looks something like this (early attempts):
Once the low-density noise was generated and upscaled for the current tile, then I would apply a transformation to the noise to make the crater stand out with a crisp border (second image). This was effectively just min( -noise, 0 ), and the result was added to the terrain elevation.
While this produced somewhat plausible results and was easy to implement using existing code, it had various problems upon further inspection. The first issue is that due to the cube-to-sphere projection used for the planet, and how everything is done on cube faces, the craters were noticeably distorted into ellipses (or worse) when near the cube vertices. This problem is completely unavoidable, even the terrain shows a noticeable anisotropy near the cube vertices. It happens due to stretching the 3 neighboring cube faces that each cover 90 degrees to be 120 degrees each at the cube vertex.
The second issue occurred when craters overlapped. When this happened when craters were the same size, craters would merge. When a smaller crater overlapped a larger one, I could no longer ensure a crisp border because all craters were contained in the same noise image. The fix for this was to use a separate layer of noise for each size of crater, then the max(-noise,0) transform still works. However, this uses quite a lot of memory (16 crater size layers for about 400MB extra when standing at surface level).
There are other issues with this method:
- No way to have an ordering of when the craters were created. In reality, newer craters should obscure older ones.
- Craters spawned in a particular LOD always have exactly the same power-of-two size. This is caused because each crater starts as a single pixel. There is no way to have craters of arbitrary size.
- Fairly CPU intensive, takes about 0.250ms to accumulate all 16 layers for one tile with SIMD optimization.
- Various artifacts and distortions near cube vertices and edges.
But at least one advantage:
- The time and space for craters is constant regardless of how many craters there are. This is good if there are a lot of craters.
The biggest issues by far are the huge memory usage and poor quality results. This led me to try another way.
Method 2: Crater Rasterization
The second method for crater generation that I tried was based on explicit rasterization of the craters within a tile. Effectively, this method iterates over all pixels that are potentially covered by a tile (a bounding box) and then calculates some change in elevation based on the squared distance from the crater center as compared to the crater radius. Craters are described by their position on the planet unit sphere, and distance is calculated using the 3D Euclidean norm.
The craters themselves are spawned in the same way as the first method (using low-density noise), but each crater can now have more flexibility because we are manually rasterizing them into the tile elevation.
The per-crater parameters include:
- radius (of crater hole)
- outer radius (bounding sphere)
- depth
- sharpness (side steepness independent of depth)
- rim height over surrounding elevation
- central peak height and radius
- creation time
Craters can also be “simple” or “complex”. Simple craters are bowl-shaped, while complex craters can have a central peak and terraced sides. Complex craters are larger, needing to be at least 3km in diameter on Earth.
The main challenge with this method is to make it fast with lots of craters. All calculations need to be done with double precision, since the calculation is done in 3D planetary space as opposed to a 2D surface tile. Craters can overlap arbitrarily, and any given pixel can be covered by several craters. There may be thousands of craters total among the set of generated terrain tiles.
The first step to make this efficient is to cull craters from the parent tile that cannot affect the current (child) tile. This is similar to building a quadtree - a subset of the craters from the parent tile overlap each child. As the LOD detail increases recursively, many craters can be culled. If we zoom in to surface level (human scale), there may be only a few craters active in a tile.
The second step is to calculate a minimal bounding box within the tile pixels that contains the entire crater. This is easy when the crater is contained within the tile's central area. The crater center is projected back from the sphere to the cube, and the radius is used to extend the bounding box from that point in the 2D plane of the cube face. However, if the crater center is in a different tile or in the margin of the tile (i.e. in the neighbor), then it's a bit harder (but do-able) to get the bounding box. The most difficult case is when the crater center is in a different face of the cube, then you need to deal with proper wrapping. I haven't done that yet, and just fall back to rasterizing the whole tile in that case (very slow).
Of course to make this all fast it needs to be optimized with SIMD. I have AVX, SSE2 and NEON implementations for all of the main functions. This provides a 2-4x speedup over scalar code. It takes about 0.05ms to generate tiles with moderate crater density (100 per tile), and up to 0.2ms if crater density is high (500 per tile). This is acceptable performance (better than previous method most of the time). The nice thing is that this method does not use much memory, it only needs to store the crater parameters.
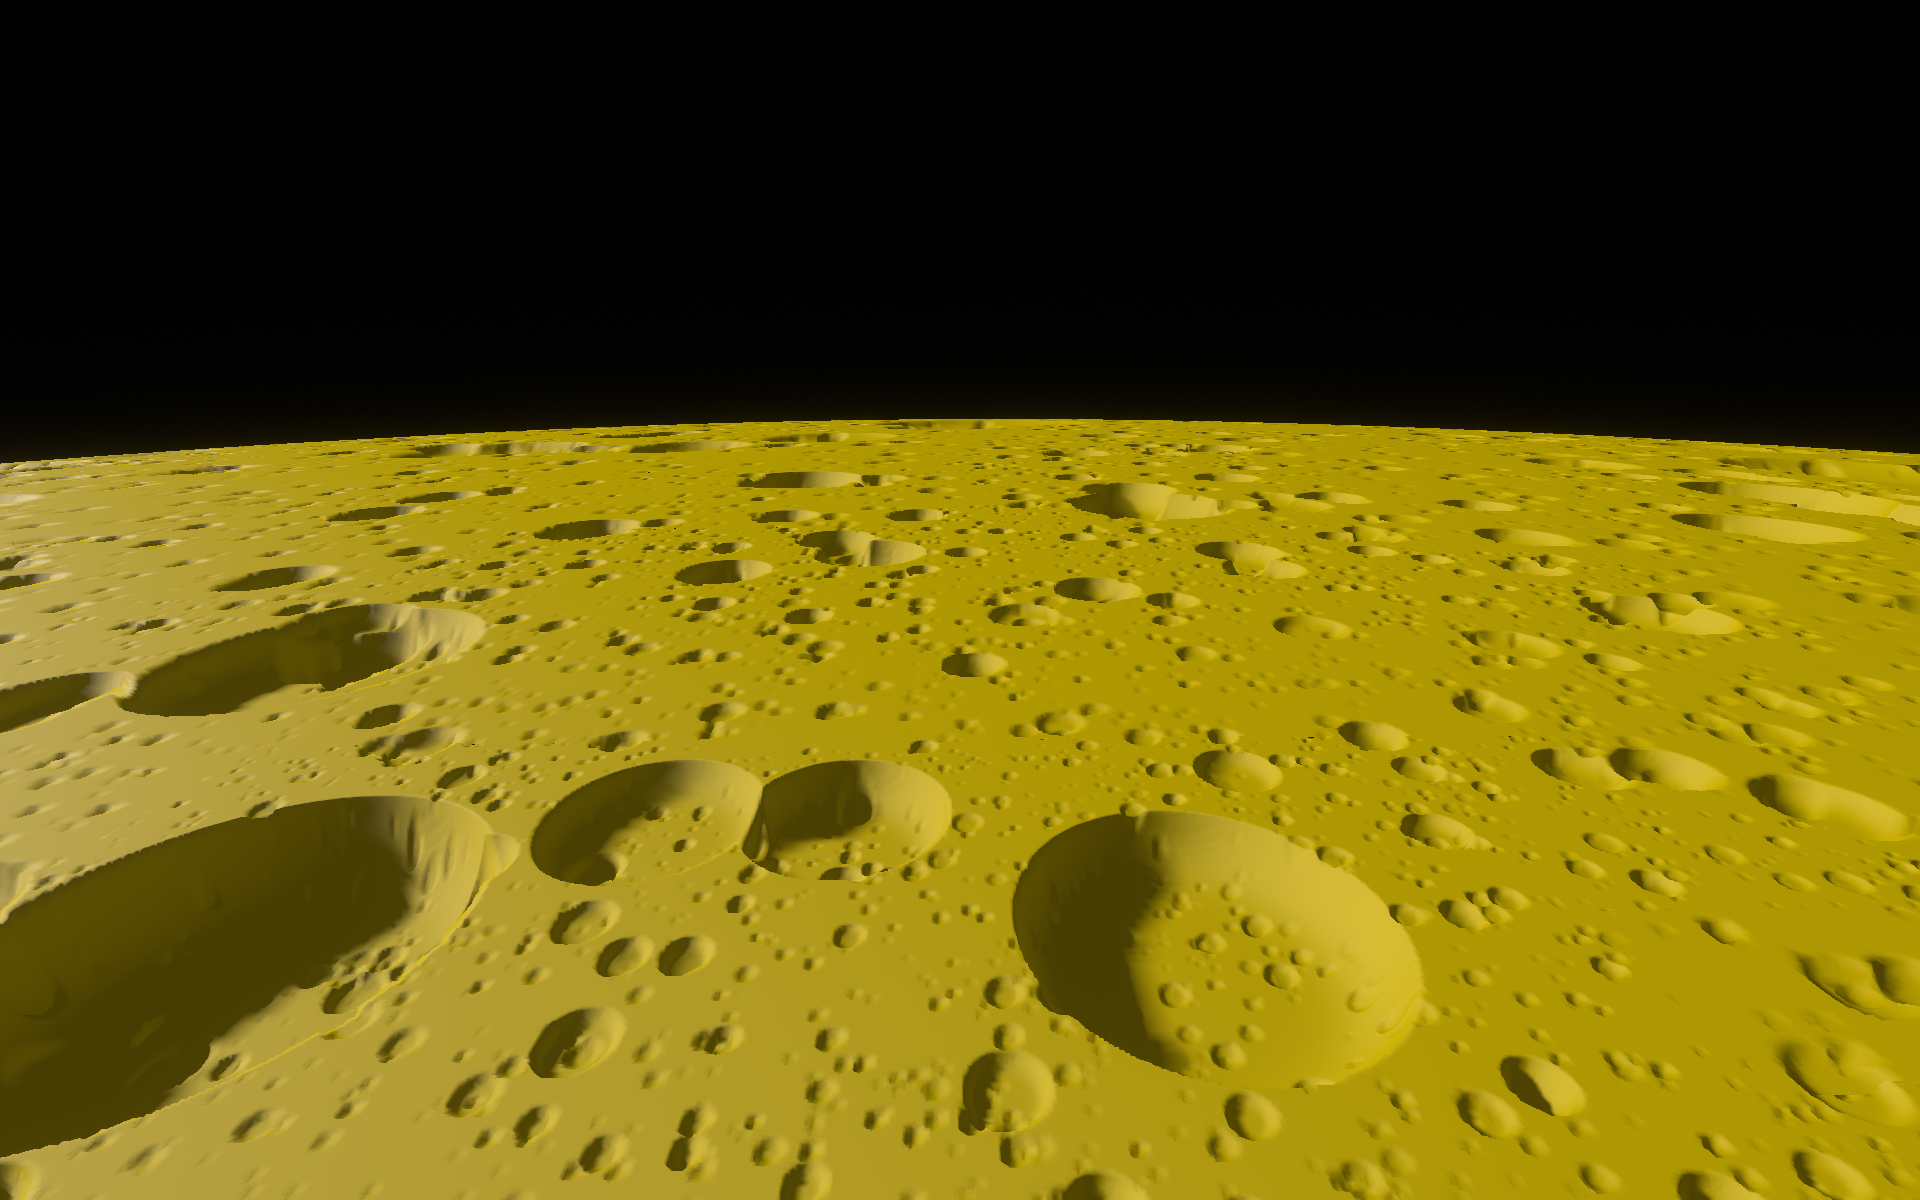
Using this method, I made this moon of cheese:
Overlap Improvements
Once the basic rasterization method was implemented, I made some improvements in how the craters overlap. A nice thing about this method is that it allows simulation of how craters are produced one after the other. This means that if a newer crater overlaps an older one, it obscures the original crater. Here is a real example from the asteroid Vesta:
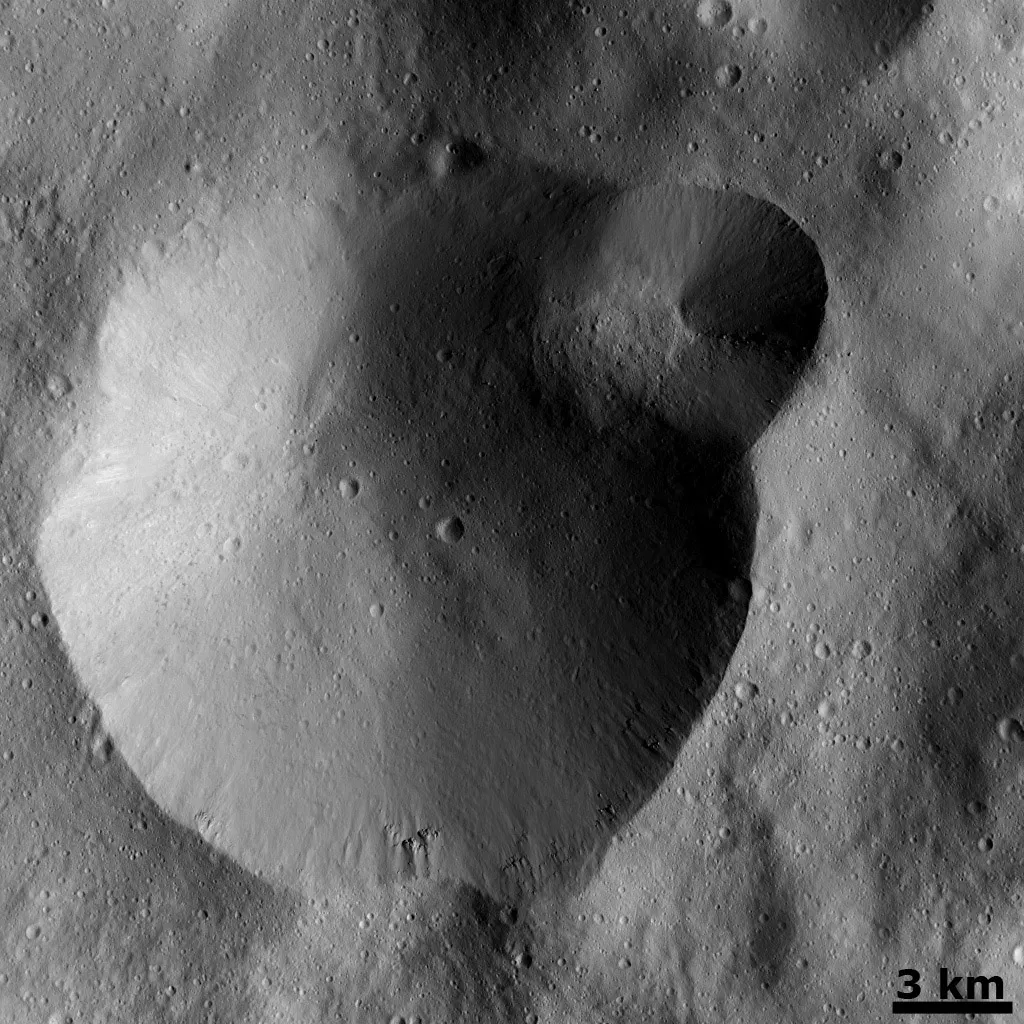
To implement this phenomenon, I added a creation time to each crater and sorted them from oldest to youngest. Then, the older craters are rasterized before the younger ones. The tricky part here is in how to combine the elevation from when craters overlap. You can't simply add them together because then the rasterization order doesn't matter, and older craters will not be obscured by younger ones. A slightly better approach is to use the minimum elevation across all craters. Then, deeper (usually bigger) craters will obscure smaller ones, but not the other way around. Neither of these solutions is satisfying.
The best approach that I have found so far is to generate the crater's elevation modification relative to a base elevation which is sampled from the previous result of all craters that are both older and larger than the crater. This happens just once when a crater is no bigger than a single pixel in the terrain tile. The crater elevation offset is read at the crater's position, and stored in the crater parameters for all subsequent child tiles that use the crater. Then, the actual elevation after the crater is:
elevationA = crater.baseElevation + craterElevationModification;
elevationB = currentElevation + craterElevationModification;
newElevation = lerp( elevationA, elevationB, clamp( centerDistance^2/radius^2, 0, 1 ) )
This interpolates between two different methods of generating elevation. In the interior, it uses the base elevation as the elevation, and towards the exterior it fades toward simple adding. This worked the best all-around, when craters were on flat surfaces and on slopes (a hard case). It allows newer craters to (mostly) obscure older ones. It's not perfect but is the best I could come up with so far.
Here are some more results with erosion, some with crater overlaps:
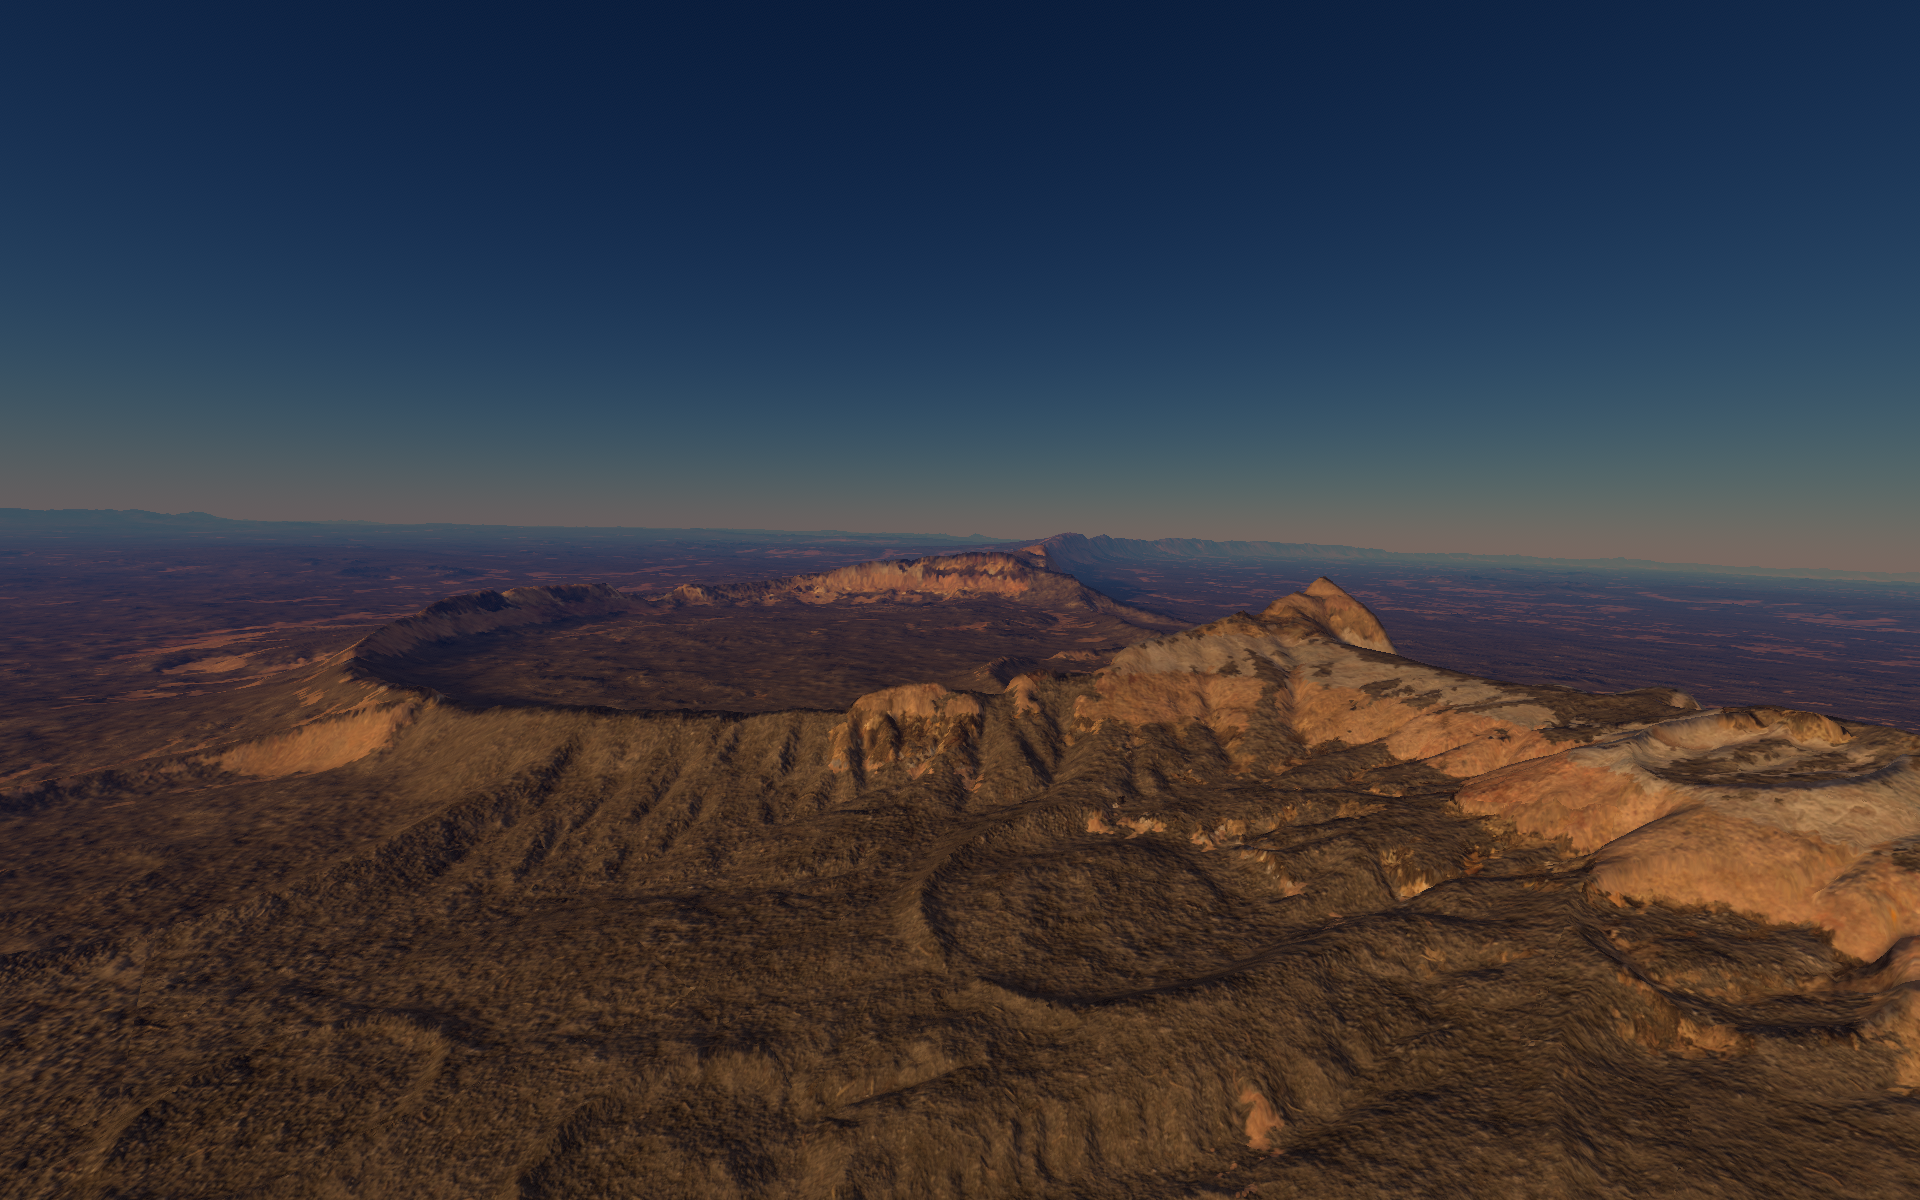

Looks awesome!