Hi all,
The main project for this weekend was to get powerups tied to an actual level in the game, which i have now got working as in the video below:
With this out of the way I have decided to progress onto the next feature of the game which requires development. This is the level select page, which you are presented with if you have previously unlocked any levels in the game, letting you revisit and replay them to get better scores and collect extra powerups.
Within the menu, each level should have a preview image, or thumbnail, showing its appearance to allow for visual memory of which level is which. This was previously implemented on the .NET version of Firework Factory, as can be seen below:
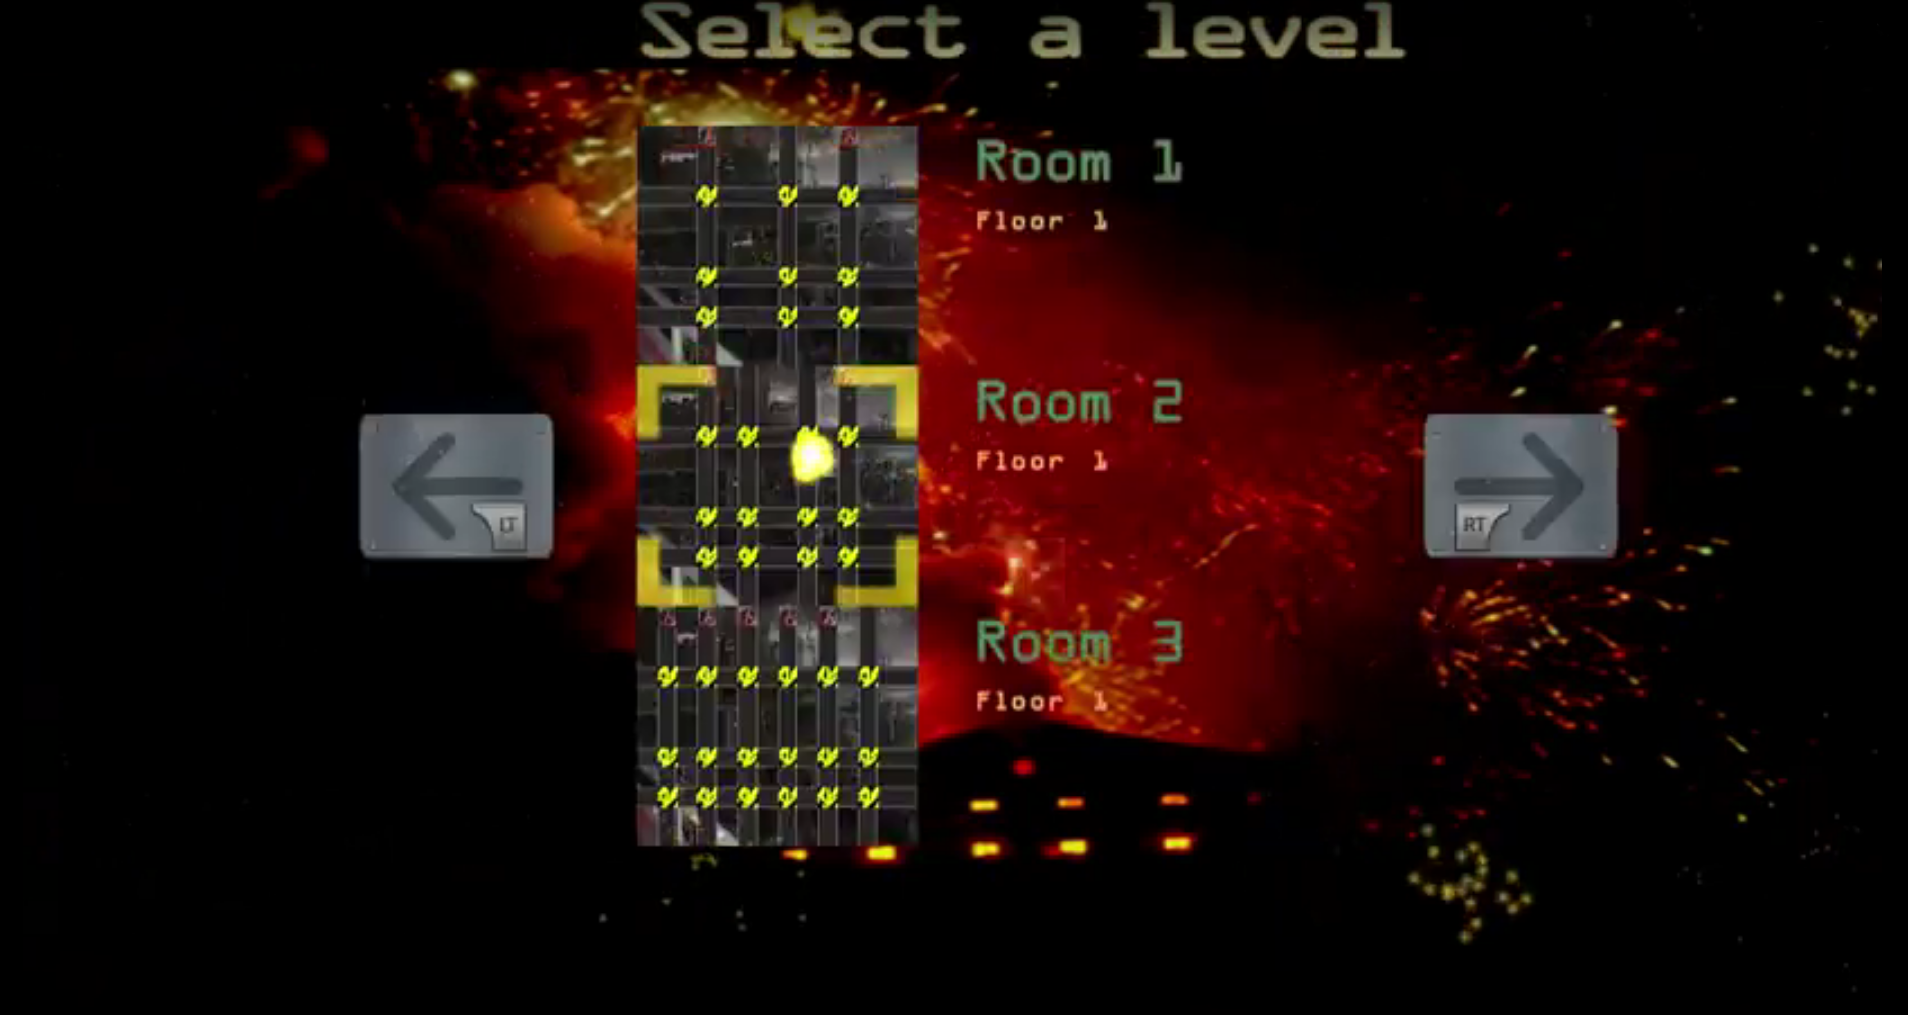
In the newer unreal engine version this must be re-implemented. In the previous version, screenshots were taken by spawning the entire level, taking a screen capture of the level and storing that in a texture.
I decided to do something similar in UE4, only to find that doing so would be overkill, as instantiating a level is quite expensive, and would have to be done dozens of times on startup just to capture screenshots to render targets, which could then be turned into materials, and displayed in the menu. Instead, i chose to make a 'photo studio', and get the levels 'photographed'.
Yes, you heard right, a photo studio.
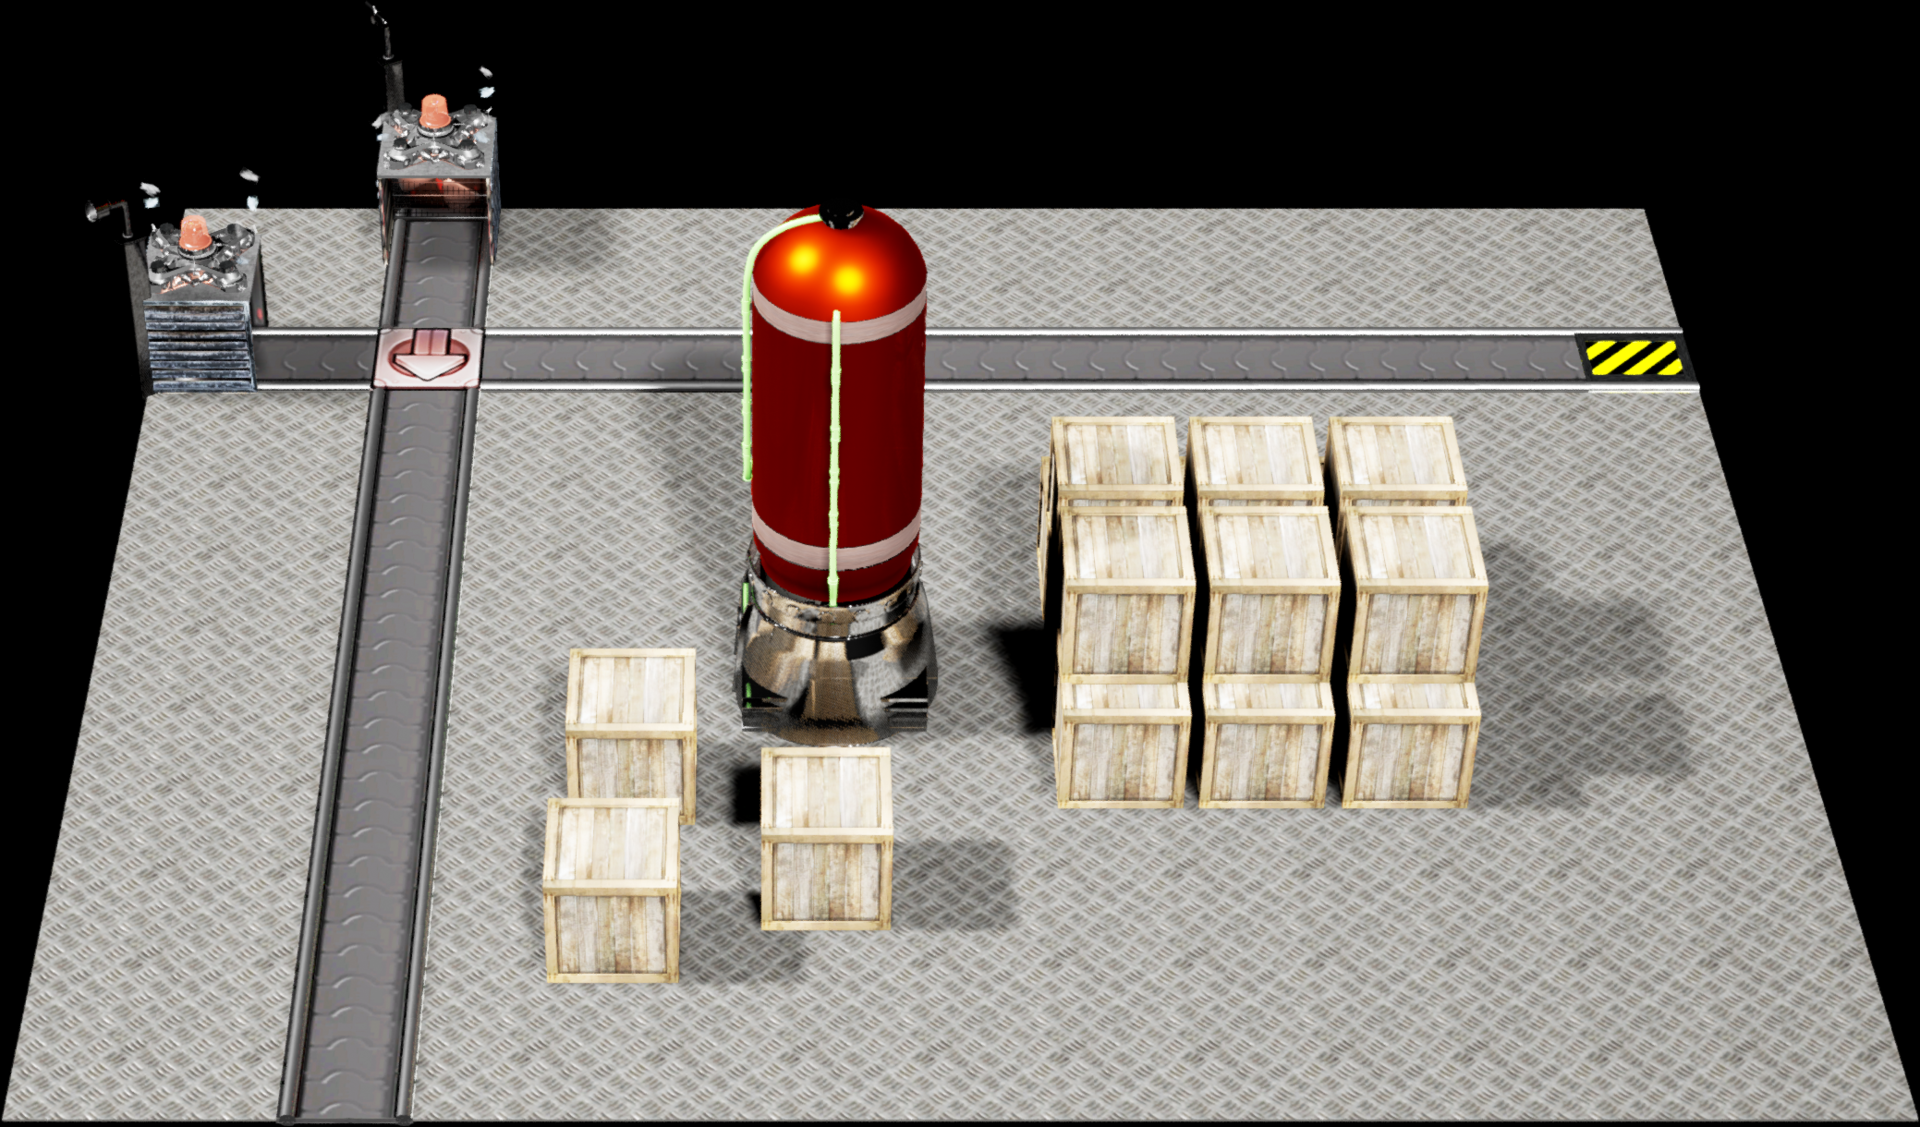
The solution for the problem is to first create a separate map. Within this separate map create a couple of strong directional lights to ensure that there isn't too much shadow in the images. Secondly, create a floor made of a non-emissive completely black material with no reflectiveness. Essentially, this floor is impossibly black, much like it has been painted with vantablack.
Next, I set up a blueprint to incrementally load each level in a loop, wait 1 second for the postprocessing effects to settle, and issue the console command:
HighResSnapshot 3.0The code for this can be seen in the blueprint below:

This causes the game to save a screenshot of the current level to the folder Saved\Screenshots\Windows, where it can be loaded into GIMP and autocropped, giving me an image like the one below, which is the one for level 4:
These can then be associated with the levels as a Texture2D by importing them into the content folder, so that a thumbnail can be displayed. As i add new levels, i just re-run the process to generate the snapshots, pick the new levels images, autocrop them and drop them into content, which takes all of 30 seconds. This means i can ensure that all the images are taken from the same angle, with the same lighting, the same postprocessing effects, and have an image of exactly the same dimensions.
Next on the list: Use these thumbnails for an actual level select menu!
Feedback as always is more than welcome, stay tuned for further updates!

This is very cool! !!
!!